 Key Takeaways
Bitbucket Webhook Jenkins integration enables automated CI/CD pipelines for scalable, containerized development workflows with enhanced deployment efficiency.
For establishing robust integration,
install the Bitbucket plugin in Jenkins,
configure Docker environments with proper memory allocation,
and create repository connections with webhook triggers.
The implementation involves downloading Jenkins plugins, executing webhook configurations through repository settings, running automated builds with ACCEPT_EULA parameters, and connecting through Jenkins dashboard interfaces.
This approach ensures seamless code deployment across environments while maintaining version control capabilities, automated testing protocols, and continuous integration practices for optimized software development lifecycles.
Continuous Integration is a DevOps Software Development practice in which the developers merge their code changes into a central repository on a regular basis, after which Automated Builds and Tests are run. Jenkins is an Open-Source Continuous Integration (CI) tool that developers extensively use to automate the testing and deployment of their applications.
BitBucket is a popular Source Code Management tool for version control that allows developers to collaborate with each other from all over the world. As a part of the Continuous Integration and Deployment process, it is a requirement that the code repository should have an interaction with the Build Automation and Continuous Integration tool leading to a BitBucket Webhook Jenkins Integration. Jenkins Bitbucket webhook enhances the development workflow through automated code testing.
This article will teach you how to configure Jenkins to work with Bitbucket repositories, which will aid in automating the deployment process. If you want to learn how to create Bitbucket webhook to Jenkins, you can use this tutorial, which covers the processes in depth.
Table of Contents
Introduction to Jenkins

Jenkins is an Open-Source Automation Tool written in Java that includes plugins for Continuous Integration. It enables you to automate the execution of a series of actions to achieve the Continuous Integration process. Jenkins is used to build and test your software projects continuously, making it easier for developers to incorporate changes to the project and for users to leverage a fresh build. It also enables you to deliver software on a continuous basis by integrating with a wide range of testing and deployment technologies.
Organizations can use Jenkins to automate and speed up the software development process. Jenkins manages and controls software delivery processes throughout the entire Development Lifecycle, including Build, Documentation, Testing, Packaging, Staging, Deployment, Static Code Analysis, and much more.
Key Features of Jenkins
Some of the developer-centric features offered by Jenkins are as follows:
- Easy to Install and Configure: Jenkins is a self-contained Java Program, hence it does not depend on the platform on which it is installed. It is available as both – a standard installer and a .war file. Thanks to its minimal Web User Interface, it is easy to configure once the installation is complete.
- Open Source: Jenkins is an Open-Source tool and is completely free to use. The strong involvement of the Open-Source community makes it a powerful Continuous Integration tool.
- Easy Distribution: Jenkins is designed in such a manner that makes it relatively simple to distribute work across multiple machines and platforms for faster Build, Testing, and Deployment.
- Plugin Ecosystem: The community is the backbone of Jenkins, and members of the community have been instrumental in the development (and testing) of close to 1500+ plugins available in the Update Center.
Introduction to BitBucket

BitBucket is a Git Repository Management System designed specifically for professional teams. It acts as a central hub that is used to manage all Git Repositories, Collaborate on Source Code, and Guide everyone through the Software Development Cycle. It is a part of the Atlassian family, with tools like Confluence, Jira, and others to help technical teams reach their full potential. BitBucket can be deployed in three different ways which are BitBucket Cloud, BitBucket Data Center, and BitBucket Server.
Key Features of BitBucket
Some of the key features of BitBucket are as follows:
- BitBucket allows developers to upload their code to the repositories and make it public, allowing others to view the developer’s profiles and collaborate on the project in real-time.
- BitBucket integrates with a variety of third-party tools and apps, allowing users to sync data and optimize workflows. It also integrates with code editors, allowing the repository to be managed directly from the editor.
- BitBucket has a user-friendly interface making it easy to use and understand. It also stores the details about the modifications done in a project.
Hevo is a No-code Data Pipeline that offers a fully-managed solution to set up data integration from Microsoft SQL Server, Oracle, and 150+ data sources (including 60+ free data sources) and will let you directly load data to a Data Warehouse or the destination of your choice.
Let’s Look at Some Salient Features of Hevo:
- Fully Managed: It requires no management and maintenance as Hevo is a fully automated platform.
- Data Transformation: It provides a simple interface to perfect, modify, and enrich the data you want to transfer.
- Real-Time: Hevo offers real-time data migration. So, your data is always ready for analysis.
- Schema Management: Hevo can automatically detect the schema of the incoming data and maps it to the destination schema.
Trust Hevo and start with the integrations today!
Get Started with Hevo for FreeSteps to Set up Bitbucket Webhook Jenkins Integration
To automate the testing and deployment of your code, you need to set up a bitbucket jenkins webhook that triggers a build whenever you push changes to your repository. You may also use the webhook to Jenkins for Bitbucket server plugin to automatically trigger Jenkins builds when you post code changes to your Bitbucket repositories.
Now that you have an idea about what BitBucket and Jenkins are capable of, you are ready to learn about the steps involved in building the BitBucket Webhook to Jenkins Integration. The BitBucket Webhook Jenkins Integration is a four stage process including the following steps:
- Step 1: Install the BitBucket Plugin in Jenkins
- Step 2: Create a New Repository using Bitbucket
- Step 3: Create a New Job in Jenkins
- Step 4: Push code to Jenkins using BitBucket Webhooks
Read more to learn how to set up bitbucket pipelines.
Step 1: Install the BitBucket Plugin in Jenkins
The first step involved in setting up BitBucket Webhook Jenkins Integration requires you to install the BitBucket Plugin in Jenkins. Follow the steps given below to install the plugin:
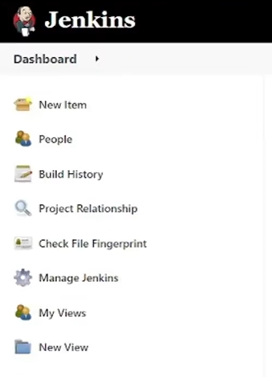
- Login to your Jenkins account and open the Dashboard section.
- Click on Manage Jenkins from the list of available options.
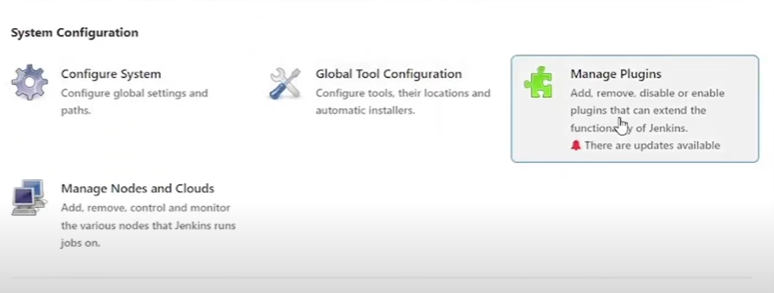
- Now click on Manage Plugins and navigate to the Search bar. Enter Bitbucket Plugin in the search bar and install the same.
Step 2: Create a New Repository using BitBucket
Once you have installed the BitBucket Jenkins webhook, you will need a repository in BitBucket to link it with Jenkins. The second step in building BitBucket Webhook Jenkins Integration involves creating a new BitBucket repository. Follow the steps given below to do so:
- Login to your BitBucket account using the appropriate credentials.
- Once you have successfully logged in to your BitBucket account, click on the Create Repository button.
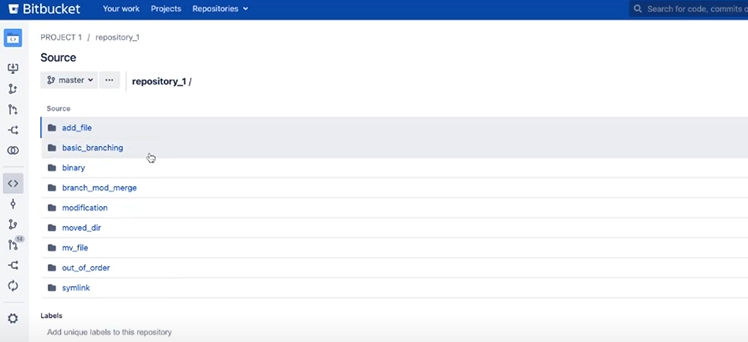
- Add a name for your Project and Repository. You can also select the access level for your repository and make it private or public according to your needs. Once you are done filling all the required fields, click on Create Repository to save and create the repository.
Step 3: Create a New Job in Jenkins
- Once you have the repository ready, go back to your Jenkins account and open the Dashboard.
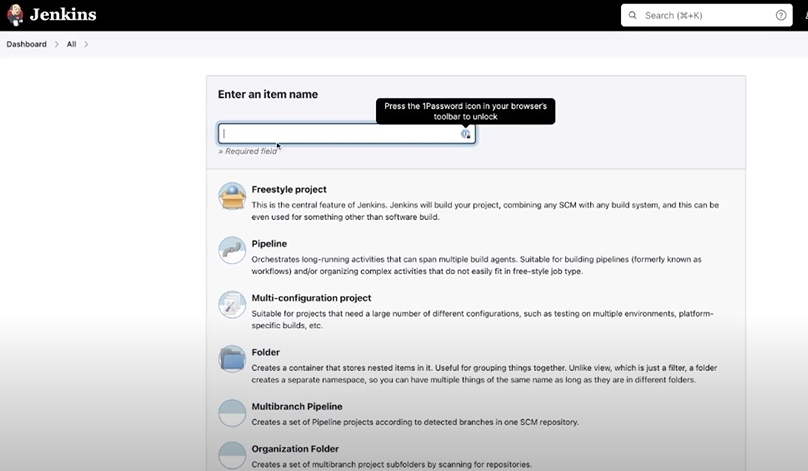
- Select the option New Item from the list of options available to create a new Jenkins Job.
- Give a name to the Job that you are creating and select the option Freestyle Project. Once you are done filling the required fields, click on the Ok button to create a new Jenkins Job.
- Now navigate to the Source Code Management section and click on the Git radio button.
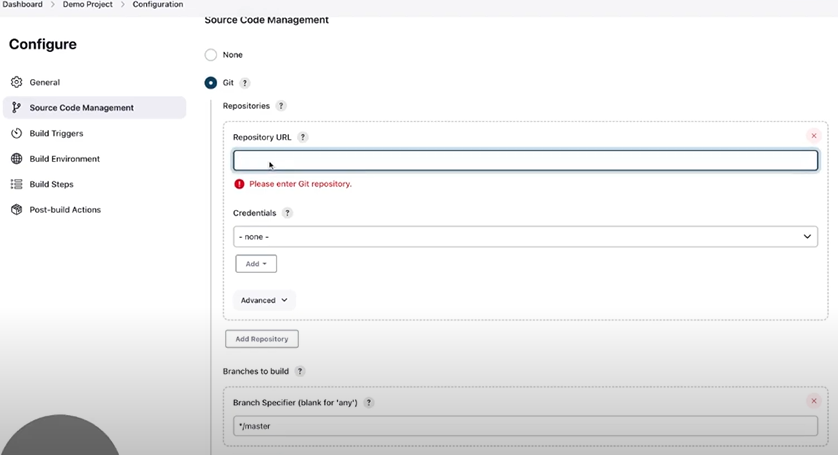
- Add the link to your BitBucket repository that you created in the previous step to set up the Jenkins BitBucket Webhook Integration.
- Navigate to the Build Triggers section and mark the option “Build when a change is pushed to BitBucket”. Then click on the Save button to save all the changes.
Step 4: Push Code to Jenkins using BitBucket Webhooks
The final step of the BitBucket Webhook Jenkins Integration is to configure it to push code-based changes to the Jenkins Server whenever new code is committed to the BitBucket Repository.
- Open BitBucket and navigate to the Repository Setting page.
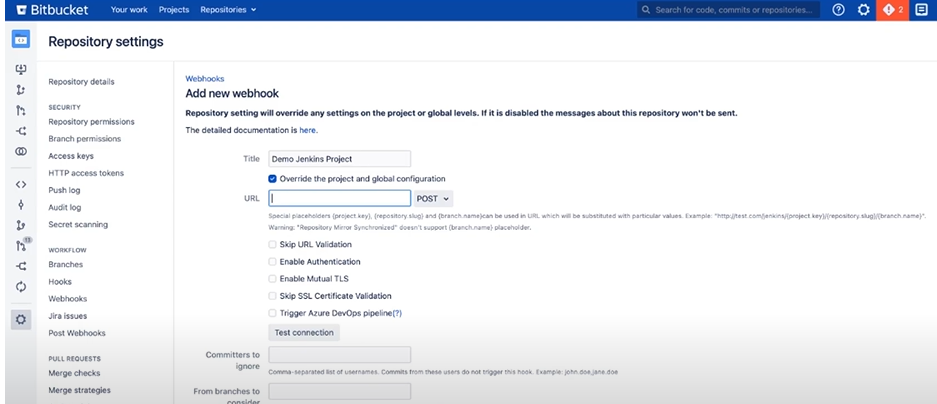
- Select the option Webhook and click on the Add Webhook button.
- Give a name to the BitBucket Webhook and add the Jenkins URL in the URL field. You can also skip the certificate verification.
- Once you have filled the required fields, click on Save to save all changes.
Once you follow the above instructions in the correct sequence, you will be able to set up BitBucket Webhook Jenkins Integration in no time!
How to Trigger Multibranch Jobs from Bitbucket Server?
The Bitbucket Branch Source plugin allows you to integrate Bitbucket with multibranch projects like Pipeline Multibranch. The API listens for notifications at the endpoint /bitbucket-scmsource-hook/notify.
- Configuration in Jenkins
- Configuration in Bitbucket Server
Configuration in Jenkins
Global Configuration
(This does not apply to versions earlier than Bitbucket Branch Source 2.2.0.)
Configure a Bitbucket endpoint under Manage Jenkins. Configure the System Bitbucket Endpoints:
Multibranch Project
To track a single repository, build a Multibranch Pipeline item with the Bitbucket branch source:
Configure the SCM Source (see the help tooltips for each Behavior to further understand what it does):
Older Versions
Prior to Bitbucket Branch Source 2.2.0, there was nothing to set up under Manage Jenkins Configure System. Configure the SCM in accordance with the Bitbucket Branch Source Plugin instructions. In the Advanced area, give the Bitbucket server URL, as well as the SSH port if SSH authentication is used for checkout credentials.
Bitbucket Team/Project
To monitor several repositories for a Bitbucket project, create an item of type Bitbucket Team/Project and utilize Bitbucket Team/Project repository source:
Configure the SCM Source (see the help tooltips for each Behavior to further understand what it does):
Older Versions
Prior to Bitbucket Branch Source 2.2.0, there was nothing to specify under the Manage Jenkins specify System. Configure the SCM as per the Bitbucket Branch Source Plugin instructions. In the Advanced section, give the Bitbucket server URL and the SSH port if utilizing SSH authentication for checkout credentials:
Further Configuration: Hook Management
Once a project has been saved, it will automatically listen for events on the endpoint /bitbucket-scmsource-hook/notify., which are typically sent by webhook.
To allow Jenkins to automatically register webhooks to a given endpoint, activate the Manage Hooks option under Manage Jenkins Configure System Bitbucket Endpoints. This is the preferred, quickest, and easiest arrangement.
There are two implementations for managing webhooks:
- Native: It will automatically construct the webhook under the Webhooks section, which implements the native Bitbucket Webhooks.
- Plugin: It will automatically construct the webhook under the Post Webhooks section, which is the Bitbucket WebPost Hooks Plugin’s implementation.
Both choices can be used, however the Native option is suggested if you are using Bitbucket Server >= 5.4.0, which includes native webhook integration. The Bitbucket WebPost Hooks Plugin is no longer required in this version, however it can still be used if desired.
Older Versions
Between Bitbucket Branch Source 2.1.1 and Bitbucket Branch Source 2.2.0, and since Post Webhooks for Bitbucket 1.4.1 (bitbucket add-on), the Auto-register webhook option may be selected to allow Jenkins to automatically register a webhook for scanned repositories. This is the recommended, quickest, and easiest arrangement.
Configuration in Bitbucket Server
If Jenkins is not configured to automatically handle webhooks, read below for instructions on how to manually generate webhooks for a repository.
Bitbucket Branch Source 2.3.0+, Bitbucket Server 5.4+
Bitbucket Server 5.4 included a native Webhook API. Version 2.3.0 of Bitbucket Branch Source now includes support for this API.
To create a webhook, navigate to the repository’s Settings , section Webhooks , and click the “Create webhook” button.
Enter any “title” and provide the Bitbucket Branch Source endpoint: $JENKINS_URL/bitbucket-scmsource-hook/notify?server_url=<BITBUCKET_URL>. Use the Test Connection function to check that the webhook can ping the Jenkins URL.
Note If you are using the Bitbucket WebPost Hooks Plugin, the Branch Source endpoint should simply be $JENKINS_URL/bitbucket-scmsource-hook/notify, as this plugin automatically injects server_url.
Select any Repository and Pull Request events that Jenkins should handle. The above sample depicts the events that are automatically picked by Bitbucket Branch Source as of version 2.4.0.
Save and check that the webhook was correctly generated and is marked as “Active“:
Important If the manual hook does not function, we recommend that you enable the Bitbucket Branch Source plugin to automatically create webhooks in order to determine which URL should be used.
- Any Version.
Starting with Bitbucket Branch Source 2.3.0, you may select between two webhook implementations: native and plugin.
For plugin implementation only:
The Post Webhooks for Bitbucket add-on is compatible with all versions of Bitbucket Branch Source and Bitbucket Server. This add-on was created by the community to support the Bitbucket Branch Source plugin with Bitbucket Server as part of JENKINS-33507. The source code for this add-on is available on GitHub.
Once installed, this add-on adds a Post Webhooks section (Webhooks section in previous versions of the add-on) to a repository’s Settings. To build a Webhook for a repository, click the Add WebHook button on the upper right:
Give it any “title” and specify the Bitbucket Branch Source endpoint $JENKINS_URL/bitbucket-scmsource-hook/notify:
Select any repository and pull request events that Jenkins should handle. The above sample depicts the events that are automatically picked by Bitbucket Branch Source as of version 2.4.0.
Note: In prior versions of the Post Webhooks for Bitbucket, the Repository and Pull requests events could not be customized and were preset to the majority of pull request changes and repository pushes.
Save and check that the webhook was correctly generated and is not marked as “inactive”:
Conclusion
Jenkins allows developers to trigger actions or events, and BitBucket allows them to keep track of version control. BitBucket Webhook Jenkins Integration can optimize the Software Development process to a great extent. This article introduced you to the steps required to set up BitBucket Webhook Jenkins Integration in a seamless manner. If you want to integrate data from various data sources into your desired Database/destination for free and seamlessly visualize it in a BI tool of your choice, Hevo Data is the right choice for you! It will help simplify the ETL and management process of both the data sources and destinations.
Want to take Hevo for a spin? Sign Up for a 14-day free trial and experience the feature-rich Hevo suite first hand. You can also have a look at our unbeatable Hevo Pricing that will help you choose the right plan for your business needs!
Share your experience of learning about BitBucket Webhook Jenkins Integration! Let us know in the comments section below!
FAQ on BitBucket Webhook Jenkins Integration
How to connect Bitbucket webhook with Jenkins?
– Open Bitbucket and go to the repository where you want to set up the webhook.
– Click on the repository’s settings (usually a gear icon in the left sidebar).
– Create a Webhook
– Configure the Webhook
Can we integrate Bitbucket with Jenkins?
Yes, You can integrate Bitbucket with Jenkins
How do I trigger a Bitbucket pipeline webhook?
– Set Up the Webhook in Bitbucket
– Ensure your bitbucket-pipelines.yml file is set up correctly to handle the webhook triggers.

