Continuous Integration is a DevOps Software Development practice in which the developers merge their code changes into a central repository on a regular basis, after which Automated Builds and Tests are run. Jenkins is an Open-Source Continuous Integration (CI) tool that is extensively used by developers to automate the testing and deployment of their applications. A Webhook is a mechanism to automatically trigger the build of a Jenkins project in response to a commit pushed to a Git repository.
In this article, you will gain information about Jenkins Webhook Integration. You will also gain a holistic understanding of Jenkins, Webhooks, and the steps involved in setting up Jenkins Webhook Integration using Bitbucket. Read along to find out in-depth information about Jenkins Webhook Integration.
Table of Contents
Introduction to Webhooks
A Webhook, also known as a web callback or HTTP push API, is a method for an application to deliver real-time information to other applications. It is sometimes referred to as “Reverse APIs,” although in reality, it allows users to skip a step involved in the API concept. Most APIs involve a request followed by a response. Whereas, no request is required for a webhook; it just delivers data to the applications when it is available. Webhooks become considerably more efficient as a result, for both provider and consumer.
Pre-requisites
- Basic knowledge of Webhooks.
- An active Git repository. It can either be GitLab, GitHub, or Bitbucket.
- Understanding of basic CI/CD pipelines.
- Readily available Jenkins Server.
A fully managed No-code Data Pipeline platform like Hevo Data helps you integrate and load data from 150+ different sources (including 60+ Free Sources) to a Data Warehouse or Destination of your choice in real-time in an effortless manner. Hevo with its minimal learning curve can be set up in just a few minutes allowing the users to load data without having to compromise performance. In addition to the 100+ data sources, Hevo also allows integrating data from non-native sources using Hevo’s in-built Webhooks Connector.
Its strong integration with umpteenth sources allows users to bring in data of different kinds in a smooth fashion without having to code a single line.
Check out some of the cool features of Hevo:
- Completely Automated: The Hevo platform can be set up in just a few minutes and requires minimal maintenance.
- Connectors: Hevo supports 150+ Integrations to SaaS platforms, Files, Databases, BI tools, and Native REST API & Webhooks Connectors. It supports various destinations including Google BigQuery, Amazon Redshift, Snowflake Data Warehouses; Amazon S3 Data Lakes; and MySQL, SQL Server, TokuDB, DynamoDB, PostgreSQL Databases to name a few.
- Real-Time Data Transfer: Hevo provides real-time data migration, so you can have analysis-ready data always.
- 100% Complete & Accurate Data Transfer: Hevo’s robust infrastructure ensures reliable data transfer with zero data loss.
- Scalable Infrastructure: Hevo has in-built integrations for 100+ sources (Including 40+ Free Sources) that can help you scale your data infrastructure as required.
- 24/5 Live Support: The Hevo team is available round the clock to extend exceptional support to you through chat, email, and support calls.
- Schema Management: Hevo takes away the tedious task of schema management & automatically detects the schema of incoming data and maps it to the destination schema.
- Live Monitoring: Hevo allows you to monitor the data flow so you can check where your data is at a particular point in time.
Setting Up Jenkins Webhooks Integration
The steps followed to set up Jenkins Webhooks Integration are as follows:
- Jenkins Webhooks Integration: Configure the Plugins in Jenkins
- Jenkins Webhooks Integration: Authenticate Jenkins
- Jenkins Webhooks Integration: Create a Jenkins Job
- Jenkins Webhooks Integration: Configure Bitbucket Webhook
- Jenkins Webhooks Integration: Set up the Authentication
- Jenkins Webhooks Integration: Test the Flow
Step 1: Configure the Plugins in Jenkins
Jenkins has more than 320 plugins in its plugin database. Installing the right plugin can ease the process of CI/CD. The following plugins are to be installed from the plugin database.
- Generic Webhook Trigger Plugin
- Pipeline Plugin
Step 2: Authenticate Jenkins
- Create users in Jenkins to Authenticate the Pipeline and Triggers.
Step 3: Create a Jenkins Job
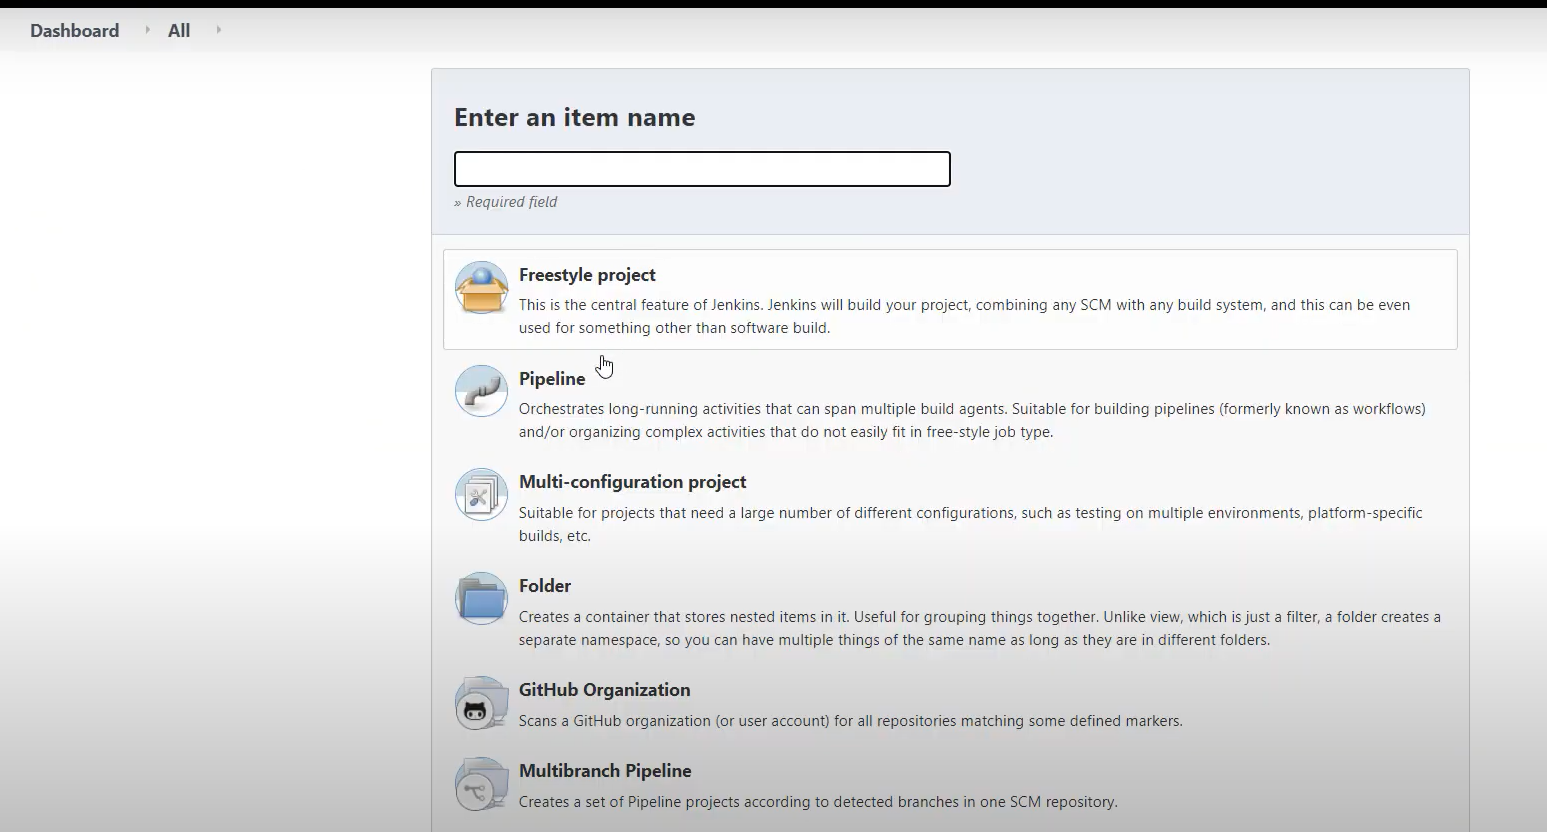
- On the Jenkins home page, create a new Job by clicking “a new item“, selecting pipeline, and providing a name for the pipeline.

- In the “build trigger” section, select the “Generic Webhook Trigger” option.
- Copy the URL syntax and update the Jenkins URL and Token in the following format:
https://<your jenkins server url>/generic-webhook-trigger/invoke?token=<your token>
Step 4: Configure Bitbucket Webhook
In this section, the above-created token needs to be added to the BitBucket to enable Jenkins Webhook. And the steps are as follows:
- Log in to your BitBucket account.
- Open the Bitbucket repository for which you want to set up the Trigger.
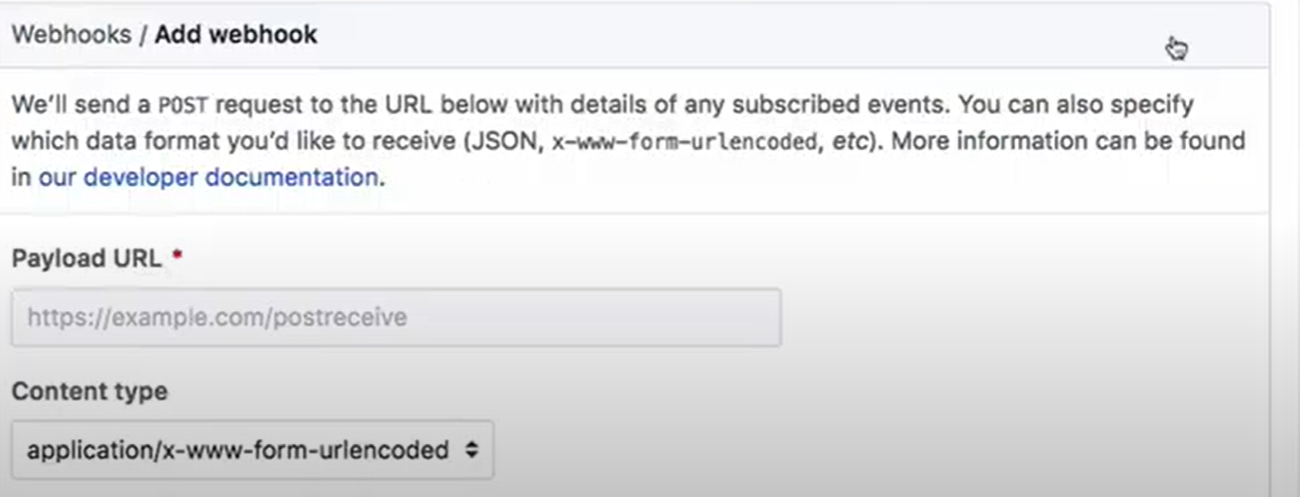
- Open the Repository setting and Click on “Add Webhook“.

- In the Webhooks window, provide the Name to the Webhook and paste the URL generated in the format same as in step 3.
- Select the required Triggers and click on the “Save” button.
Step 5: Set up the Authentication
Now that the Webhook is set up in Bitbucket, you can set up the Authentication between Jenkins and Bitbucket.
- To create a token in Jenkins, navigate to the “Token Credential” area from the Generic Webhook you created for that Job.
- Click on the “Add” option, and select the location to store the credential.
- Add the token to both Secret and ID and click “OK” to add credential.
- Now, go back to Bitbucket and test the Webhook. A 200 response is what expected to be displayed on the screen.
Step 6: Test the Flow
- Once the above steps are completed, push the code to BitBucket.
- As soon as the code is pushed to Bitbucket, the Bitbucket will execute the URL to Jenkins and launch the Jenkins job.
- Verify the Job created on Jenkins server; if there are no errors, you can see the Build created on Jenkins.
Conclusion
In this article, you have learned about Jenkins Webhook Integration from Bitbucket. This article also provided information on Jenkins, Webhooks, and steps involved in implementing Jenkins Webhook Integration.
Hevo Data, a No-code Data Pipeline provides you with a consistent and reliable solution to manage data transfer between a variety of sources and a wide variety of Desired Destinations with a few clicks.
Hevo Data with its strong integration with 150+ data sources (including 60+ Free Sources) allows you to not only export data from your desired data sources & load it to the destination of your choice but also transform & enrich your data to make it analysis-ready. Hevo also allows integrating data from non-native sources using Hevo’s in-built Webhooks Connector. You can then focus on your key business needs and perform insightful analysis using BI tools. Try a 14-day free trial and experience the feature-rich Hevo suite firsthand. Also, check out our unbeatable pricing to choose the best plan for your organization.
FAQs
1. Is it possible to add retries for webhook-triggered jobs?
Yes, you can set up Jenkins pipelines or plugins to automatically retry builds in case of failure.
2. What if my webhook doesn’t trigger a job?
Verify the webhook URL, authentication token, and payload format. Additionally, ensure Jenkins permissions allow external triggers.
3. What types of events can a generic webhook trigger?
It can drive builds on events such as code pushes, pull requests, or any other custom action in compatible platforms.


