

Unlock the full potential of your Redshift data by migrating it seamlessly to another Redshift account. With Hevo’s automated pipeline, get data flowing effortlessly—watch our 1-minute demo below to see it in action!
Data migration from one instance of a data warehouse to another is essential to consider if you want to optimize cost, improve performance, and consolidate operations in a single place.
Amazon Redshift is a cloud data warehousing service that allows you to deploy your application while securely storing your data. Migrating data from one Redshift cluster to another can enable you to perform collaborative analysis between different databases.
This article will explore the most prominent methods of migrating data from Amazon Redshift to Redshift.
Table of Contents
Why Integrate Data from Redshift to Redshift?
- Redshift to Redshift data integration can be beneficial if you assign separate databases for development, testing, and production purposes.
- With lower AWS region pricing, moving data from one Redshift cluster to another can reduce the overall operation costs.
- This migration can enable you to improve the performance of data queries by moving the data to a cluster that is present near the user base.
Use Hevo’s no-code data pipeline platform, which can help you automate, simplify, and enrich your data replication process in a few clicks. You can extract and load data from 150+ Data Sources, including Hive, straight into your Data Warehouse, such as Redshift or otherany Databases.
Why Choose Hevo?
- Offers real-time data integration which enables you to track your data in real time.
- Get 24/5 live chat support.
- Eliminate the need for manual mapping with the automapping feature.
Discover why Postman chose Hevo over Stitch and Fivetran for seamless data integration. Try out the 14-day free trial today to experience an entirely automated hassle-free Data Replication!
Get Started with Hevo for FreeAn Overview of Amazon Redshift

Amazon Redshift is a cloud data warehousing service that enables you to analyze and perform queries on your data. It can give you six times better price performance than other data warehouses. With Amazon Redshift’s massively parallel processing (MPP) feature, you can quickly improve performance and scale your data.
It allows you to run SQL queries, visualize data, and create dashboards catering to your business needs. You can quickly and securely integrate data within and across AWS regions and third-party applications.
Methods to Load Data from Redshift to Redshift
Method 1: Migrate Redshift Data to Redshift Using Hevo
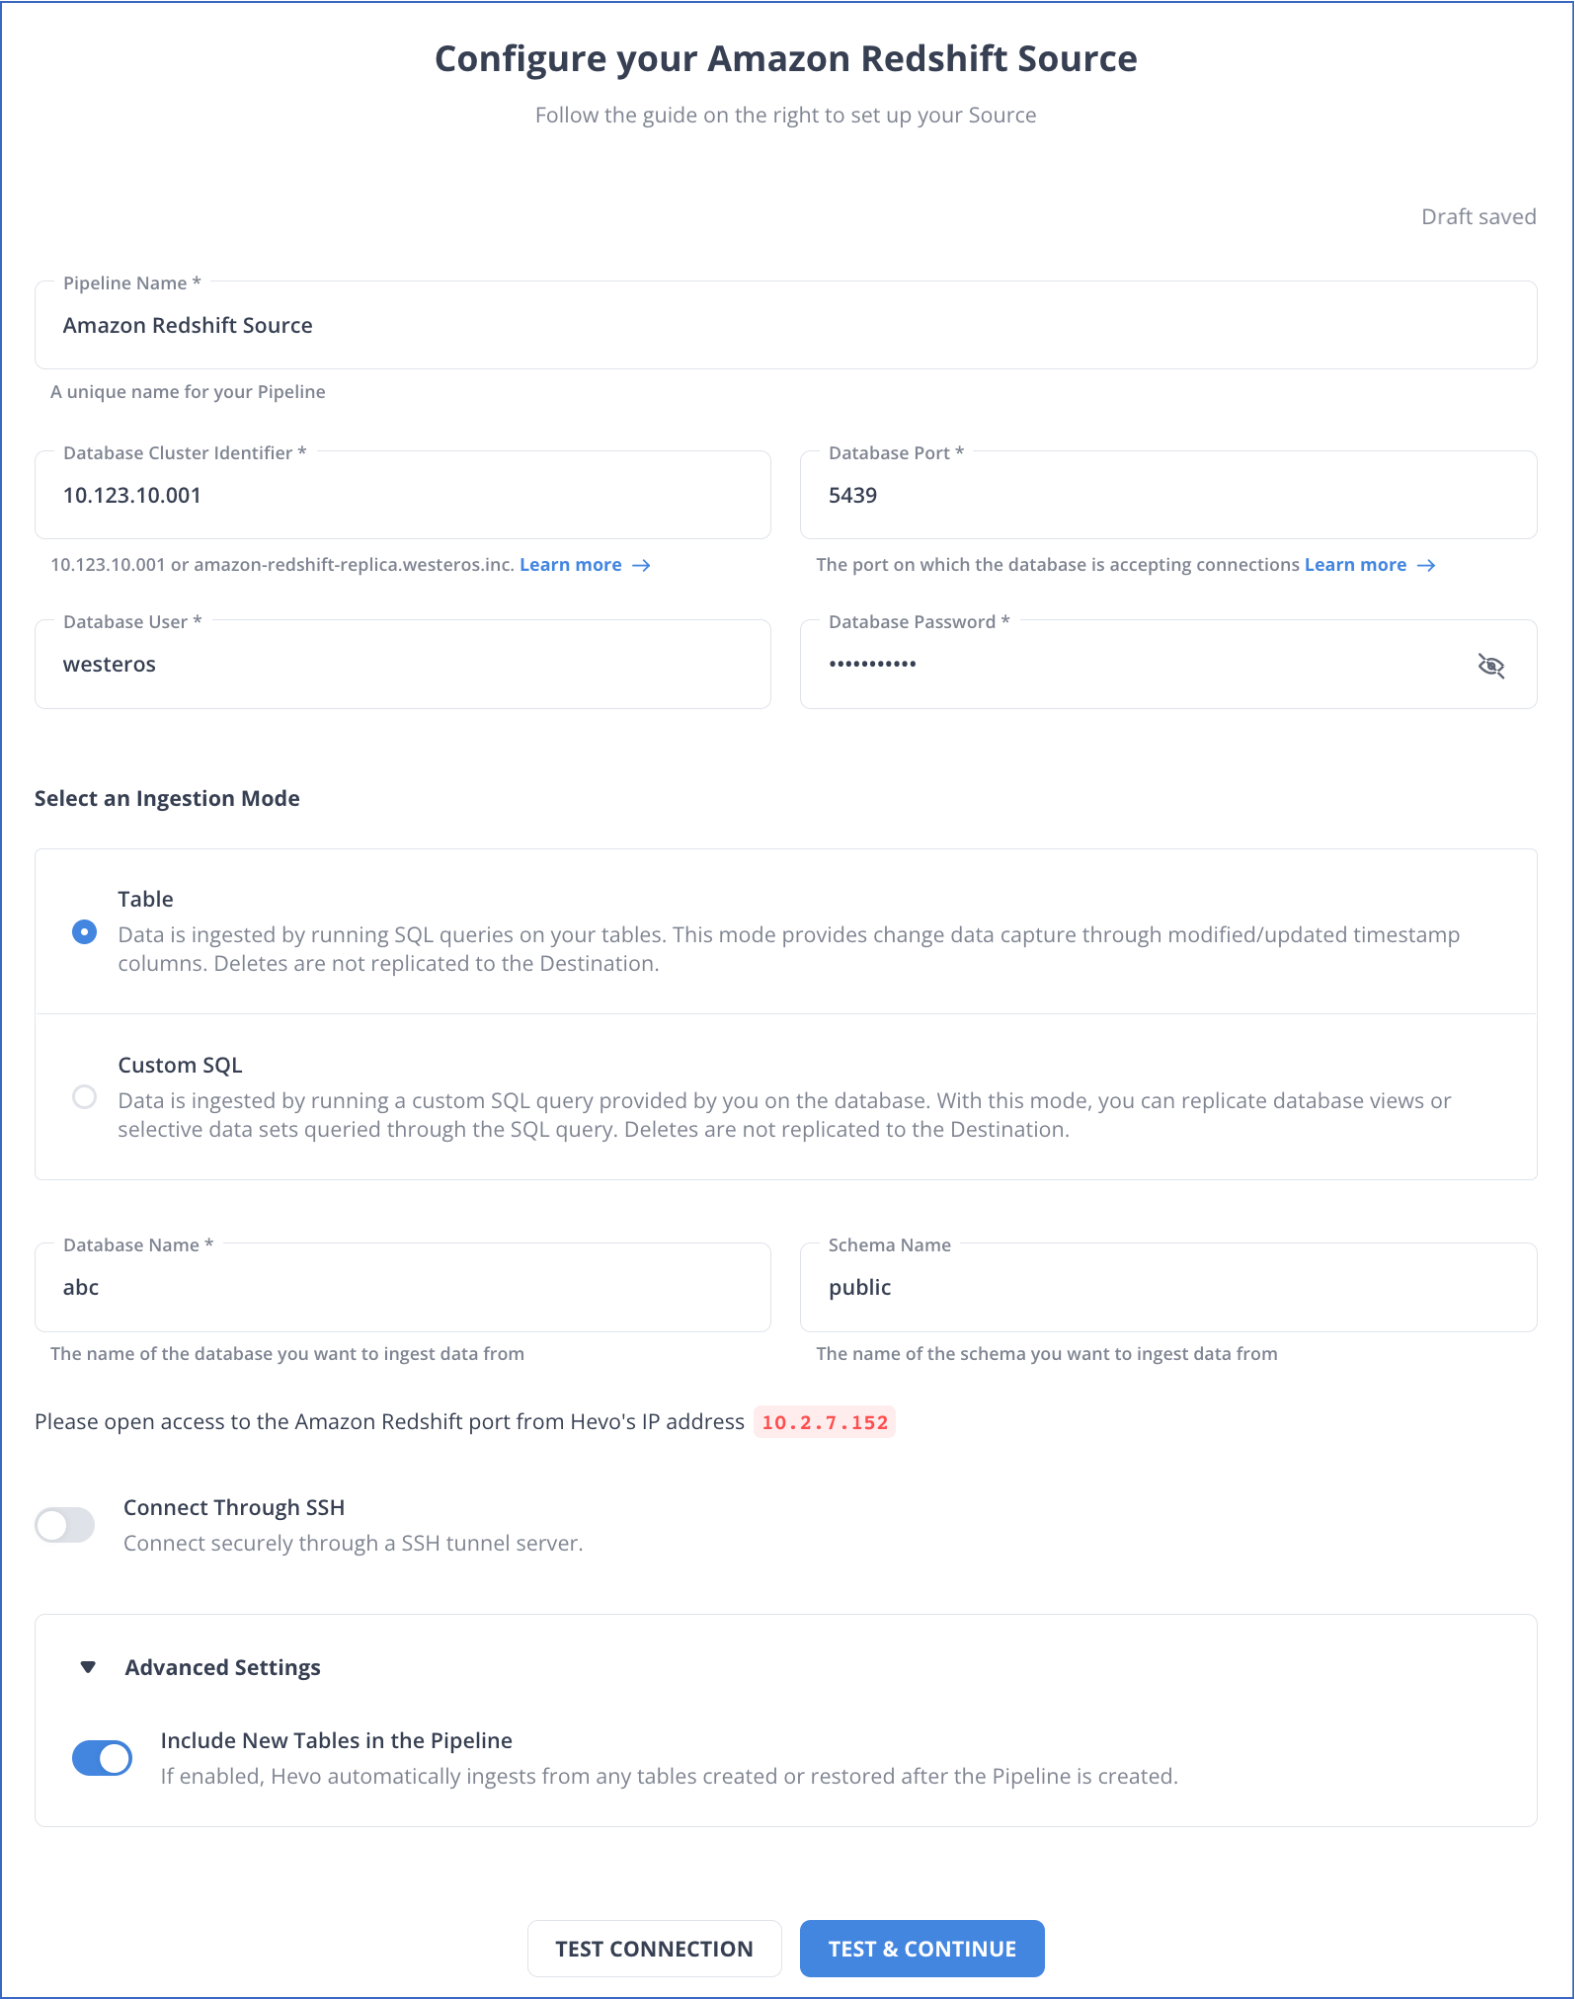
Step 1: Configure Amazon Redshift as a Source
This section will highlight the steps to configure Amazon Redshift as a source connector in Hevo Data. But before getting started, you must ensure you satisfy the prerequisites.
Prerequisites:
- You must have an active AWS account, and the Amazon Redshift instance must be running.
- You must whitelist Hevo’s IP addresses.
- You must grant the SELECT privileges to the database user.
- You must retrieve the database port number and hostname of the source instance.
- You must be a Team Administrator, Pipeline Administrator, or Team Collaborator in Hevo.
Step 2: Configure Amazon Redshift as a Destination
This section will guide you through the steps to configure Amazon Redshift as a destination in Hevo. But before getting into the steps involved, ensure you satisfy the prerequisites.
Prerequisites:
- You must ensure that the Amazon Redshift instance must be running.
- You must create an Amazon Redshift database.
- You must retrieve the port number and hostname of the Amazon Redshift instance.
- You must whitelist Hevo’s IP addresses.
- You must grant the necessary privileges to the database user.
- You must be a Team Collaborator or any administrator except the Billing Administrator role in Hevo.
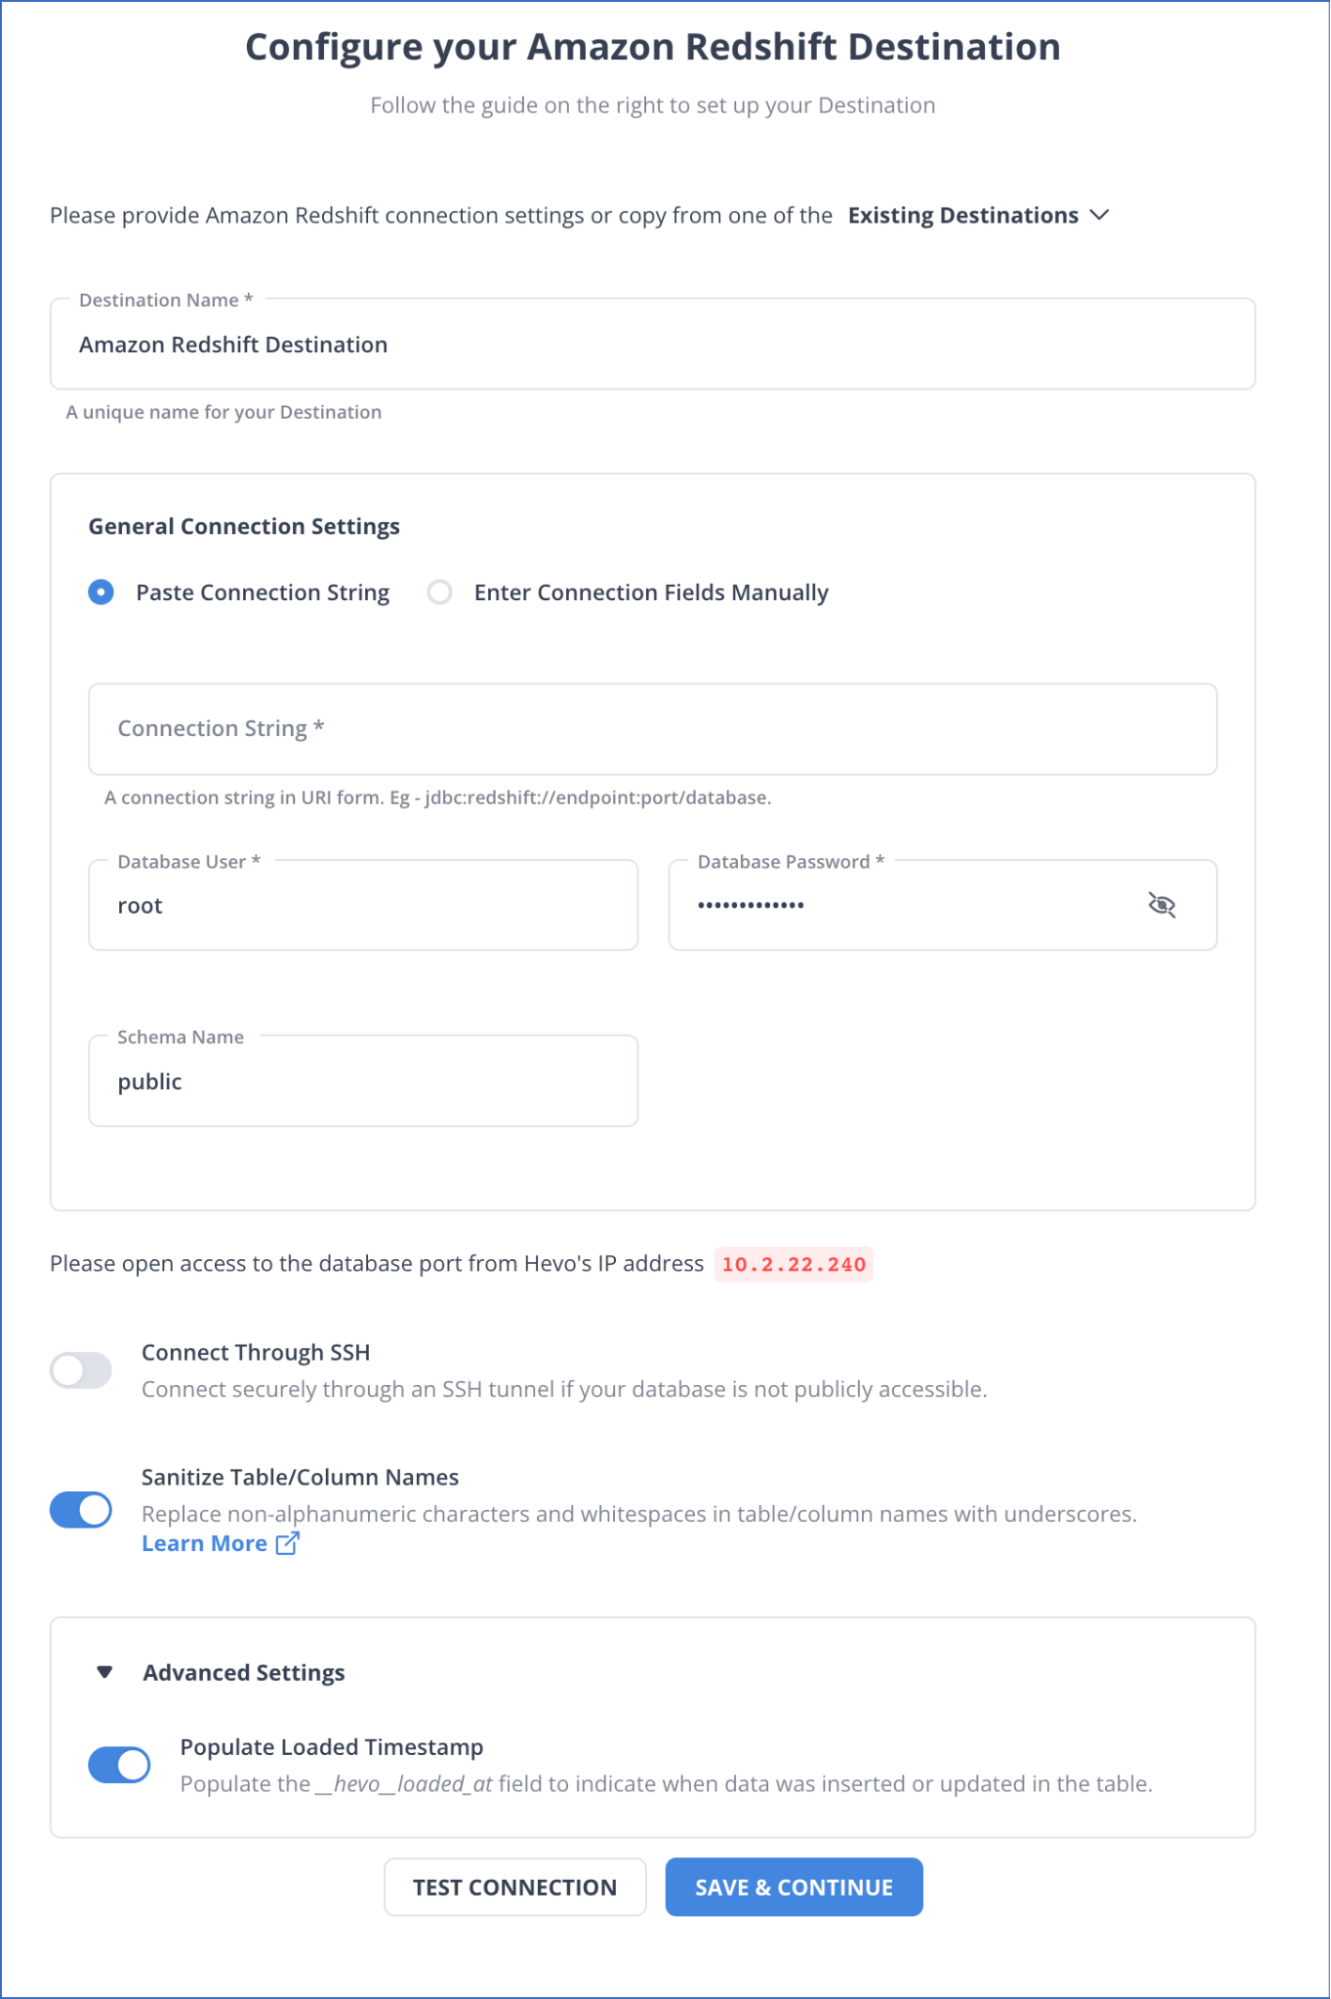
Hence your data will be migrated successfully.
Method 2: Moving Data from Redshift to Redshift Using COPY and UNLOAD Commands
This section will highlight the COPY and UNLOAD commands to convert Redshift to Redshift table. Follow the steps given below to perform Redshift Redshift integration.
Step 1: Create a Folder in Amazon S3 to Unload the Data
In this step, you must create an Amazon S3 folder and associate an IAM role to access it. The S3 cluster will mediate between the two Redshift database instances.
Step 2: Select Tables to Unload Data
You can run queries in the source before loading the data to the destination table to ensure the correct data is present. Remember to query the fields and check if they return the desired values so you can use them with the COPY command. You can load a query instead of a table to the destination database with the help of the UNLOAD command.
Step 3: Use UNLOAD Command
Using the UNLOAD command, you can load data from the Amazon Redshift Database to Amazon S3. To unload data to Amazon S3, follow the syntax given below.
UNLOAD ('select-statement')
TO 's3://object-path/name-prefix'
authorization
[ option, ...]
where authorization is
IAM_ROLE { default | 'arn:aws:iam::<AWS account-id-1>:role/<role-name>[,arn:aws:iam::<AWS account-id-2>:role/<role-name>][,...]' }
where option is
| [ FORMAT [ AS ] ] CSV | PARQUET | JSON
| PARTITION BY ( column_name [, ... ] ) [ INCLUDE ]
| MANIFEST [ VERBOSE ]
| HEADER
| DELIMITER [ AS ] 'delimiter-char'
| FIXEDWIDTH [ AS ] 'fixedwidth-spec'
| ENCRYPTED [ AUTO ]
| BZIP2
| GZIP
| ZSTD
| ADDQUOTES
| NULL [ AS ] 'null-string'
| ESCAPE
| ALLOWOVERWRITE
| CLEANPATH
| PARALLEL [ { ON | TRUE } | { OFF | FALSE } ]
| MAXFILESIZE [AS] max-size [ MB | GB ]
| ROWGROUPSIZE [AS] size [ MB | GB ]
| REGION [AS] 'aws-region' }
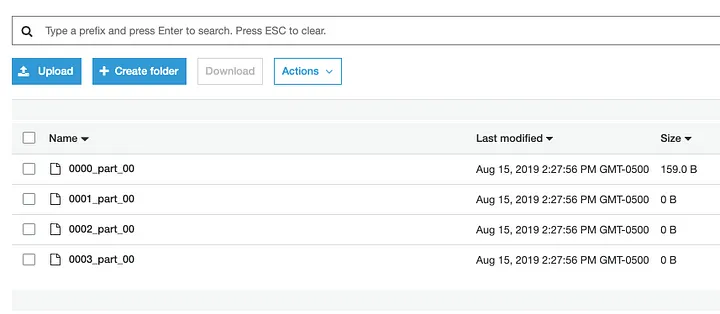
| EXTENSION 'extension-name'The UNLOAD command uses an SQL query, the Amazon S3 path where you want to load data, and the IAM role with permissions to access S3.
After performing the above command, you can check for the files in the Amazon S3 path.
You can also use Hevo Data to load data from Amazon Redshift to S3. For more information, refer to Amazon S3 to Redshift data transfer.
Step 4: Create a Destination Table
In this step, you create a table in the destination Redshift database. You must ensure that the schema and table you make in the destination database match the structure of the initial Redshift database.
You can use the CREATE TABLE command to create new tables in the Redshift database. You can follow this syntax to create new tables:
CREATE [ [LOCAL ] { TEMPORARY | TEMP } ] TABLE

[ IF NOT EXISTS ] table_name

( { column_name data_type [column_attributes] [ column_constraints ]

  | table_constraints

  | LIKE parent_table [ { INCLUDING | EXCLUDING } DEFAULTS ] }

  [, ... ]  )

[ BACKUP { YES | NO } ]

[table_attributes]

where column_attributes are:

  [ DEFAULT default_expr ]

  [ IDENTITY ( seed, step ) ]

  [ GENERATED BY DEFAULT AS IDENTITY ( seed, step ) ]

  [ ENCODE encoding ]

  [ DISTKEY ]

  [ SORTKEY ]

  [ COLLATE CASE_SENSITIVE | COLLATE CASE_INSENSITIVE  ]

and column_constraints are:

  [ { NOT NULL | NULL } ]

  [ { UNIQUE  |  PRIMARY KEY } ]

  [ REFERENCES reftable [ ( refcolumn ) ] ]

and table_constraints  are:

  [ UNIQUE ( column_name [, ... ] ) ]

  [ PRIMARY KEY ( column_name [, ... ] )  ]

  [ FOREIGN KEY (column_name [, ... ] ) REFERENCES reftable [ ( refcolumn ) ]

and table_attributes are:

  [ DISTSTYLE { AUTO | EVEN | KEY | ALL } ]

  [ DISTKEY ( column_name ) ]

  [ [COMPOUND | INTERLEAVED ] SORTKEY ( column_name [,...]) |  [ SORTKEY AUTO ] ]

  [ ENCODE AUTO ]
Step 5: Use COPY Command
The COPY command moves data from the Amazon S3 bucket to the new Amazon Redshift table, enabling you to move large amounts of data in seconds. To execute the COPY command, you must have:
- The Amazon Redshift table’s name.
- The columns you want to copy.
- IAM roles for permission, and
- The location in S3 where the data is present.
You can follow the syntax given below to execute the COPY command.
COPY table-name

[ column-list ]

FROM data_source

authorization

[ [ FORMAT ] [ AS ] data_format ]

[ parameter [ argument ] [, ... ] ]
After executing the command by replacing the arguments with your own values, you can move your data from the Amazon S3 bucket to the new Redshift database table. You must cross-check to see if the new data matches with the previous table.
You can also use data sharing to query external data using Amazon Redshift spectrum or read data from another cluster using cluster snapshots. These methods also provide an easy guide for moving your data from one Redshift cluster to another.
Limitations of Using Copy and Unload Commands
There are certain limitations to using the second method, which you must know before using it to perform Redshift Redshift migration. Here are some of the specific limitations that you must keep in mind:
- Lack of Real-Time Data Integration: This method lacks the feature of real-time data integration, as it requires you to move data manually from one Amazon Redshift cluster to another. Any changes in the source data would not reflect on the destination.
- Error Production: Manual data transfer can lead to error production, so you must be cautious when moving data from source to destination. This method requires continuous monitoring to reduce the risk of error production.
- External Schemas Compatibility: Amazon Redshift does not support adding external schemas or tables to data shares.
- Schema Management: You must also be careful about the source and destination schema, as they must match in structure to perform efficient data integration.

Use Cases of Redshift to Redshift Integration
- Cost Optimization: This migration allows you to deploy clusters in the AWS region at lower pricing, saving additional costs.
- Latency Optimization: Moving the cluster closer to the user base in a different AWS region can reduce latency and improve query performance.
- Consolidation: Migrating the cluster to a region where the rest of the company’s deployments are present can help streamline management and reduce complexity. It can also optimize costs using a centralized resource management system.
Conclusion
This article explains two of the most widely used methods for moving data from one Redshift database to another. Although both methods are efficient, the second method has some limitations.
To overcome these limitations, you can use Hevo Data to transfer data between different Redshift clusters. Hevo provides over 150 data source connectors from which you can integrate data. Its easy-to-use user interface lets you easily combine data between various sources and destinations without requiring technical knowledge.
Try a 14-day free trial and experience the feature-rich Hevo suite firsthand. Also, check out our unbeatable pricing to choose the best plan for your organization.
Frequently Asked Questions (FAQs)
1. What are the ways to copy data from one Redshift cluster to another?
There are multiple ways to transfer your data from one redshift cluster to another. Here are the prominent ones:
– Using SaaS-based tools such as Hevo.
– Using COPY and UNLOAD commands by transferring data to an Amazon S3 bucket.
– Using a cluster snapshot of the source and restoring it into the destination cluster.
2. Does Redshift use SQL?
Yes, Amazon Redshift supports SQL as a query language. This allows users to easily perform data analysis and manipulation. It is PostgreSQL compatible, allowing the standard SQL commands to be used to query and manage data.
3. Is Redshift an OLAP?
Amazon Redshift is designed as an OLAP data warehouse optimized for complex queries and analytics on large datasets. It is designed to perform fast query performance using columnar storage and parallel processing techniques.
Share it with your connections.
-
 Share To LinkedIn
-
 Share To Facebook
-
 Share To X
-
 Copy Link


