

With your projects and tasks in Wrike, it can be challenging to collaborate with technical and other teams that use JIRA. Limited insights into what they are doing makes it much harder to manage the projects they are involved in. Hence, building a Wrike Jira Integration makes absolute sense.
Upon a complete walkthrough of this article, you will gain a decent understanding of Wrike and Jira along with their salient features. You will also learn about the steps involved in setting up Wrike Jira Integration from scratch. Read along to learn more about Wrike Jira Integration!
Table of Contents
Prerequisites
- An active Jira account.
- An active Wrike account.
- Basic understanding of Project Management.
Steps to Set up Wrike Jira Integration
Wrike Jira Integration is an easy-to-follow 3-step process. Follow the steps given below to set up Wrike Jira Integration in a seamless manner:
- Step 1: Create a Jira Test Project
- Step 2: Enable Project Syncs Add-On
- Step 3: Sync set up between Wrike and Jira
Step 1: Create a Jira Test Project
Wrike Jira Integration begins with the creation of a Jira Project. You need to create a test project in Jira for your first sync to get a sense of how the Wrike Jira integration works. Follow the steps given below to create a Jira Test Project:
- Log in to your Jira account.
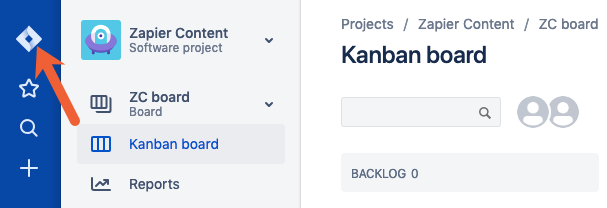
- Click on the Jira icon located in the top left corner of the home page. It will take you to the Jira Dashboard.
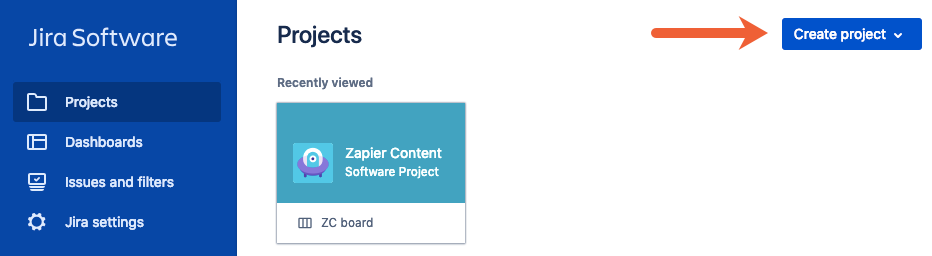
- Click on the Create Project button.
- By default, Jira will select a template for you that was used in your previous projects. If you want to change the template, click on the Change Template button.
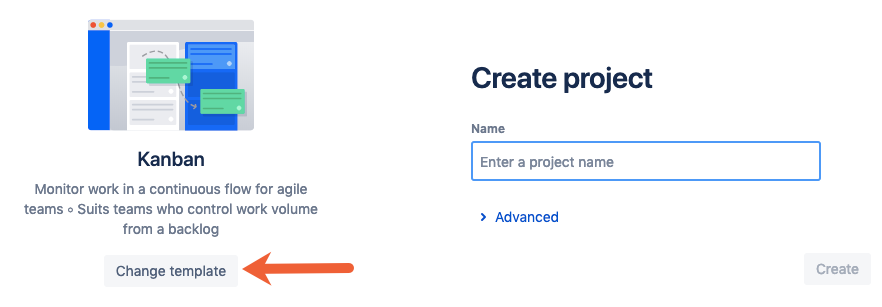
- Finally, enter a unique name for your Jira Project and then click on the Create button.
Step 2: Enable Project Syncs Add-On
Before setting up the Wrike Jira Integration, you need to enable Project Syns Add-On in your Wrike account. Follow the steps given below to do so:
- Navigate to the top right corner of the Wrike workspace and click on your profile picture.
- Click on the Settings option.
- Select the Subscription option present in the left panel.
- Find the Project Syncs Add-On by scrolling down the page.
- Now, click on the Add to Trial button.
- Once you have clicked on the Add to Trial button, a pop-up window will appear on your screen showing that the “Project Sync trial is activated”.
- Now, navigate to the Settings page again and select the option Apps & Integrations.
- Then, click on the Project Syncs tab located on the left side of the pane.
- Finally, accept the sync tool’s request for access to your Wrike account by clicking the Accept button.
Step 3: Set up Sync between Wrike and Jira
- Navigate to the top right corner of your Wrike account and click on your profile picture.
- Select the option Apps & integrations from the drop-down menu.
- Click on the Project Sync tab located in the left panel.
- Now, click on the Create Flow button.
- Once you have clicked on the Create Flow button, you’ll see two cards for the two applications you’re trying to sync. By default, the card on the right is reserved for Wrike.
- Click on the Account drop-down and select the option Connect a New Account.
- Now, click on the option Jira Cloud. This will prompt you to enter your Jira Cloud URL.
- Once you have entered the Jira Cloud URL, you will get two options to log in to Jira along with the steps displayed on the screen. The two options are:
- With an API Token.
- With OAuth Login.
- From the Project drop-down, select the Jira Project that you wish to sync with Wrike.
- After selecting the Jira Project, choose a connector for Wrike on the right card.
- After you’ve set up both cards, scroll down to select your preferred sync direction.
- Click on Next to get redirected to the page where you can configure the rules for Wrike Jira Integration.
- Once you have all the preferred configurations in place, click on the Create Flow button.
Introduction to Jira
- JIRA is one of the most popular software/tools developed by Atlassian that can be leveraged for Bug Tracking, Reporting Issues, and Project Management. It is a Java-based Project Management tool that helps monitor challenges and issues in software and mobile applications.
- The Jira platform has grown in response to the Software Industry’s desire for Agile Development methodologies. Your software development team can use it to create roadmaps and distribute tasks across the team and plan sprints.
- The JIRA Dashboard comprises numerous valuable capacities and highlights, which make tackling & resolving issues simple. It can help you deliver your product faster by making smarter plans for the team.
Key Features of Jira
Some of the key features of Jira are as follows:
- Project Tracking: You can track your ongoing project at any stage using Jira. The customized Query Language of Jira (JQL) gives you the liberty to filter or sort different issues based on certain parameters.
- Reports: Jira provides legitimate data via a helpful arrangement called Reports. There are numerous reports accessible in Jira that can help you uncover insights on various product situations.
- Security: The security settings in Jira software restrict access to a certain bug, only to the people of a team who are working together at a given security level.
- Roadmap: Jira allows the users to build roadmaps for complex projects which provides a high-level overview of the project goals and deliverables on a timeline.
- Dashboard: Jira Dashboard is the first thing you see when you sign in to Jira. You can make an individual dashboard and add devices to monitor the tasks on which you are working. Dashboards are intended to show gadgets that assist you in sorting out your tasks and accomplishments using numerous graphs and visualizations.
Introduction to Wrike
- Wrike is a Project Management solution that comes with a minimal user experience and an interface with enough depth for the power users. It houses capabilities that allow users to Optimize Workflow, Consolidate Communication, and Simplify Project Planning even when they are working remotely.
- It allows the users to track projects and is flexible enough to be used in any business with its robust mix of basic and advanced features.
- For Marketing and Creative teams, Wrike offers customized packages. These are designed to handle the whole Marketing Project Lifecycle from one central location.
- Wrike lets you collect and analyze Marketing performance data from more than 50 different platforms, including Facebook, Instagram, and Google. You can also integrate Wrike with other Project Management tools. Later in this article, you will learn about one such integration(Wrike Jira Integration).
Conclusion
This article provided a brief introduction of Jira & Wrike and also explained their key features. Moreover, it discussed the steps using which you can easily set up Wrike Jira Integration. The Integration of these two tools has the potential to maximize the output of any team working on a project.
Integrating and analyzing your data from a diverse set of data sources such as Jira can be challenging and this is where Hevo Data comes into the picture.
Simplify your data analysis with Hevo today and ”Sign[/hevoButton].
Share your experience of learning about Wrike Jira Integration. Tell us in the comments below!
Share it with your connections.
-
 Share To LinkedIn
-
 Share To Facebook
-
 Share To X
-
 Copy Link

