

ETL (Extract, Transform, and Load) is an emerging topic in all IT Industries. Industries often look for an easy solution to do ETL on their data without spending much effort on coding. If you’re also looking for such a solution, then you’ve landed in the right place.
This blog will act as an AWS Glue Tutorial and will provide a step-by-step method to build an ETL process using AWS Glue. Furthermore, this AWS Glue tutorial will explain AWS Glue, its features, and its components. Read along with the AWS Glue tutorial to understand the process of setting up your own ETL process!
Table of Contents
Prerequisites for AWS Glue Tutorial
For the best understanding of AWS concepts and working principles, you will need the following in this AWS Glue tutorial.
- Active AWS Account.
- IAM Role for AWS Glue
- S3 Bucket Setup
- A basic understanding of data and the ETL process is required.
If you don’t have an AWS account, check this link to set up your account.
Looking for the best ETL tools to connect your data sources? Rest assured, Hevo’s no-code platform helps streamline your ETL process. Try Hevo and equip your team to:
- Integrate data from 150+ sources(60+ free sources).
- Utilize drag-and-drop and custom Python script features to transform your data.
- Risk management and security framework for cloud-based systems with SOC2 Compliance.
Try Hevo and discover why 2000+ customers, such as Postman and ThoughtSpot, have chosen Hevo over tools like AWS Glue to upgrade to a modern data stack.
Get Started with Hevo for FreeWhat is AWS Glue?

AWS Glue is another offering from AWS and is a serverless ETL (Extract, Transform, and Load) service on the cloud. It is a fully managed, cost-effective service to categorize your data, clean and enrich it and finally move it from source systems to target systems.
AWS Glue consists of a centralized metadata repository known as Glue Catalog, an ETL engine to generate the Scala or Python code for the ETL, and also does job monitoring, scheduling, metadata management, and retries. AWS Glue is a managed service, and hence you need not set up or manage any infrastructure.
AWS Glue works very well with Structured and Semi-structured Data, and it has an intuitive console to discover, transform and query the data. You can also use the console to edit/modify the generated ETL scripts and execute them in real-time.
In the upcoming sections of this AWS Glue tutorial, we’ll explore AWS components, its key features, along with steps to build your own ETL pipeline.
AWS Glue Tutorial: Building ETL Pipeline
AWS Glue is the perfect tool to perform ETL (Extract, Transform, and Load) on source data to move to the target. This section of this AWS Glue tutorial will explain the step-by-step process of setting up your ETL Pipeline using AWS Glue that transforms the Flight data on the go.
Following are the 3 major steps in the AWS Glue tutorial to create an ETL pipeline:
Step 1: Create a Crawler
This could be achieved by using the following small steps:
- Sign in to AWS Console, and from the search option, search AWS Glue and click to open the AWS Glue page.
- Go to the tutorial section at the bottom, and click on Add Crawler.
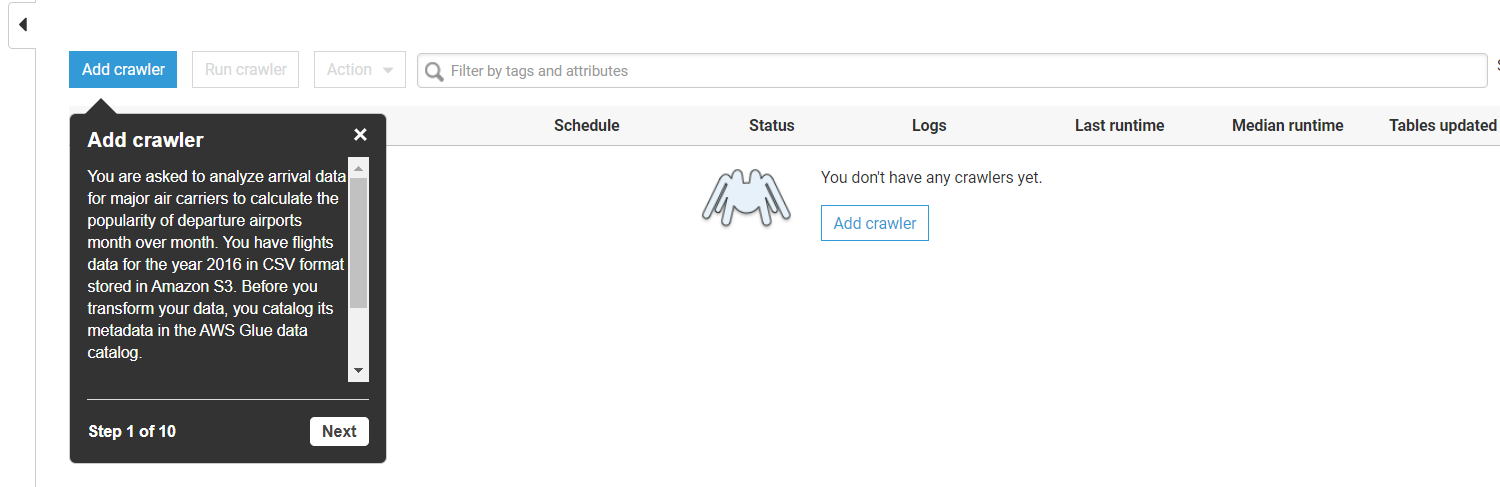
- Once you click on Add Crawler, a new screen will pop up, specify the Crawler name, say “Flight Test”.
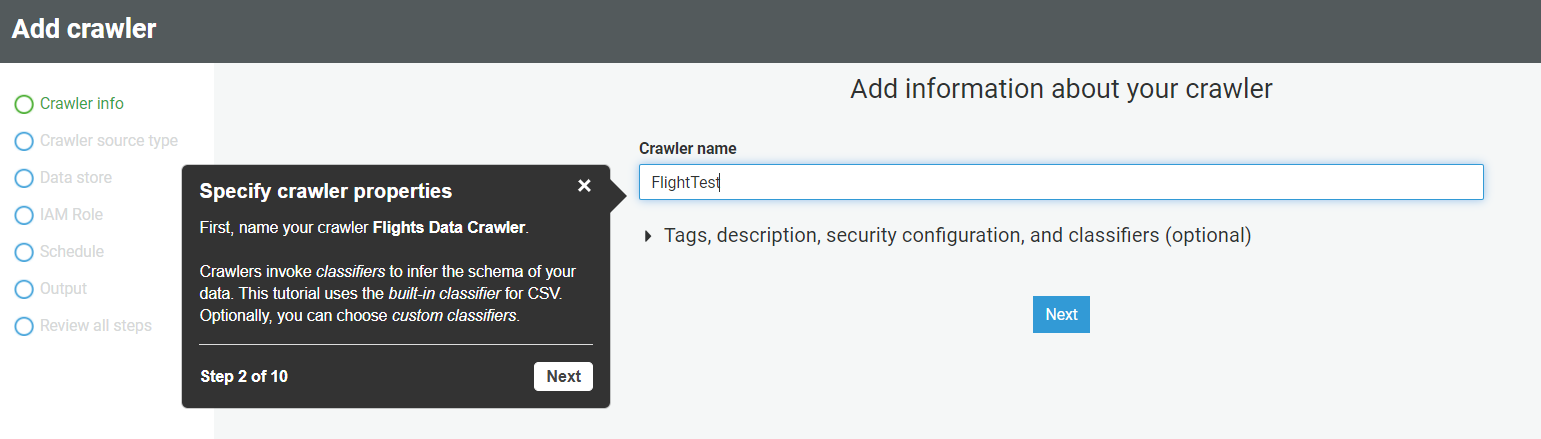
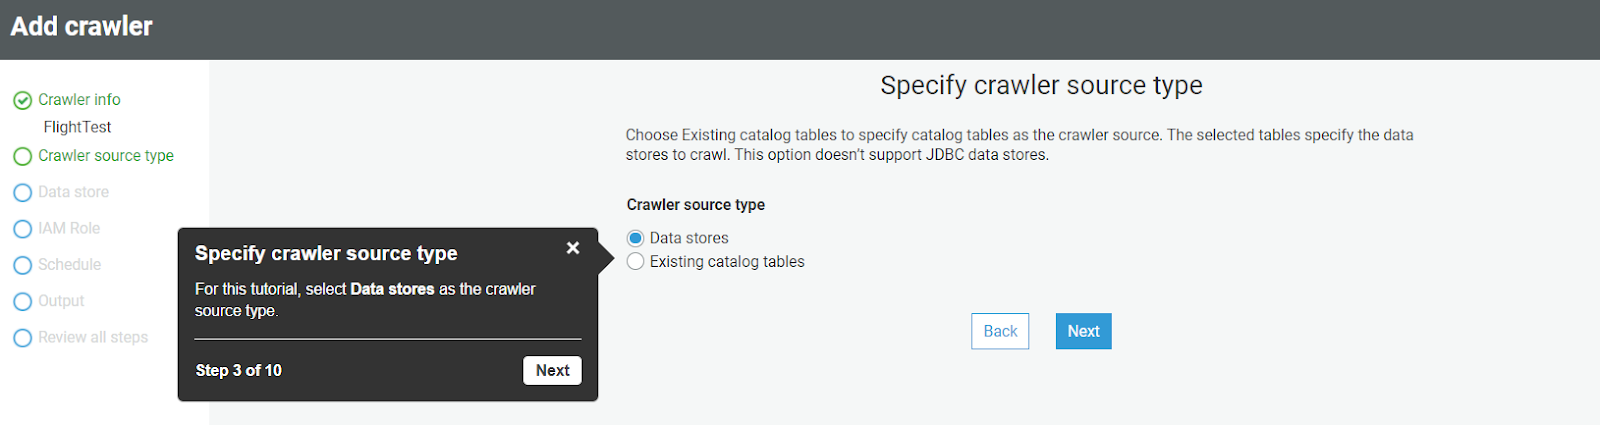
- After specifying the name, click Next, and on the next screen, select the data source and click Next.
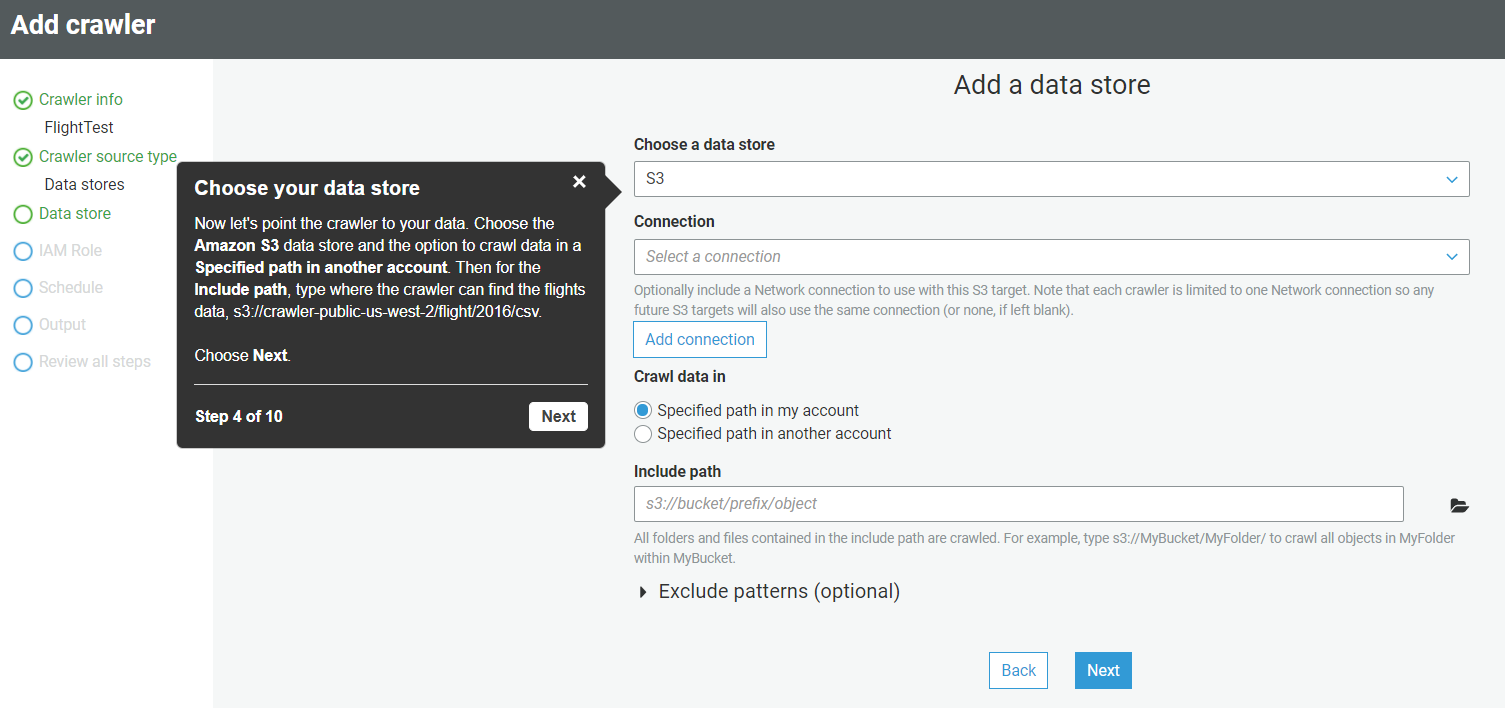
- On the next screen, select the Data Source as S3, and specify the path of the flight data. The default path is – s3://crawler-public-us-west-2/flight/2016/CSV
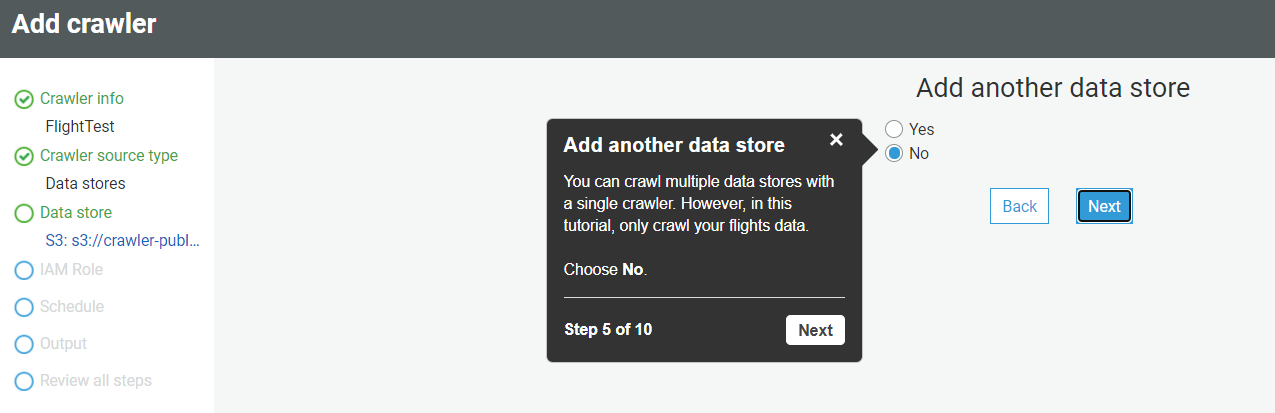
- Once you fill in all the information, click on Next, and in the next section, select No when asked to add another data source.
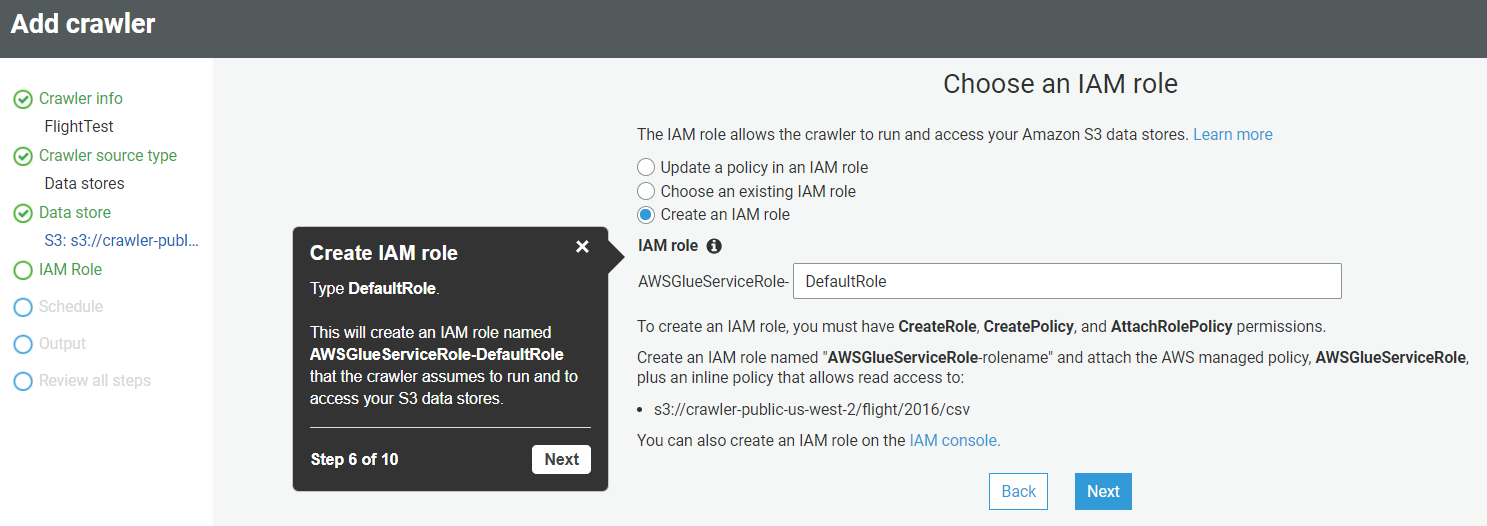
- Once you click Next, it will ask you to create an IAM role to access S3 and run the job. Provide the name of the role and click Next.
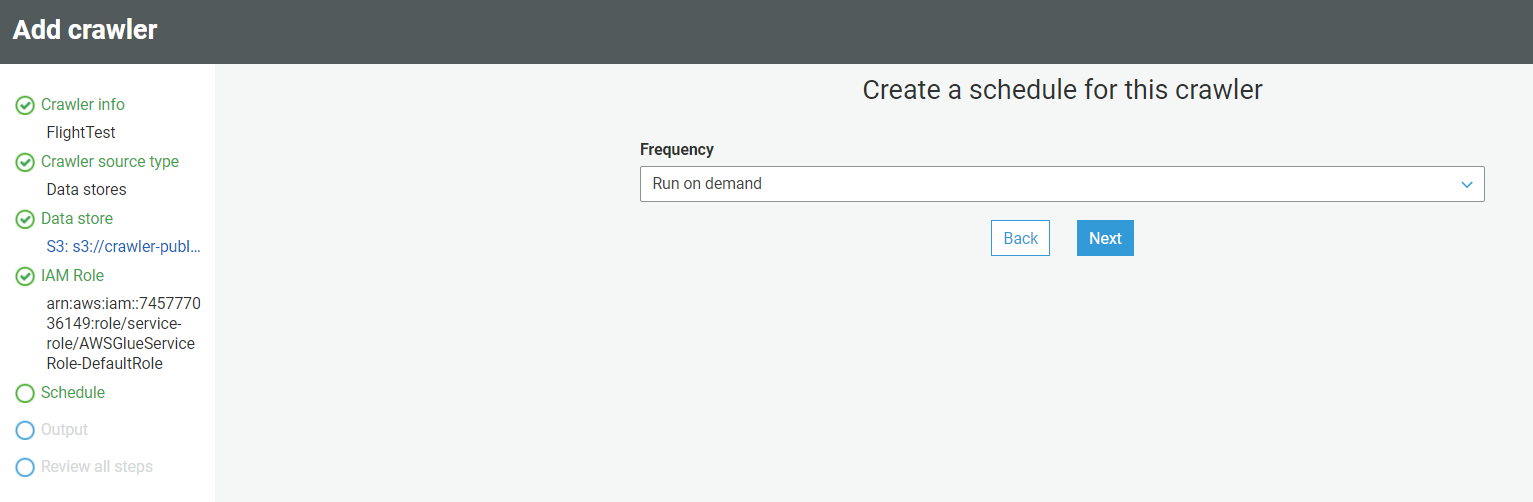
- Once you provide the IAM role, it will ask how you want to schedule your crawler. We suggest you choose the “Run on Demand” option.
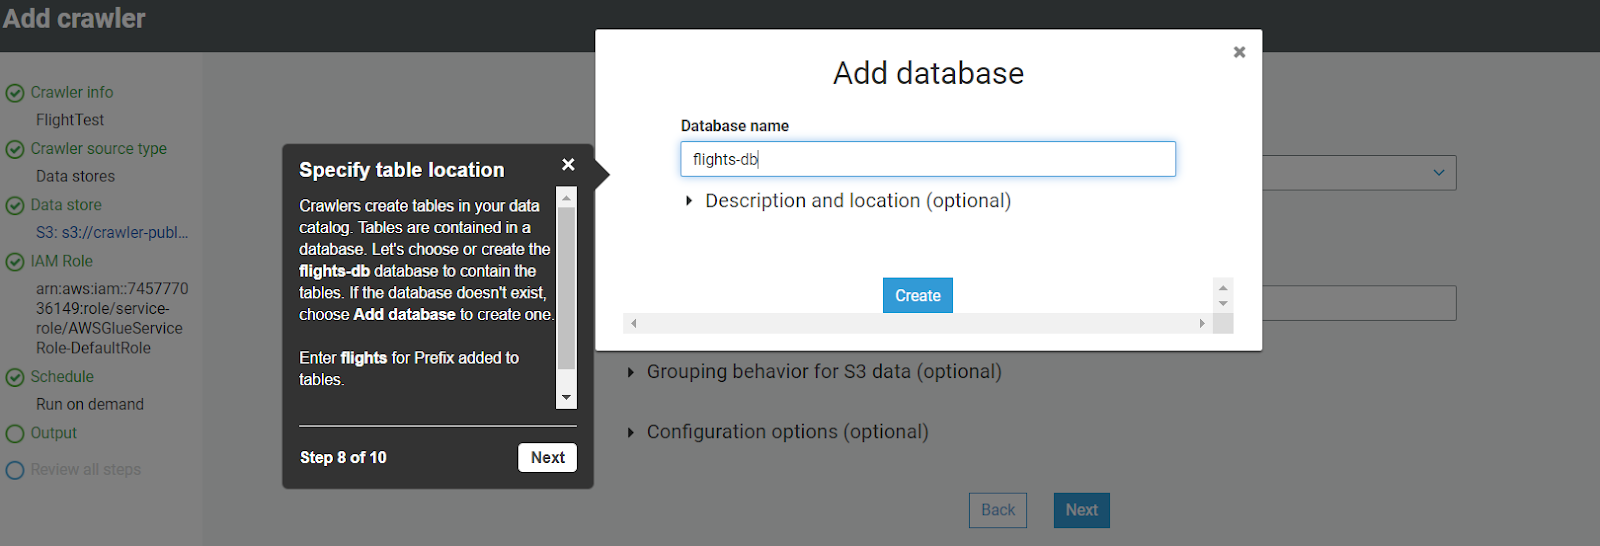
- Once you select the scheduler, click next and create the output database.
- Once you create the database, the review page will be open. Review all the settings and click finish.
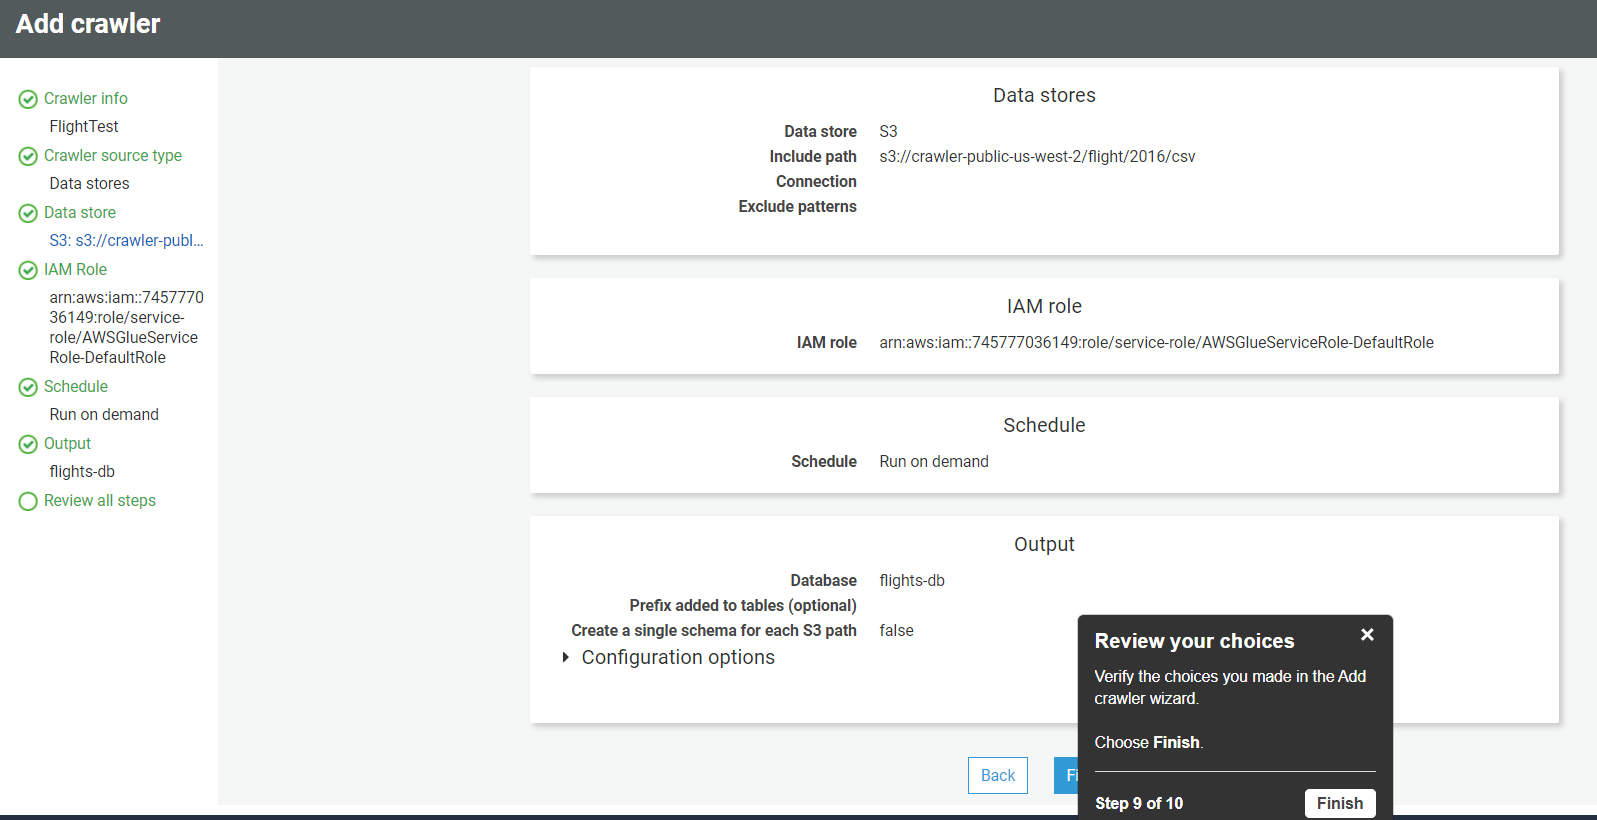
- Once you click on finish, the crawler will be created instantly, and it is available for the run. Click on Run Crawler, to start execution.
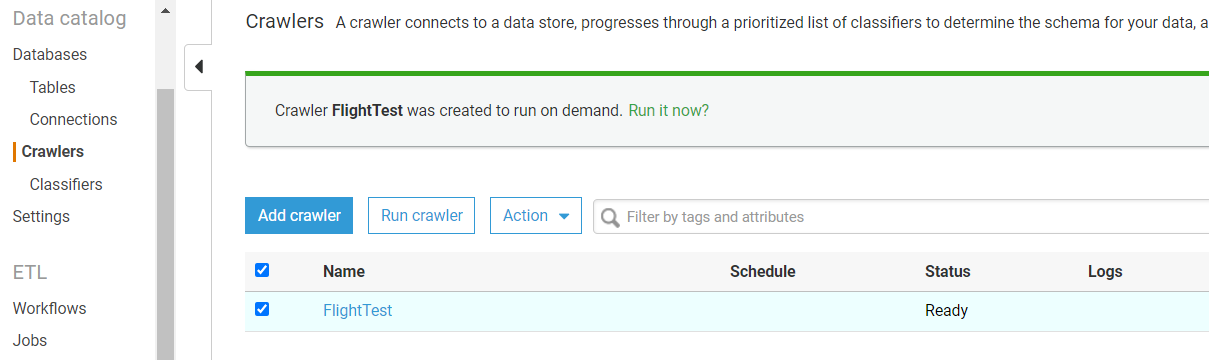
Step 2: View the Table
Once the crawler is successfully executed, you can see the table and its metadata created in the defined DB. Follow the below steps to explore the created table –
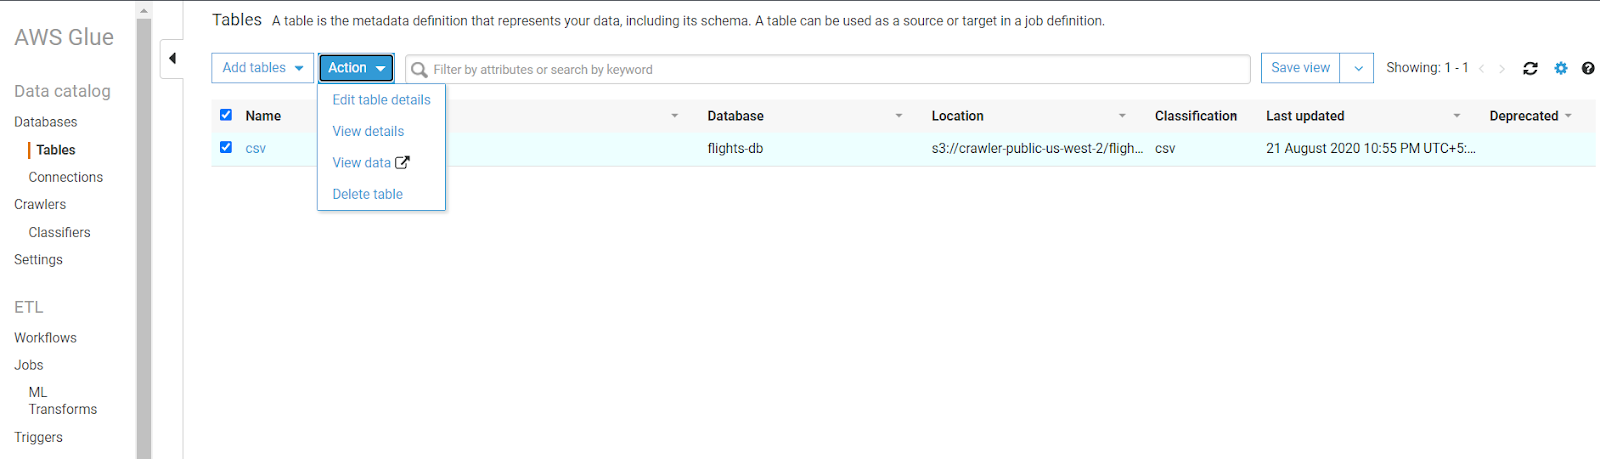
- On the bottom section of Glue Tutorial, click on Explore table.
- This will head you to the tables section and click on the CSV table created inside the flights-db database
- Click on the table, and click View Details.
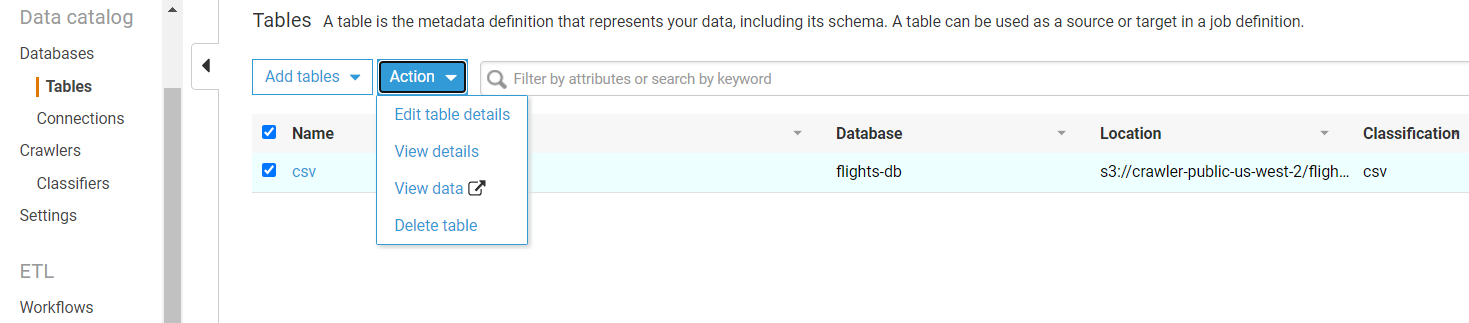
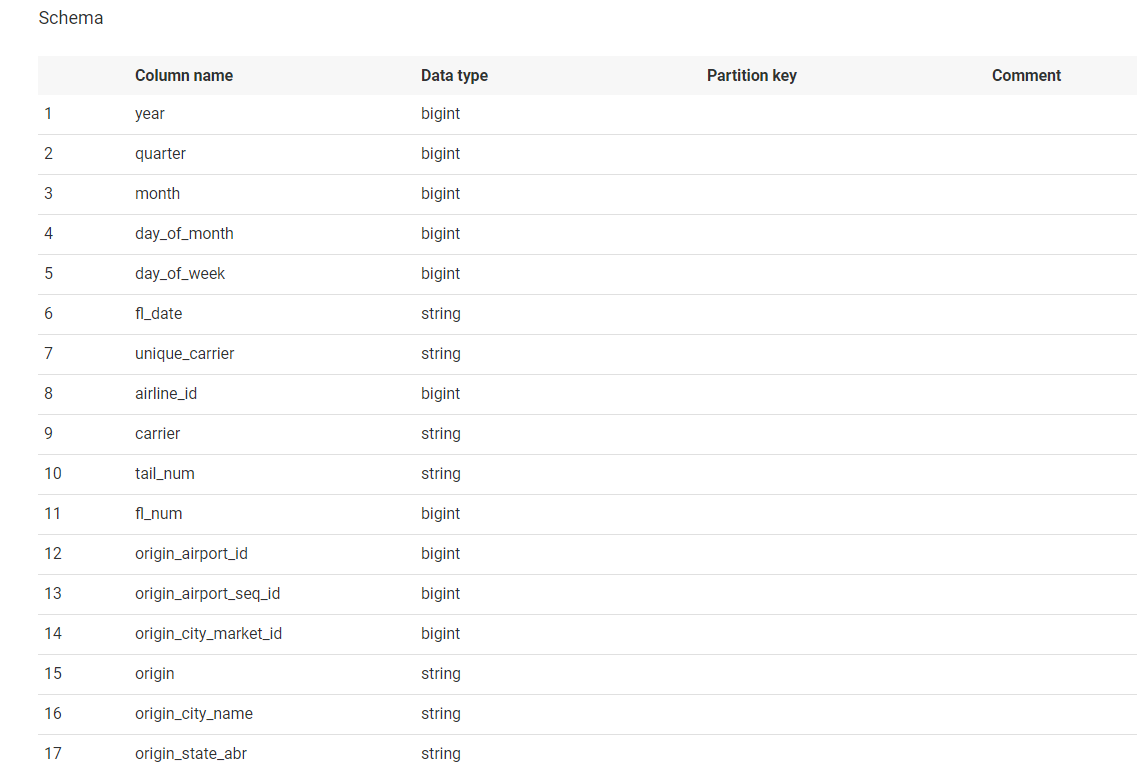
- You can see all the information/properties of the table.
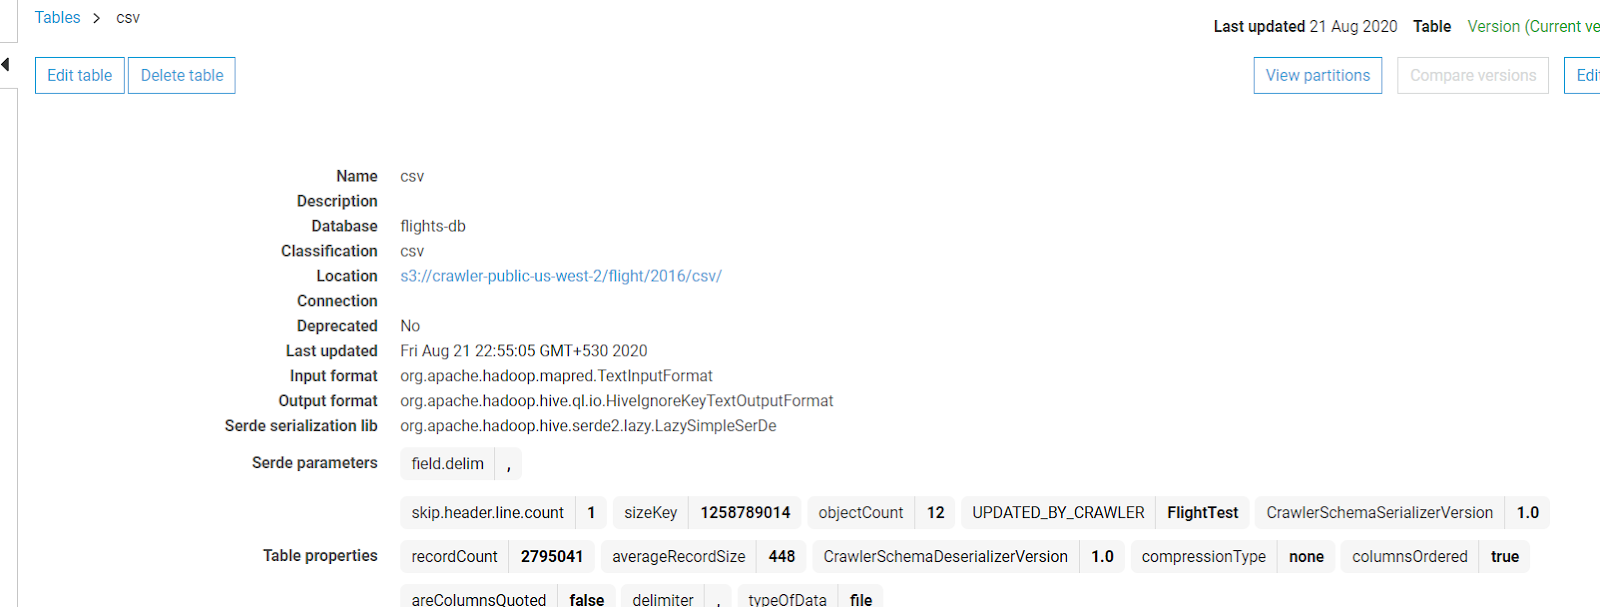
- If you scroll down further, to the same page, you can see the metadata of the table fetched automatically from the file.
Step 3: Configure Job
This step requires you to configure a job using the previously set up crawler. This can be achieved by using the following steps:
- In this section, you have to configure the job to move data from S3 to the table by using the crawler.

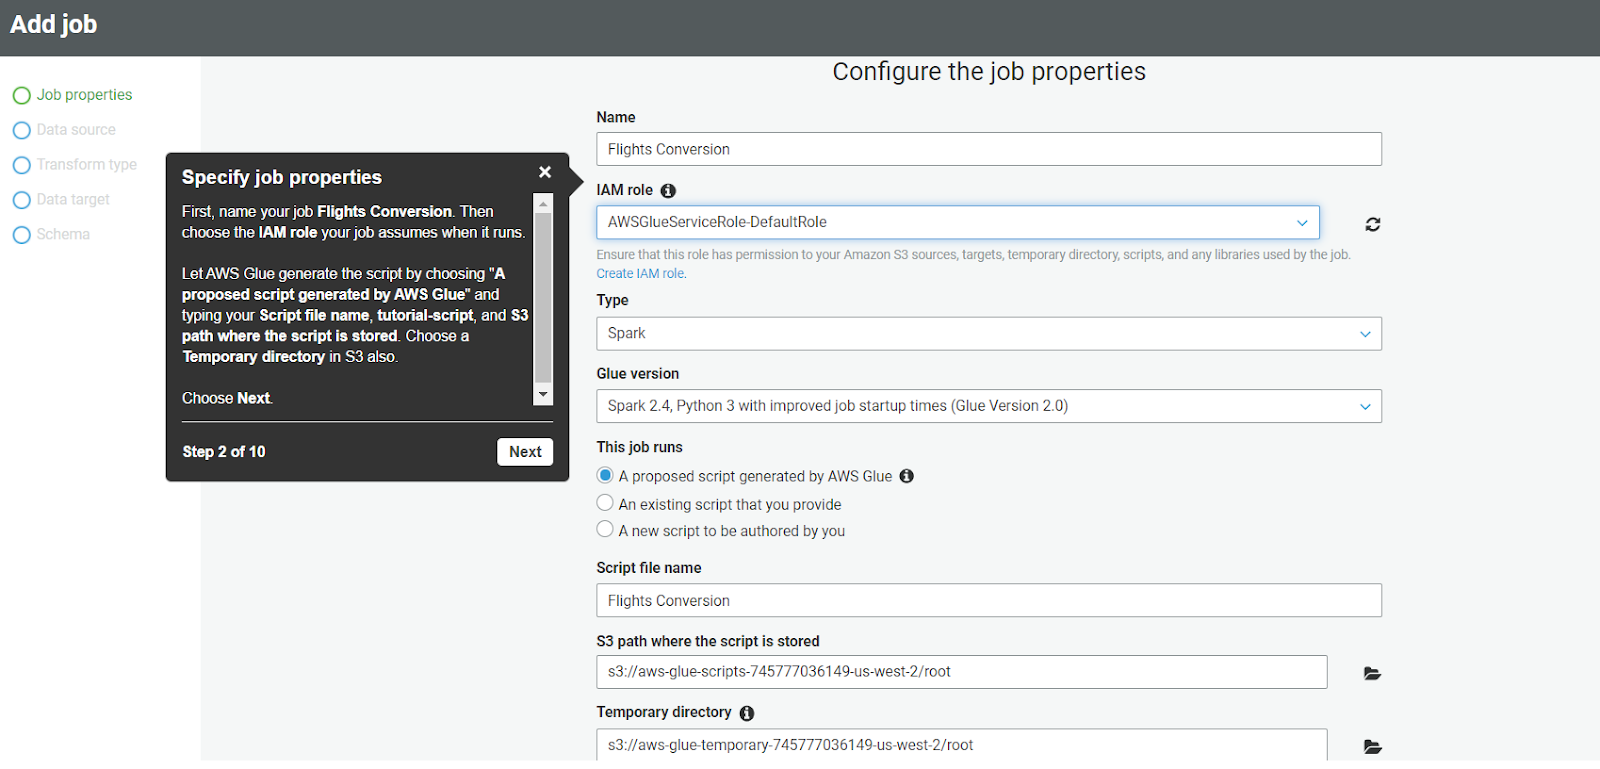
- Once you click on Add Job, a job configuration page will open up. Fill in the required details like the name of the job, select the IAM role, type of execution, and other parameters.
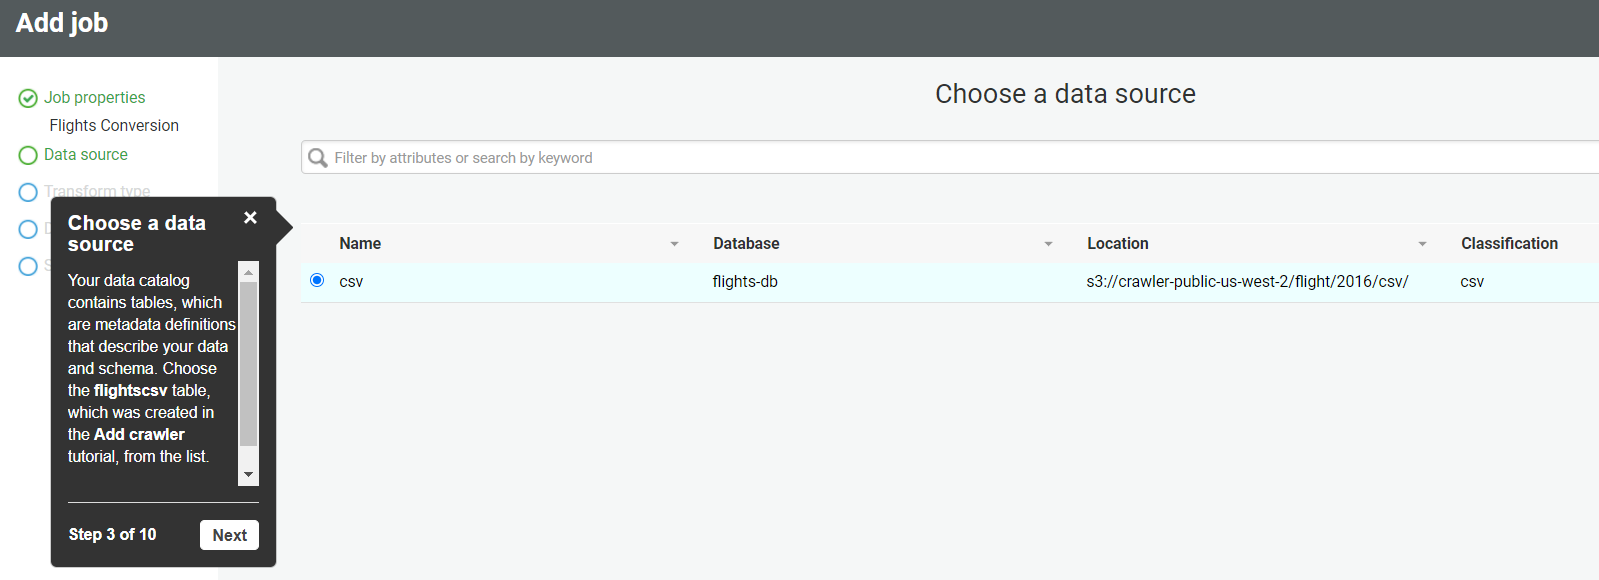
- After the configuration click on Next. On the next page select the data source “CSV” and click on next.
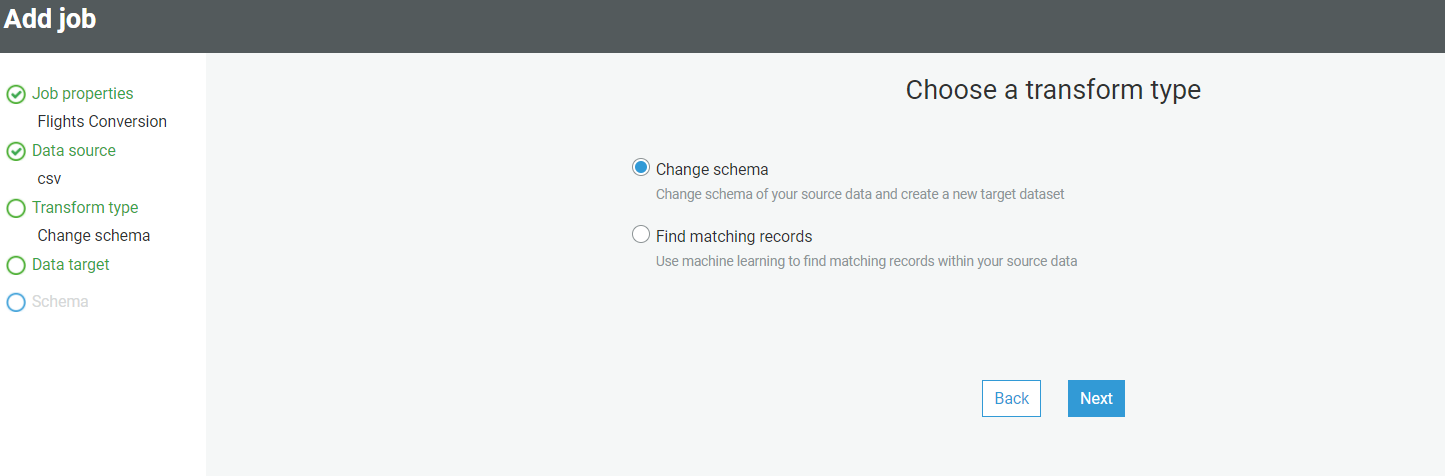
- Choose a transformation type – Change Schema.
- Choose the data target, and select the table “CSV” created above.
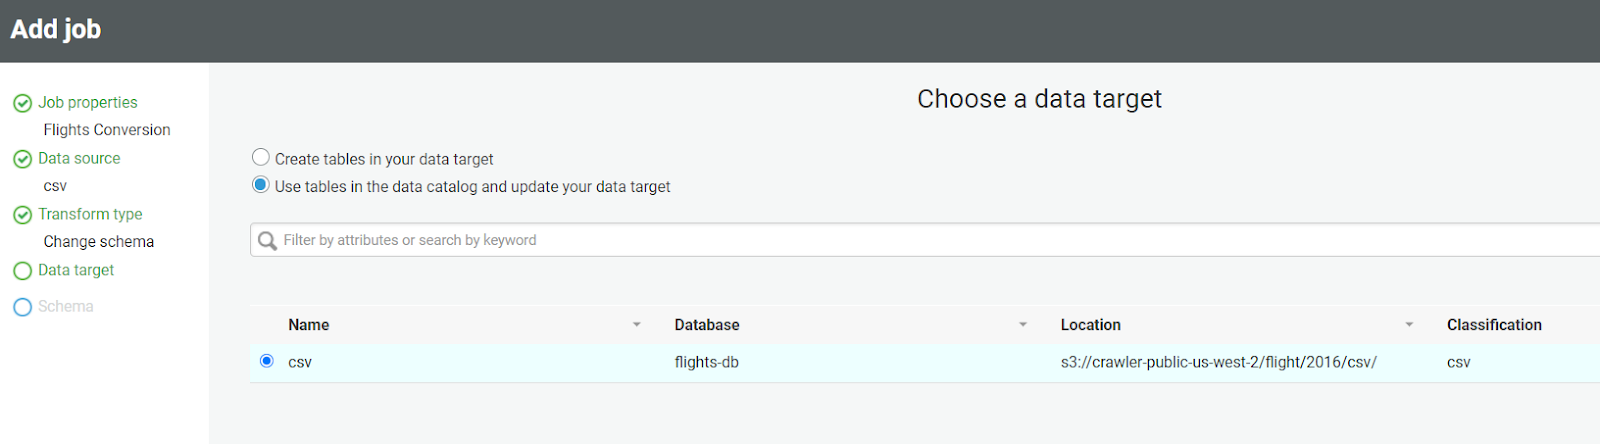
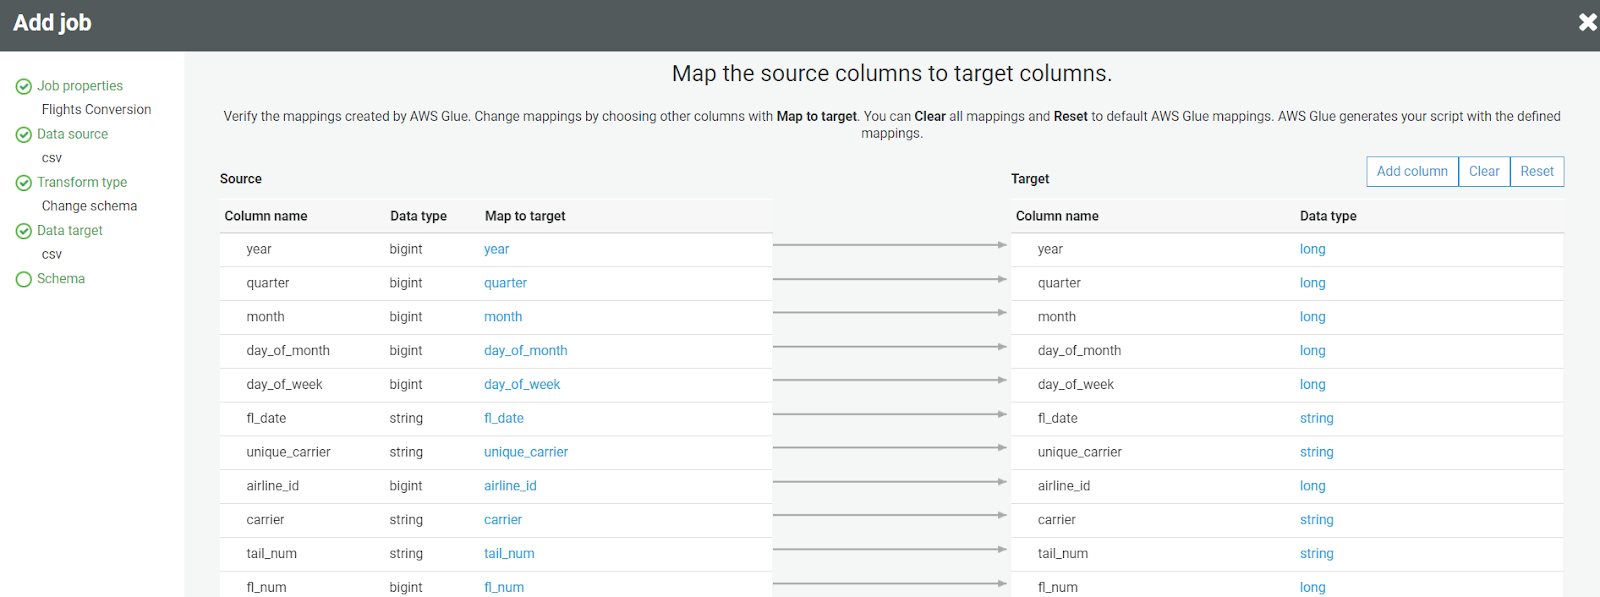
- On the next page, you’ll see the source of the target mapping information. Add/delete the columns that you wish to. We suggest keeping the default mapping and clicking next.
- Click on the save job, and on the next page, you can see the flow diagram of the job and can edit the script generated.
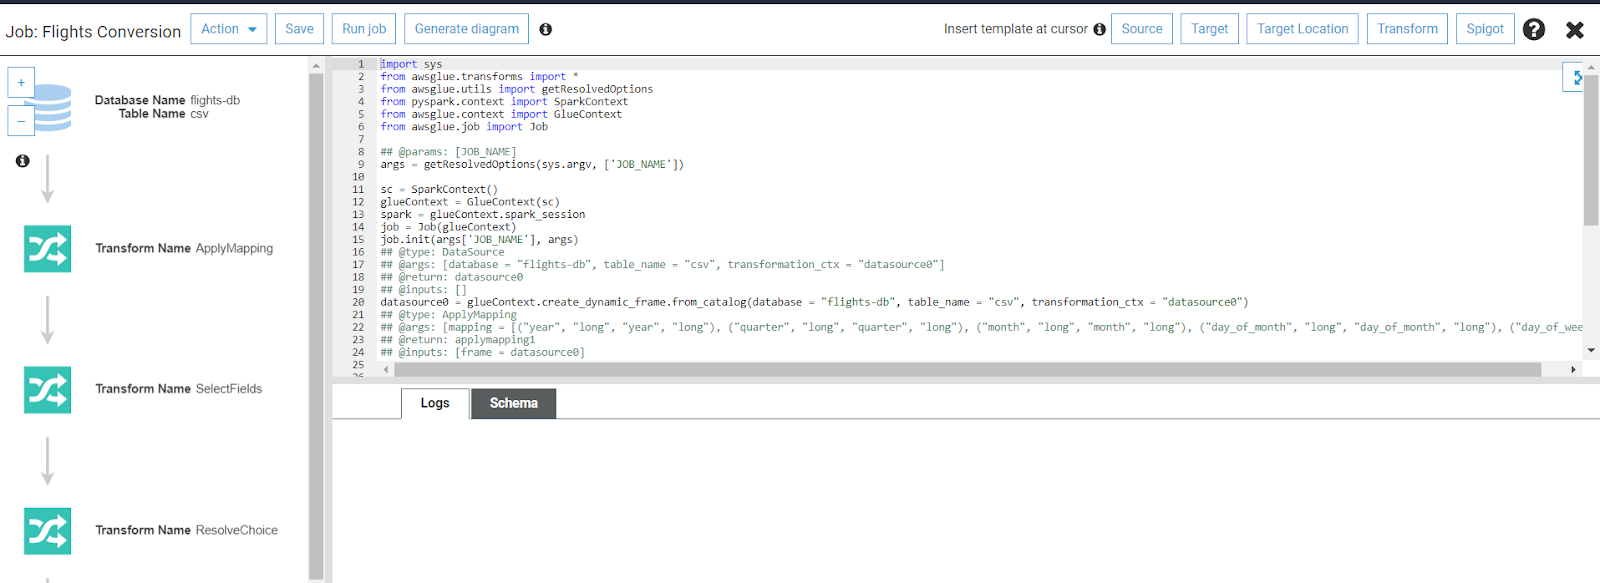
- You can use the inbuilt transform feature of AWS Glue to add some predefined transformations to the data.

- Check the status of the Job, once it is completed, head out to the table section to see the data.
- Click on View Data, it will open Athena, and preview a few records from the data.
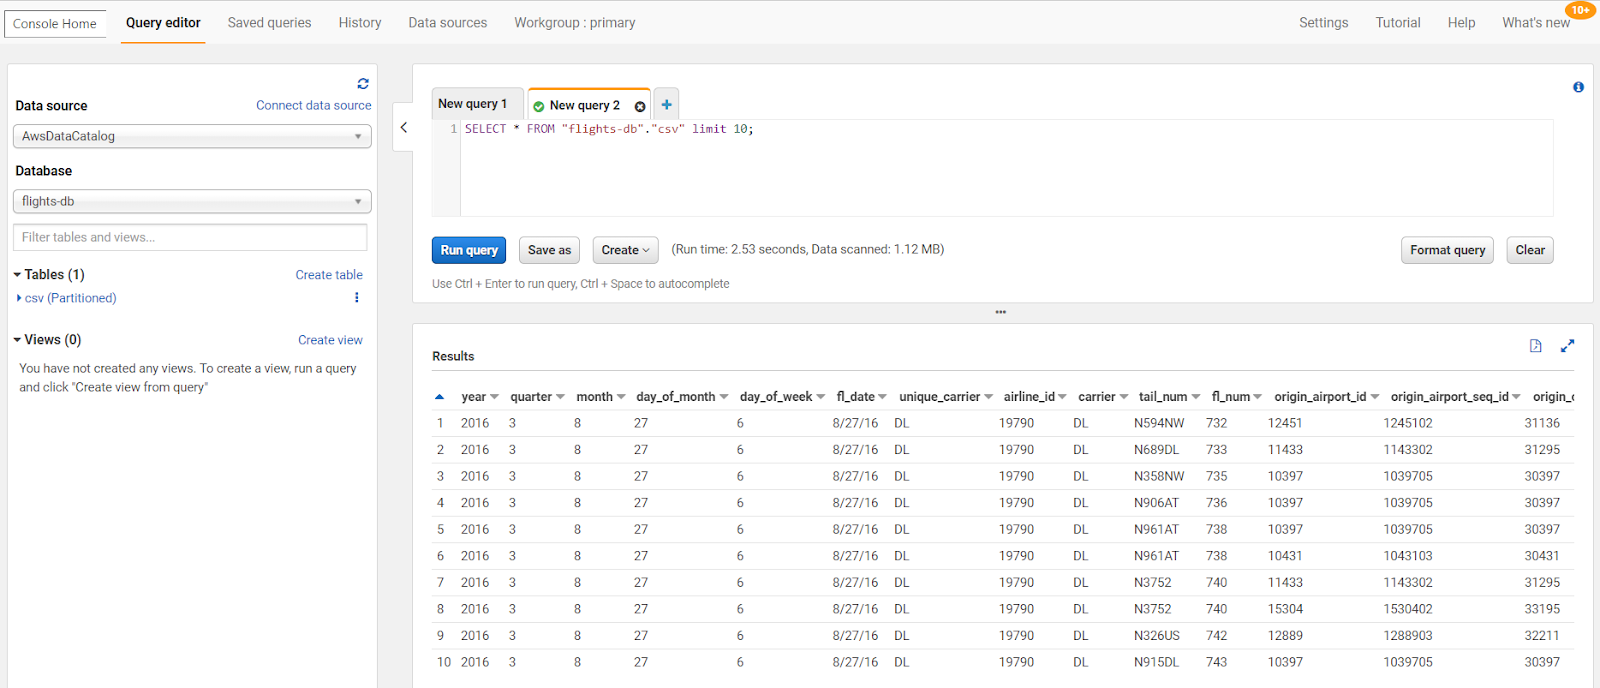
That’s it! Your ETL is ready. It is super easy to develop and design the ETL workflow in AWS Glue. This brings us to the end of this AWS Glue tutorial.
Read more about AWS Glue.
The Architecture of AWS Glue
You define jobs in AWS Glue to perform the operations required to extract, transform, and load (ETL) data from a data source to a data target. The following actions you need to follow:

- Firstly, identify the data sources you are using.
- For your AWS Data Catalog, you’ll now have to define a crawler that will help you populate it with definitions associated with Metadata tables.
- When you position your crawler at the data store, the crawler creates table definitions and fills up metadata in Data Catalog.
- For streaming sources, manually define the data catalog tables and specify the properties of the data stream.
- Once the data catalog is cataloged, data can be immediately searched and queried, and ETL accessible.
- AWS Glue can create scripts to transform your data. You can also make scripts available in the AWS Glue console or the API.
- You can run a task on-demand or set it to run when a specified trigger fires. A trigger can be a time-based schedule or event.
- While running the job, the script gets data from the data source, transforms it, and loads that data into the data target, as shown in the above diagram. Therefore, the extract, transform, load (ETL) job in AWS Glue succeeds.
Major Components of AWS Glue
Before moving to the AWS Glue tutorial ETL setup, it is important to understand its components. AWS Glue uses the following components to ensure its smooth workflow:
- Data catalog: It is the centralized catalog that stores the metadata and structure of the data. You can point Hive and Athena to this centralized catalog while setting up to access the data. Hence you can leverage the pros of both the tools on the same data without changing any configuration and methods.
- Database: This option is used to create the database for movement and storing the data from source to target.
- Table: This option allows you to create tables in the database that can be used by the source and target.
- Crawler and Classifier: A crawler is an outstanding feature provided by AWS Glue. It crawls the location to S3 or other sources by JDBC connection and moves the data to the table or other target RDS by identifying and mapping the schema. It creates/uses metadata tables that are pre-defined in the data catalog.
- Job: A job is an application that carries out the ETL task. Internally it uses Spark or Python as the programming language and EMR/EC2 to execute these applications on the cluster.
- Trigger: A trigger starts the ETL job execution on-demand or at a specific time.
- Development endpoint: The development environment consists of a cluster that processes the ETL operation. It is an EMR cluster that can be then connected to a notebook or to execute the jobs.
- Notebook: Jupyter notebook is an on the web IDE to develop and run the Scala or Python program for development and testing.
When to Use AWS Glue?
Having the all information about AWS Glue, if you are not sure when to use AWS Glue, here are some scenarios given below to guide you in decision-making:
- You can build your custom Amazon S3 Data lake architecture with AWS Glue, without the hassle of data moving.
- With AWS Glue, you can analyze the semi-structured data in your data warehouse. It creates a schema for your data sets and creates ETL scripts to transform, flatten and enrich data.
- AWS Glue provides you a unified view of your data sets across multiple data stores.
- You can set the event to run the ETL job in AWS Glue.
Pricing of AWS Glue
With AWS Glue, you pay hourly for crawlers (data retrieval) and ETL jobs (data processing and loading). For the AWS Glue Data Catalog, you pay a simple monthly fee for storing and accessing your metadata. The first 1 million items saved are free, and the first 1 million accesses are free.
If you provide a development endpoint for interactive development of your ETL code, you pay per hour at a per second rate. For AWS Glue DataBrew, interactive sessions are charged per session and DataBrew jobs are charged per minute.
Use of the AWS Glue Schema registry is provided at no additional cost. Pricing may vary from region to region.

How to Get Started with Serverless ETL on AWS Glue
- Set Up AWS Glue – Create an AWS Glue job and configure the data source.
- Define the ETL Process – Use Glue Data Catalog to organize and prepare data.
- Write and Execute ETL Scripts – Use Python or Scala to transform data.
- Schedule and Automate Jobs – Set up triggers for real-time or batch processing.
- Monitor and Optimize – Use AWS CloudWatch for tracking performance.
Benefits and Limitations of Serverless ETL
Benefits
- No Infrastructure Management – AWS handles scaling and maintenance.
- Cost-Effective – Pay only for the resources used.
- Scalable & Flexible – Easily process large datasets.
- Seamless Integration – Works well with AWS services like S3, Redshift, and Athena.
Limitations
- Cold Start Delays – Jobs may take time to initialize.
- Limited Customization – Less control over the underlying infrastructure.
- Execution Time Limits – Not ideal for long-running ETL processes.
Check out our blog comparing AWS Glue and Azure Data Factory to help you make a more informed decision.
Conclusion
This AWS Glue tutorial explained AWS Glue and how you can create a simple ETL pipeline without any coding effort. Moreover, in this AWS Glue tutorial, we discussed the key features and components of AWS Glue. The ETL process although feasible will require a lot of time and effort on your part.
Hevo is an all-in-one cloud-based ETL pipeline that will not only help you transfer data but also transform it into an analysis-ready form. Hevo’s native integration with 150+ data sources (including 40+ free sources) ensures you can move your data without the need to write complex ETL scripts.
Hevo’s Data Pipeline provides a fully automated and secure data transfer without having to write any code. It will make your life easier and make data migration hassle-free.
Want to take Hevo for a spin? Sign Up or a 14-day free trial and experience the feature-rich Hevo suite firsthand. Also checkout our unbeatable pricing to choose the best plan for your organization.
FAQ
What is Glue used for in AWS?
AWS Glue is a fully managed ETL (Extract, Transform, Load) service that simplifies the process of preparing and transforming data for analytics. It allows users to discover, catalog, and organize data stored in various sources, making it easier to clean, enrich, and analyze the data. Glue integrates with multiple AWS services, facilitating data movement and transformation.
Is AWS Glue good for ETL?
Yes, AWS Glue is an excellent choice for ETL tasks. It automates many aspects of the ETL process, including data discovery, schema inference, and job scheduling. Glue supports both batch and streaming data processing, enabling users to transform and load data efficiently into data lakes, data warehouses, and other data stores.
What is an AWS Glue job used for?
An AWS Glue job is a script that runs a specific ETL operation on data. It can extract data from various sources, transform it according to defined rules, and load it into target data stores. Glue jobs can be written in Python or Scala, and they can be scheduled to run at specific intervals or triggered by events. They allow for seamless data processing in AWS environments.
Share it with your connections.
-
 Share To LinkedIn
-
 Share To Facebook
-
 Share To X
-
 Copy Link


