The Bitbucket Pipelines tool allows your team to automate the software development process by seamlessly integrating and delivering it. The importance of automation in the software development process has never been greater.
By automating your team’s code, you save time by doing less manual work, and you lower risk by following a consistent and repeatable process. In the end, you spend less time handling emergency situations and more time delivering quality code quickly.
In this blog, you’ll learn how Bitbucket Pipeline Trigger activates manual pipelines and schedules them.
Table of Contents
What Are Bitbucket Pipelines?
Data pipelines are an essential feature of Bitbucket. This application provides developers with a safe and flexible environment for automatically creating, testing, and deploying code based on a configuration file in their repository. The system can be configured precisely to your requirements.
The service is referred to as an integrated Continuous Integration/Continuous Deployment service. Continuous Integration (CI) – The process of integrating code frequently into a single repository, ideally several times a day. Once the integration has been verified, it can be tested by building an automated pipeline. Continuous Deployment (CD) – refers to a strategy for a software release, wherein any commitment to the code that passes a test is automatically thrust into production, making changes visible to the users.
Quite simply, Bitbucket pipeline services provide teams with best practices and methodologies for achieving their work goals while maintaining security and code quality.
Using manual scripts and custom code to move data into the warehouse is cumbersome. Frequent breakages, pipeline errors, and lack of data flow monitoring make scaling such a system a nightmare. Hevo’s reliable data pipeline platform enables you to set up zero-code and zero-maintenance data pipelines that just work.
- Reliability at Scale: With Hevo, you get a world-class fault-tolerant architecture that scales with zero data loss and low latency.
- Monitoring and Observability: Monitor pipeline health with intuitive dashboards that reveal every stat of the pipeline and data flow. Bring real-time visibility into your ELT with Alerts and Activity Logs
- Auto-Schema Management: Correcting improper schema after the data is loaded into your warehouse can be challenging. Hevo automatically maps the source schema to the destination warehouse so that you don’t have to deal with schema errors.
- 24×7 Customer Support: With Hevo, you get more than just a platform; you get a partner for your pipelines. Discover peace with round-the-clock live chat within the platform.
How do Bitbucket Pipelines Work?
It’s no secret that Bitbucket Pipelines is a set of tools for developers within Bitbucket. Let’s explore a bit more.
As a CI/CD service, Bitbucket Pipelines provides developers with the ability to automatically build and test their code. Within the cloud, containers are created, and commands can be executed from within them. It provides developers with the ability to run unit tests on all changes made to the repository.
This makes it easier to ensure that your code meets your requirements and is safe.

By using Bitbucket Pipelines, you can be assured that your tests are being scaled appropriately, as the pipeline runs in tandem with each commit, creating a new Docker image. You won’t be limited by the power of your hardware, and your pipelines will grow as your requirements do.
In addition to a simple setup with ready-to-use templates, Bitbucket Pipelines are an outstanding value. Consider this example: You want to get up and running as quickly as you can but do not wish to bother with the setup of build agents or integration with CI tools – after all, it would consume time that would otherwise be spent coding. With Bitbucket Pipelines, you can start working right away without having to set up anything beforehand; you don’t need to switch between different tools.
In addition, with Bitbucket, the entire process of developing a project is managed within its own cloud, providing a quick feedback loop. The entire process is handled within the cloud, from coding to deployment. You can see exactly where a command broke your build on all commits, pull requests, and branches.
If you’re looking for a reliable solution to simplify your software development process, this is an excellent option.
How to get started with Bitbucket Pipelines?
Bitbucket Pipelines is a CI/CD solution that is incorporated into Bitbucket. It enables you to create, test, and even deploy your code automatically depending on a configuration file in your repository.
Understand the YAML file
YAML files called bitbucket-pipelines.yml are used to define pipelines. The files are located in the root folder of your repository. To learn more about configuring a YAML file, see Configure bitbucket-pipelines.yml.
Configuring your first pipeline
Bitbucket provides two ways to configure your pipeline: either directly through the YAML file or by using the wizard. Follow these steps to configure your pipeline.
Requirements
- An account on Bitbucket Cloud is required.
- At least one repository must be present in your workspace.
Steps
- Select Pipelines in your repository in Bitbucket.
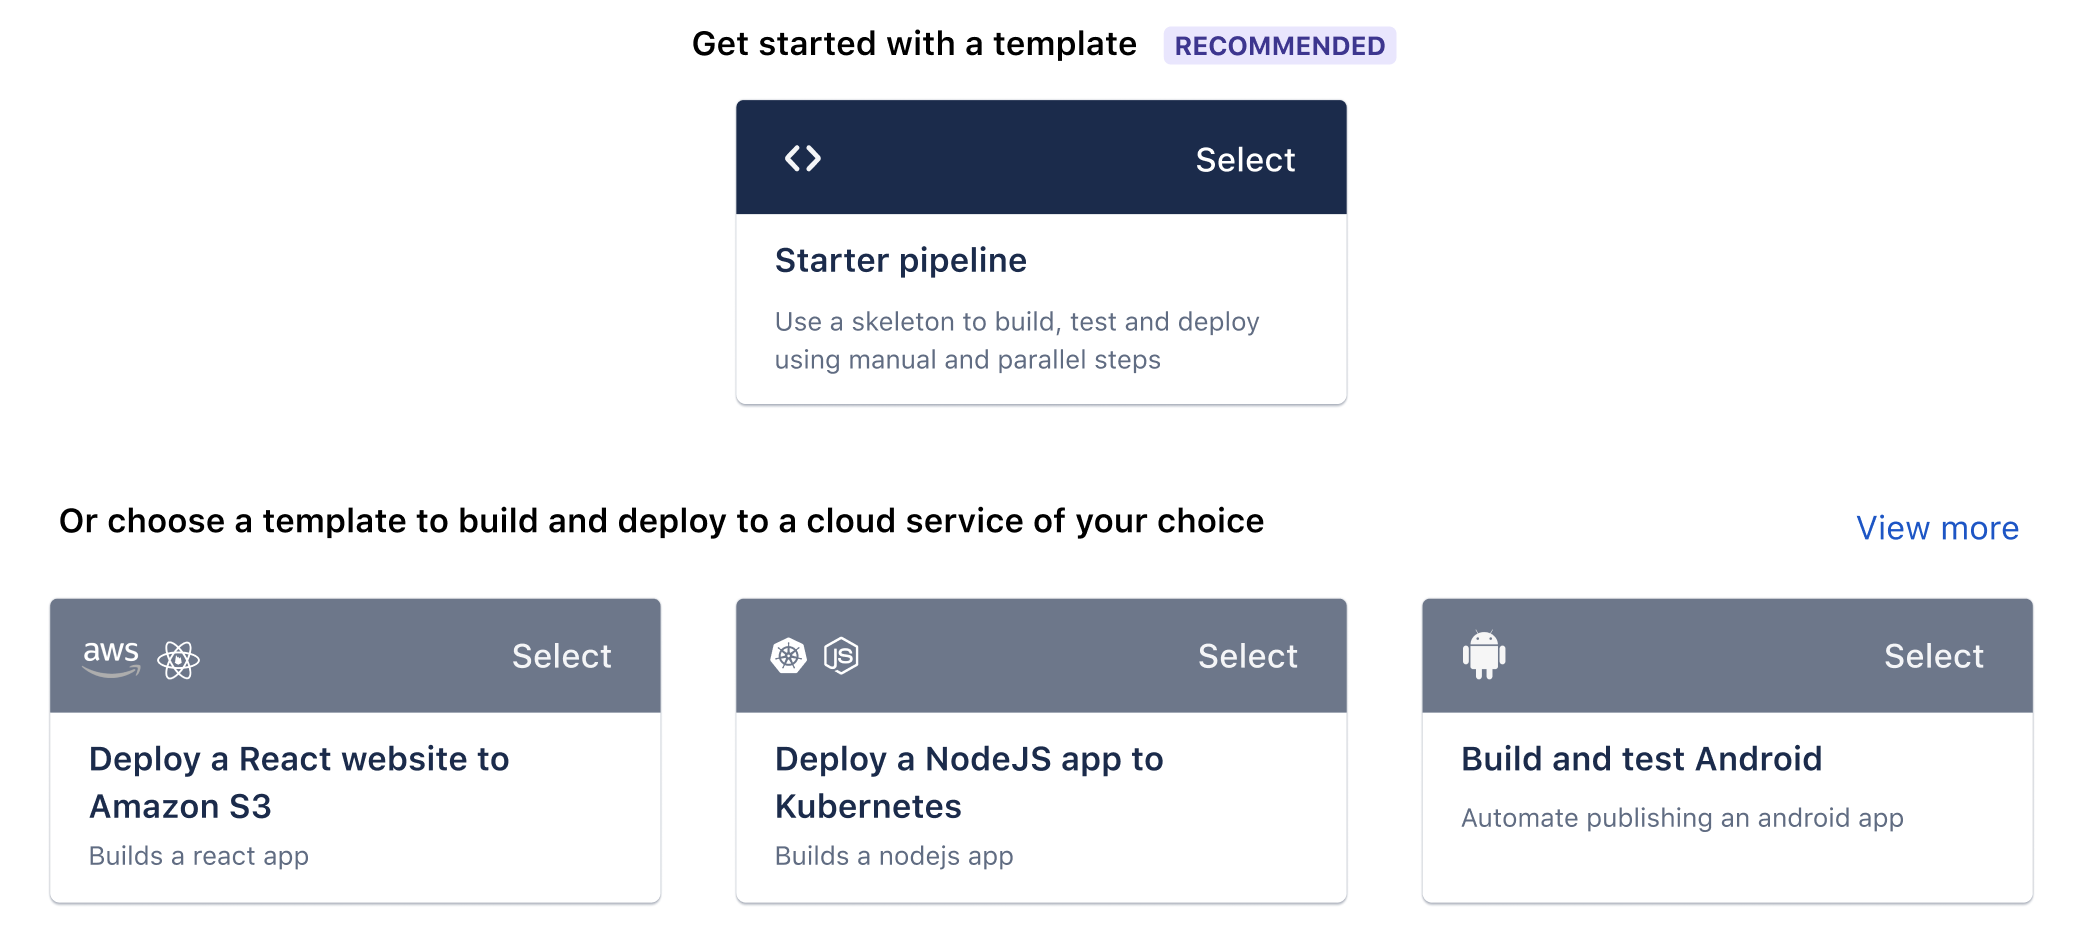
- By clicking on Create your first pipeline, you will be directed to the template section.
- There are several templates available. Use the one RECOMMENDED if you are not sure.

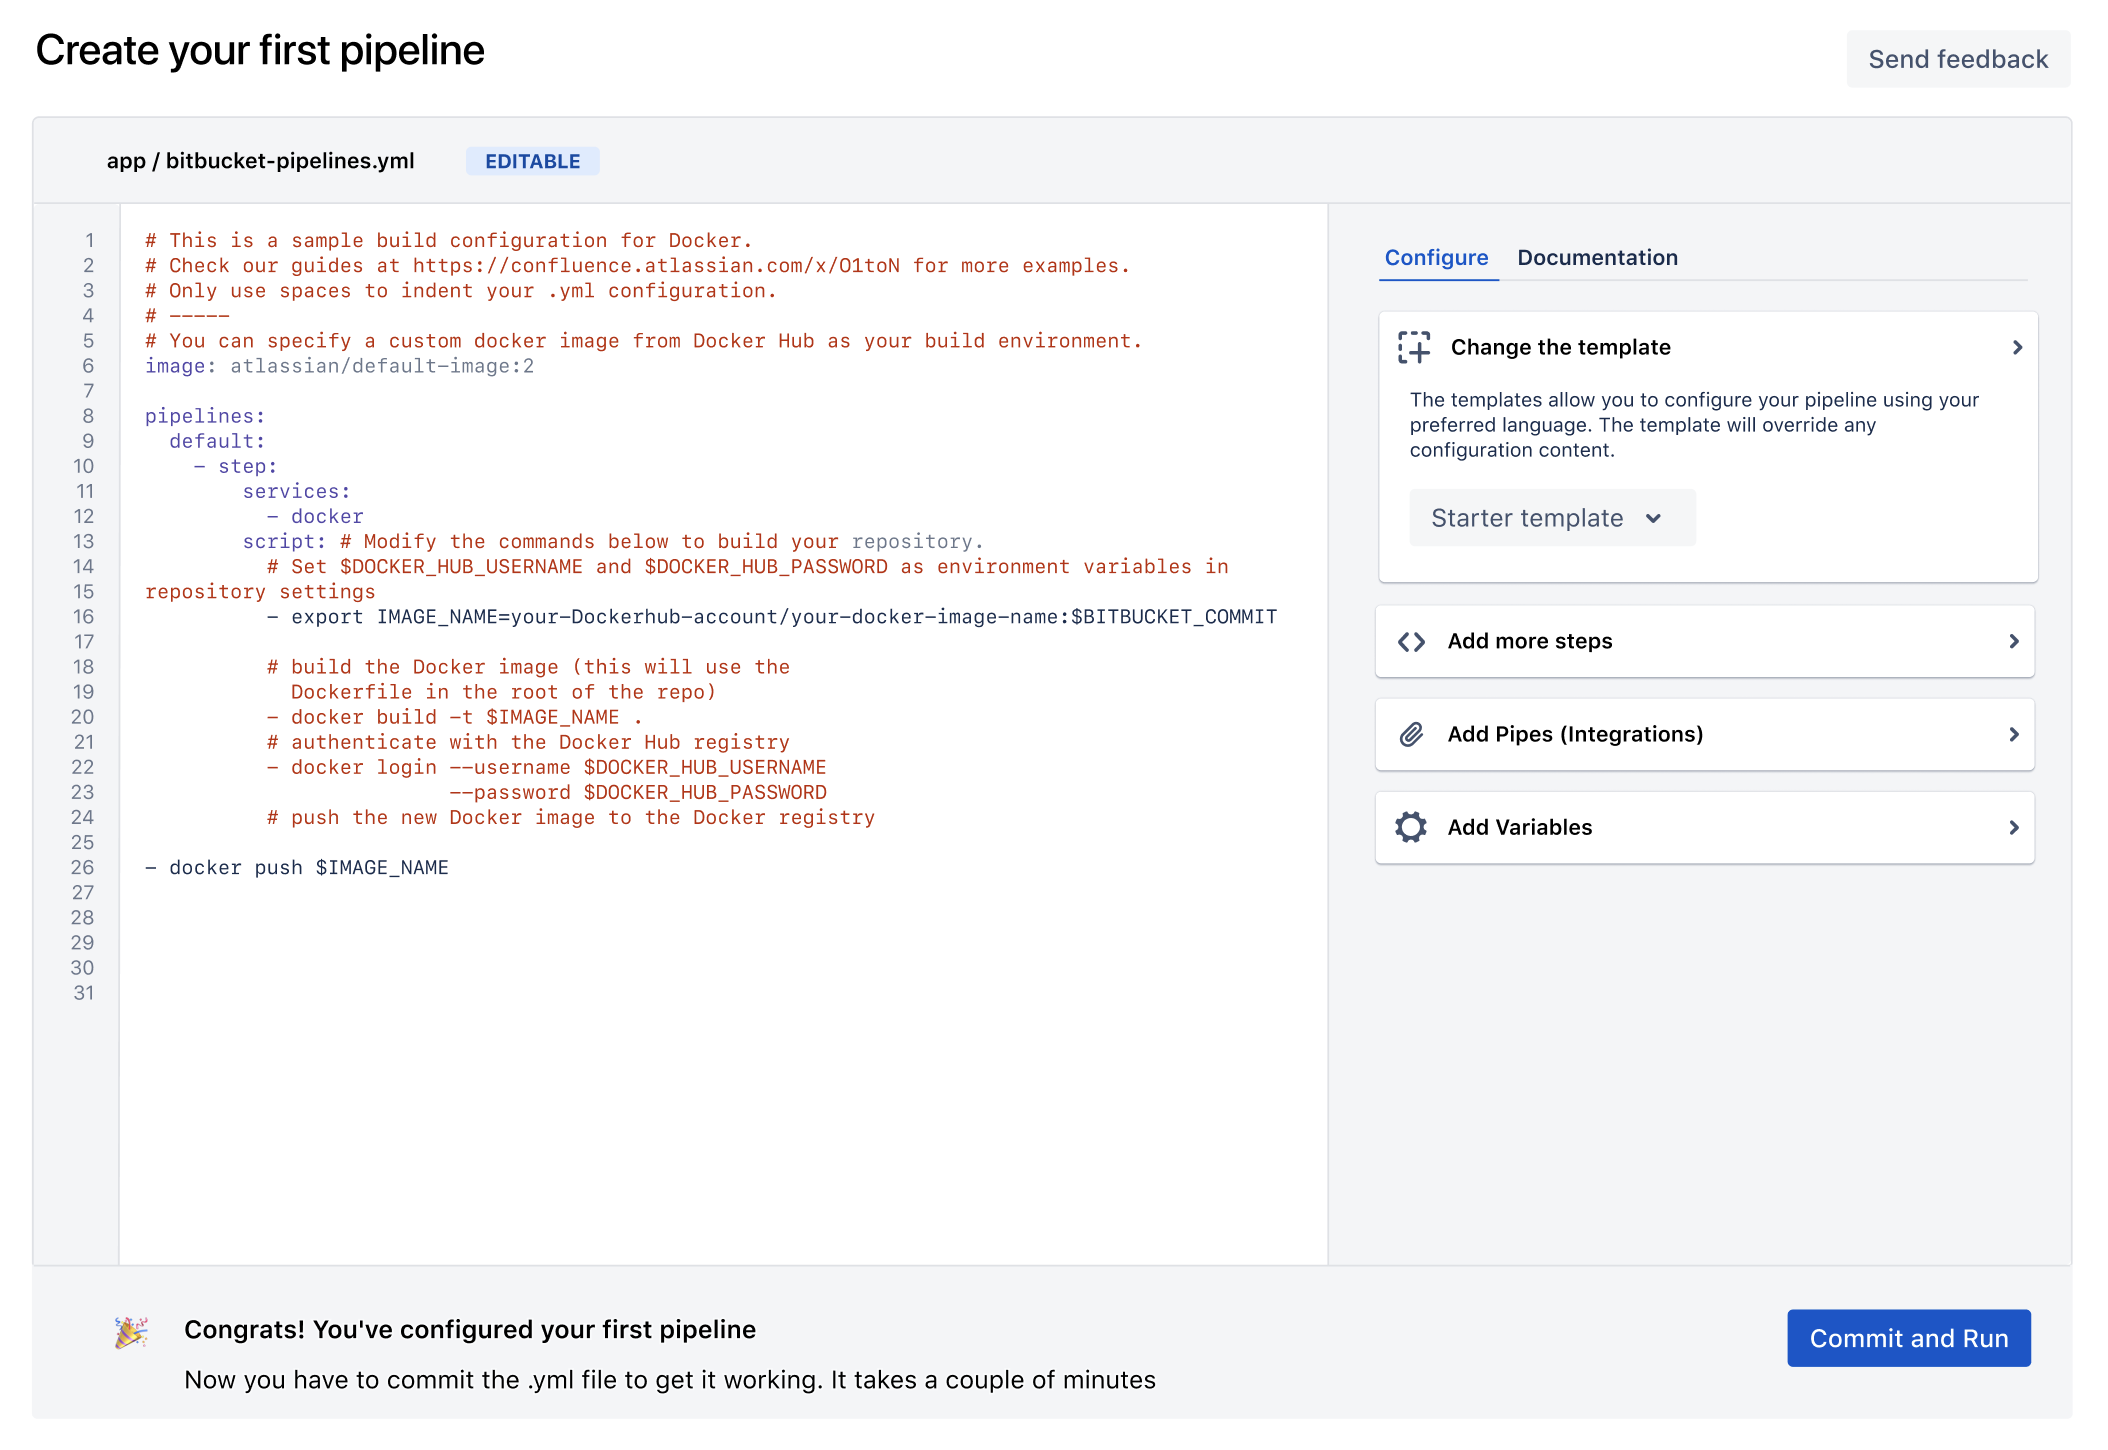
4. You can configure your pipeline once you choose a template by using the YAML editor.

How to change a template?
Changing the template is as easy as opening a dropdown and selecting another one. It is important to remember that choosing a new template overrides the existing content.

How to add more steps?
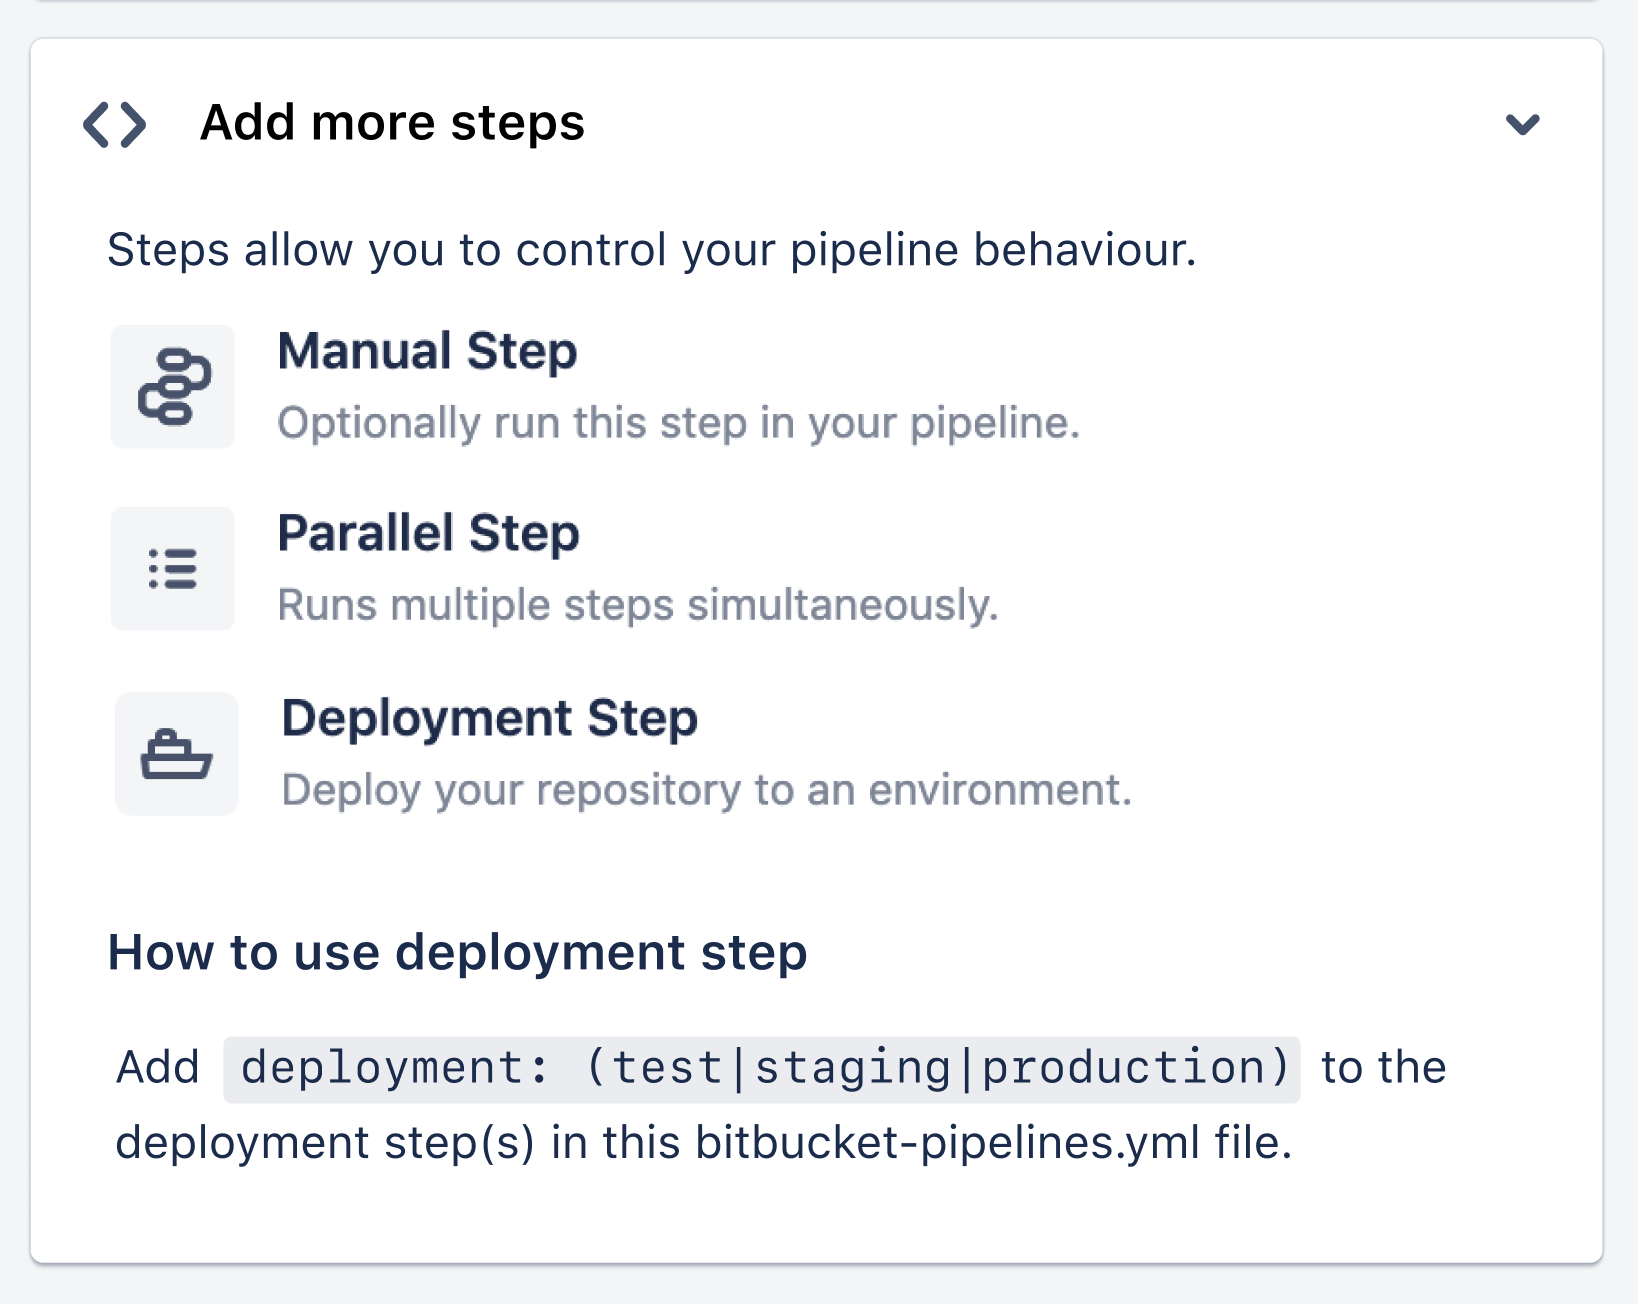
Adding more steps is easy. You can copy the code snippets in the steps panel by hovering over the options and adding them to the editor.

How to add Pipes?
Use a custom pipeline if you just want to execute a pipeline manually. Third-party tools can be easily integrated with pipelines.
Using a pipe is as simple as selecting the pipe you want to use, copying it, and pasting it into the editor. The full list of pipes is available by clicking Explore more pipes.

How to add variables?
Custom variables can be defined, which can be used in the YAML file. The name of the variable must be typed in, along with its value; you can encrypt it by clicking the secure box and clicking Add.

Result
Once you’ve configured your first pipeline, you can always return to the pipeline cog icon to edit your pipeline.
Executing Bitbucket Pipeline Trigger manually
By using Bitbucket Pipeline Trigger manually, you can customize your CI/CD pipeline so that some steps are only executed if they are manually triggered. Deployment steps are perfect for this, as they require manual testing or checks before they run.
You can add a manual step in your bitbucket-pipelines.yml file by adding a trigger: manual above the step.
As pipelines are triggered by commits, the first step cannot be made manually. In the event a Bitbucket Pipeline Trigger manually needs to run manually, you may set up a custom pipeline. The advantage of a custom pipeline is that you can add or change the values of your variables temporarily, for example, to add a version number or to supply a single-use value.
Setting up a Bitbucket Pipeline Trigger manually
It is possible to run an existing Bitbucket Pipeline Trigger manually or schedule it to run against a specific commit.
Use a custom pipeline if you wish to run a pipeline only manually. As soon as a commit is made to a branch, custom pipelines are not automatically executed. Adding a custom pipeline configuration to bitbucket-pipelines.yml will enable you to define a pipeline configuration. Any pipeline that isn’t defined as a custom pipeline will also be run automatically when a commit to the branch is made.
Run a pipeline manually in Bitbucket Cloud using the UI. To trigger it, you’ll need to write permission on the repository.
Steps
- In the bitbucket-pipelines.yml file, add a pipeline. In your bitbucket-pipelines.yml file, you can manually trigger builds for pipeline build configurations.
Example
#Bitbucket Pipeline Trigger
pipelines:
  custom: # Bitbucket Pipeline Trigger that can only be triggered manually
    sonar:
      - step:
          script:
            - echo "Manual triggers for Sonar are awesome!"
    deployment-to-prod:
      - step:
          script:
            - echo "Manual triggers for deployments are awesome!"
  branches:  # Bitbucket Pipeline Trigger that run automatically on a commit to a branch can also be triggered manually
    staging:
      - step:
          script:
            - echo "Automated pipelines are cool too."
#Bitbucket Pipeline Trigger
How does Bitbucket Pipeline Trigger work?
The Bitbucket Cloud interface allows users to trigger pipelines manually from either the Branches or Commits views.
1) How to run a pipeline manually from the Branches view?
- Go to Branches in Bitbucket and select a repo.
- Choose the branch for which a pipeline should be run.
- Choose Run pipeline for a branch from the (…) menu.
- Select a pipeline and click Run:
2) How to run a pipeline manually from the Commits view?
- Go to Commits in Bitbucket and choose a repository.
- For a commit, open the Commits view.
- Choose a commit hash.
- Choose Run pipeline.
- Click Run after selecting a pipeline:
Conclusion
Just now, you saw how simple it is to set up and use Bitbucket Pipeline Trigger. But just like with anything, it’s crucial that you fully grasp its features so you can reduce your stress and save time. Using Pipelines, you can deploy to Test automatically after every commit in the main branch.
To become more and more efficient in handling your Databases, it is preferable for you to integrate them with a solution that you can carry out Data Integration and Management procedures for you without much ado and that is where Hevo Data, a Cloud-based ETL Tool, comes in. Hevo Data supports 150+ Data Sources and helps you transfer your data from these sources to your Data Warehouses in a matter of minutes, all this, without writing any code!
Want to take Hevo for a spin? Sign Up for a 14-day free trial and experience the feature-rich Hevo suite firsthand. Hevo offers plans & pricing for different use cases and business needs; check them out!
Share your experience of learning Bitbucket Pipeline Trigger in the comments section below!
FAQs
1. How to trigger Bitbucket pipeline manually?
To manually trigger a Bitbucket pipeline, go to the Pipelines section of your repository, click the Run pipeline button, choose the branch, and specify any required variables if applicable.
2. What are pipeline triggers?
Pipeline triggers are events or conditions that start a pipeline automatically, like code pushes, pull requests, or scheduled jobs. They help automate workflows without manual intervention.
3. How to trigger Bitbucket pipeline from another pipeline?
To trigger a pipeline from another pipeline, use the curl command to make an API call to the target repository’s pipeline endpoint. Ensure you have the correct repository permissions and authentication token.


