A monitoring system holds great importance for matured tech products and applications. Getting notified when something goes wrong with the system helps limit operational losses and the time lost in recovering from the unpleasant situation. Therefore, alarms and performance alerts play a major role in the smooth functioning of any application or platform. If you are hosted on AWS, CloudWatch is an impeccable tool to create triggers and alarms for specific scenarios. In this article, you will learn how to get these notifications from CloudWatch onto your Slack platform with CloudWatch Slack Integration.
Let us start by briefly describing Slack and CloudWatch and then move on to the steps for CloudWatch Slack Integration.
Hevo, an enterprise-grade data pipeline as a service, enables real-time data transfer from various sources to any destination without requiring any coding. Designed to handle large-scale data, Hevo ensures that your data is transferred reliably, accurately, and consistently.
Table of Contents
Key Features of Hevo:
- Fully Managed: Hevo is a fully automated platform, eliminating the need for management and maintenance.
- Easy to Use: With its simple and interactive UI, Hevo is user-friendly, making it easy for new customers to perform operations.
- Schema Management: Hevo automatically detects the schema of incoming data and maps it to the destination schema.
Simplify your data warehousing and analysis with Hevo today!
Get Started with Hevo for FreeWhat is Slack?
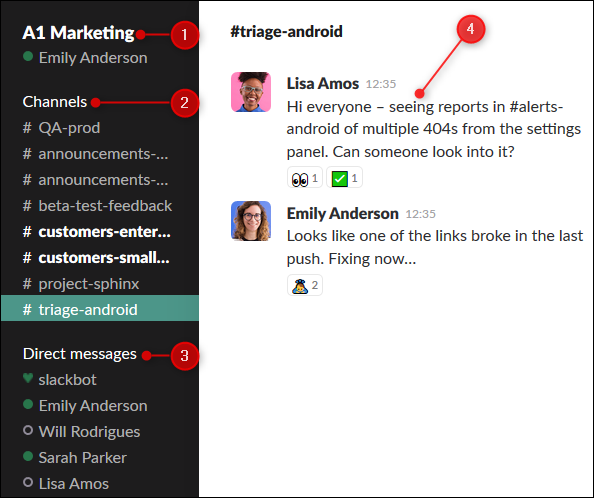
Slack is a widely used messaging platform for businesses and enterprises. The most basic purpose of this platform is to connect people to the information they are seeking. It is different from any other basic communication app for businesses. It is a unified platform for messaging, and sharing files, and has various tools that make day-to-day tasks seamless and more collaborative in nature. The two methods of chat in slack are the direct message (personal chat) and channels (for group chat).
The UI/UX is pretty simple as well. This is what it looks like:
What is CloudWatch?
CloudWatch is one tool that helps you monitor your stack end to end and uses alarms, events, and logs to automate actions. This helps in reducing the meantime to resolution and reduces the dependency on critical resources. CloudWatch provides data and insights for cloud, hybrid, and on-premise applications. Ultimately, CloudWatch helps businesses with:
- Application Performance Optimization
- Optimum Resource Utilization
- Monitoring System-wide Operational Health
There is a provision for performing analysis on historical data to optimize cost, applications, and infrastructure resources by deriving real-time insights. The CloudWatch Container Insights helps businesses to monitor, troubleshoot, and alert their containerized applications and also microservices. It also allows DevOps engineers in identifying issues by summarizing compute utilization information. With this information, DevOps engineers are able to quickly isolate specific issues and resolve them within no time.
What are Performance Alerts in CloudWatch?
A performance alert in CloudWatch, also known as alarms, performs one or many actions for a certain time period based on the value of a metric that is relative to a threshold. Now, what is a metric?
The basic metrics in CloudWatch are the functions that allow engineers to monitor how the entire system performs. These could be latency, invocations, errors, and concurrency. The possibility and probability of an engineer checking the metrics at the same time something goes wrong are very less. Therefore, configuring alarms or alerts upfront helps with smooth operations.
There are three alarm states:
- OK: It means that the metric is located inside the defined threshold.
- ALARM: It means the metric is located outside the defined threshold.
- INSUFFICIENT_DATA: It means that the metric is not available but the alarm has already started, or the data is not enough for the metric to realize the state of the alarm.
How does CloudWatch Evaluate when to Change the Alarm State?
The answer is by specifying the below-mentioned settings:
- Period: It enables you to evaluate the time duration of the metric to create an individual data point for an alarm.
- Evaluation Period: It is the number of recently generated data points required to decide the state of the alarm.
- Datapoints to Alarm: The number of data points that must be breached in order to cause the alarm to go in the ALARM state
How to Setup CloudWatch Slack Integration?
Here is a step by step guide for CloudWatch Slack Integration:
- Step 1: Create an SNS Topic
- Step 2: Create a Lambda Function
- Step 3: Create a Slack Channel
- Step 4: Create CloudWatch Alarms
Step 1: Create an SNS Topic
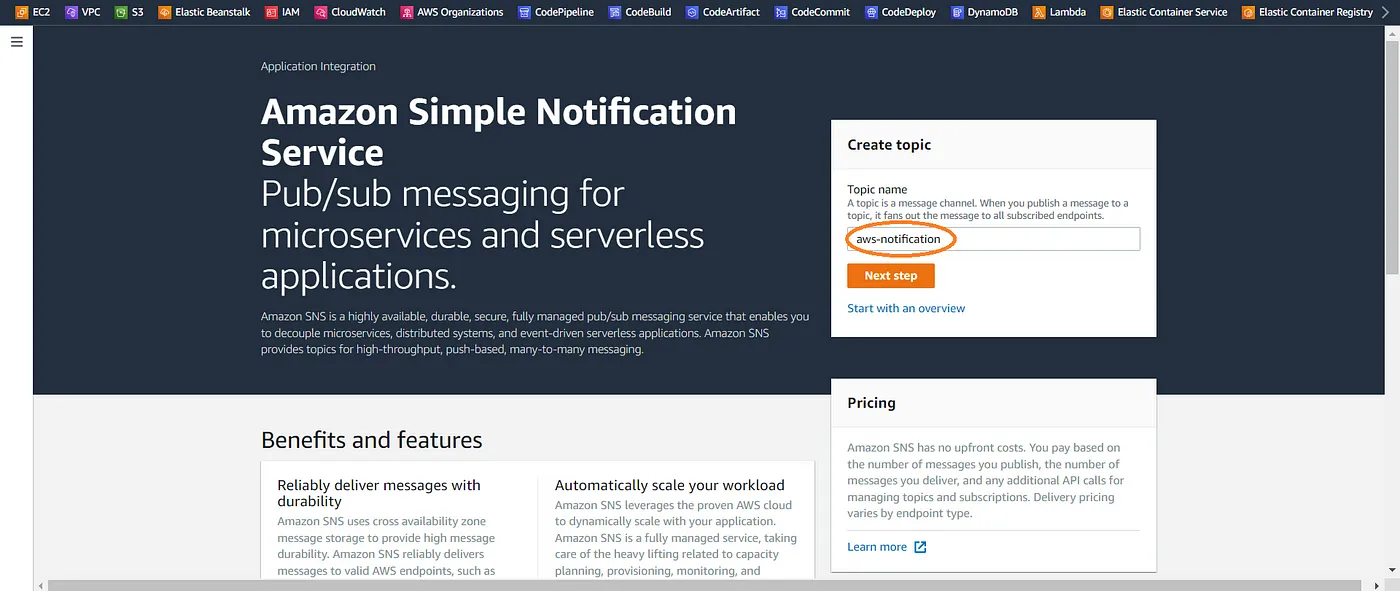
Under create topic option, assign the name “aws-notification” and click next step.
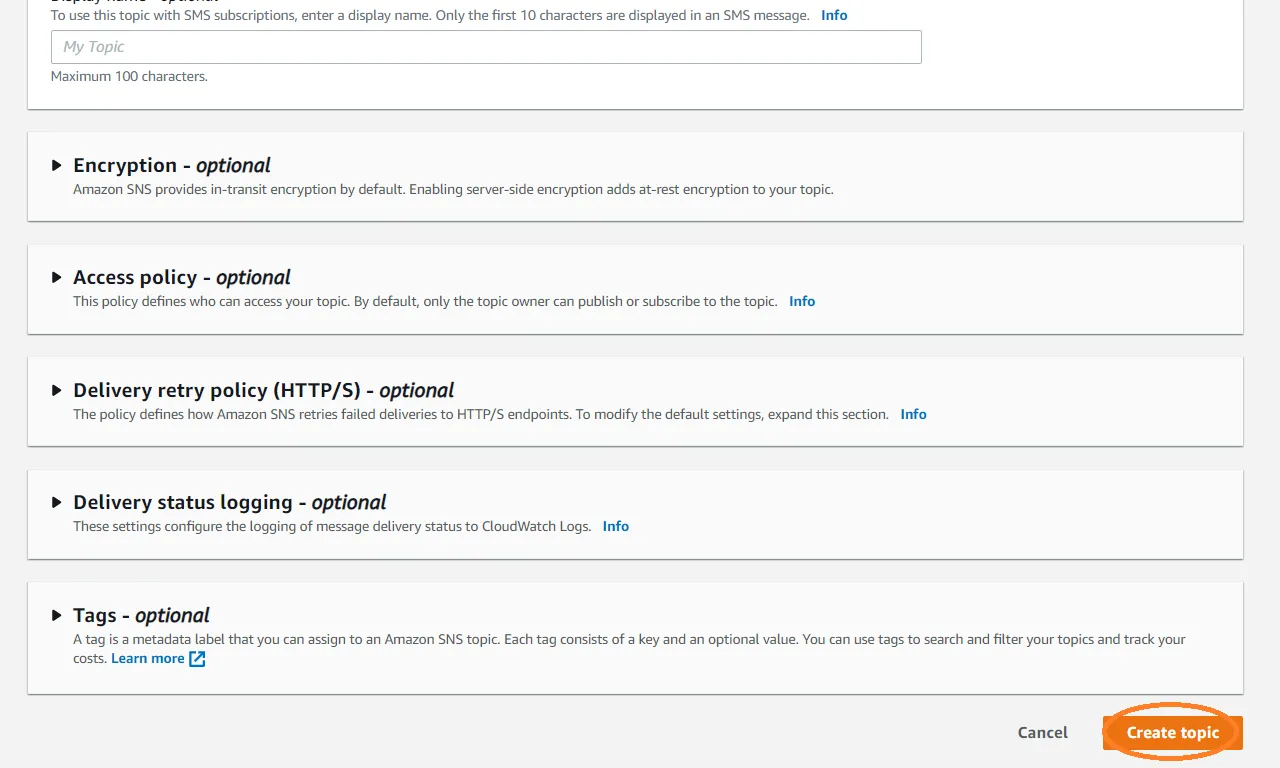
Keeping the rest of the things as default, click the create topic button.
Step 2: Create a Lambda Function
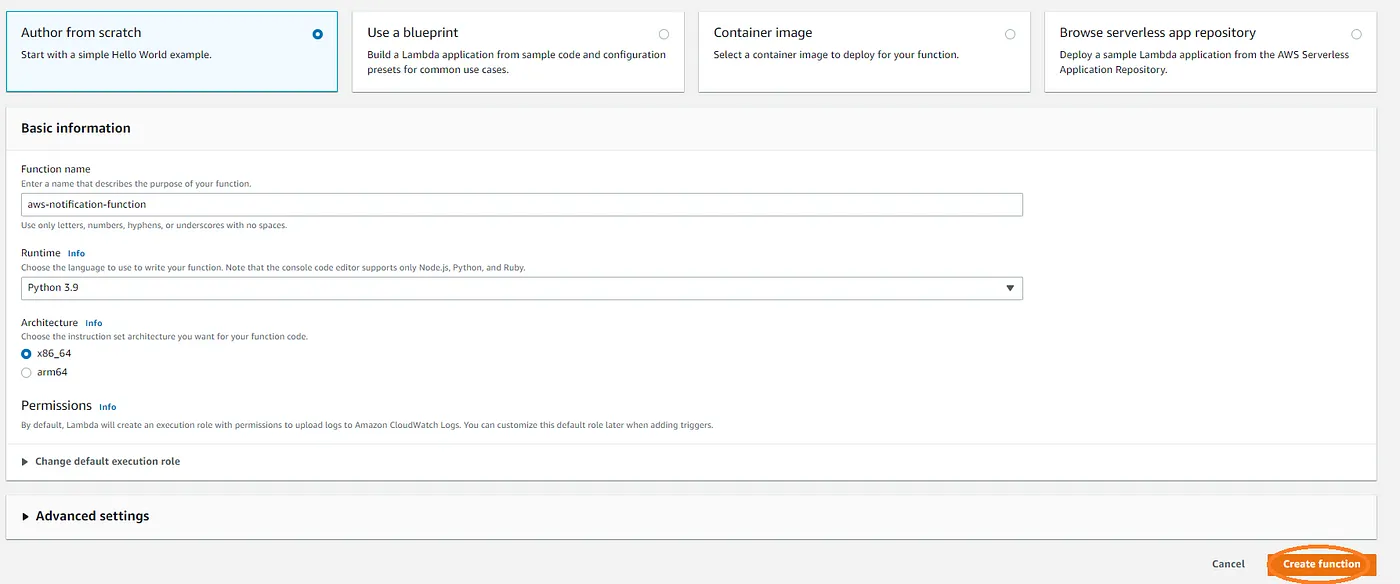
- Click create function under the Lambda service.
- Select the author.
- Assign the function name as “aws-notification-function”.
- Select Runtime as Python 3.9.
- Last but not the least, click Create Function.
- Select lambda_function.py and add the code that is mentioned below:
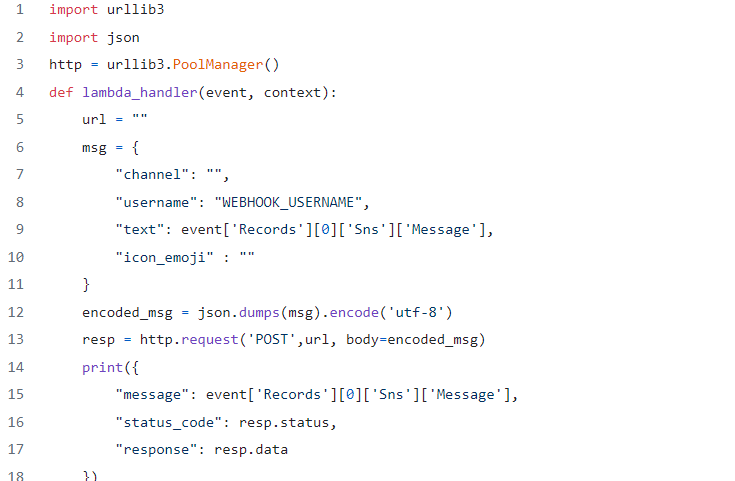
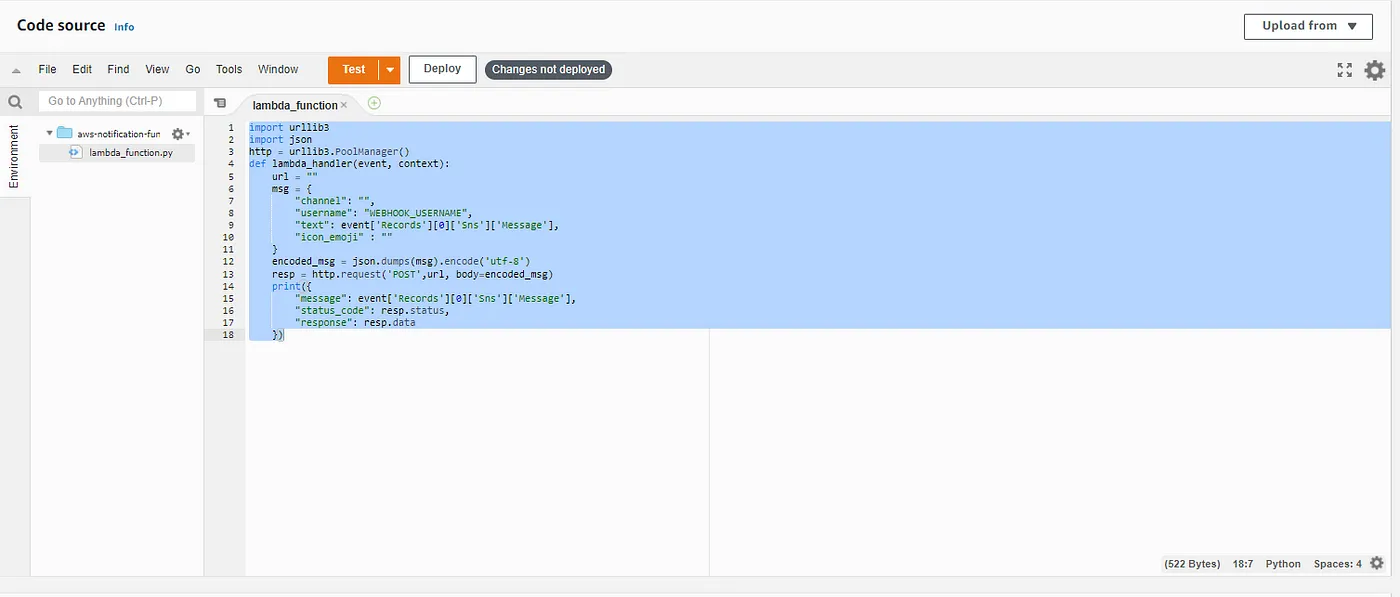
- Next, add the Slack App URL and Channel Name followed by saving the code inside AWS Lambda.
- If the changes are not deployed then you cannot test the functions.
Step 3: Create a Slack Channel
- Next, you would have to create a Channel and an app inside Slack.
- You can follow these steps to create a Slack App.
- Activate Incoming Webhooks in the Slack App to connect with SNS
- Click the “Add New Webhook to Workspace” button.
- Copy the Webhook URL.
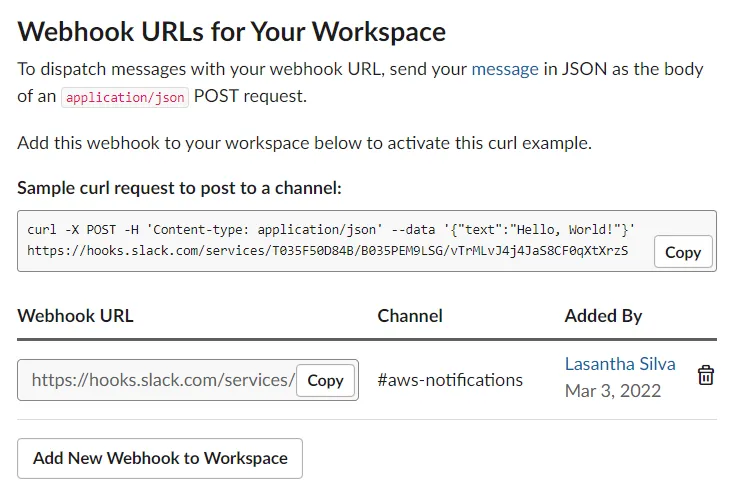
- Paste the previously copied webhooks URL to the lambda_function.py URL section and add the channel name
- Here’s a sample:
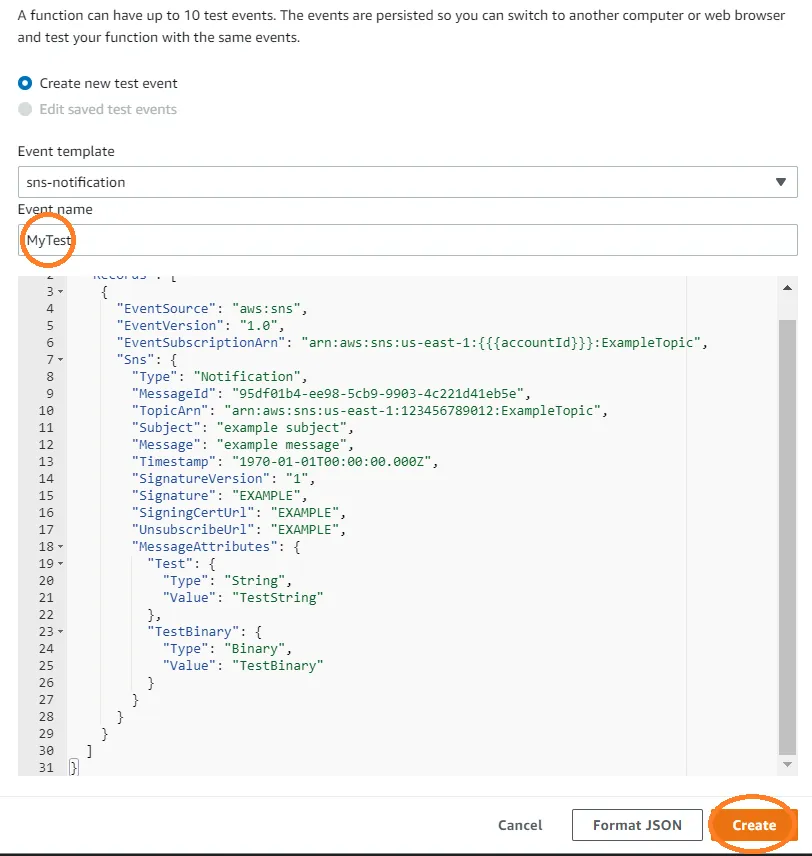
url = "https://hooks.slack.com/services/xxxxxxxxxxx/xxxxxxxxxxx/xxxxxxxxxxxxxxxxxxxxxxx" "channel": "aws-notifications",- Click the Test Button in the Lambda function and create a Test Event. Select the event template as “SNS Topic Notification”.
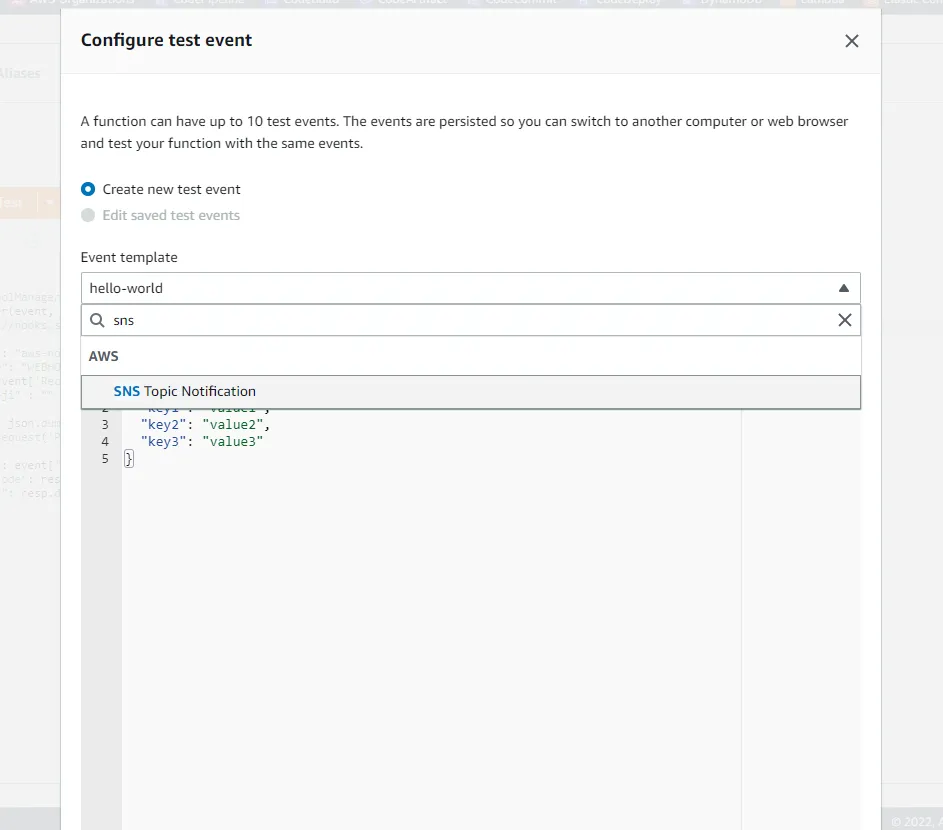
- Give the Event Name and click create button.
- Deploy changes by clicking the Deploy button.

- Click the Test button to see the following output. If you are getting this specific output, your function is working.

- You will also see the message below on your Slack channel.
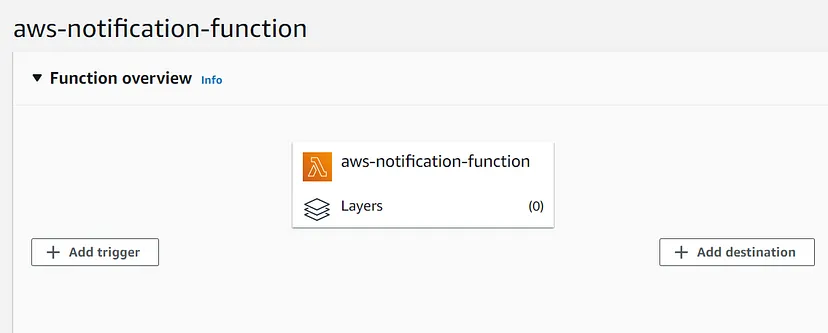
- Next, add SNS as a trigger to the Lambda function. Under Trigger, select SNS as configuration and select SNS Topic name. Then, click the Add button.
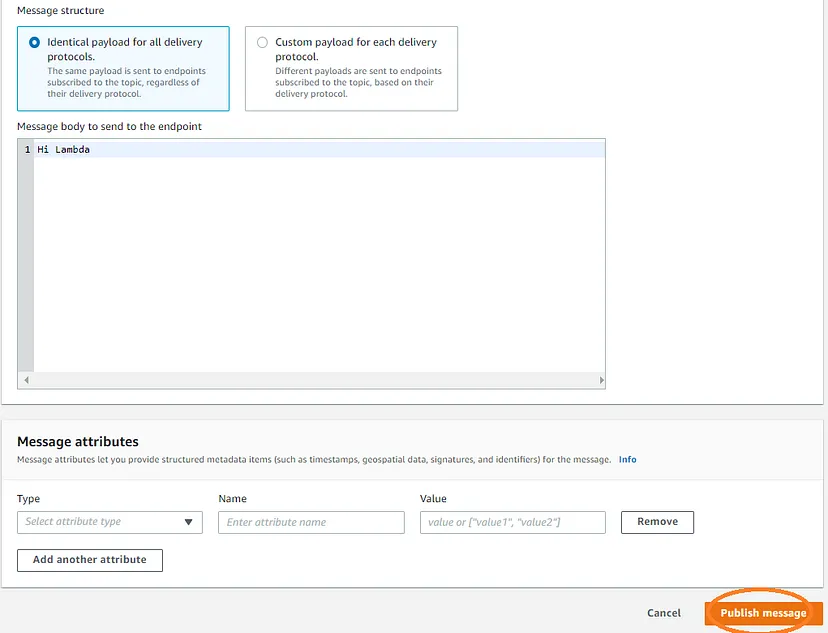
- Click publish message in SNS. After that, you can type anything in “Message body to send to the endpoint” and click publish message button.
- Your latest message will also appear on the Slack Channel.
Step 4: Create CloudWatch Alarm
The Slack channel that you have created while CloudWatch Slack Integration will receive the CloudWatch alarms.
- Create an Ubuntu 20.04 EC2 instance and install the below-mentioned package:
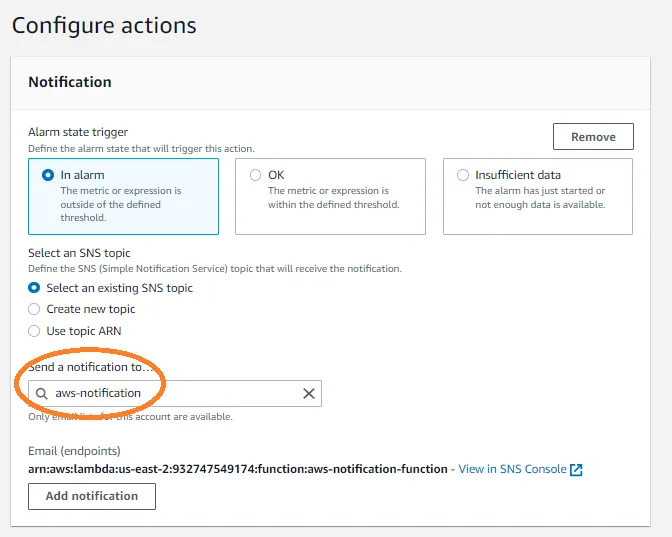
sudo apt-get install -y stress- After that create CloudWatch Alarm for previously created EC2. Select an SNS topic name.
- Increase CPU usage in EC2 with the below-mentioned command
stress --cpu 2 --timeout 300s- After all this, you can finally see the latest alerts on the Slack channel. Hence, the CloudWatch Slack Integration is successful!

Conclusion
As this article comes to an end, you would now be able to get CloudWatch alarms on a Slack channel by following the steps for Cloudwatch Slack Integration. This kind of integration and automation make the lives of DevOps engineers much easier. Similarly, the Data Integration and Transformation enabled by Hevo also make the lives of Data Engineers and Analysts easier.
Hevo Data is a prizewinning ETL solution to help businesses export data from their sources into their desired Database/destination. Its No-code Data Pipeline provides you with a consistent and reliable solution to manage data transfer from 100+ Data Sources (including 40+ Free Sources) to a wide variety of desired destinations with a few simple clicks.
Hevo also allows the integration of data from non-native sources using Hevo’s in-built REST API & Webhooks Connector. You can then focus on your key business needs and perform insightful analysis using BI tools.
You can try Hevo’s 14-day free trial. You can also have a look at the unbeatable pricing that will help you choose the right plan for your business needs!
We hope you found this article on CloudWatch Slack Integration helpful. Thanks for reading.
FAQs
1. How to integrate Slack with CloudWatch?
Use AWS Chatbot to connect CloudWatch alarms or events to a Slack channel. Configure an AWS Chatbot with a Slack workspace and set up notifications in the AWS Management Console.
2. Can CloudWatch send notifications?
Yes, CloudWatch can send notifications via Amazon SNS by setting up alarms or event rules to trigger email, SMS, or other delivery protocols.
3. How to invite AWS chatbot to Slack channel?
Install AWS Chatbot in your Slack workspace, authorize it, and then use the /invite command in Slack to add the AWS Chatbot to the desired channel.


