

If you are wondering how to integrate Airflow with Google Cloud Platform, then you have come at the right place. This article will discuss Apache Airflow and Google Cloud Platform along with the salient features that they offer. This article will also provide you with a step-by-step guide on how to set up Google Airflow Integration. Read along to learn more about Google Airflow Integration!
Table of Contents
What is Apache Airflow?
Apache Airflow is a popular Open-Source tool mainly used for monitoring and scheduling workflows. It is widely used in Data Engineering practice, and it has an easy-to-navigate UI that shows dependencies, logs, job progress, task, successes/failures, and many more.
Airflow allows users to create workflows as Directed Acyclic Graphs (DAGs) of tasks tied together to create workflows. Airflow can connect with multiple data sources and send alerts via email/notification about the Job’s status.
Key Features of Apache Airflow
The key features of Apache Airflow are:
- Dynamic: Apache Airflow pipelines are coded entirely on Python, allowing Dynamic pipeline generation based on DAGs and SubDAGs concept. Users can write codes in Python to generate dependent pipelines.
- Extensible: Apache Airflow is built on Python; it allows users to quickly define custom operators and executors by extending the libraries making Apache Airflow an extensible component.
- Elegant: Apache Airflow pipelines are lean and explicit. It uses Jinja as a templating engine that provides the utmost customization level. Apache Airflow has an exquisite UI on which users can monitor progress, schedule jobs, link tasks, etc.
- Scalable: Apache Airflow has a scalable architecture, and it uses message queues to communicate with workers.
- Easy to Use: Apache Airflow is relatively easy to use. A user with a little programming background in Python can use Airflow.
- Pure Python: Apache Airflow is pure Python, and therefore it allows users to use any library that exists in Python and build workflow pipelines.
What’s new in Airflow 2.0?
With the newest version, 2.0, Apache Airflow comes loaded with many new features and designs, making it a perfect scheduler tool for industries. Let us have a look at those features:
- Redesigned Scheduler: Airflow 2.0 has switched from a single scheduler to a new multi scheduler. Single Scheduler in earlier versions of Airflow was more prone to a single point of failure. Hence, upgrading to multi-scheduler increases the performance scalability and provides high cluster availability.
- Full Rest API: Earlier in Airflow, engineers used the Experimental UI to trigger the DAGs. With Airflow 2.0 comprehensive REST interface, users can now check and manage DAGs, triggers, and task instances. The REST API provides XCom variables; DAG runs, schedulers, graphs, and success/failure messages. Users can also see tree/graph representations of various tasks and DAGs.
- Smart Sensors: Sensors are the special kind of operator that checks particular tasks’ final state before moving to the next one. In Airflow 2.0, the SmartSensor Operator can check the status of tasks and store them in the Airflows’ metadata DB.
- DAG Serialization: In the earlier versions of Airflow, the DAGs must be present in the webserver and scheduler, which causes an unnecessary storing of the same file at two different locations. With the Apache Airflow 2.0, all the DAGs are first serialized in JSON format and then stored in metadata DB. This serialization method decouples the webserver from DAG parsing, making it a lightweight webserver.
- Task flow API: The way to create and define the DAG has been changed in Airflow 2.0. Airflow has introduced a decorator-based DAG creation with the task flow API.
- @task: It is used to define the task
- @dag: It is used to instantiate the dag.
What is Google Cloud Platform?
Google Cloud Platform is a cloud-based platform offering various cloud services under the hood. The platform includes a range of hosted services for compute, storage, and application development on Google hardware. Google Cloud Platform allows developers, administrators, and IT professionals to develop and build the framework over the cloud.
Google Cloud Platform offers various products like Cloud Storage, Compute Engine, SQL engine, Data Orchestration, and many more. You can find the complete product offering on the official page here.
Key Features of Google Cloud Platform
Some of the key features of the Google Cloud Platform are as follows:
- Variety – Google Cloud Platform is an Infrastructure as a Service (IaaS) offering, which means that it offers infrastructures on its platform for users to use. It provides various services like Computing, Storage, Big Data, Machine Learning, Security, and many more under the same hood.
- Scalable: Google Cloud Platform is an extensively scalable platform designed to process petabytes of data within seconds. GCP offers an auto-scaling capability that auto-scales the node dynamically when the load increases.
- Extensible: Google Cloud Platform offers a variety of products and supports almost all of the programming languages to code that allows users to create and build a framework without any restrictions.
- Easy to Use: Google offers a friendly and elegant UI that we find easy to navigate. There is a search box at the top which searches on the entire platform. Also, it is easy to create VMs, Firewalls, VPCs, running SQL, etc.
- Security: Google provides utmost security to the data at rest and in flight. It allows users to create VPC, and create firewall rules and subnets to make restricted and secured access to their environments.
How to integrate Google Airflow?
Integrating Airflow on Google Cloud is pretty straightforward to do. Follow the below step-by-step guide to install Airflow on Google Cloud and set up Google Airflow Integration:
- Google Airflow Integration Step 1: Create Compute Engine Instance
- Google Airflow Integration Step 2: Install Apache Airflow
- Google Airflow Integration Step 3: Setting up Airflow
- Google Airflow Integration Step 4: Open Firewall
- Google Airflow Integration Step 5: Start Airflow
Step 1: Create Compute Engine Instance
The minimum requirements for a Compute Engine to host Airflow are as below:
- e2-standard-2 (2vCPU, 8 GB Memory)
- Debian 1.0
- 50 GB HDD
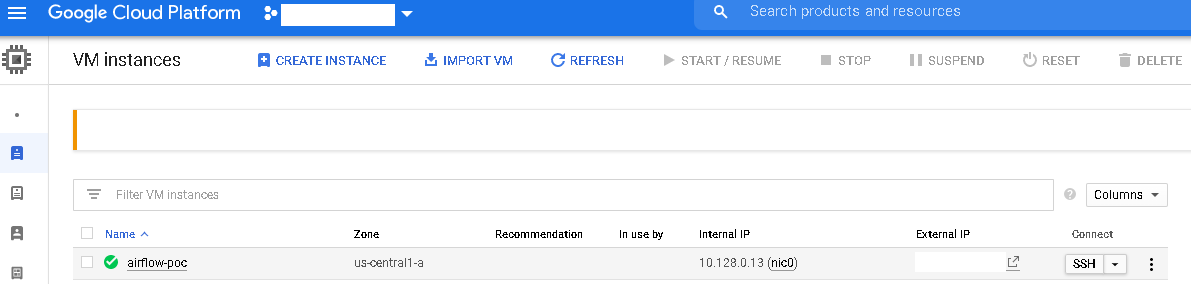
Given below are the steps required to create a Compute Engine Instance to set up Google Airflow Integration:
- log in to Cloud Console, and on the search box, Search for “Create an Instance“.
- Click on New VM Instance, provide the Instance’s name, and select the instances as mentioned above.
- Click on Create to create Compute Engine.
Step 2: Install Apache Airflow
- Once the Instance is created, click on the SSH to start a terminal.
- Once the terminal is up and running, upgrade the machine and install Python3.
- Run the below commands to upgrade and install Python3.
sudo apt update
sudo apt -y upgrade
sudo apt-get install wget
sudo apt install -y python3-pip- You can use either conda or miniconda to create a virtual environment for Google Airflow Integration. Run the following command to create a virtual environment.
mkdir -p ~/miniconda3
wget https://repo.anaconda.com/miniconda/Miniconda3-latest-Linux-x86_64.sh -O ~/miniconda3/miniconda.sh
bash ~/miniconda3/miniconda.sh -b -u -p ~/miniconda3
rm -rf ~/miniconda3/miniconda.sh
~/miniconda3/bin/conda init bash
~/miniconda3/bin/conda init zsh- Reopen the terminal and activate the virtual environment.
mkdir airflow_demo
cd airflow_demo
pwd #important for setting AIRFLOW HOME variable
export AIRFLOW_HOME=/home/user/airflow_demo
conda create --name airflow_demo python=3.8
conda activate airflow_demo- Once the conda environment is created, install the Airflow and its dependencies by using the following command:
AIRFLOW_VERSION=2.0.1
PYTHON_VERSION=3.8
CONSTRAINT_URL="https://raw.githubusercontent.com/apache/airflow/constraints-${AIRFLOW_VERSION}/constraints-${PYTHON_VERSION}.txt"
pip install "apache-airflow[gcp]==${AIRFLOW_VERSION}" --constraint "${CONSTRAINT_URL}"
pip install pyspark==2.4.5
pip install cryptography==2.9.2- Once the Airflow is installed, run the following command to check the version of Airflow:
airflow versionStep 3: Setting up Airflow
- Once the Airflow is installed, you need to initialize and create metadata and admin user.
- Run the following command:
airflow db init
airflow users create -r Admin -u <username> -p <password> -e <email> -f <first name> -l <last name>- Upon successful completion of the above command, you will see the success message for created admin.
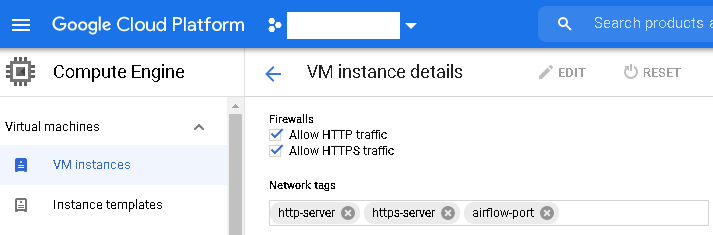
Step 4: Open Firewall
- Airflow runs on port 8080, and in GCP we need to whitelist the IP for this port.
- Navigate to the VPC Network > Click on Firewall and create a port rule.
- Add port 8080 under TCP and click Create Rule in the Port rule.
- On the Compute Instance, add the Firewall rule to access port 8080.
Step 5: Start Airflow
- Once the Firewall is set up correctly. Start the Airflow Webserver by the following command:
airflow webserver -p 8080- Open another terminal and start the Airflow Scheduler:
export AIRFLOW_HOME=/home/user/airflow_demo
cd airflow_demo
conda activate airflow_demo
airflow db init
airflow scheduler- Once the scheduler is started. Open the Airflow console from the browser. Go to https://<vm-IP-address>:8080.
- If everything is right, you’ll see the Airflow page below:

- Supply the username and password that we have created in Step 3.2
That’s it; we have successfully set up the Google Airflow Integration. Now you can create the Dags and place them under Dag’s folder to be visible in the Airflow UI.
Conclusion
In this blog post, we have detailed the step-by-step procedure to install Apache Airflow on GCP and set up Google Airflow Integration. We have also discussed the key features of Apache Airflow and Google Cloud Platform. However, in businesses, extracting complex data from a diverse set of Data Sources can be a challenging task and this is where Hevo saves the day!
Visit our Website to Explore HevoHevo Data, a No-code Data Pipeline provides you with a consistent and reliable solution to manage data transfer between a variety of sources and a wide variety of Desired Destinations, with a few clicks. Hevo Data with its strong integration with 150+ sources (including 40+ free sources) allows you to not only export data from your desired data sources & load it to the destination of your choice, but also transform & enrich your data to make it analysis-ready so that you can focus on your key business needs and perform insightful analysis using BI tools.
Want to take Hevo for a spin? Sign Up for a 14-day free trial and experience the feature-rich Hevo suite first hand. You can also have a look at the unbeatable pricing that will help you choose the right plan for your business needs.
Share with us your experience of learning about Google Airflow Integration in the comments below!
Share it with your connections.
-
 Share To LinkedIn
-
 Share To Facebook
-
 Share To X
-
 Copy Link


