


Easily move your data from Google Search Console To Snowflake to enhance your analytics capabilities. With Hevo’s intuitive pipeline setup, data flows in real-time. Check out our 1-minute demo below to see the seamless integration in action!
If you’re looking to move your data from Google Search Console to Snowflake without the hassle, you’re in the right place. Manual methods often involve repetitive CSV exports, lack transformation options, and consume valuable engineering time, making automation a must. Through this blog, I’ll share with you the journey I took in the course of a migration process, some of the challenges that I faced, and the benefits that I gained from this migration. So without wasting your time, let’s dive in!
Table of Contents
Use Cases of Connecting Google Search Console to Snowflake
- Snowflake can store historical data from Search Console so that you can analyze trends over time to spot seasonal changes and, more notably, the effects of algorithmic updates in terms of any changes in website traffic.
- Use data from Search Console in conjunction with other marketing datasets in Snowflake to analyze the SEO performance, monitor keyword rankings, and optimize content strategies.
- Merge Google Search Console data with user behavior data from other sources, such as Google Analytics, to get a rich view on how search performance impacts user engagement and conversions.
- You can build custom dashboards and reports in Snowflake that may visualize graph clicks, impressions, CTR, and average position over time.


Methods to Connect Google Search Console to Snowflake
Method 1: Migrate Data from Google Search Console to Snowflake Using Hevo
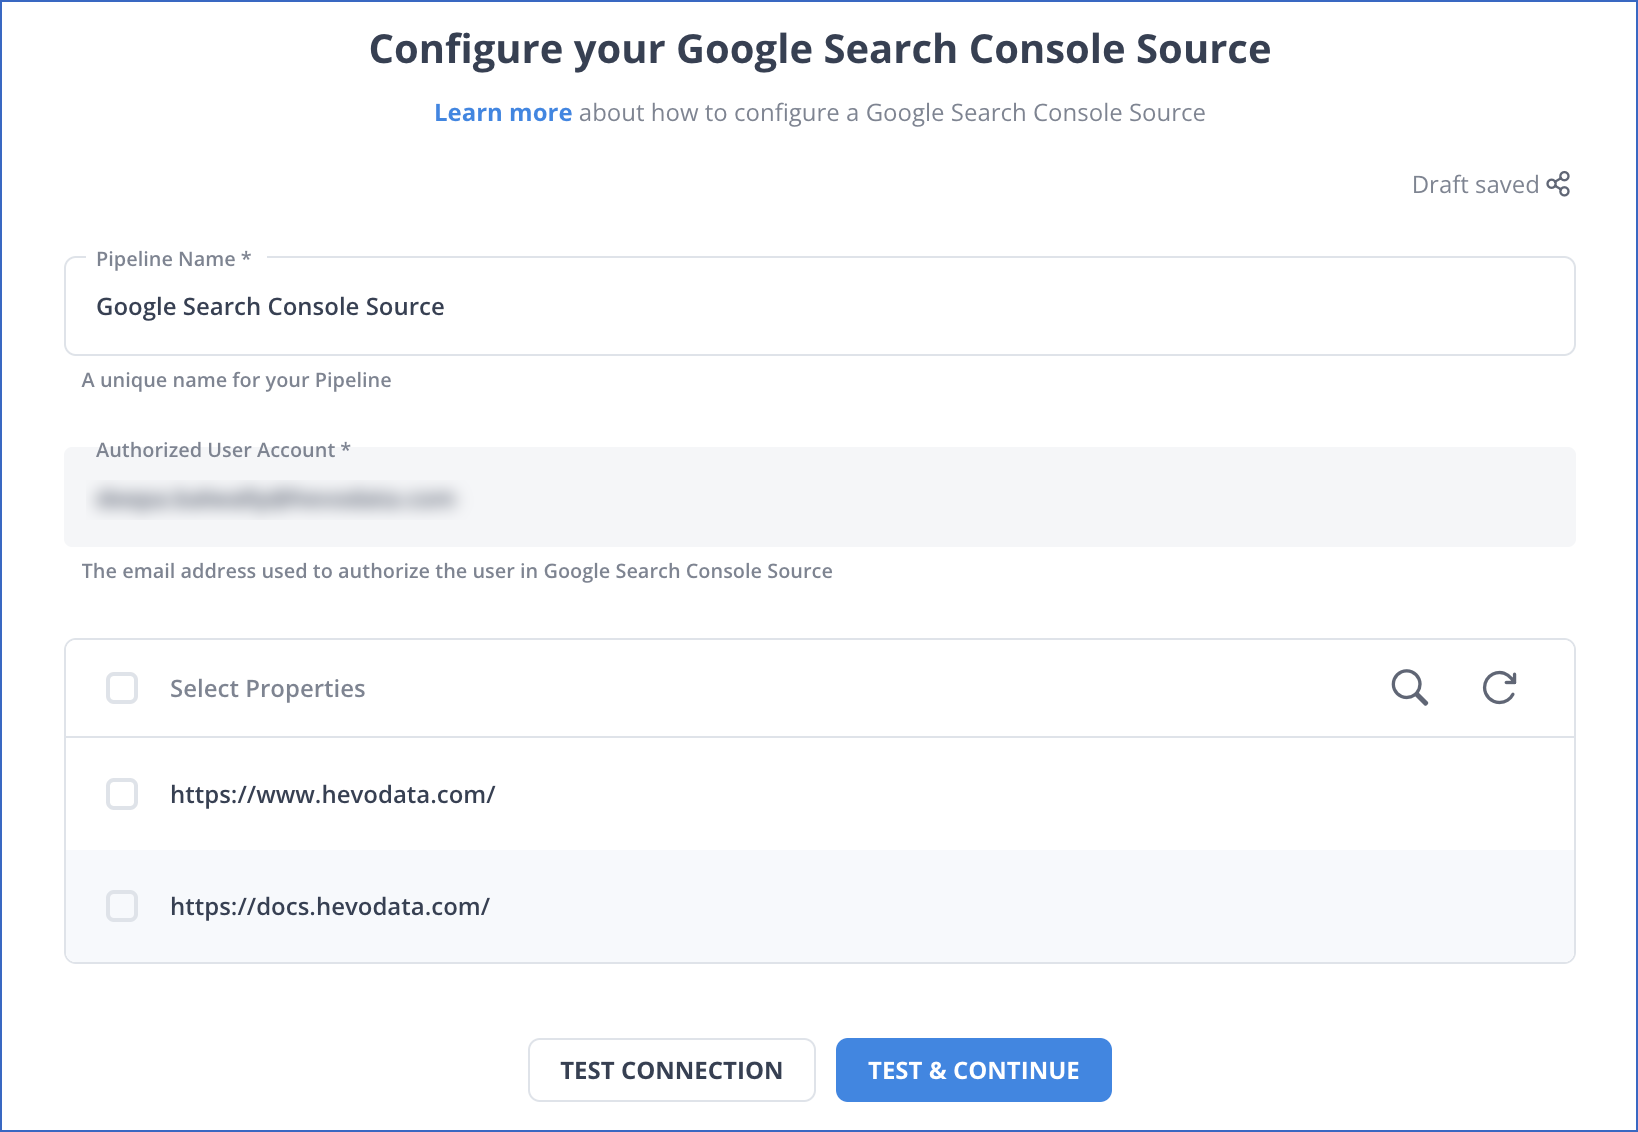
Step 1: Connect your Google Search Console account as the source.
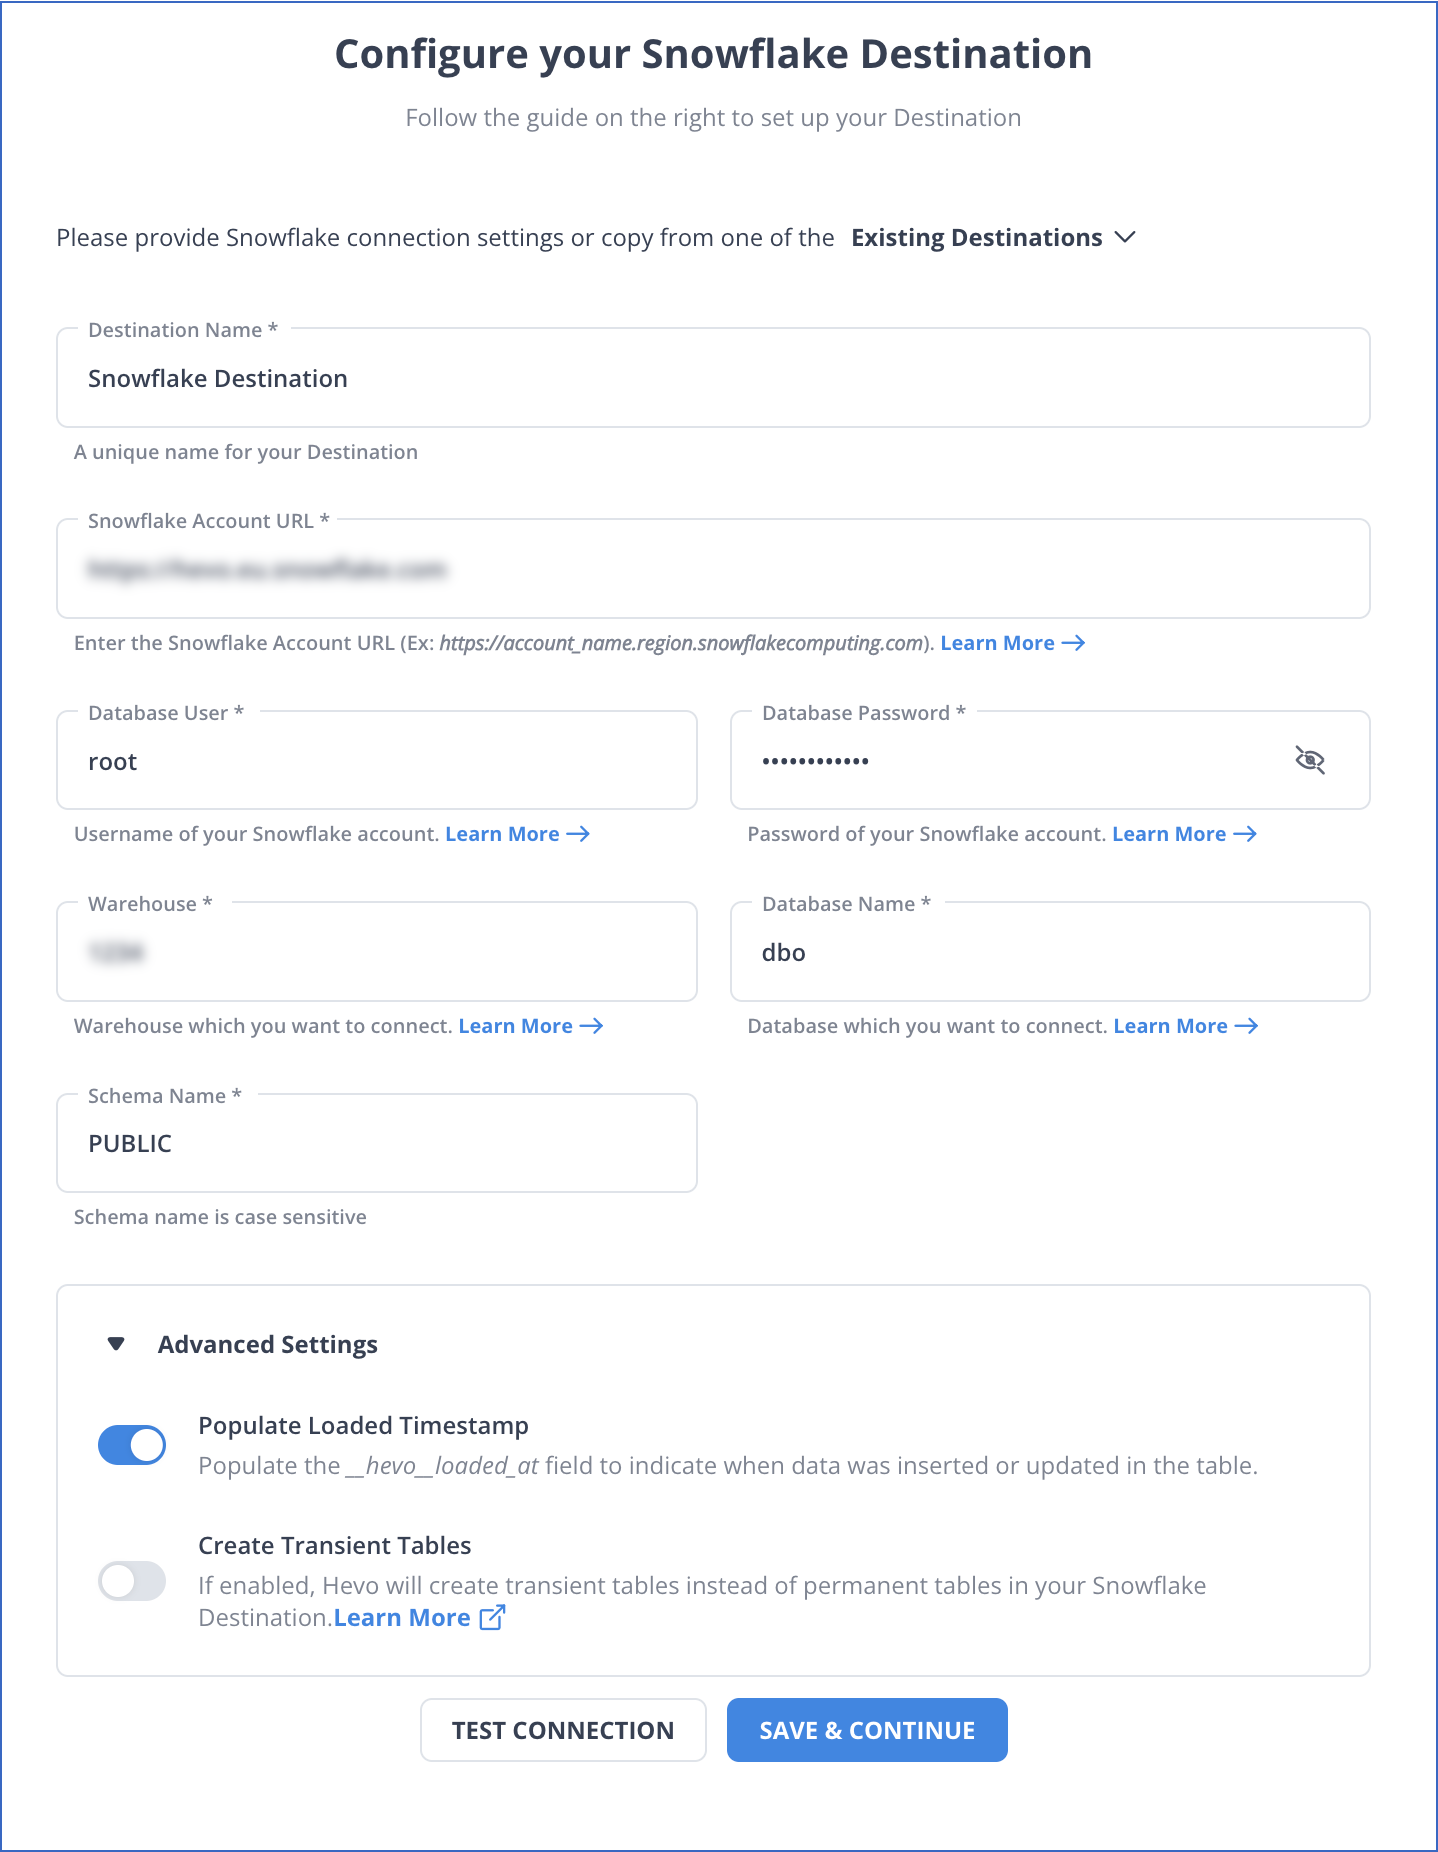
Step 2: Connect your Snowflake account as the destination.
Method 2: Connect Google Search Console to Snowflake Manually using CSV Files
You cannot directly export the data from Google Search Console to Snowflake. To export data from Google Search Console to Snowflake, first, you will have to export data from Google Search Console as CSV files and then load the CSV files into Snowflake.
Step 1: Export Data from Google Search Console as CSV
The first step in exporting data from Google Search Console to Snowflake is exporting data from Google Search Console as CSV files.
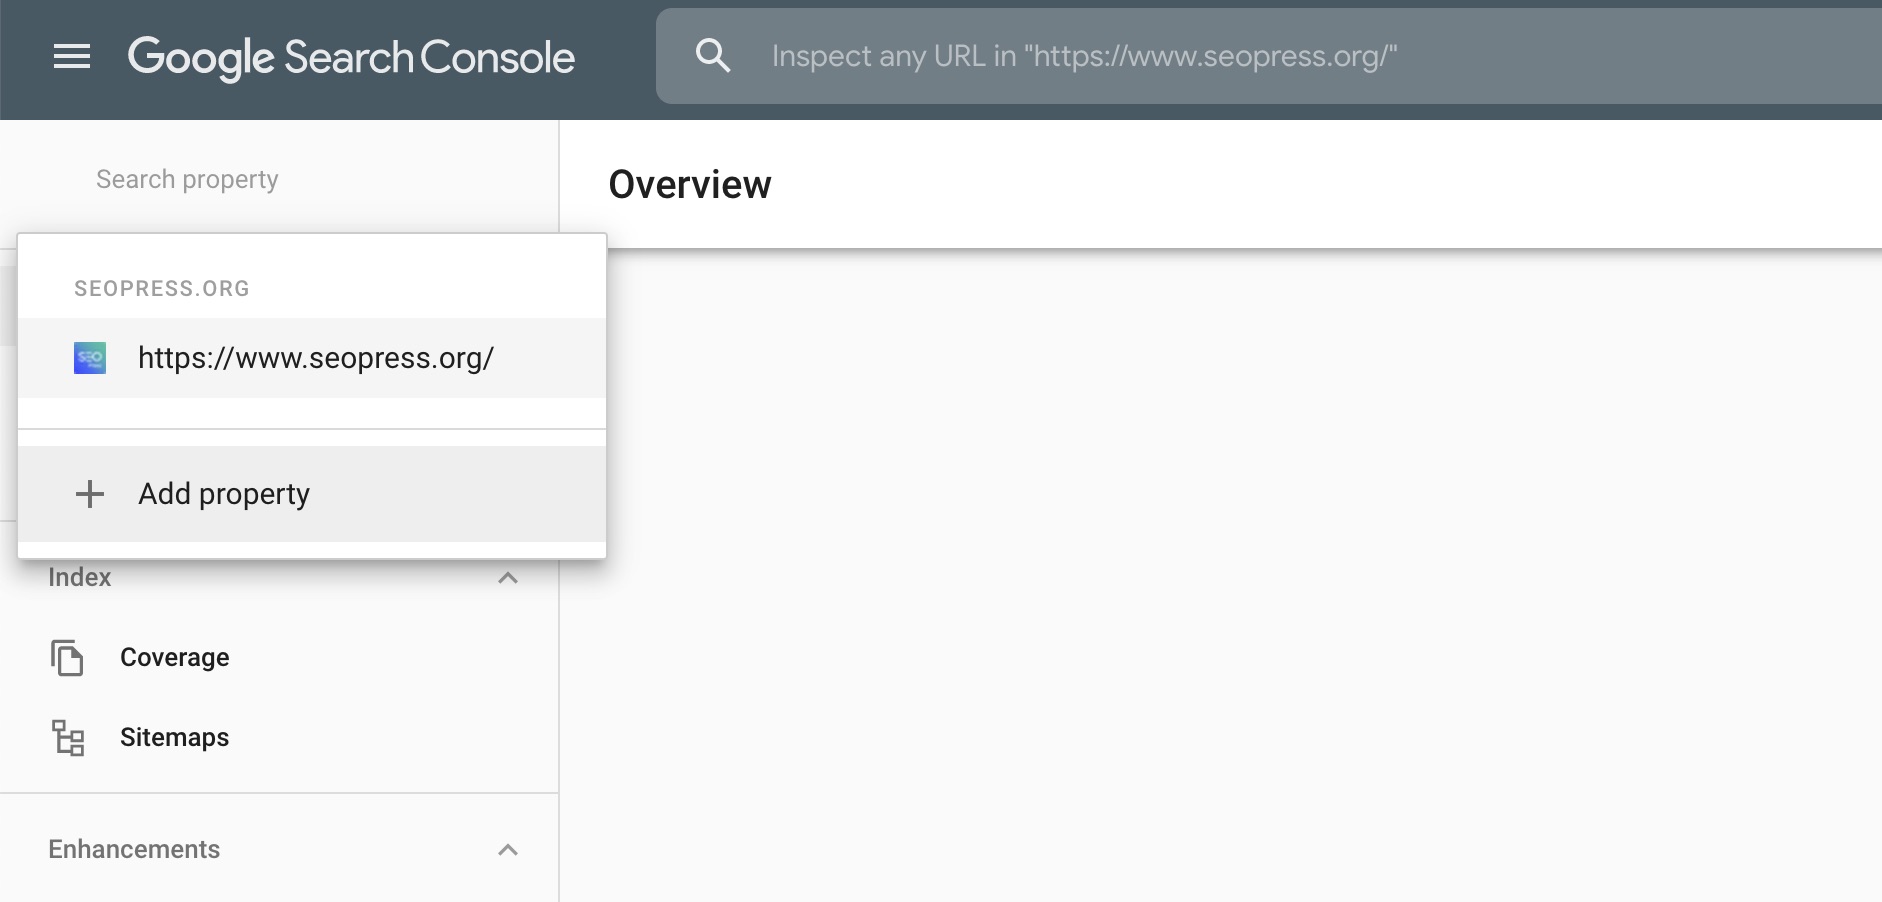
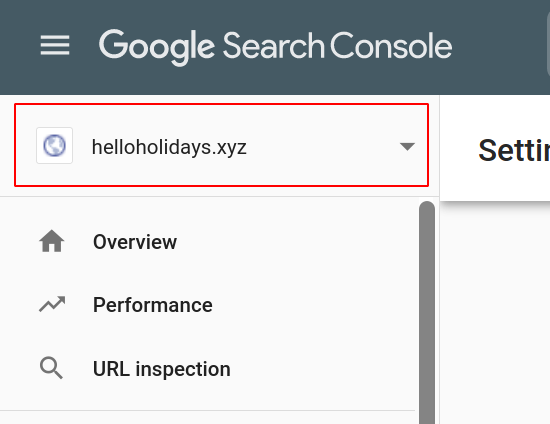
- Step A: Log in to your Google Search Console account and choose the property from which you wish to export data.
- Step B: In the left menu, select Performance view.
- Step C: Choose the time period you want to examine.
- Step D: Click the Export icon in the top left corner and choose the format that you like (Google Sheets, CSV).
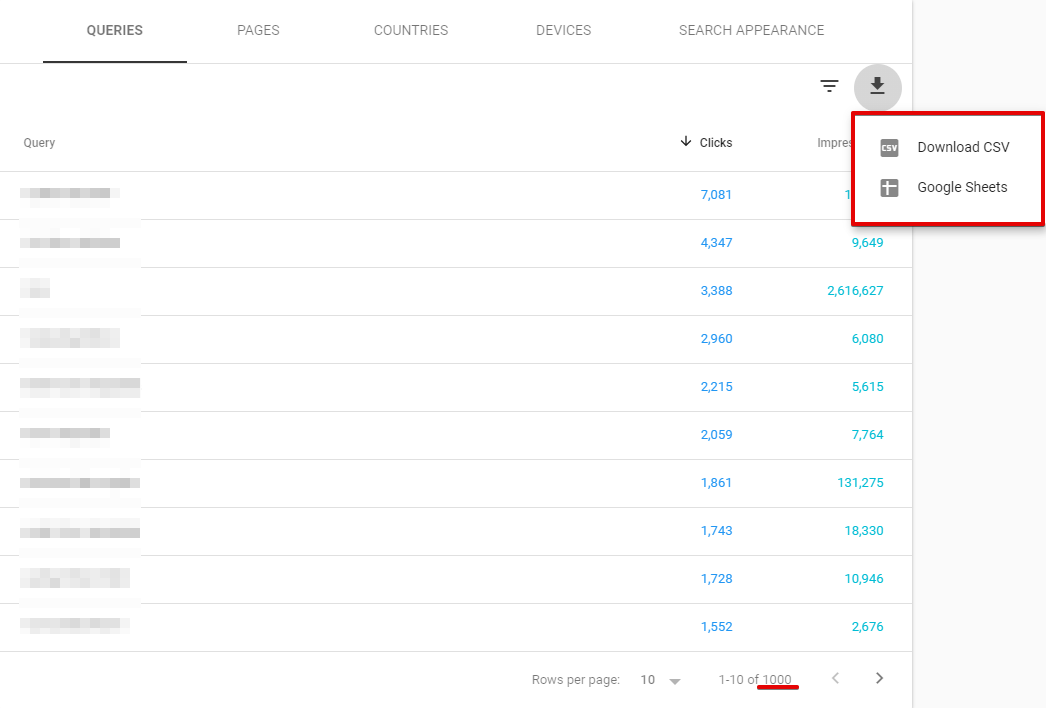
Now you have your CSV Data with you.
Looking for the best ETL tools to connect your Snowflake account? Rest assured, Hevo’s no-code platform seamlessly integrates with Snowflake, streamlining your ETL process. Try Hevo and equip your team to:
- Integrate data from 150+ sources(60+ free sources).
- Simplify data mapping with an intuitive, user-friendly interface.
- Instantly load and sync your transformed data into Snowflake.
Choose Hevo and see why Deliverr says- “The combination of Hevo and Snowflake has worked best for us. ”
Get Started with Hevo for FreeStep 2: Load CSV Data into Snowflake
The second step in exporting data from Google Search Console to Snowflake is importing CSV data into Snowflake.
To make your data accessible to Snowflake, begin by uploading your CSV files; this process is known as file staging. You can use internal stages for secure, convenient storage without external dependencies, or if your data is already in cloud storage like GCS or S3, you can load directly from there. Alternatively, simply upload the CSV files from your local machine.
Once staging is complete, you can import the data into your Snowflake tables by selecting the appropriate database using the USE command.
Syntax:
Use database [database-name]; Example:
use database dezyre_test;Output:
vampship#COMPUTE_wh@(no database).(no schema)>use demo_db;
+--------------------------------+
|status                          |
---------------------------------|
|Statement executed successfully.|
+--------------------------------+- Step C: This step involves creating a named file format that can be read or loaded into Snowflake tables for a group of staged data.
Syntax:
CREATE [ OR REPLACE ] FILE FORMAT [ IF NOT EXISTS ]
                      TYPE = { CSV | JSON | AVRO | ORC | PARQUET | XML } [ formatTypeOptions ]
                      [ COMMENT = '' ]
Example:
create or replace file format my_csv_format
  type = csv
  field_delimiter = '|'
  skip_header = 1
  null_if = ('NULL', 'null')
  empty_field_as_null = true
  compression = gzip;
Output:
vamship#COMPUTE_WH@DEMO_DB.PUBLIC>create or replace file format my_csv_format
type = csv
field_delimiter = skip_header = 1
null_if = ('NULL', 'null') empty_field_as_null = true compression = gzip;
status
|
| File format MY_CSV_FORMAT successfully created.
1 Row(s) produced. Time Elapsed: 3.638s
---HCOMDUITE LILIAREMO DO DUBITO- Step D: The Construct statement is now used to create a table, as shown below. In the current or provided schema, it either creates a new table or modifies an existing one.
Syntax:
CREATE [ OR REPLACE ] TABLE [ ( [ ] , [ ] , ... ) ] ;Example:
CREATE OR REPLACE TABLE dezyre_employees (
EMPLOYEE_ID number,
FIRST_NAME varchar(25),
LAST_NAME varchar(25),
EMAIL varchar(25),
PHONE_NUMBER varchar(15),
HIRE_DATE DATE,
JOB_ID varchar(15),
SALARY  number(12,2),
COMMISSION_PCT  real,
MANAGER_ID number,
DEPARTMENT_ID number
);Output:
vamship#COMPUTE_WH@DEMO_DB.PUBLIC>CREATE OR REPLACE TABLE dezyre_employees (
EMPLOYEE_ID number,
FIRST_NAME varchar(25), LAST_NAME varchar(25), EMAIL varchar(25),
PHONE NUMBER varchar(15), HIRE DATE DATE,
JOB_ID varchar(15), SALARY number(12,2), COMMISSION_PCT real, MANAGER_ID number,
DEPARTMENT_ID number
);
+
status
Table DEZYRE_EMPLOYEES successfully created.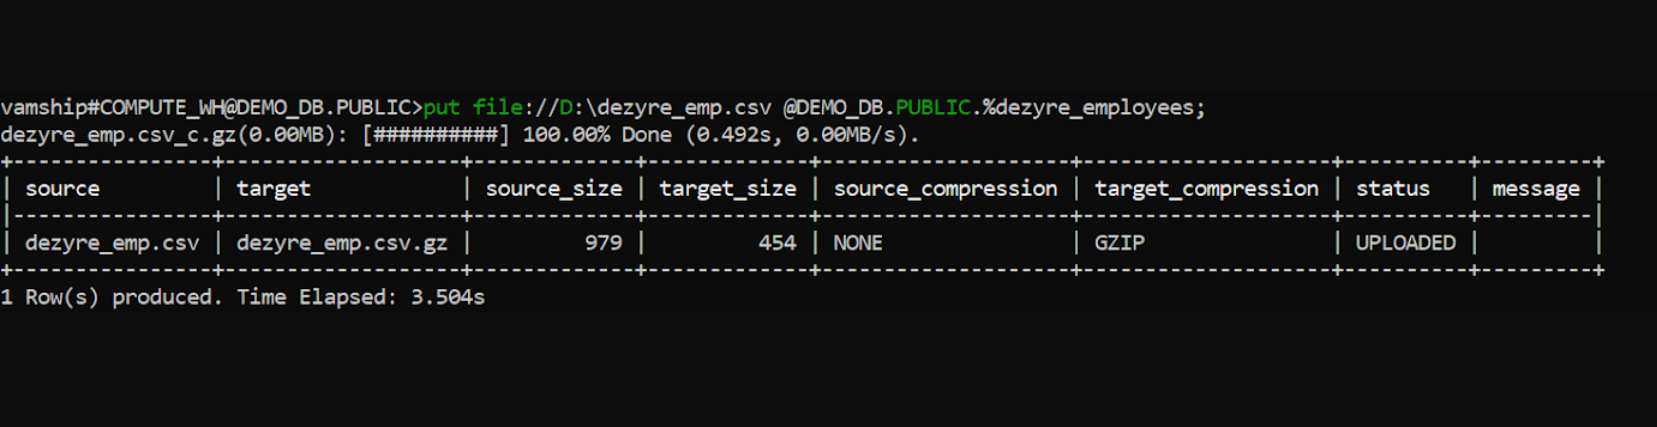
1 Row(s) produced. Time Elapsed: 1.288s- Step E: As shown below, upload the CSV data file using your local computer to the Snowflake’s staging area. Along with the URLs for the locations of the staged CSV files, you may also specify the access credentials if the destination is secured. Additionally, you can make named stages that point to various places.
Syntax:
put file://D:\dezyre_emp.csv @DEMO_DB.PUBLIC.%dezyre_employees;Output:
- Step F: The CSV data is now loaded into the target Snowflake table that was previously established, as can be seen in the image below.
Example:
copy into dezyre_employees
  from @%dezyre_employees
  file_format = (format_name = 'my_csv_format' , error_on_column_count_mismatch=false)
  pattern = '.*dezyre_emp.csv.gz'
  on_error = 'skip_file';
Output:

- Step G: By running the select query indicated below, you can check to see if the data that was put into the target database is accurate.
Example:
select * from dezyre_employees;Output:
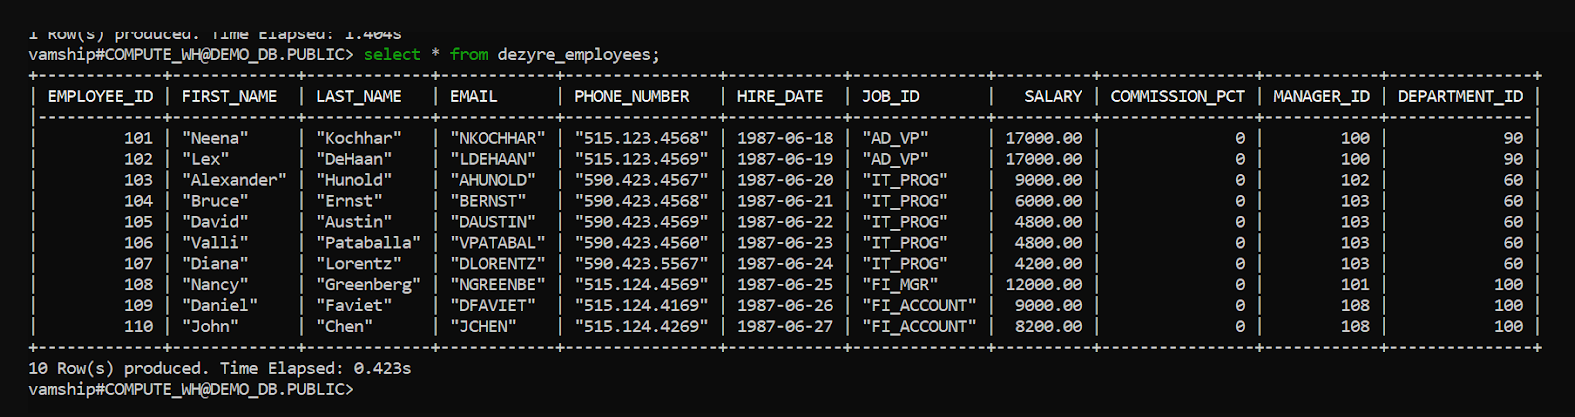
You have successfully done the Google Search Console to Snowflake data transfer.
Limitations of Connecting Google Search Console to Snowflake Manually
- Data may only be transmitted from Google Search Console to Snowflake in one direction. In order to maintain both tools up to date, two-way sync is required.
- The manual process takes time because the records need to be updated often. This is a waste of time and resources that could be used for more crucial company duties.
- Some customers may find the amount of engineering bandwidth needed to maintain workflows across numerous platforms and update current data bothersome.
- No transformation is possible during data transport. This could be a big problem for companies that wish to edit their data before moving it from Google Search Console to Snowflake.

Conclusion
In this article, you got a glimpse of how to connect Google Search Console to Snowflake after a brief introduction to the salient features and use cases. The methods talked about in this article are using automated solutions such as Hevo and CSV files. The second process can be a bit difficult for beginners. Moreover, you will have to update the data each and every time it is updated, and this is where Hevo saves the day!
Hevo removes the need to write and maintain custom scripts by letting you move data from Google Search Console and 150+ other sources effortlessly. It helps your team save time and focus on more valuable tasks. Try Hevo free for 14 days and check out affordable pricing that fits teams of all sizes.
FAQs
1. What is the Google equivalent of Snowflake?
The Google equivalent of Snowflake is Google BigQuery.
2. Can Snowflake be used on GCP?
Yes, Snowflake account can be hosted on Google Cloud Platform as well as on Amazon Web Services and Microsoft Azure.
3. What data can you collect from Google Search Console?
Google Search Console provides data on search performance, including clicks, impressions, CTR, average position, search queries, pages, countries, devices, and more.

Share it with your connections.
-
 Share To X
-
 Share To LinkedIn
-
 Share To Facebook
-
 Copy Link


