


Data Replication is a must to keep your data protected. It ensures not only the high availability of data but also the ease of access, especially in the event of any unexpected errors such as a system crash, hardware or software-based errors, etc.
Replication in MongoDB takes place with the help of MongoDB Replica Sets. Each MongoDB Replica Set contains a set of MongoDB instances, in a way that all contain the same data or by using the concept of Sharding, allowing users to distribute data across various machines.
The present article aims at providing a step-by-step guide to help you set up MongoDB Replication and help you replicate your MongoDB data with ease. A complete walkthrough of the content will help you develop the skill to set up this replication using various methods.
Table of Contents
What is MongoDB?
It is a high-performance document-oriented database that is powered by a NoSQL structure. It makes use of collections (tables) each having multiple documents (records) & allows the user to store data in a non-relational format.
MongoDB stores its data as objects which are commonly identified as documents. These documents are stored in collections, analogous to how tables work in relational databases.
MongoDB is known for its scalability, ease of use, reliability & no compulsion for using a fixed schema among all stored documents, giving them the ability to have varying fields (columns).
For further information on MongoDB, you can check the official site here.
Why Replication?
MongoDB Replication is a necessary feature because of the following benefits it offers:
- With multiple copies of data placed on several servers, this replication provides High(24*7) availability of data.
- Better data protection as a failure of a single server won’t lead to data loss.
- In cases of hardware failures and service interruptions, quick disaster recovery is possible.
- Eliminates any downtime required for maintenance such as backups, index rebuilds, or compaction.
- Replica sets are transparent to your application.
- Read scaling (additional copy for reading).
What is MongoDB Replication?

Replication in MongoDB is the process of making data available across multiple data servers. Data Replication ensures data security not only in the case of a single server failure, but also in the case of a hardware failure.
Replication stores multiple data copies across various data servers, allowing users to recover data whenever required.
MongoDB supports replication with the help of Replica Sets. These Replica Sets are a combination of various MongoDB instances, each having a single primary node and multiple secondary nodes.
Key Features of Replica Set
Some key features of the Replica Set MongoDB are as follows:
- Replica Set is a cluster of N nodes with several data-bearing nodes and one arbiter node.
- With Replica Set, any node can be a primary server node.
- You will have automatic failover and recovery with Replica Set.
- When you perform any write operation with Replica Set, it goes to the primary server node.
For further information on the MongoDB Replication setup, you can check the official documentation here.
How MongoDB Replication Works
MongoDB Replication is managed by Replica Set where multiple MongoDB nodes are grouped as a unit. For this replication, a Replica Set requires at least 3 MongoDB nodes.
Here, one node will be considered as the primary node that will do all the write operations received. The other nodes will become the secondary nodes and they will replicate data from the primary node.
The secondary nodes will perform only read operations so, they can be configured through a supported MongoDB client. Whenever the primary node is unavailable to deliver the request of data, the secondary node will provide continuous data needed.
In such a case, the primary node selection is made through a process called Replica Set Elections, where the most suitable secondary node is selected as the new primary node.
Heartbeat Process
Heartbeat is the method of finding out the current state of the MongoDB nodes in a replica set. Here, the replica set nodes to ping each other every two seconds. If a node does not ping within 10 seconds, other nodes in the replica set mark the node as unreachable.
This feature is important for automatic failover processes where the primary node is unreachable and no heartbeat is received from the secondary node within the allotted time frame. MongoDB then automatically assigns a secondary server that acts as the primary server.
Replica Set Elections
The replica set selection is used to find out which MongoDB node should be the primary node. These choices can occur when:
- Loss of connection to the primary node that is recognized by the heartbeat process.
- Replica set initialization
- Add a new node to an existing replica set
- Replica set Maintenance using stepDown or rs.reconfig method
During the election process, the first node sets a flag that requires an election, and all other nodes vote to elect that node as the primary node. Assuming the replication configuration settings are the default values, the average time to complete the selection process is 12 seconds.
A key factor that can affect the time it takes to complete a selection is network delay. This can delay the reestablishment operation on the replica’s new primary node. The replica set cannot handle write operations until the selection is complete.
However, if the read query is configured to be processed on the secondary node, you can stage the read. MongoDB 3.6 supports connection drivers that need to be configured to retry required writes.
Dealing with MongoDB Replication Delay
One of the major problems while performing a MongoDB Replication is the delay or lag in the process. When there is a delay in the replication process to a secondary node after an update to the primary node in the replica set.
A few factors are listed below that can increase the replication delay:
- Network Latency: If the network is insufficient to deliver the needs for the replication process it will cause a delay in data replication to the entire Replica Set. It is a good practice to route your traffic in a stable network with sufficient bandwidth.
- Disk Throughput: If the disks used in primary and secondary nodes are different like the primary node has SSD and the secondary node has HDD then there will be a delay in the writing process on the secondary node.
- Heavy Workloads: Executing heavy and long-running write operations on the primary nodes will lead to a delay in the replication process. It is always a good practice to configure the MongoDB Write Concern correctly.
- Database Operations: Some Database queries take more time to execute. With the help of a Database Profiler, one can identify and optimize the queries.
What is Sharding in MongoDB?
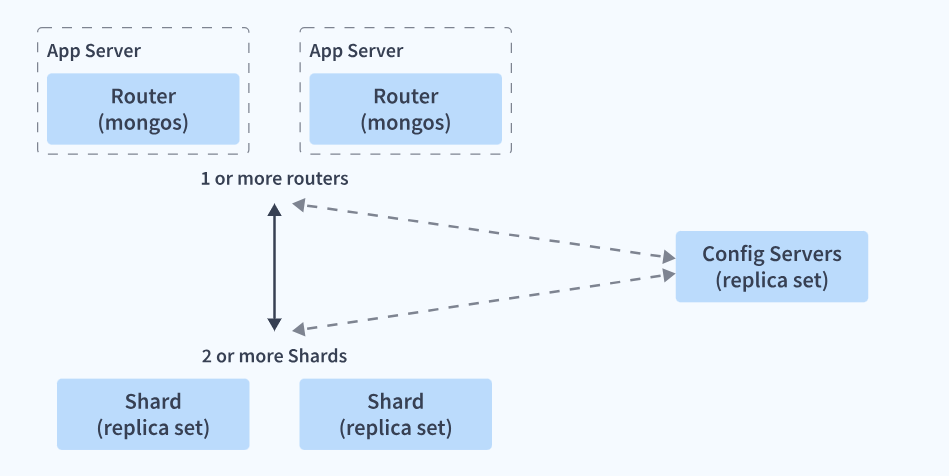
MongoDB scales immensely using a technique known as Sharding to handle enormous volumes of data. MongoDB handles the data storage requirements using the concept of Sharding, which includes distributing data and storing it across various machines. Sharding allows MongoDB to scale horizontally and handle the read-write load easily.
Sharding makes use of three components:
- Shards: It is the location where the data is stored.
- Config Server: These servers help map data from a cluster to a Shard, which is then used by query routers to perform operations specific to a particular Shard.
- Query Server: These servers allow users to access and perform operations on the desired MongoDB Shards.
For further information on Sharding in MongoDB, you can check the official documentation here.
Replication vs Sharding in MongoDB
Replication refers to the practice of copying data from the primary server node to secondary server nodes. It increases data availability and promotes backup, in case your primary server fails. It copies data on every server.
Sharding refers to the process of handling horizontal scaling across various servers using a shared key. You will copy data holistically by sharding copies of pieces of data across various replica sets. All these replica sets work together to utilize all the data.
When sharding and replication work together, they are referred to as a shared cluster. Each shard is replicated to preserve the same data availability.
MongoDB Replica Set vs MongoDB Cluster
| Criteria | MongoDB Replica Set | MongoDB Cluster |
| Purpose | Ensure data availability and provide a built-in backup solution | Distribute data and workloads across multiple nodes using sharding for horizontal scaling |
| Data Distribution | Copies the entire dataset across multiple nodes | Distributes data by dividing it into shards and storing them on different nodes |
| Data Redundancy | Data is replicated across multiple nodes (i.e., replicas) | Data is distributed into shards, each shard is replicated to maintain redundancy |
| Scalability | Provides Limited Scalability | Supports large datasets and high-throughput operations through horizontal scaling |
| Data Sharding | Not applicable; entire dataset is copied across nodes | Implements sharding to distribute and manage large datasets |
| Node Types | Includes primary (read-write) and secondary (read-only) nodes | Includes primary shards and replica nodes for each shard |
| Use Case | Ideal for high availability and failover scenarios | Ideal for managing large datasets and high-throughput workloads through distributed architecture |
| Implementation | Data replication across nodes for backup and availability | Data distribution across shards with replication for fault tolerance and high availability |
Method 1: Using Hevo Data
Skip the complexity and streamline your data replication with Hevo. Effortlessly set up MongoDB replication and ensure your data is synchronized across your systems with minimal hassle. Simplify your data management process and focus on what matters most.
Method 2: Using Replica Set
Utilize MongoDB’s Replica Set to create copies of your data across multiple nodes. This method ensures high availability and data redundancy. Follow our detailed guide to configure your replica set and achieve reliable data replication.
Method 3: Using Sharding
Leverage MongoDB’s Sharding to distribute data across multiple servers. This approach enhances performance and scalability. Implement sharding with our straightforward instructions to manage large datasets efficiently and maintain optimal system performance.
Methods to Set up Replication in MongoDB
Before going ahead with the techniques to set up replication in MongoDB, ensure the following prerequisites:
- Working knowledge of MongoDB.
- MongoDB is installed at the host workstation.
- A general idea of using the command line.
Method 1: Using Hevo Data

Hevo Data, a No-code Data Pipeline, helps you replicate data from MongoDB to Data Warehouses, Business Intelligence Tools, or any other destination of your choice in a completely hassle-free & automated manner.
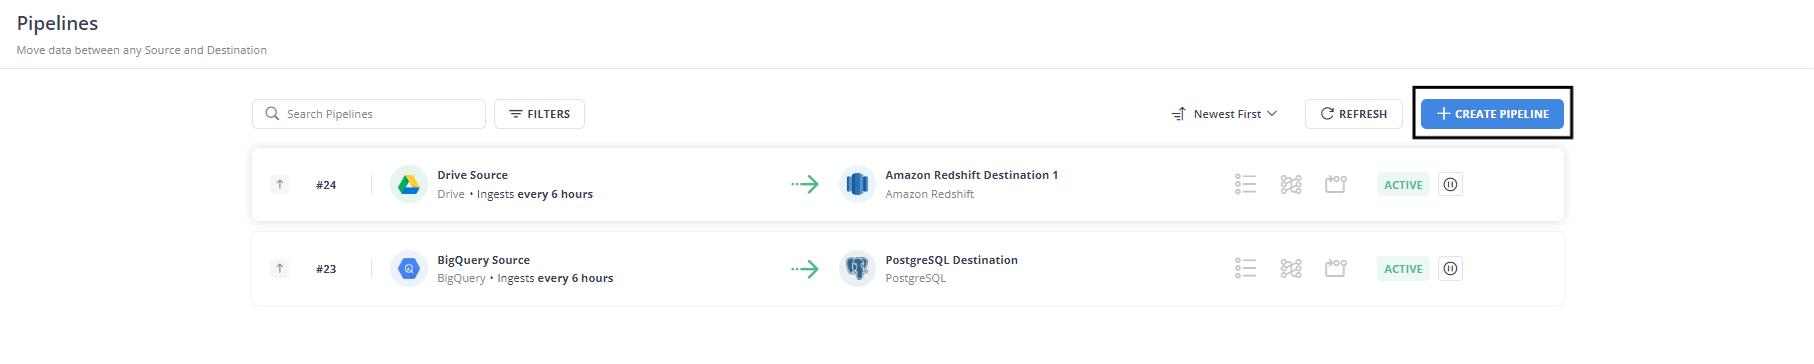
Step 1: Create a New Pipeline
Click on Create Pipeline Button to create a new pipeline.
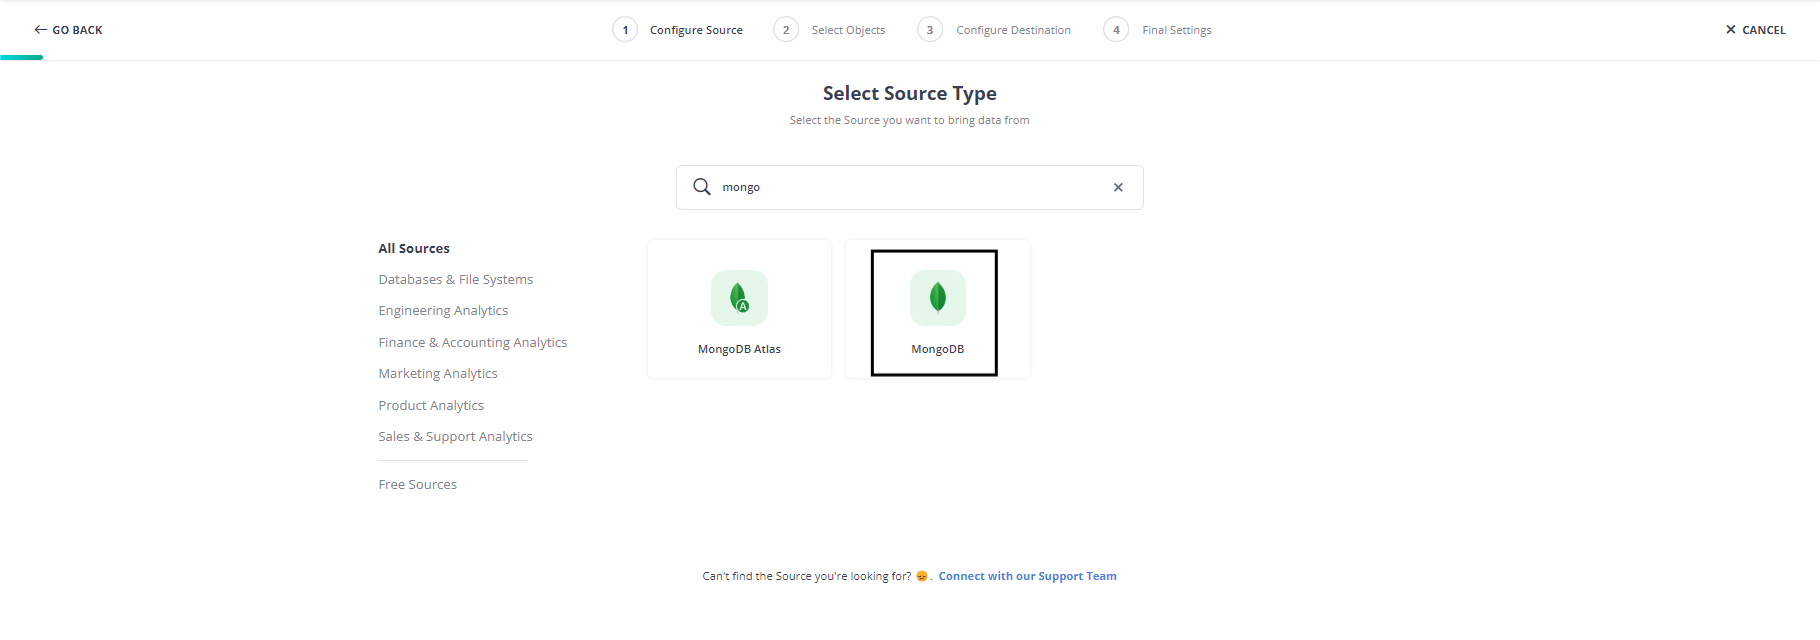
Step 2: Select MongoDB as a Source
Step 3: Configure MongoDB Source Details
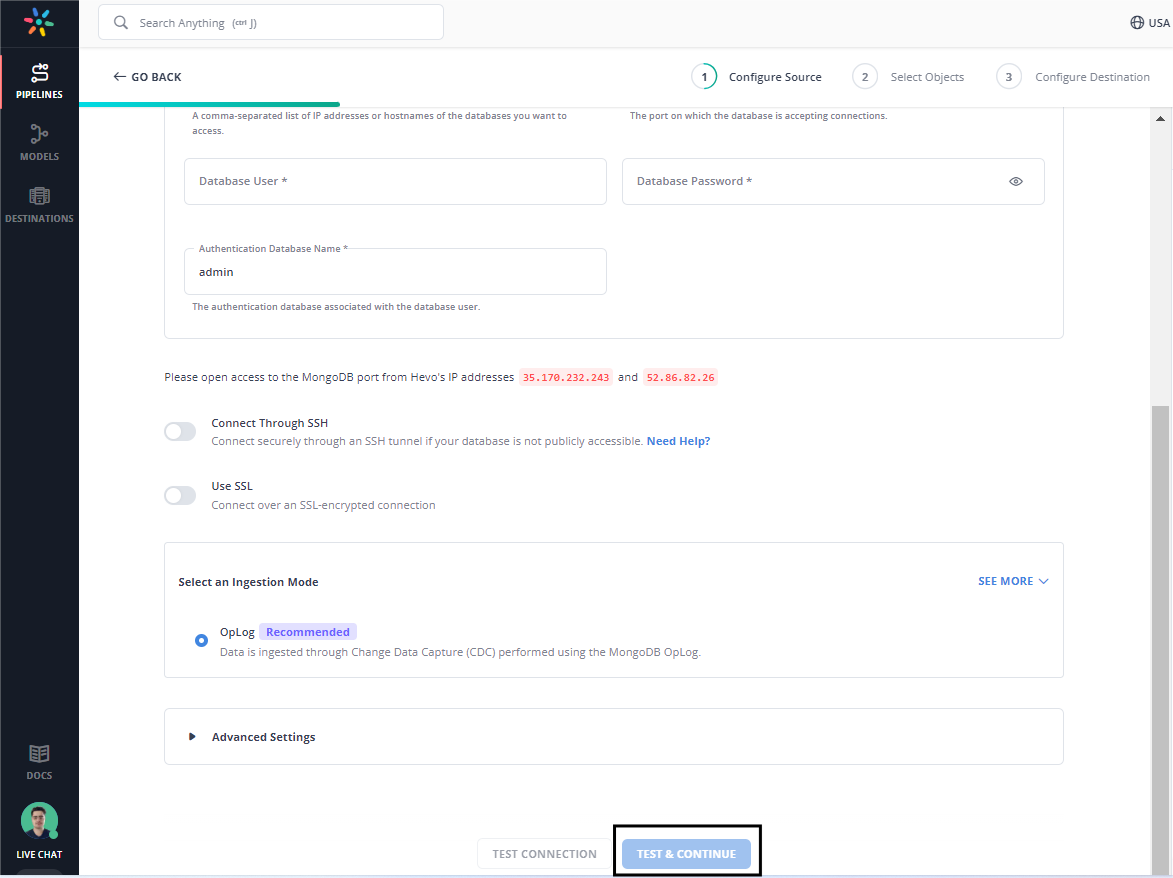
With this few easy and simple steps you have successfully connected MongoDB as a source.
Method 2: Using Replica Set
You can use the following methods to create and deploy your Replica Sets:
Creating a New MongoDB Replica Set
You can set up a new Replica Set in MongoDB using the following steps:
Step 1: Starting the MongoDB Instances
To start the MongoDB instance, specify the port value for your Mongo instance along with the path to your MongoDB installation on your system. Use the following command to enable your MongoDB instance:
$ mongod --port 27017 --dbpath /var/lib/mongodb --replSet replicaSet1MongoDB uses port 27017 as its default port number. In case the user doesn’t specify the port number, MongoDB automatically establishes a connection with the default port.
The –repelset parameter specifies the name of the replica set, which will store various MongoDB instances. Here the Replica Set is called replicaSet1.
Step 2: Configuring the Replica Set
A replica set contains multiple instances that communicate with each other. To establish communication between them, you need to specify the hostname along with their IPs as follows:
You can also connect them by using the following lines of code:
mongo –host node-2 –port 27017
mongo –host node-3 –port 27017
To establish a complete connection, you need to use these commands once with every server by changing the server/nodes as required.
Step 3: Enabling Replication in MongoDB
Once you’ve made all the configurations, you now need to open the Mongo Shell with your primary instance and use the initiate command as follows:
rs.initiate()You will now see the following output on your system. This indicates that the replication process has begun:
MongoDB shell version v3.4.10
connecting to: mongodb://172.34.21.121:27017
MongoDB server version: 3.4.10
> rs.initiate()
{
"info2": "no configuration specified. Using a default configuration for the set",
"me" : "example:27017",
"ok" : 1
This is how you can use the rs.initiate() command to start the replication process. The Mongo Shell will now change its prompt to the name of your Replica Set, replicaSet1.
Step 4: Adding MongoDB Instances to Replica Sets
Once you’ve initialized your Replica Set, you can now begin to add the various MongoDB instances to it using the add command as follows:
rs.add(<servername:port>)For example, if you want to add the node-2 and node-3 to replicaSet1, you can use the following command in your Mongo Shell:
rs.add('node-2:27017')
rs.add('node-3:27017')
The output {‘ok’:1} indicates that a MongoDB instance has been successfully added to the Replica Set. To check the status of the replication, you can use the status command as follows:
rs.status()The status command will produce the following output if the MongoDB instances have been added successfully:

This is how you can add MongoDB instances to your Replica Sets.
Step 5: Removing Instances from Replica Sets
MongoDB Replica Sets also allow users to remove single or multiple instances they’ve added to the replica set using the remove command. To remove a particular instance, you first need to shut it down using the following command:
db.shutdownserverOnce you’ve shut down the server, you need to connect with your primary server and use the remove command as follows:
rs.remove("server_name")For example, if you want to remove the “node-2” instance from replicaSet1, you can use the following command:
rs.remove("node-2")Step 6: Testing the Replication Process
You can test the process by adding a document in the primary node. If replication is working properly, the document will automatically be copied into the secondary node.
First, connect to the primary node and add a document using the insertOne command as follows:
replicaSet1: PRIMARY> use movies
switched to db movies
replicaSet1:PRIMARY> db.release_year.insertOne({ name: "Example", year: 2017})
{
"acknowledged" : true,
"insertedId" : ObjectId("5a018ea7c89da78ba2076f25")
}
replicaSet1: PRIMARY>
Switch to your secondary node, node-2 using the following command:
mongo -host node-2 -port 27017If replication has taken place properly, the document in your primary node will automatically be copied to the secondaries. You can check this using the find command as follows:
replicaSet1: SECONDARY> use movies
switched to db movies
replicaSet1:SECONDARY> db.release_year.find();
The find command will access the database movies and the collection release_year and output the stored documents as follows:
{ "_id" : ObjectId("5a018ea7c89da78ba2076f25"), "name" : "Example", "year" : 2017 }
resplicaSet1:SECONDARY>
The above output indicates that the document was automatically replicated into the secondary node. This is how you can easily set up Replication using Replica Sets and perform various operations on them.
Converting a Standalone to MongoDB Replica Set
MongoDB allows its users to transform their standalone MongoDB instances into a Replica Set. Standalone instances are used in the testing and development process, whereas the Replica Sets are a part of the production phase.
First, shut down your mongod instance using the following command:
db.adminCommand({"shutdown":"1"})Restart your mongod instance. You must use the –repelSet parameter in your command to specify the Replica Set you’re going to use. Users must specify the name of the server along with their unique IPs in their command as follows:
mongod --port 27017 --dbpath /var/lib/mongodb --replSet replicaSet1 --bind_ip localhost,<hostname(s)|ip address(es)>Connect your Mongo Shell with your MongoDB instance and use the initiate command to start the replication process and successfully convert your standalone MongoDB instance into a Replica Set.
You can now perform all the basic operations such as adding an instance, removing an instance, etc. using the following commands:
rs.add(“<host_name:port>”) & rs.remove(“host-name”)You can even check the status of your replica set, using the rs.status() and rs.conf() commands.
This is how you can convert your standalone MongoDB instance into a MongoDB Replica Set.
For further information on creating Replica Sets in MongoDB, you can check the official documentation here.
Method 3: Using Sharding
MongoDB lets users conveniently use the concept of Sharding, allowing you to replicate data across multiple servers. You can use the following methods to replicate your MongoDB data using Sharing :
Creating a New MongoDB Shard as a Replica Set
You can replicate your MongoDB data into various Shards using the following step:
Step 1: Creating Config Servers for MongoDB
Launch MongoDB server on your system and login as a superuser. You can use the following command to start as a superuser:
Sudo suOnce you’ve logged in, you need to create the required directories for your three Replica Sets. You can use the following lines of code to create them:
Commands for Config Server:
mkdir /var/lib/cfgsvr0
mkdir /var/lib/cfgsvr1
mkdir /var/lib/cfgsvr2
Commands for ReplicaSet1:
mkdir /var/lib/replica10
mkdir /var/lib/replica11
mkdir /var/lib/replica12
Commands for ReplicaSet2:
mkdir /var/lib/replica20
mkdir /var/lib/replica21
mkdir /var/lib/replica22
Commands for ReplicaSet3:
mkdir /var/lib/replica30
mkdir /var/lib/replica31
mkdir /var/lib/replica32
To create the Config Server, you need to use the –configsvr parameter in your mongod command along with the path for your database, its port value and the logpath. Use the following syntax for the mongod command:
mongod --configsvr --dbpath value --port value --fork --logpath value –logappendUse the following commands to create three Config Servers:
Command for Server 1:
mongod --configsvr --dbpath /var/lib/cfgsvr0 --port 27021 --fork --logpath /var/lib/cfgsvr1/log --logappendCommand for Server 2:
mongod --configsvr --dbpath /var/lib/cfgsvr1 --port 27022 --fork --logpath /var/lib/cfgsvr1/log --logappendCommand for Server 3:
mongod --configsvr --dbpath /var/lib/cfgsvr2 --port 27023 --fork --logpath /var/lib/cfgsvr1/log –logappendOnce you’ve created the Config Servers successfully, you will see the following output on your screen:
about to fork child process, waiting until server is ready for connections.
forked process: #process_id
child process started successfully, parent exiting
This is how you can create Config Servers to set up replication using Sharding.
Step 2: Creating Shard Servers for MongoDB
To implement replication using Sharding, you need to start your Shard Servers as Replica Sets, which makes use of the Master-Slave mechanism.
To create the Shard Server, you need to use the –shardsvr parameter in your mongod command along with the path for your database, its port value, logpath and the –repelSet parameter to specify the Replica Set. Use the following syntax for the mongod command:
mongod --shardsvr --replSet value --dbpath value 1 --logpath value --port value --logappend --smallfiles --oplogSize 50 --fork –nojournalUse the mongod commands three times for each Replica Set to start the Shard Server as follows:

Step 3: Starting the Servers
Once you’ve created your Shard Servers, you now need to configure every Shard. Begin by staring the first Replica Set which uses the port 27010 using the mongo command as follows:
mongo --port 27010Use the initiate command to start the Replication process and then add your MongoDB instances to the Replica Set using the add function as follows:
rs.add("example.com:27011")
rs.add("example.com:27012")
To check whether the MongoDB instances were successfully added to the Replica set, use the status command as follows:
rs.status()Perform the same operation for both ReplicaSet2 and ReplicaSet 3 as follows:

Once you’ve added your Replica Sets, you need to link them together. You can do this as follows:

This is how you start Config and Shard Servers.
Step 4: Adding Shards to MongoDB Shard Servers
To start the Sharding process, you need to start your mongos servers and add various Shards to the Shard Servers. Use the following command to start the mongos server:
mongo --port 47017To add Shards, you will need to use the addShard function and pass your Replica Sets as the parameter:
sh.addShard("ReplicaSet1/example.com:27010")
sh.addShard("ReplicaSet2/example.com:27020")
sh.addShard("ReplicaSet3/example.com:27030")
You can check the status of Shards as follows:
sh.status()This will generate the following output:

This is how you can add Shards to your Shard Servers.
Step 5: Testing the Replication process
To test the Replication process, create a new database to store some documents. Create a database called movies and a collection called movie_info and add documents to it as follows:
use movies
for(i=0;i<10;i++){ db.movie_info.insert( {_id:i,name:"dir_name"+i,author:"Neil"} ) }
Now enable Sharding for the movies database as follows:
sh.enableSharding(“movies”)Once you’ve enabled Sharding for the database, you need to enable it for the collection. You can do it as follows:
sh.shardCollection(“movies.movie_info”,{_id:1},true)Add a few more documents and use the status command as follows:
for(i=0;i<50000;i++){ db.movie_info.insert( {_id:i,name:"dir_name"+i,author:"Neil"} ) }

db.movie_info.stats()
From the output generated by this command, you can easily see out of 49999 documents each Replica Set contains a certain number of them.
This is how you can use Sharding to set up MongoDB Replication.
Converting a Shard Standalone to Shard Replica Set
MongoDB allows its users to transform their Shard standalone into a Shard Replica Set. Standalone instances are used in the testing and development process, whereas the Replica Sets are a part of the production phase.
First, shut down your mongod instance using the following command:
db.adminCommand({"shutdown":"1"})Now restart your Shard instance. You must use the –repelSet parameter in your command to specify the MongoDB Replica Set (this can be the same as the name of your MongoDB Shard) you’re going to use. Users must specify the name of the server along with their unique IPs in their command as follows:
mongod --port value --dbpath value --shardsvr --replSet shardA --bind_ip localhost,<ip address of the mongod host>Connect your Mongo Shell with your MongoDB instance to start Sharding your MongoDB instance and use the initiate command to start the Replication process and successfully convert your Shard standalone instance into a Shard Replica Set.
You can now perform all the basic operations such as adding an instance, removing an instance, etc. using the following commands:
rs.add(“<host_name:port>”) & rs.remove(“host-name”)You can even check the status of your Replica Set using the rs.status() and rs.conf() commands.
Once your Replica Set is operational, you can retrieve information about the Shard by connecting the Mongo Shell to one of the mongos instances as follows:
var myShard = db.getSiblingDB("config").shards.findOne( { _id: "<name>"})Replace the name field with the name of your Shard. If you are using the same name as your Replica Set, you can directly use it, or you can use the sh.status() command and note down the Shard name from the Shards section as follows:
shards:
      { "_id" : "shard0000", "host" : "example1.net:27018", "state" : 1 }
      { "_id" : "shard0001", "host" : "example2.net:27018", "state" : 1 }
Once you have the information about your Shards, you need to update it to your host server. You can do this using the following command:
myShard.host = "<replica-set>/<member>Replace the “replica-set” parameter with the name of your Replica Set and the member parameter with any member of that Replica Set. For example, if you’re using ShardA as your Replica Set, you can write your command as follows:
shardA/example1.net:27018Save your configuration settings using the following command:
db.getSiblingDB("config").shards.save(myShard, { writeConcern: { w: "majority" } } )Perform the same operation for all your Shard standalone and give each of them a distinct name. This is how you can convert your standalone Shard instance into a Shard Replica Set and perform MongoDB Replication.
For further information on using MongoDB Shards, you can check the official documentation here.
Learn more about: MongoDB to BigQuery
Helpful Resources
- 3 Easy Methods to Replicate MongoDB Replica Set
- How to Set up MongoDB Replica Set Configuration
Conclusion
This article teaches you how to set up MongoDB Replication with ease and answers all your queries regarding it.
Use them to perform data replication & recovery in the most efficient way possible using various methods.
FAQ
What is the replication in MongoDB?
Replication in MongoDB ensures high availability by duplicating data across multiple servers in a replica set, with one primary handling writes and secondaries providing redundancy and failover.
What is the difference between sharding and replication?
Sharding distributes data across multiple servers to manage large datasets and high traffic, while replication ensures data redundancy and fault tolerance by maintaining copies of data across servers.
What is the replication status of MongoDB?
Replication Status can be checked using the rs.status() command, which provides details about the replica set members’ roles and replication health.
Share it with your connections.
-
 Share To LinkedIn
-
 Share To Facebook
-
 Share To X
-
 Copy Link


