Getting right to the point, you can always optimize your processes to improve your efficiency with Salesforce Forms. Salesforce Forms have multiple uses across various industries and are a viable option for those who want to leverage Salesforce’s true potential. However, it is essential to select the correct platform for creating Salesforce Forms that are flexible and good enough to meet your Data Collection requirements.
You can also quickly create Salesforce Forms without writing a line of code. Some options help you get the data in Salesforce, but the options must be created differently. Some functions or solutions may require manual work, while others may not consider connecting to data.
Table of Contents
Introducing Salesforce Forms
Though many of us know of Salesforce due to its cloud-based CRM, it now hosts several services, such as Sales Cloud, Marketing Cloud, and Mobile Connectivity. These services help businesses use cloud technology to connect more effectively with clients and partners by offering amazing flexibility and scalability.
One of these gems is Salesforce Forms. These forms allow you to display and portray data based on certain criteria in a dynamic and interactive layout. Customizing these layouts helps facilitate admin work, improving performance and navigation.
You can take a look at how to use Salesforce to get started with Salesforce.
Migrating your data can become seamless with Hevo’s no-code intuitive platform. With Hevo, you can:
- Automate Data Extraction: Effortlessly pull data from 150+ connectors like Salesforce(and other 60+ free sources).
- Transform Data effortlessly: Use Hevo’s drag-and-drop feature to transform data with just a few clicks.
- Seamless Data Loading: Quickly load your transformed data into your desired destinations, such as BigQuery.
Try Hevo and join a growing community who rely on us for seamless and efficient migrations.
Get Started with Hevo for FreeHow do Salesforce Forms Work?
- Data Collection and Submission: Salesforce forms allow you to capture data directly from users, like leads, customers, or team members. For example, a web-to-lead form can automatically add new leads into Salesforce as soon as they fill out an online inquiry form.
- Automatic Record Creation: When a form is submitted, Salesforce creates or updates records in real time. For instance, a customer support form on your website can instantly create a new case in Salesforce, helping teams respond faster.
- Customizable Fields and Logic: Salesforce forms can include various fields (like text, dropdowns, checkboxes) and can apply rules to validate entries. This flexibility means you can create specific forms for different scenarios, such as surveys, event registrations, or feedback forms.
- Automated Workflows: Once data is submitted, Salesforce can trigger workflows or notifications based on the form’s data. For example, a job application form could automatically notify the HR team when a candidate applies, streamlining the hiring process.
Types of Salesforce Forms
Web-to-Lead Forms in Salesforce
- Captures leads from website forms directly into Salesforce.
- Automates lead creation, saving time and reducing data entry errors.
- Example: A “Contact Us” form that automatically adds new leads for follow-up.
Custom Web Forms for Different Use Cases
- Flexible forms for collecting information beyond leads, like feedback or event registrations.
- Tailored to specific needs, allowing detailed data collection.
- Examples: Event sign-ups, customer feedback forms.
External vs. Internal Salesforce Forms
- External Forms: Used by customers or partners; data goes directly into Salesforce. For example, a partner application form on a website.
- Internal Forms: Used within the organization for tasks or data updates. For example, employee form for submitting project updates.
Why is it Essential to Use an External Data Collection Platform?
With a Data Collection platform by your side, you have access to a powerful integration medium. You will also get various native features and customizable functions that are available with a Web Form Builder. With the Salesforce Form, you can create your data and send it where it needs to go.
Integrate your Data with Salesforce
Entering data manually can be a cumbersome task that takes time, effort, and accuracy. That is why you need to connect your data to Salesforce in a rational way to minimize the time and effort:
- Use a data loader to import or export data from your system. The tool allows you to upload a large amount of data at a single time, as Salesforce doesn’t allow direct integration for upload.
- Salesforce offers built-in data options in the CRM. You can use the web-to-lead and web-to-case forms for implementation.
- Use an external Salesforce Form platform to input the data into Salesforce. Many integration platforms are available, and they feature customization options with a drag-and-drop feature.
How to Create a Salesforce Form?
Method 1: Building Forms in Salesforce Lightning
- Step 1.1: Access the App Builder by navigating to the App Launcher in Salesforce Lightning and selecting “App Builder.”
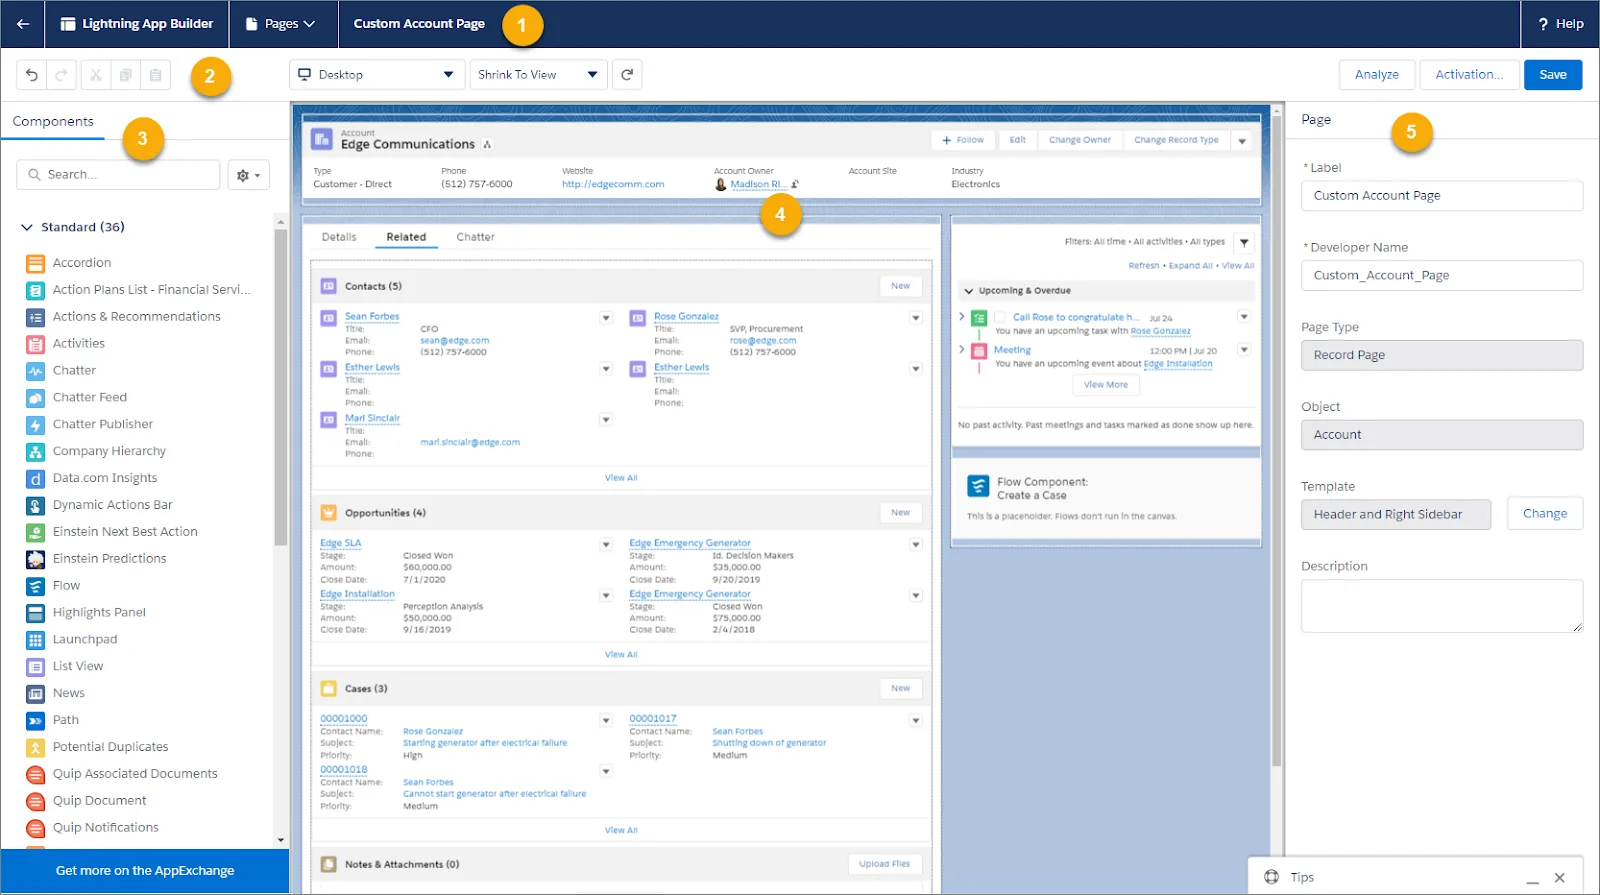
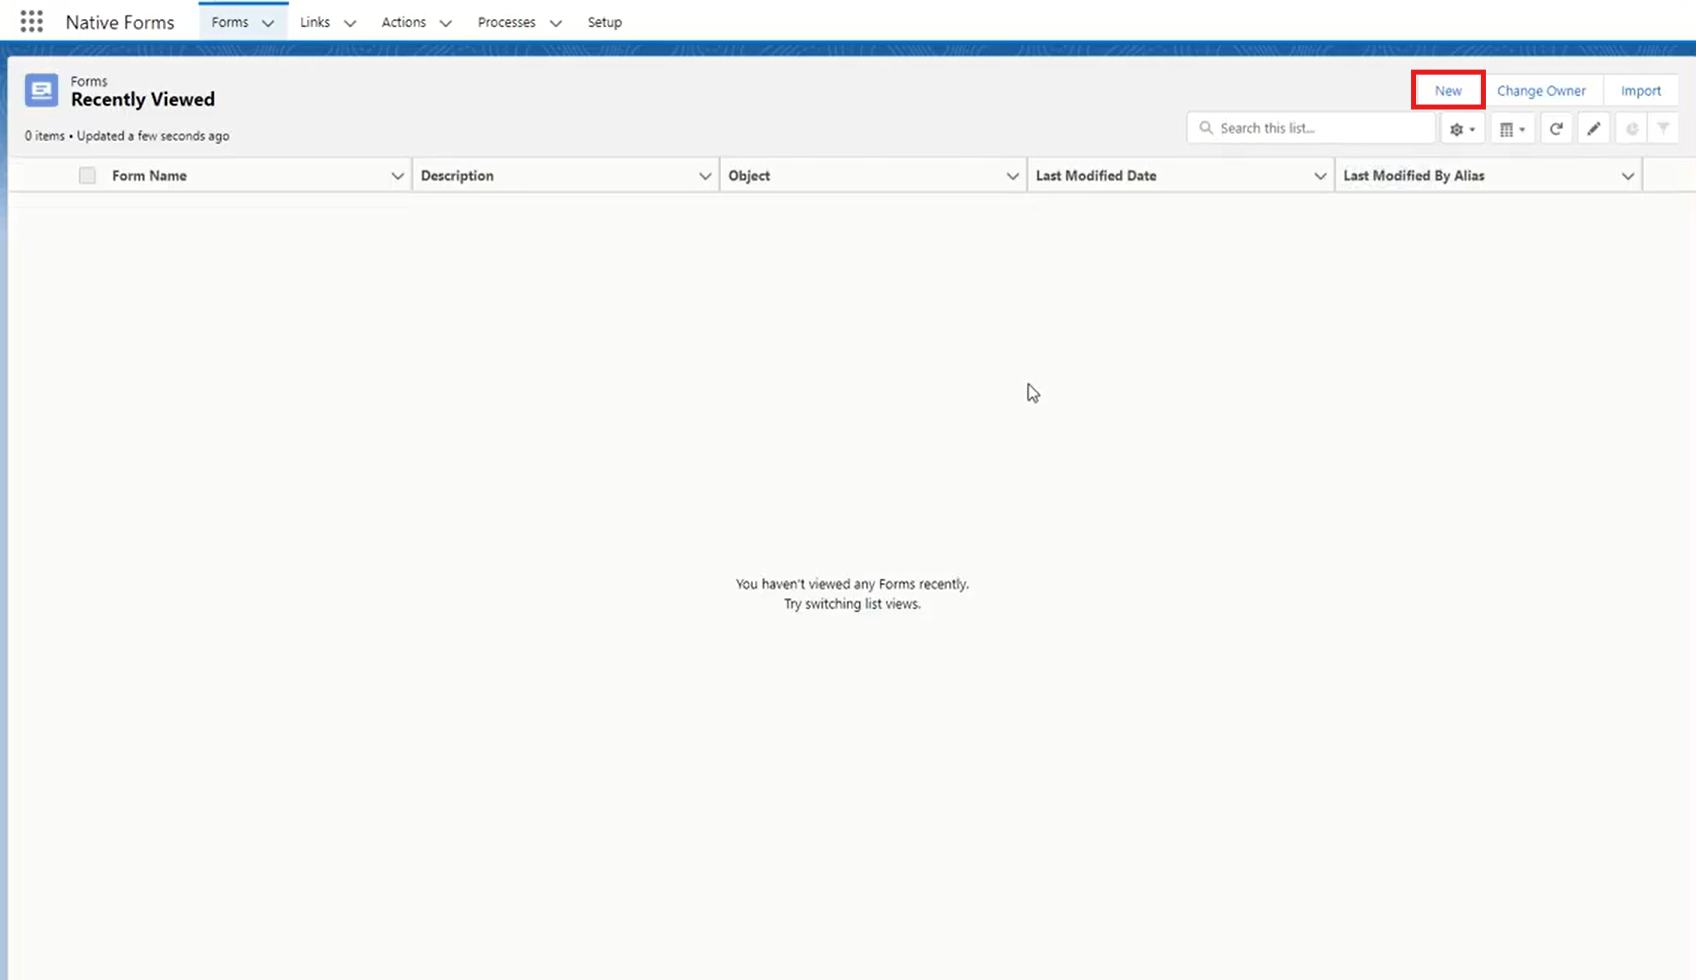
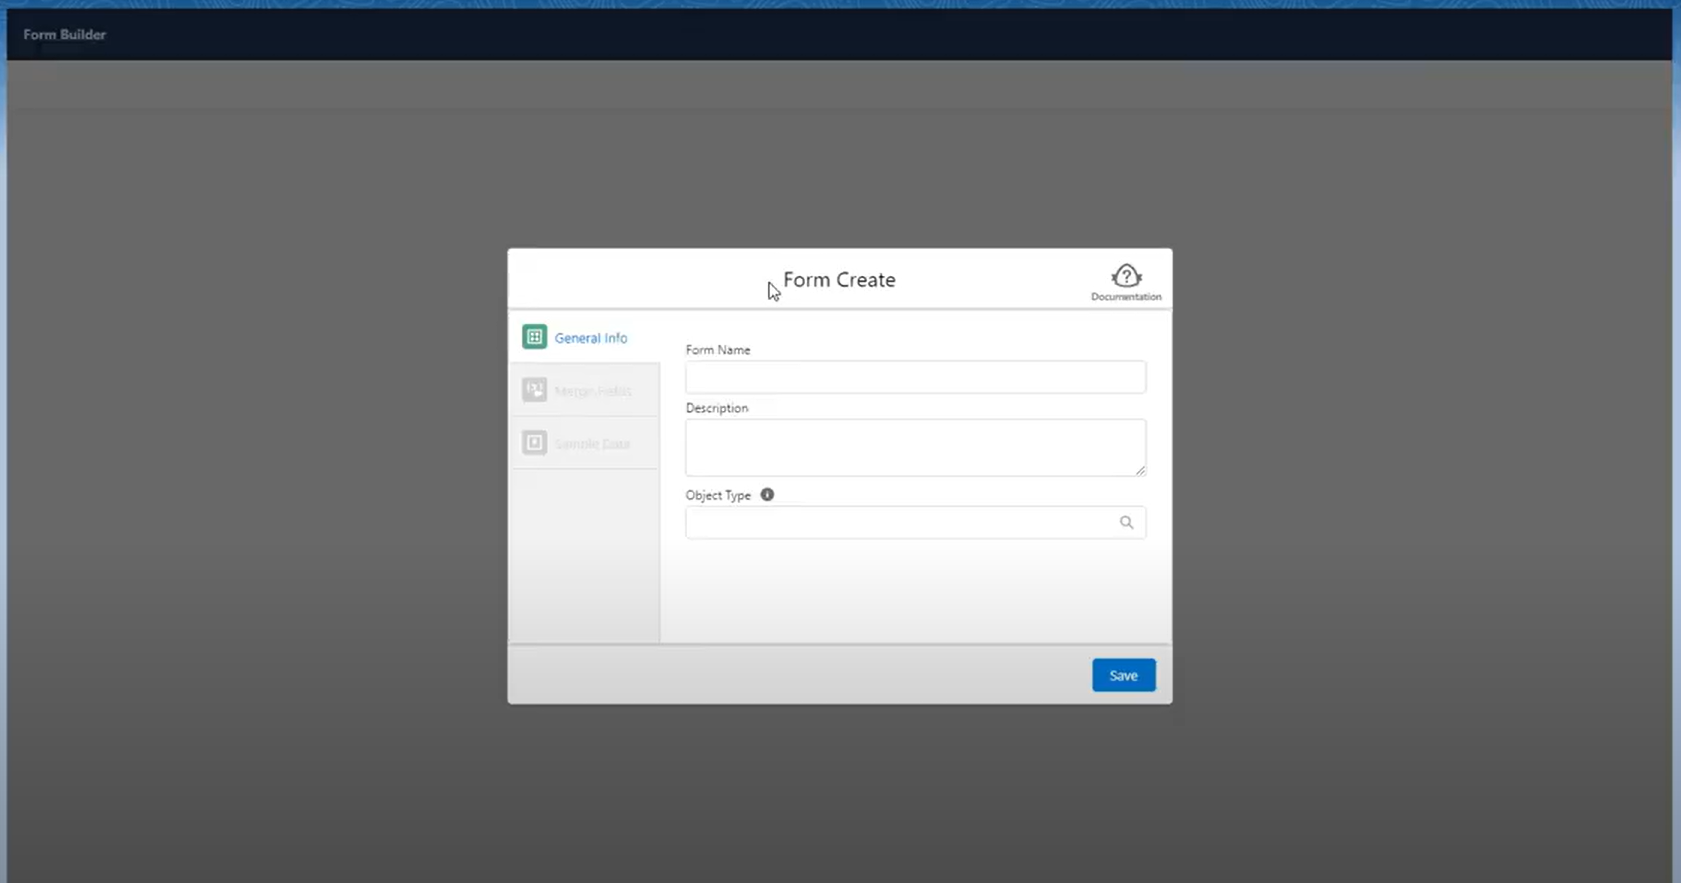
- Step 1.2: Choose a form template that fits your needs, such as a single-page layout for quick entries.
- Step 1.3: Add fields to capture data by dragging and dropping elements like text boxes, dropdowns, or date pickers onto the form.
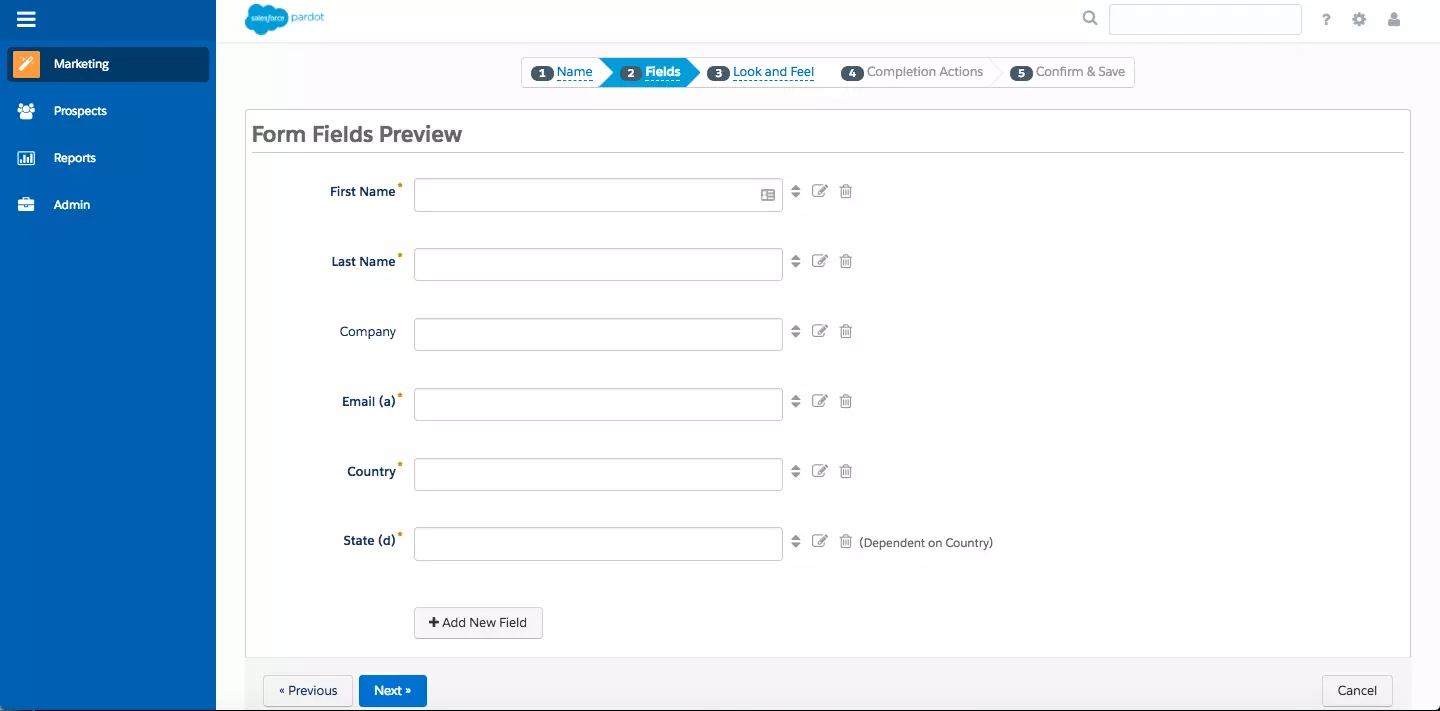
- Step 1.4: Customize the layout, labels, and help text as needed, then save your form to make it ready for use.
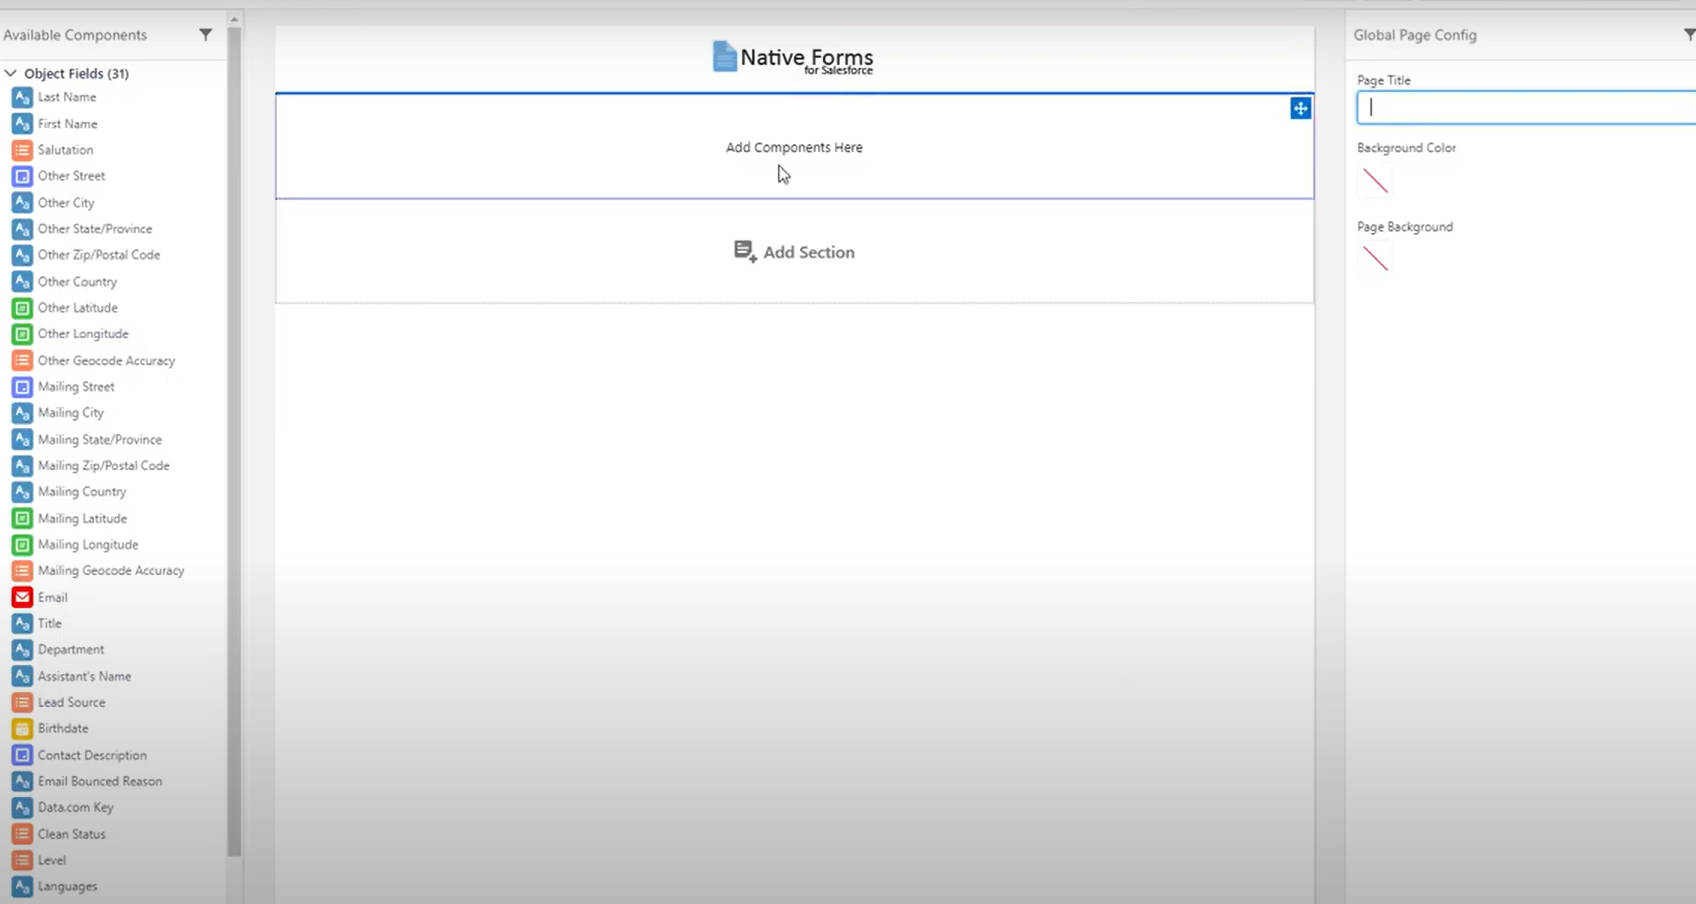
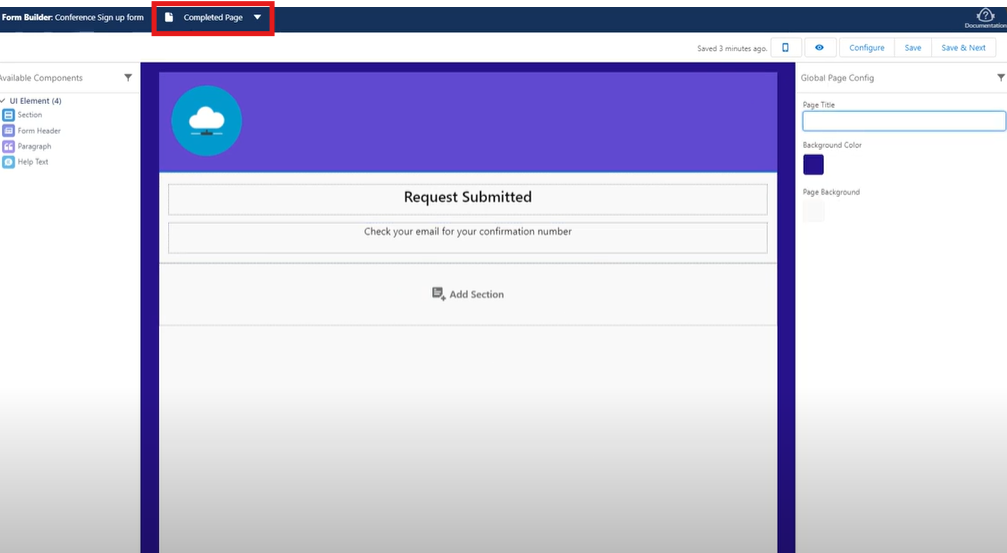
Method 2: Using Salesforce Form Builder Tools and App Options
- Step 2.1: Explore Salesforce’s built-in tools (like Web-to-Lead) or third-party apps like FormAssembly, Titan, or 123FormBuilder.
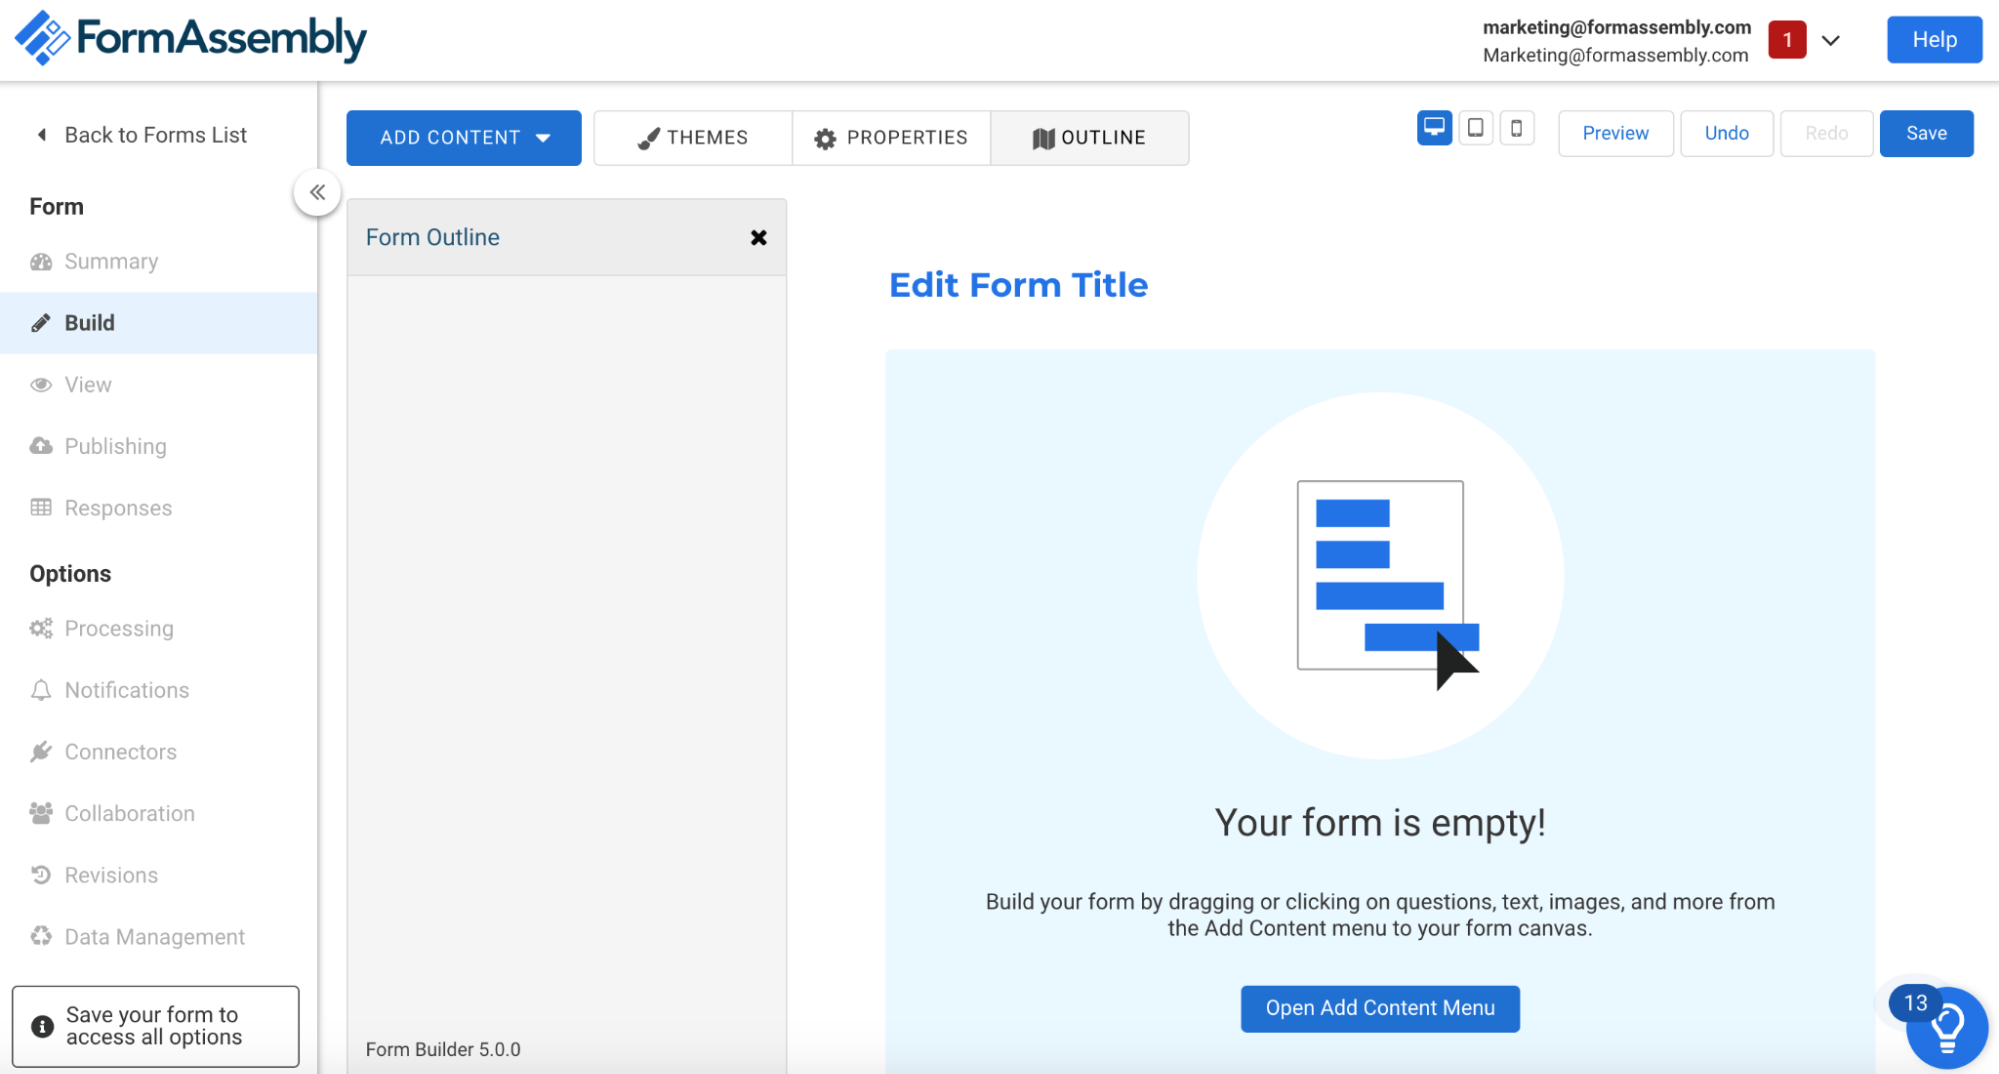
- Step 2.2: Select the app or tool that meets your form requirements, particularly if you need advanced customization.
- Step 2.3: Configure the form settings, adding necessary fields, setting permissions, and specifying submission options to ensure data flows into Salesforce correctly.
Method 3: Creating Web Forms to Collect Data Online
- Step 3.1: Use Web-to-Lead to set up a lead capture form by going to “Setup” > “Web-to-Lead.”
- Step 3.2: Generate the HTML code provided by Salesforce, which you can embed on your website to capture leads directly into Salesforce.
- Step 3.3: Test the form to ensure data is collected correctly, and then publish it online for users to access.
Salesforce Forms – Which Option is Best for You?
Choosing the right type of Salesforce form depends on your specific needs:
- Web-to-Lead Forms: Best for collecting contact information and generating leads directly from your website.
- Custom Forms: Ideal for specialized data collection, such as surveys or product feedback, where you need full customization.
- External Forms: Used for collecting data from external users like customers or partners via websites or landing pages.
- Internal Forms: Best for internal use, such as employee surveys or team-specific data collection.
Consider the complexity of your needs and the level of customization you require when deciding on the right Salesforce form type.


Best Practices for Using Salesforce Forms
- Test Forms Regularly: Periodically test your forms to ensure they work correctly and the data flows smoothly into Salesforce.
- Define Clear Field Labels: Make sure form fields are clearly labeled to guide users in entering the correct information.
- Keep It Simple: Avoid clutter. Only ask for the necessary information to ensure a smooth user experience.
- Set Up Data Validation: Use validation rules to ensure data accuracy before submission.
- Leverage Automation: Automate follow-up actions (e.g., email confirmations, lead assignments) to save time and reduce manual effort.
Salesforce Forms as Tools for Data Management
Salesforce forms are powerful tools for managing your data by capturing, storing, and automating data flows.
- Centralized Data Collection: Keep all customer, lead, and form submissions in one place for easy access and analysis.
- Automation Integration: Automatically update records, trigger actions, and send notifications based on form submissions.
- Data Accuracy: With validation rules and conditional logic, Salesforce forms help maintain data integrity.
Using Salesforce forms effectively streamlines your data management and enhances your ability to make informed decisions.
Also, take a look at the best data management tools that you can use in your organization.
Salesforce Dynamic Forms
Salesforce Dynamic Forms allow you to create flexible, adaptive forms that change based on user input or specific conditions. These forms help streamline the data collection process and improve user experience by showing only relevant fields. They are customizable and support advanced features like field visibility rules, conditional logic, and automated workflows.
Dynamic Features to Create a Form
Form Validation
- Salesforce Dynamic Forms allow you to set rules for validating data before submission, ensuring accuracy.
- You can set required fields, limit the type of data entered (like numbers or dates), and check for specific conditions (e.g., email format).
- This reduces the chances of incorrect or incomplete data being submitted.
Form Guidance and Suggestions
- Salesforce provides helpful hints and suggestions within the form fields to guide users in filling out the form correctly.
- You can include tooltips, placeholder text, or help icons to assist users in understanding what data is expected.
- This improves user experience and reduces form submission errors.
Automation Options for Post-Submission Data Processing
- After a form is submitted, you can set up automation rules to process the data, such as creating leads, updating records, or triggering workflow actions.
- Use Salesforce Flow or Process Builder to automate follow-up actions like sending confirmation emails or assigning tasks to team members.
- This saves time and ensures that the right steps are automatically taken after each form submission.
Benefits and Uses of Salesforce Forms

Dynamic and extraordinary, Salesforce Forms brings custom forms to the different needs of your industry—whether that is enrollments in higher education or new patient registration in healthcare—so you automate data collection to drive productivity. Whether financial services, government, or nonprofit, Salesforce Forms can help take things to a whole new level; plus, they’re great for surveys, contact forms, and web-to-lead forms.
- Higher Education: Allow Salesforce Forms for application submissions and enrollment processes, making it easy for students and staff to apply on admission matters.
- Financial Services: Salesforce Forms makes client onboarding and KYC processes easier.
- Healthcare: This will help make patient registration easy for new patients by saving them a lot of time collecting information through Salesforce Forms.
- Government: Program signup forms make it easier for citizens to deal with the government and apply for public service.
- Non-Profit Organization: Donation forms easily engage donors and track contribution records.
Next Steps After Collecting Data from Salesforce Forms
- Review and Cleanse Data: Ensure the collected data is accurate and complete. Remove duplicates and fix any inconsistencies.
- Integrate with Other Systems: Sync your Salesforce data with other tools or platforms for further analysis or automation, like CRMs or marketing platforms.
- Segment and Categorize: Organize the data into relevant segments (e.g., leads, customers, feedback) for easier analysis and action.
- Automate Follow-Up Actions: Set up workflows or automation to trigger actions based on form submissions, like sending emails or creating tasks.
- Analyze and Report: Use Salesforce’s reporting tools to analyze the data, track trends, and generate actionable insights.
What should you look for in a Salesforce platform?
Your Salesforce Form should be accessible and understandable to both technical personnel and laymen. You don’t have to go back and resolve any form change or issue. It should integrate well with other applications. The ability to connect with a single app won’t take you anywhere.
The advanced capabilities will allow you to integrate with third-party and popular apps. It should also allow form authentication with SAML and a Salesforce experience in the Cloud. Every company has unique needs regarding Data Collection, so choosing the best Salesforce Form platform plays a key role here.
Conclusion
You can collect valuable customer data and increase your sales with Salesforce Forms. It helps establish a strong relationship with all your customers without predefined codes. Automating the data increases your productivity.
The Salesforce Platform is the world’s number one enterprise Platform-as-a-Service (PaaS), and with web-to-lead forms for Salesforce, your business gets the best exposure. It helps to analyze and collect actionable insights for your business. It is sufficient to say that Salesforce has been designed to help bridge the gap between companies and customers. You can augment your conversions with Salesforce forms and get better customer satisfaction. Streamline your Salesforce Data Collection and optimize the entire process.
As an advanced Salesforce user, you will probably deal with many data sources internally and from other Software-as-a-Service (SaaS) offerings. Having all this data in one place helps in analysis and accelerates the Decision-Making Process. Accomplishing this requires integration with all such third-party apps and services. In such cases, Hevo Data can be a great asset in your ETL tool portfolio.
Sign up for a 14-day free trial and simplify your data integration process. Check out the pricing details to understand which plan fulfills all your business needs.
FAQ on Salesforce Forms
1. How to use dynamic forms in Salesforce?
Dynamic forms in Salesforce create responsive, flexible forms that adapt to user input. Using the Lightning App Builder, you can add dynamic fields and logic to forms.
2. Can Microsoft Forms be used in Salesforce?
Not directly, but you can integrate Microsoft Forms with Salesforce using third-party tools like Zapier or Microsoft Power Automate.
3. How do I add a form field in Salesforce?
In Salesforce, navigate to the Object Manager, select the object you want to add a field, go to Fields & Relationships, and click New to create a new field.
4. Can you make fillable forms in Salesforce?
You can create fillable forms in Salesforce using Lightning App Builder, Visualforce, or third-party tools like FormAssembly.
