


Managing data ingestion from Azure Blob Storage to Snowflake can be cumbersome. Manual processes lead to inefficiencies and potential errors while also increasing operational overhead.
But what if you could automate the process, ensure data integrity, and leverage real-time analytics?
In this guide, I’ll walk you through the automated process of Snowflake Snowpipe Azure Integration. We’ll cover everything from configuring your Azure Blob Storage environment to creating the necessary Snowflake Snowpipe components and monitoring the data loading process. Let’s get started!
Table of Contents
What is Azure?

Azure is Microsoft’s cloud computing platform that provides a range of services, including virtual machines, databases, AI tools, and networking, allowing businesses to build, manage, and deploy applications and services on a global scale.
What is Snowpipe?

Snowpipe is a continuous data loading service in Snowflake that automatically ingests data into Snowflake from external sources like Amazon S3, enabling near real-time data availability for analysis with minimal manual intervention.
Hevo enables seamless data migration from various sources to Snowflake by automating the entire ETL (Extract, Transform, Load) process. With Hevo, you can effortlessly move data into Snowflake, ensuring it is transformed and ready for analysis in real-time without manual coding or maintenance.
What Hevo Offers:
- No-Code Interface: Easily set up data pipelines with minimal effort.
- Automated Data Integration: Connects to 150+ sources and loads data to Snowflake.
- Real-Time Sync: Ensures your data is always up-to-date.
Why Integrate Snowpipe with Azure?
Traditional data loading processes face several challenges that can hinder your efficiency and reliability, some of which are listed below. With the integration, you can overcome these challenges.
- Data Latency: Although Azure Blob Storage is efficient for storing large volumes of data, it typically requires batch processes to load the data into the analytics platform. Snowflake Snowpipe Azure automates this entire process, reducing data availability latency.
- Scalability: Handling fluctuating volumes of data can overload the resources, leading to performance issues. Snowpipe Azure integration enables streamless data loading without affecting the performance.
- Cost Management: It follows the pay-as-you-go model, which minimizes resource usage only when data is loaded into the Snowpipe.
A Snowflake-native app to monitor Fivetran costs

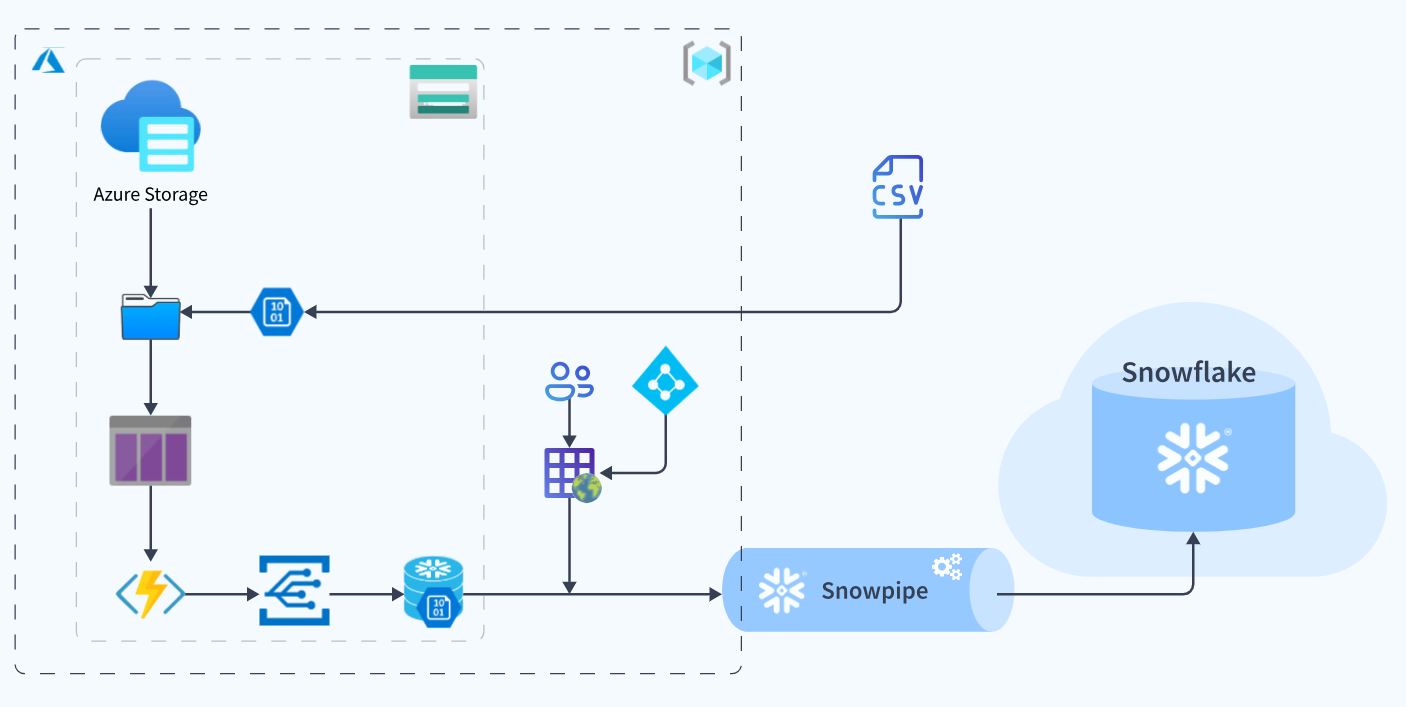
Loading data from Azure Blob Storage to Snowflake using Snowpipe
In this section, you will see how you can integrate your Azure Blob storage account with Snowpipe and ultimately load the data directly from Blob Storage to the table where you want to store it in Snowflake, therefore forming your Snowflake Snowpipe Azure pipeline.
Step 1: Create a table in Snowflake
We need to create a table with the required schema and compatible file columns, so that we can load our data in that table.
You can create a table using the command:
CREATE TABLE bank_transactions
(
TransactionNo INT,
DateTime DATETIME,
FromAccount INT,
ToAccount INT,
Amount Number,
TypeOfTransaction VARCHAR(20),
TranDescription VARCHAR(200),
Source VARCHAR(100)
);
Note: <bank_transactions> is the table’s name, which you can give as your choice.

Step 2: Configuring the Azure Storage Account
2. a) We need to create a Storage Account on Azure using the user interface and name it accordingly.
For this tutorial, I have named it ‘snowflakesnowpipe1234’.
Note: While configuring your storage account, you need to select StorageV2 or higher.

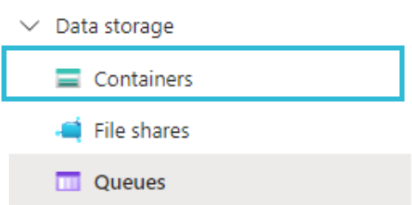
2. b) After the successful creation of the Storage Account, we need to create a Container so that we can stage our files that will be loaded in Snowflake.
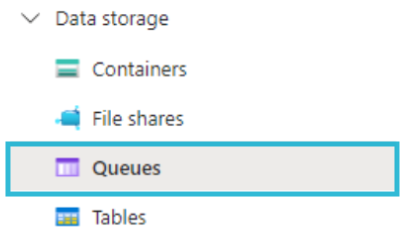
2. c) After creating a container, we need to create a storage queue as an endpoint of the event subscription.
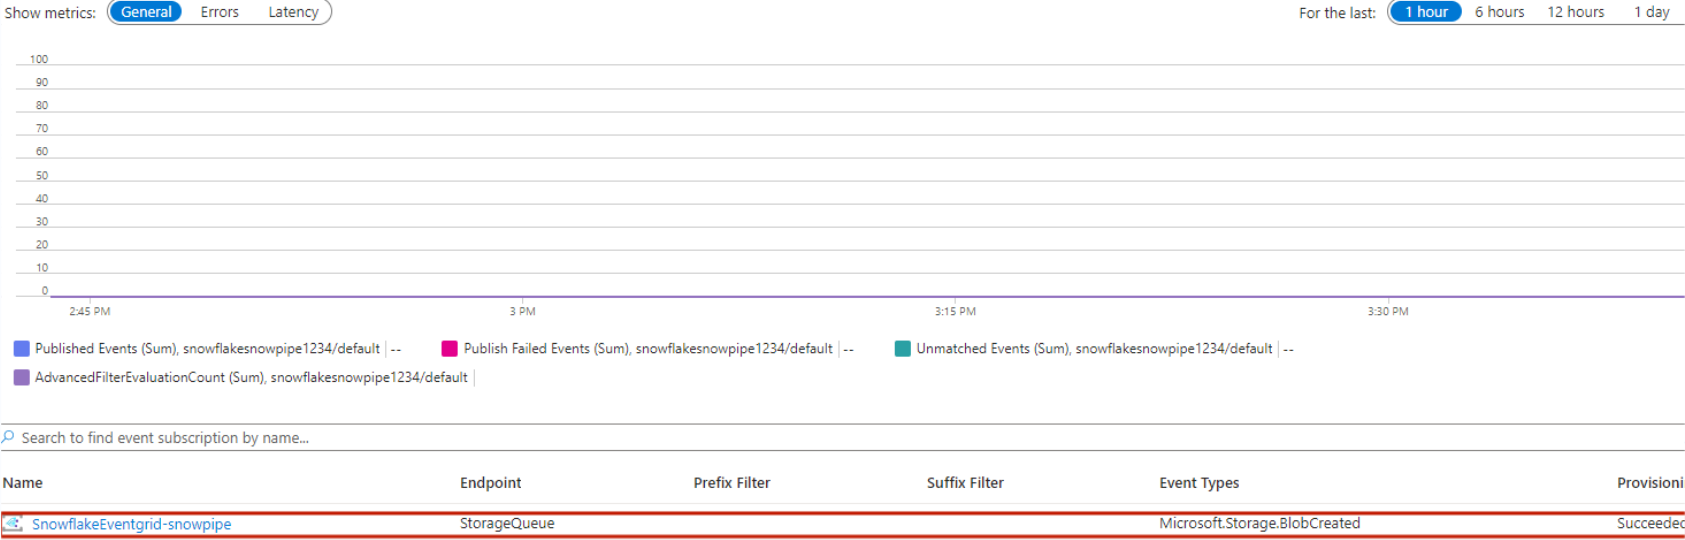
2.d) We need to create the Event Grid Subscription for the blob container and set the endpoint for the storage queue.
2. e) To create an Integration in Snowflake, you must have the Storage Queue URL and the Azure Acting Directory ID.
If we go to Queues, we will get the URL.
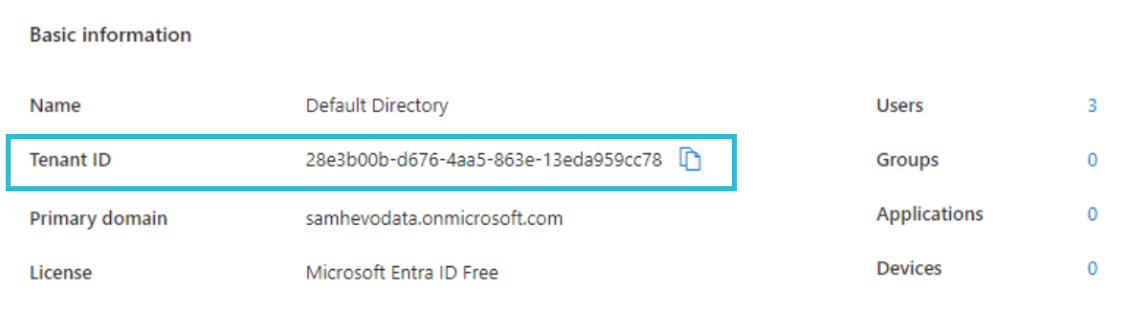
2. f) For Azure Active Directory ID, Go to Home >> Active Directory.Note: The Tenant ID is your Azure Active Directory ID
Step 3: Create a Notification Integration in Snowflake
We need to create an integration in Snowflake that would allow Snowflake access to our Azure Blob Storage Account.
You can create an integration using the following command:
CREATE NOTIFICATION INTEGRATION BANKING_SNOWPIPE_EVENT
ENABLED=TRUE
TYPE=QUEUE
NOTIFICATION_PROVIDER=AZURE_STORAGE_QUEUE
AZURE_STORAGE_QUEUE_PRIMARY_URI=""
AZURE_TENANT_ID=''

Note: Use the Queue URL and the Azure Active Directory ID in place of primary_uri and azure_tenant_id.

To verify the integration that you just created, use the following command:
SHOW INTEGRATIONS;
Step 4: Authenticate the Azure Account and Grant Access
We need to perform this step so that Azure authenticates our Snowflake account.
4. a) You can execute the DESC integration command to display the integration description and use the AZURE_CONSENT_URL to establish a protocol between your Azure Account and Snowflake Account.

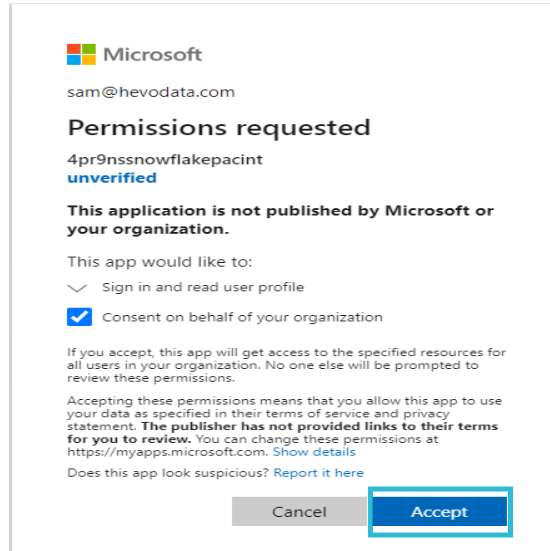
4. b) Copy the URL, open it in a new window, and accept the permissions requested.
4. c) Grant Snowflake access to the Storage Queue.
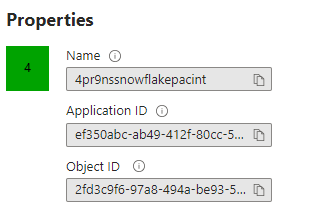
4. d) Go to the Enterprise Applications for the Application Details.
Your Snowflake Application Name and ID will be displayed. Keep those in mind; we will need them later.
Step 5: Grant Access to the Storage Queue through IAM
We need to give the enterprise application access to our storage queue to load data into Snowflake automatically. Perform the given steps to grant access to your storage queue.
What we are essentially doing is adding a new custom role and assigning a few permissions to that role. In members, we will add our new enterprise application to that role.
5. a) Go to Storage Account >> IAM.
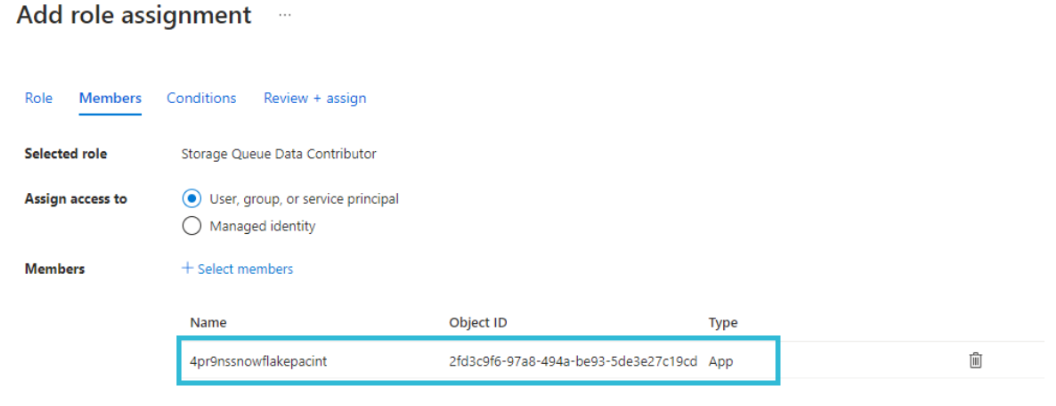
5.b) To add a new role assignment, Go to Role Assignment >> Add >> Add Role Assignment.
5. c) Assign the Role to the Snowflake Application Name.
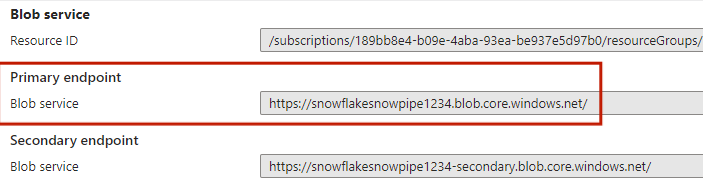
Step 6: Blob Service Endpoint and SAS
To create a snowflake stage, we will need a blob service endpoint and shared access signature.
6. a) To get the Blob Service Endpoint, go to Storage Account >> Settings >> Endpoints.
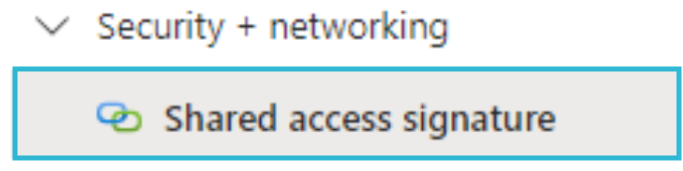
6. b) To get the Shared Access Signature, go to Security + networking.
6. c) To create a shared access signature string, check the Allowed Services, Resources Types, Start and End Expiry Date, and Time. After configuring everything, click on the Generate SAS connection string.
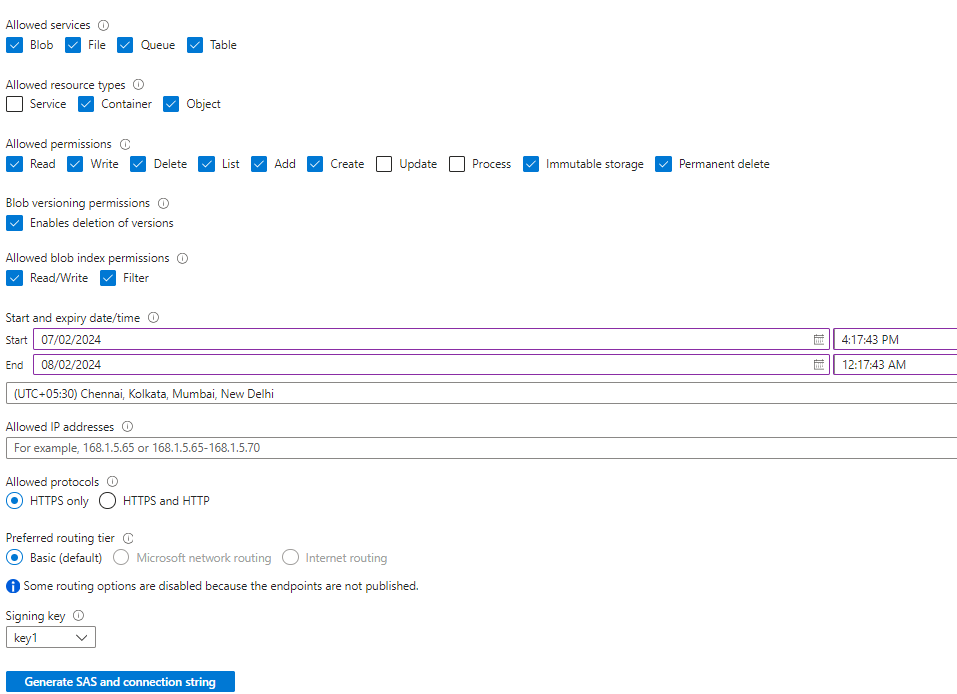
6.d)Scroll down and keep the Blob Service SAS URL.
Step 7: Create a stage and pipe in Snowflake
7. a) You must create a stage in Snowflake where the data would be kept using the following command:
CREATE OR REPLACE STAGE BANK_TRANSACTIONS_STAGE
url = ''
credentials = (azure_sas_token='');
Note: The URL will not have the HTTP part; it will be Azure, and the Sas Token will remove the HTTP part. It should start with ‘?’.
Example for the above command:
CREATE OR REPLACE STAGE BANK_TRANSACTIONS_STAGE
url = 'azure://snowflakesnowpipe1234.blob.core.windows.net/banking-data-blob/'
credentials = (azure_sas_token='?sv=2022-11-02&ss=bfqt&srt=co&sp=rwdlaciytfx&se=2024-08-01T18:47:43Z&st=2024-07-02T10:47:43Z&spr=https&sig=3MeWvsw4MW%2BtpaD7iU6XhD1gijsuTe327YP0sbX2Aqs%3D');
After you have created the stage, you will receive a status saying stage created.

7. b) Next, we need to create a pipe to ingest our data from Azure to Snowflake
We can use the following query to create the snowpipe:
CREATE OR REPLACE pipe "BANK_TRANSACTIONS_PIPE"
auto_ingest=true
integration = 'BANKING_SNOWPIPE_EVENT'
as
copy into BANK_TRANSACTIONS
from @BANK_TRANSACTIONS_STAGE
file_format = (type='CSV');
Note: Here, auto_ingest = true signifies that the files will be automatically ingested into Snowflake once they are in the staging area.

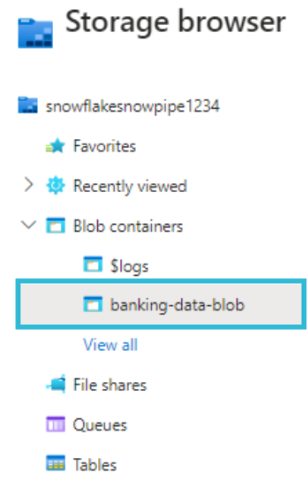
7. c) Next, we need to upload our files to Azure. You can do so by navigating to the blob container you just created and dragging and dropping your file into the container.
7.d) In the worksheet, use the command to look at the files present in the stage:
ls @BANK_TRANSACTIONS_STAGE;Here, you can see that the data you uploaded to Azure is already in the stage.
7. e) Refresh the pipe using the command given below:
ALTER PIPE BANK_TRANSACTIONS_PIPE REFRESH;

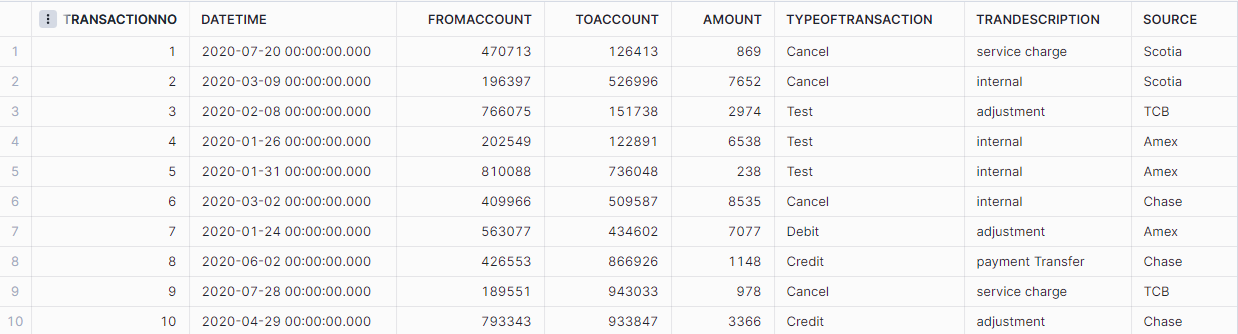
7. f) Now, run the SELECT command to view the data that has been loaded.
Learn More:
- Azure Synapse vs Snowflake
- Azure SQL to Snowflake integration
- Azure Blob Storage to Snowflake integration
Conclusion
In this blog, we discussed integrating Snowflake Snowpipe with Azure, which not only streamlines the process of loading data into Snowflake but also enhances scalability, efficiency, and real-time data availability.
You can achieve seamless data integration and analytics by leveraging Hevo’s automated data pipeline. Want to try Hevo? Sign up now for the 14-day free trial.
Don’t know where to start from? We are here to help you. Schedule a demo now.
Frequently Asked Questions (FAQs)
- Can Snowflake replace ETL?
By using Snowflake as your Data Lake or Data Warehouse, ETL can be actively eliminated, as no pre-load transformations or pre-schema definitions are required for loading data into Snowflake.
- Is Snowpipe serverless?
Snowpipe is a serverless feature, so you do not have to worry about loading and changing data.
- What is an Azure equivalent of Snowflake?
Azure Databricks is a cloud-based big data analytics platform optimized for Azure. It offers an Apache Spark-based platform to simplify the handling of big data.
Share it with your connections.
-
 Share To LinkedIn
-
 Share To Facebook
-
 Share To X
-
 Copy Link


