 Quick Takeaway
Migrating data from PostgreSQL to Amazon Redshift can be done manually by exporting as CSV, uploading to S3, and using the COPY command, or automating the process with AWS DMS. Hevo simplifies this further with its no-code platform, automating data extraction, transformation, and loading in real-time.
Here’s a detailed breakdown of the three methods:
- Step 1: Set Up AWS DMS
- Step 2: Configure Source and Target Endpoints
- Step 3: Create a Migration Task
- Step 4: Monitor and Validate Migration
- Step 1: Configure PostgreSQL to export data as CSV
- Step 2: Load CSV to S3 Bucket
- Step 3: Move Data from S3 to Redshift
- Step 1: Configure Postgres as your Source
- Step 2: Configure Redhsift as your Destination
Are you tired of locally storing and managing files on your Postgres server? You can move your precious data to a powerful destination such as Amazon Redshift, and that too within minutes.
Data engineers are given the task of moving data between storage systems like applications, databases, data warehouses, and data lakes. This can be exhaustive and cumbersome. You can follow this simple step-by-step approach to transfer your data from PostgreSQL to Redshift so that you don’t have any problems with your data migration journey.
Table of Contents
What is PostgreSQL?
PostgreSQL is a powerful open-source relational database known for its flexibility, reliability, and strong support for modern data types. It’s widely used across industries and works seamlessly on Linux, Windows, and macOS.
Key Features of PostgreSQL
- Security-First Design: Includes advanced access controls and supports major security standards like LDAP and GSSAPI.
- Flexible & Developer-Friendly: Supports complex data types and offers full control for custom database setups.
- Open-Source & Cross-Platform: Free to use and runs smoothly on all major operating systems.
- Trusted by Top Companies: Used by Apple, Spotify, Facebook, and more for everyday data operations.
- Reliable & Fault-Tolerant: Features like write-ahead logging ensure data integrity and high availability.
What is Amazon Redshift?
Amazon Redshift is a fully managed cloud data warehouse built for fast and scalable analytics. It uses powerful parallel processing to handle massive data sets and complex queries with ease.
Key Features of Amazon Redshift
- Managed & Cost-Efficient: Redshift handles setup, scaling, and maintenance automatically, with flexible pricing so you only pay for what you use.
- Highly Scalable: Easily scales from gigabytes to petabytes, keeping performance fast as your data grows.
- Optimized for Analytics: Built for OLAP workloads, Redshift runs complex queries quickly on large datasets.
- AWS Ecosystem Integration: Seamlessly connects with services like S3, Glue, and EC2 for streamlined data workflows.
- Serverless, Sharing & Security: Supports serverless queries, secure data sharing, and includes built-in encryption, compression, and high availability.
Why Replicate Data from Postgres to Redshift?
- Analytics: Postgres is a powerful and flexible database, but it’s probably not the best choice for analyzing large volumes of data quickly. Redshift is a columnar database that supports massive analytics workloads.
- Scalability: Redshift can quickly scale without any performance problems, whereas Postgres may not efficiently handle massive datasets.
- OLTP and OLAP: Redshift is designed for Online Analytical Processing (OLAP), making it ideal for complex queries and data analysis. Whereas, Postgres is an Online Transactional Processing (OLTP) database optimized for transactional data and real-time operations.
Methods to Connect or Move PostgreSQL to Redshift
Still exporting CSVs, uploading to S3, and writing custom scripts? Hevo’s no-code platform automates your Postgres to Redshift migration; no manual steps, no data delays.
- 150+ Integrations: Bring in data from Postgres and beyond – quickly and reliably.
- Analytics-Ready Data: Hevo transforms your data to fit Redshift’s schema perfectly.
- Real-Time Pipelines: Keep your Redshift updated without ever writing a script.
Join 2,000+ customers that trust Hevo for hassle-free data flows. See how Meru saved 70% on costs and made insights 4x faster with Hevo.
Move PostgreSQL Data for Free with HevoMethod 1: Migrating Postgres to Redshift with AWS DMS
AWS Database Migration Service (DMS) offers a fully managed way to migrate your PostgreSQL data to Amazon Redshift. It works by setting up a replication instance that connects to both your source (Postgres) and target (Redshift). Once the endpoints are configured, DMS pulls the data from Postgres, stages it in Amazon S3 as CSV files, and then loads it into Redshift using the COPY command. This approach is great if you’re already using AWS and want a flexible, code-free option that handles both full and incremental loads.
For detailed steps, check out this blog on migrating data from PostgreSQL to Amazon Redshift via AWS DMS
Method 2: Connecting Postgres to Redshift Manually
Prerequisites:
- Postgres Server is installed on your local machine.
- Billing is enabled for the AWS account.
Step 1: Configure PostgreSQL to export data as CSV
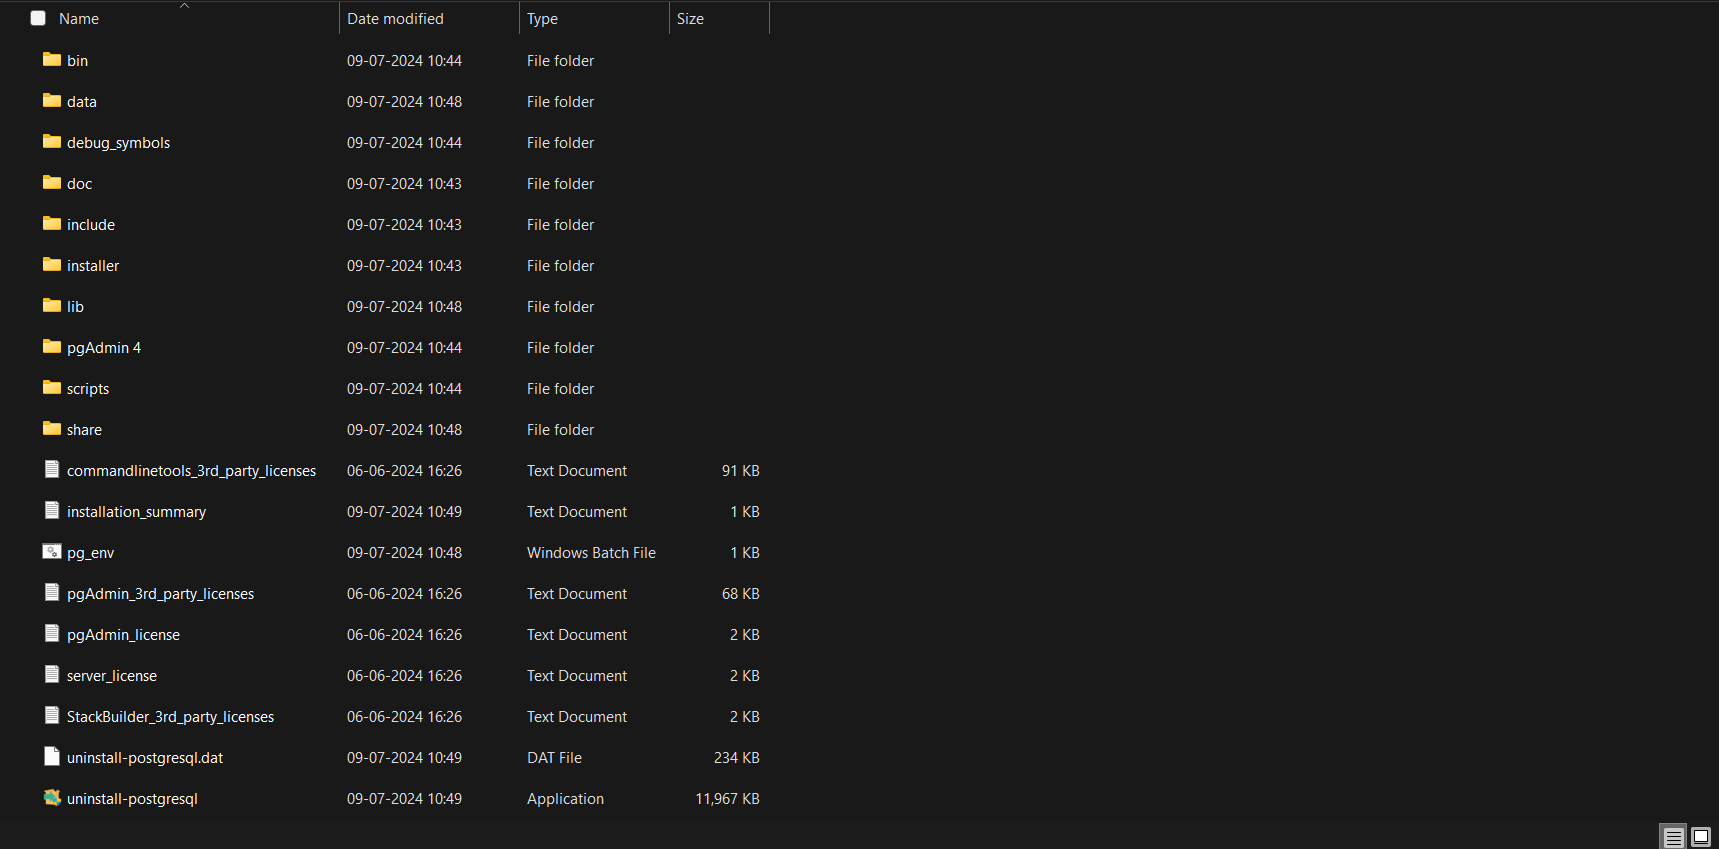
Step 1. a) Go to the directory where PostgreSQL is installed.
Step 1. b) Open Command Prompt from that file location.
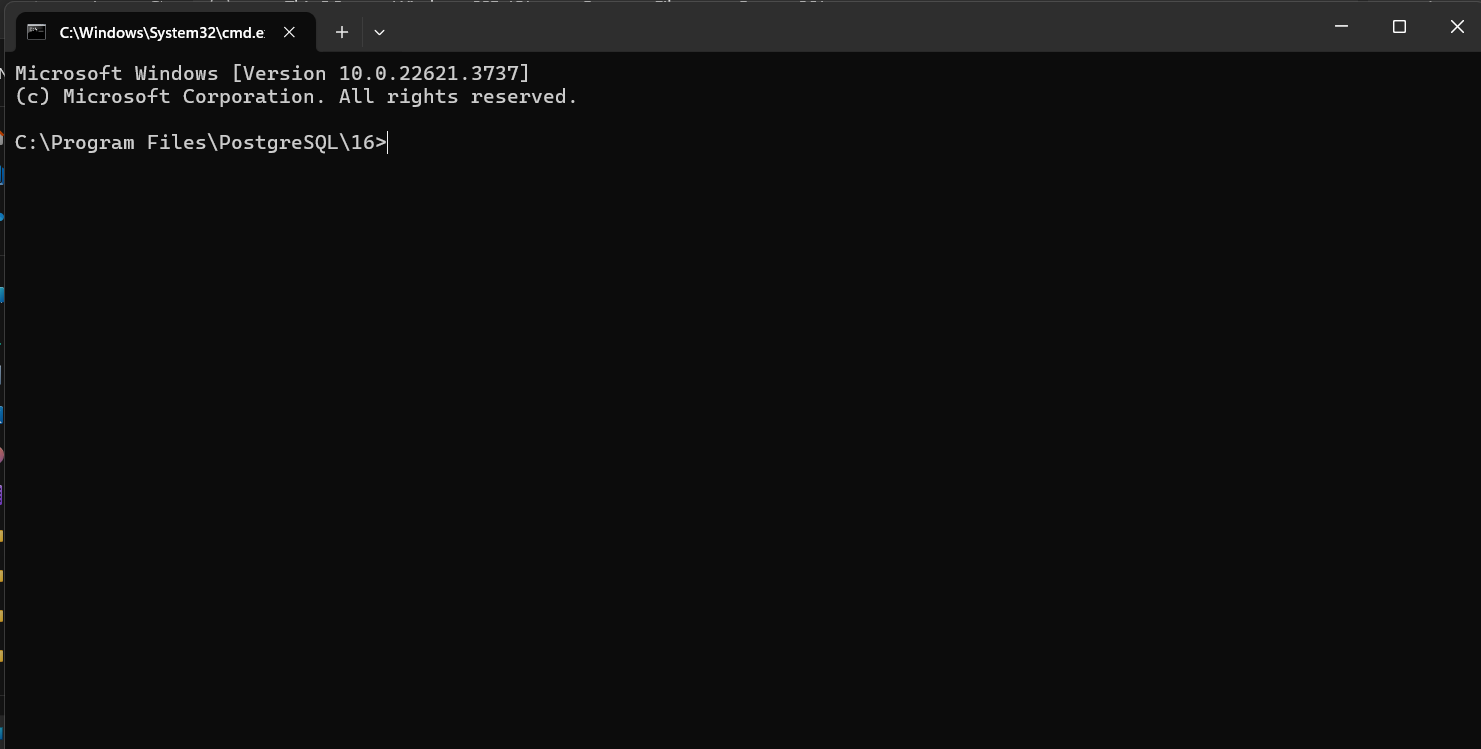
Step 1. c) Now, we need to enter PostgreSQL. To do so, use the command:
psql -U postgres
Step 1. d) To see the list of databases, you can use the command:
\l
I have already created a database named productsdb here. We will be exporting tables from this database.
This is the table I will be exporting.

Step 1. e) To export as .csv, use the following command:
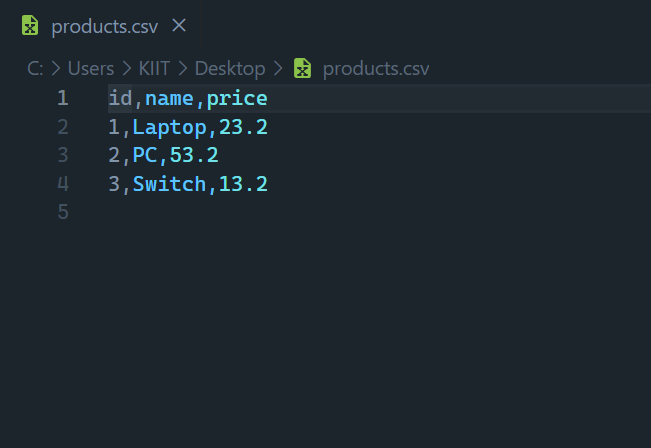
\copy products TO '<your_file_location><your_file_name>.csv' DELIMITER ',' CSV HEADER;Note: This will create a new file at the mentioned location.
Go to your file location to see the saved CSV file.
Step 2: Load CSV to S3 Bucket
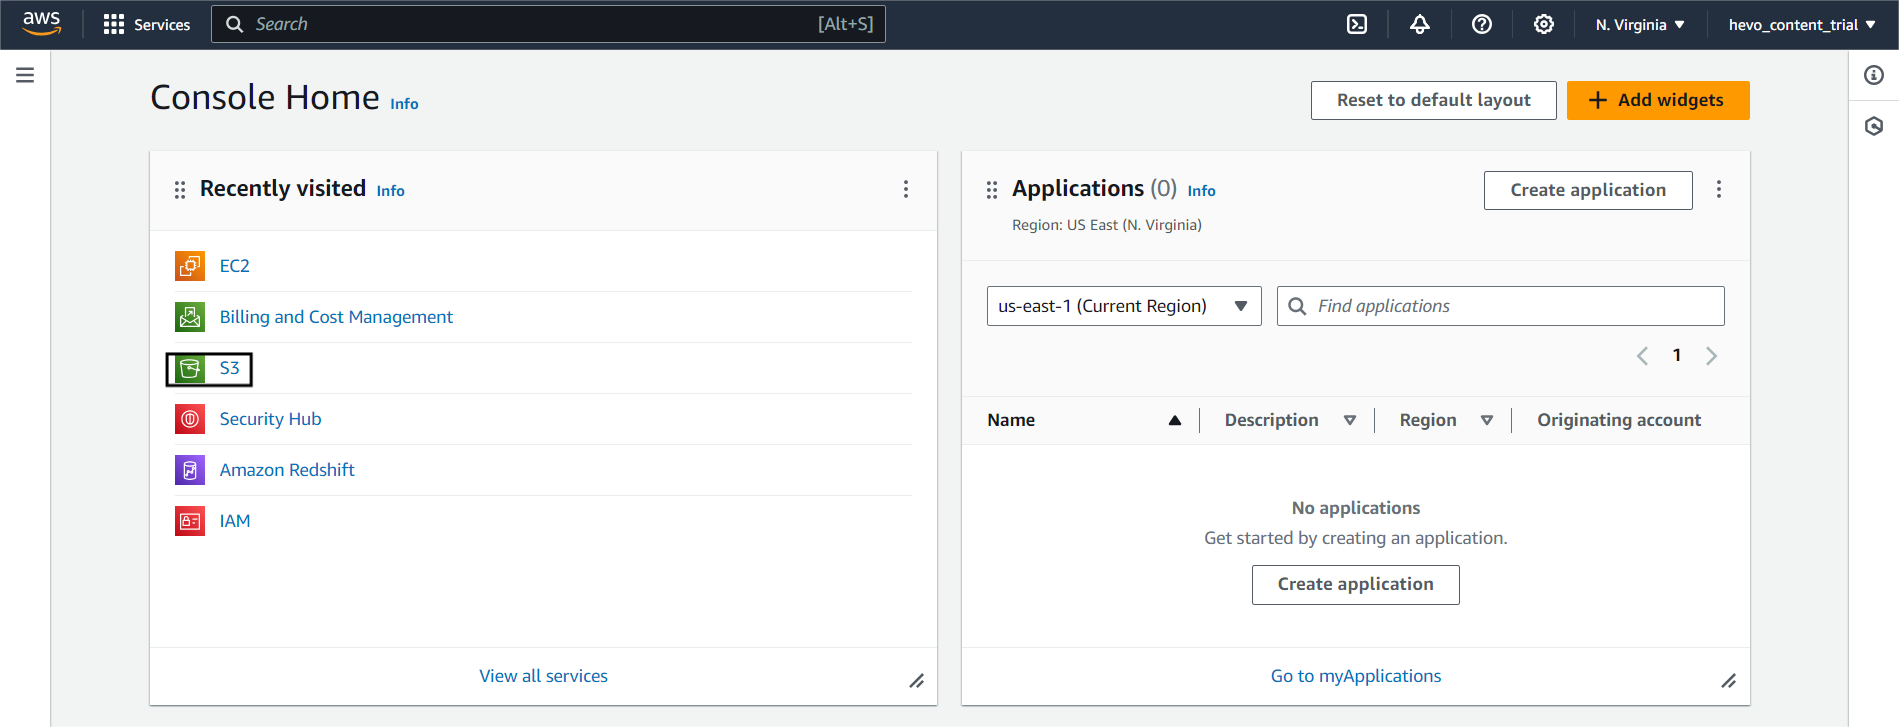
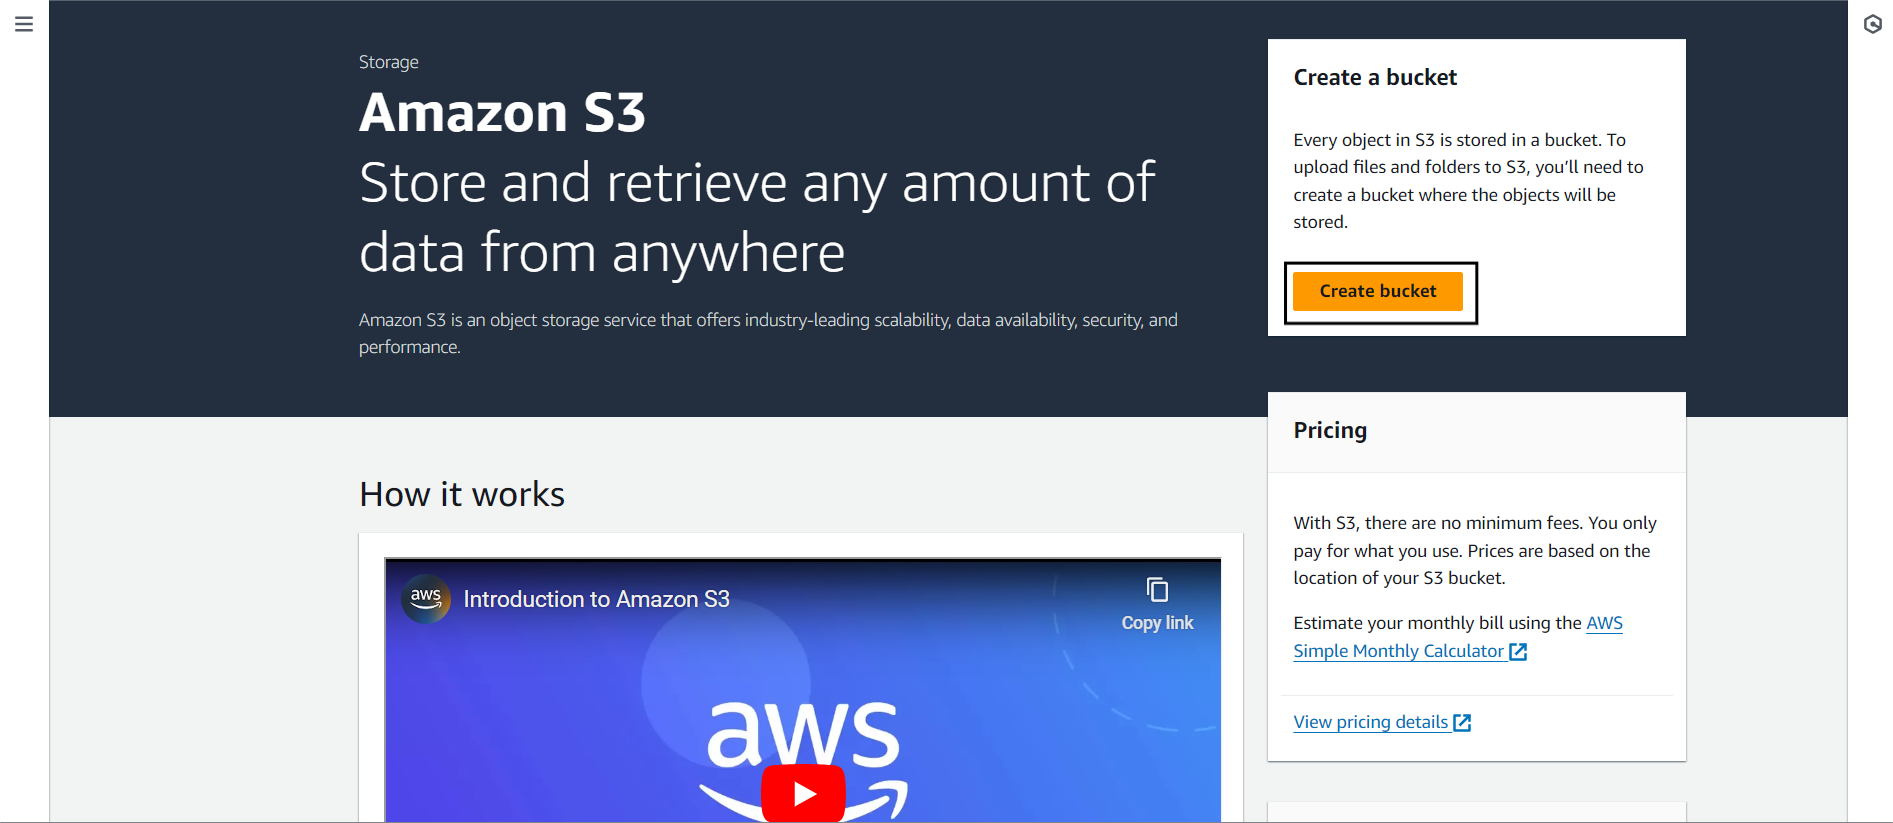
Step 2. a) Log Into your AWS Console and select S3.
Step 2. b) Now, we need to create a new bucket and upload our local CSV file to it.
You can click Create Bucket to create a new bucket.
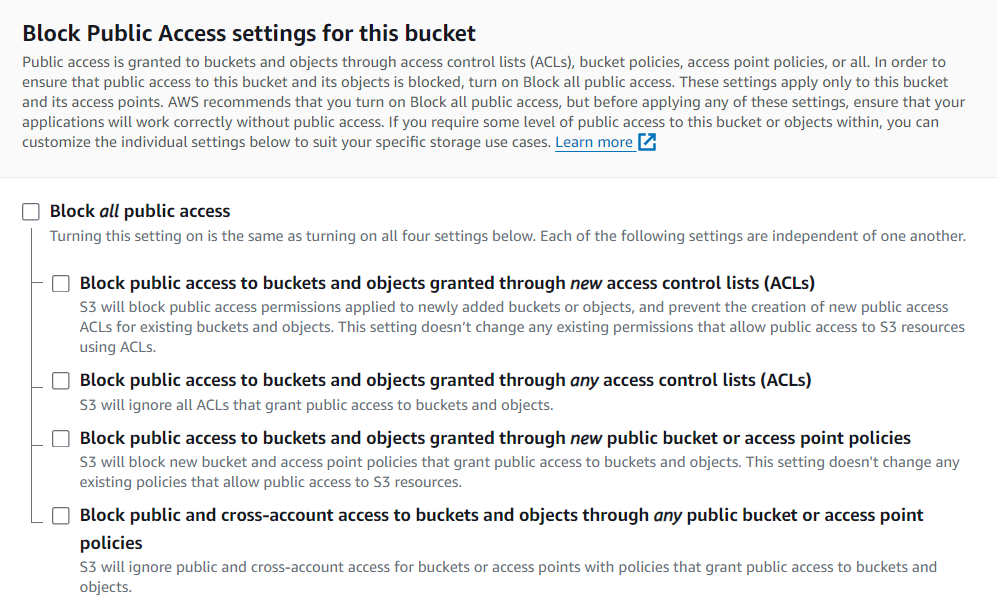
Step 2. c) Fill in the bucket name and required details.
Note: Uncheck Block Public Access
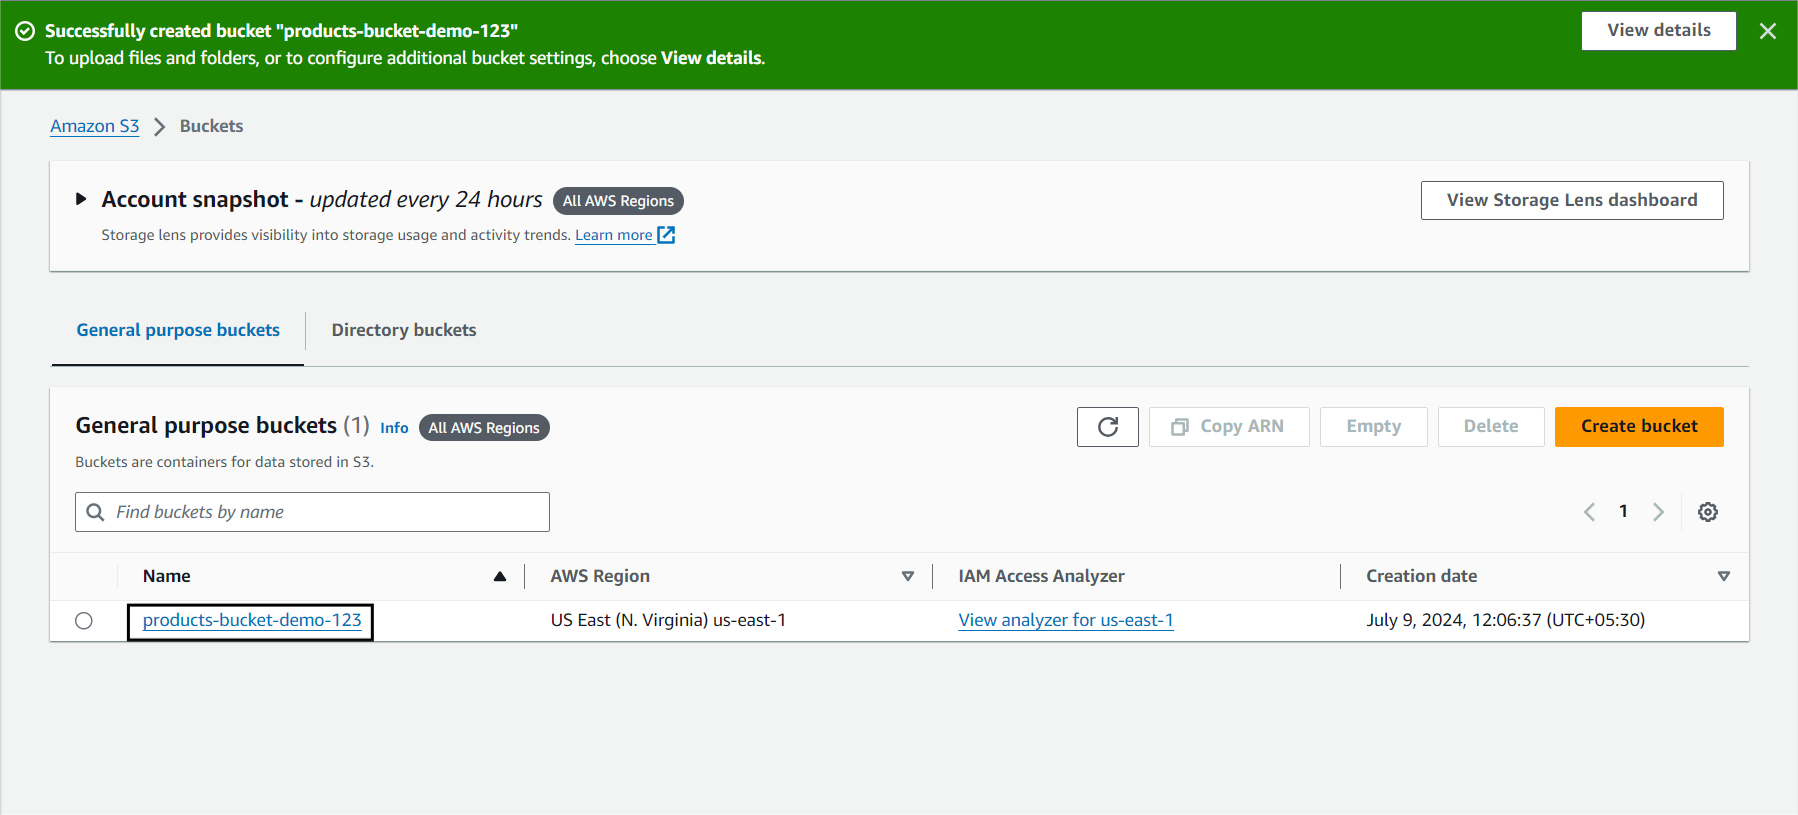
Step 2. d) To upload your CSV file, go to the bucket you created.
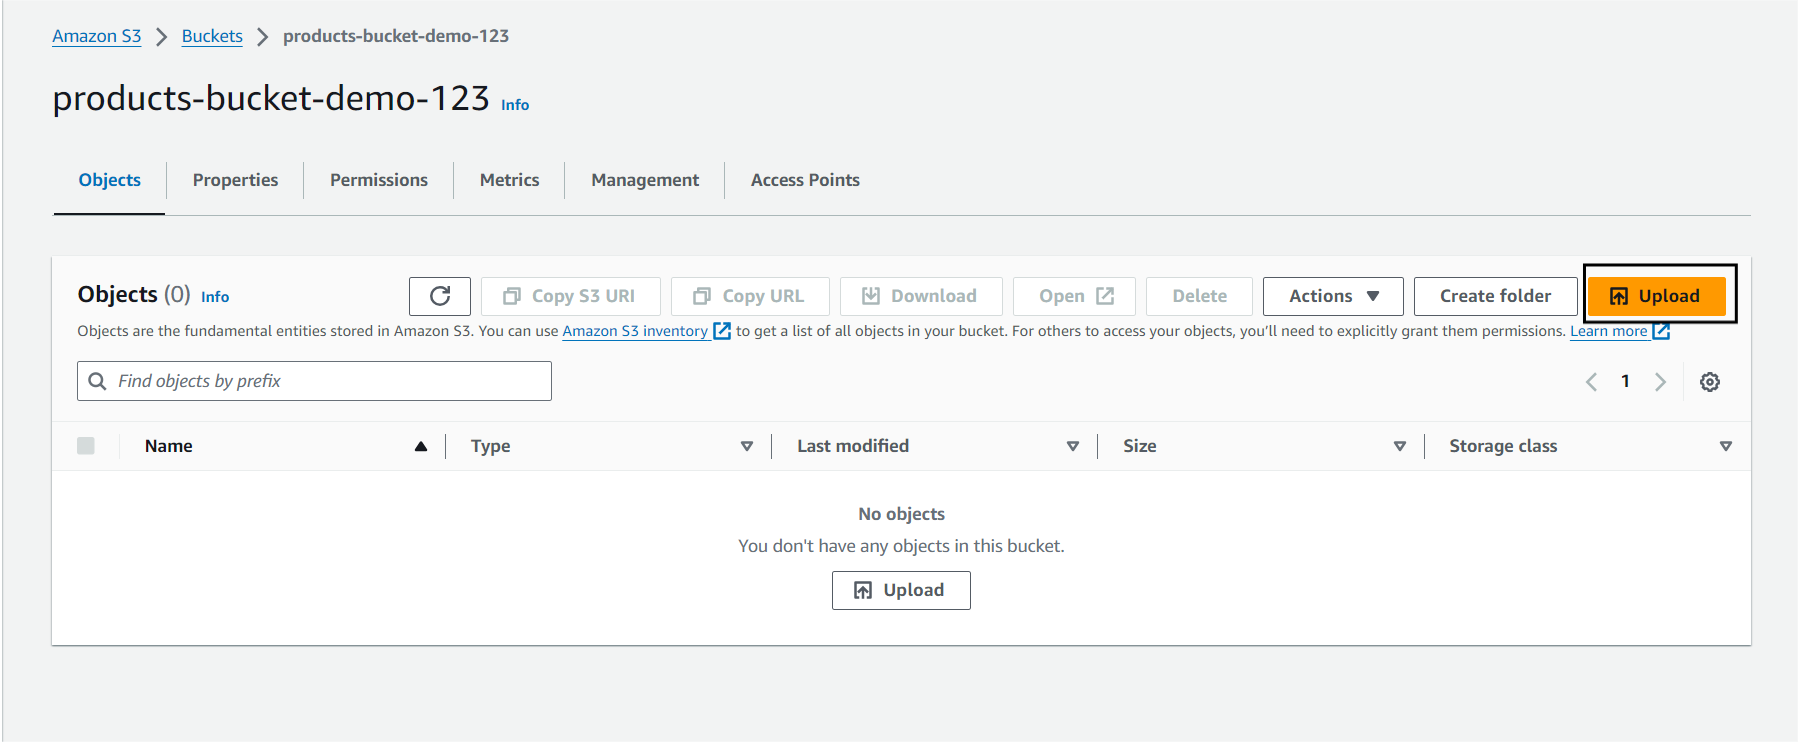
Click on upload to upload the file to this bucket.
You can now see the file you uploaded inside your bucket.

Step 3: Move Data from S3 to Redshift
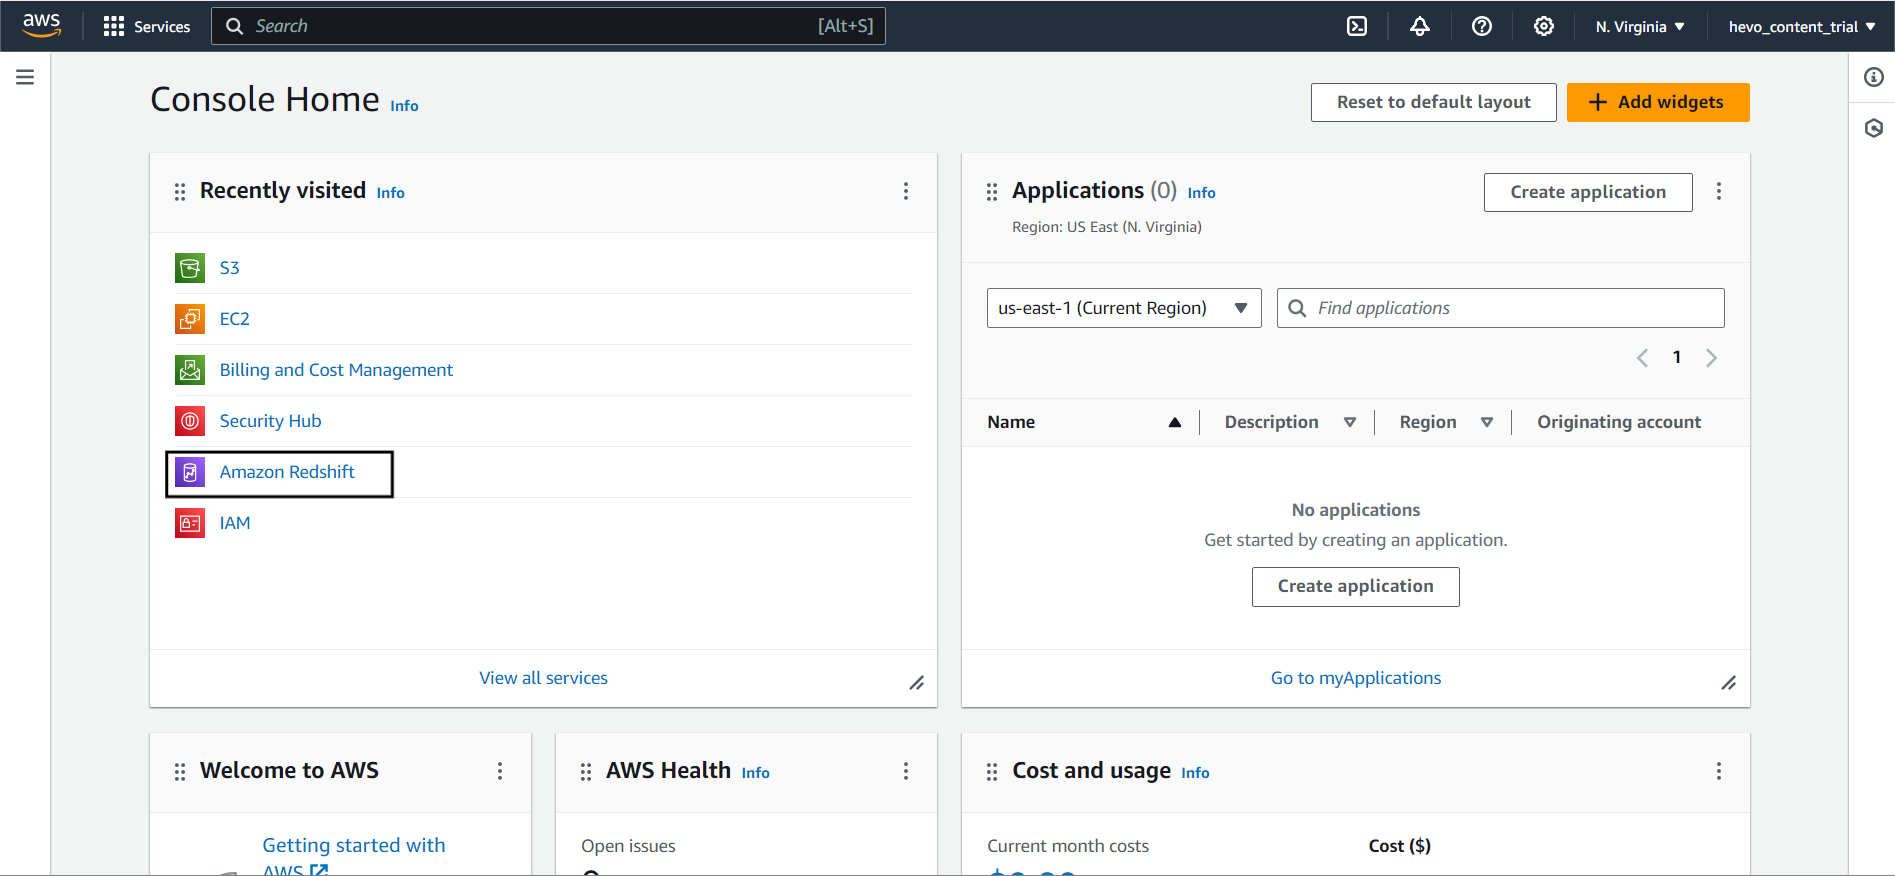
Step 3. a) Go to your AWS Console and select Amazon Redshift.
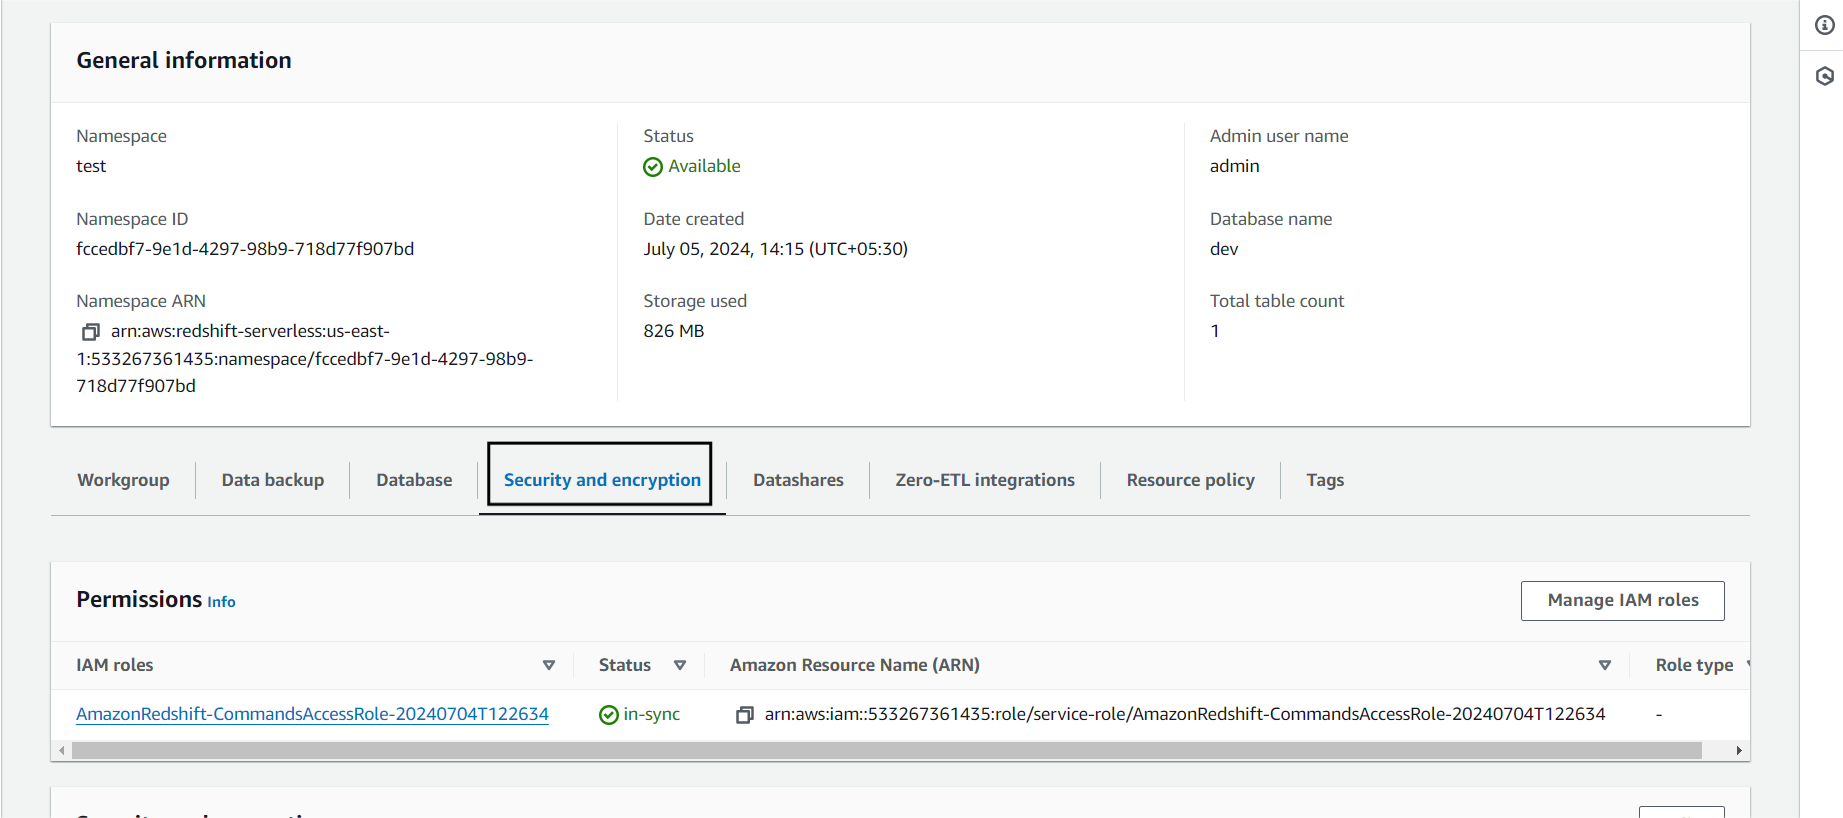
Step 3. b) For Redshift to load data from S3, it needs permission to read data from S3. To assign this permission to Redshift, we can create an IAM role for that and go to Security and Encryption.
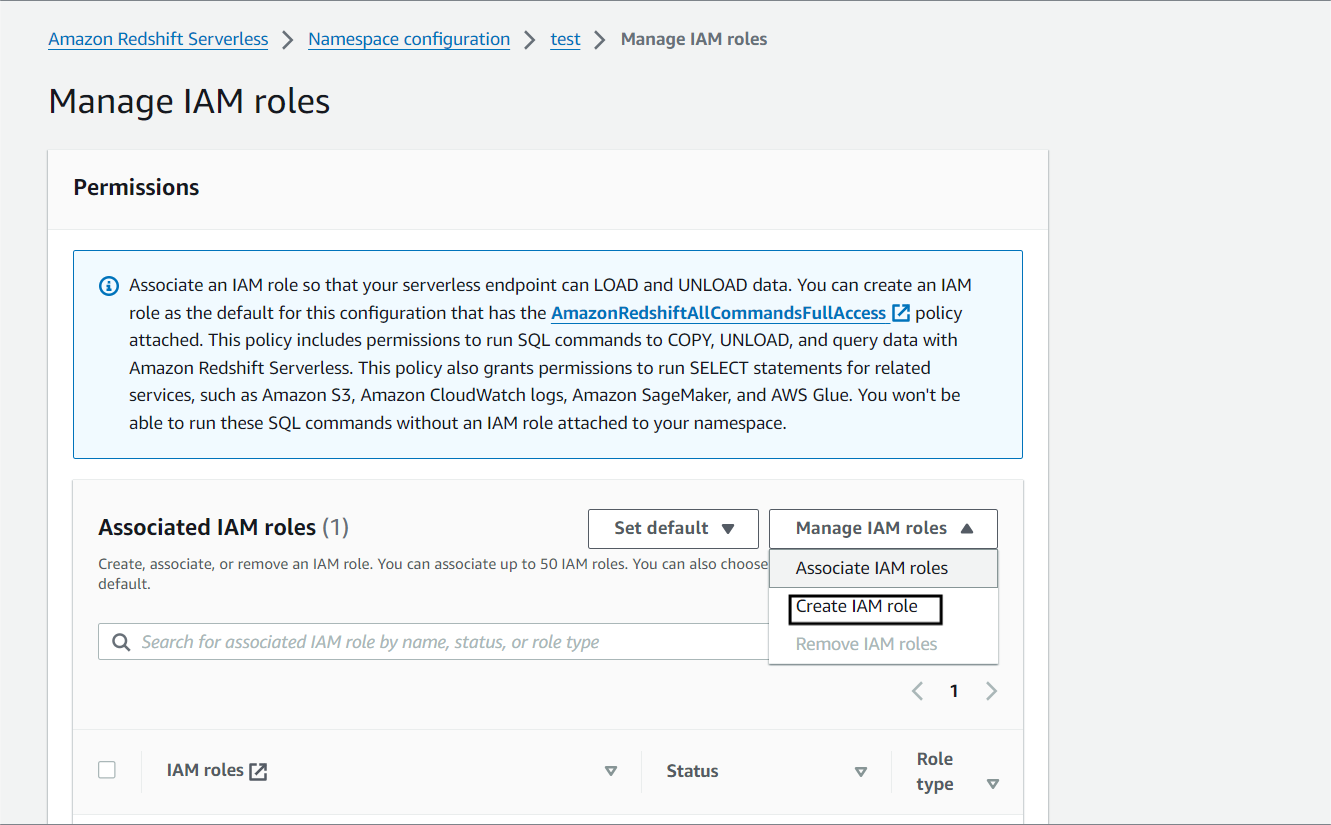
Click on Manage IAM roles followed by Create IAM role.
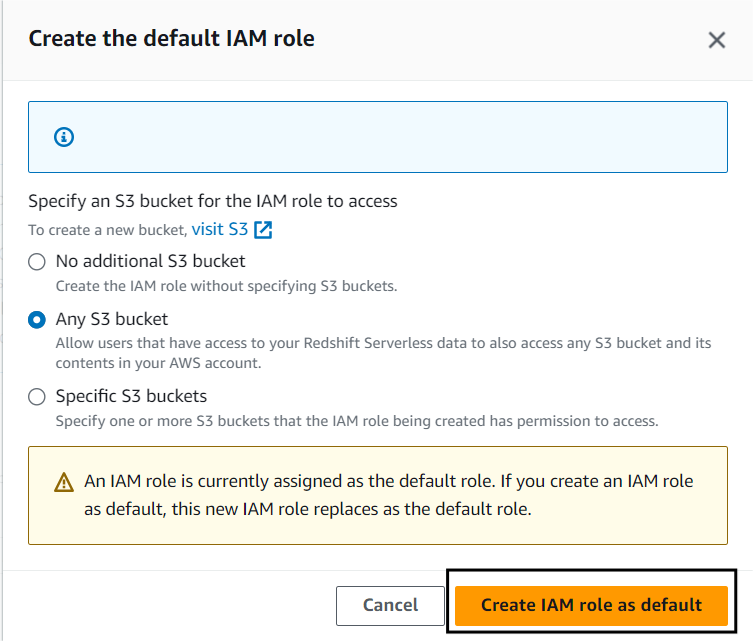
Note: I will select all s3 buckets. You can select specific buckets and give access to them.
Click Create.
Step 3. c) Go back to your Namespace and click on Query Data.

Step 3. d) Click on Load Data to load data in your Namespace.
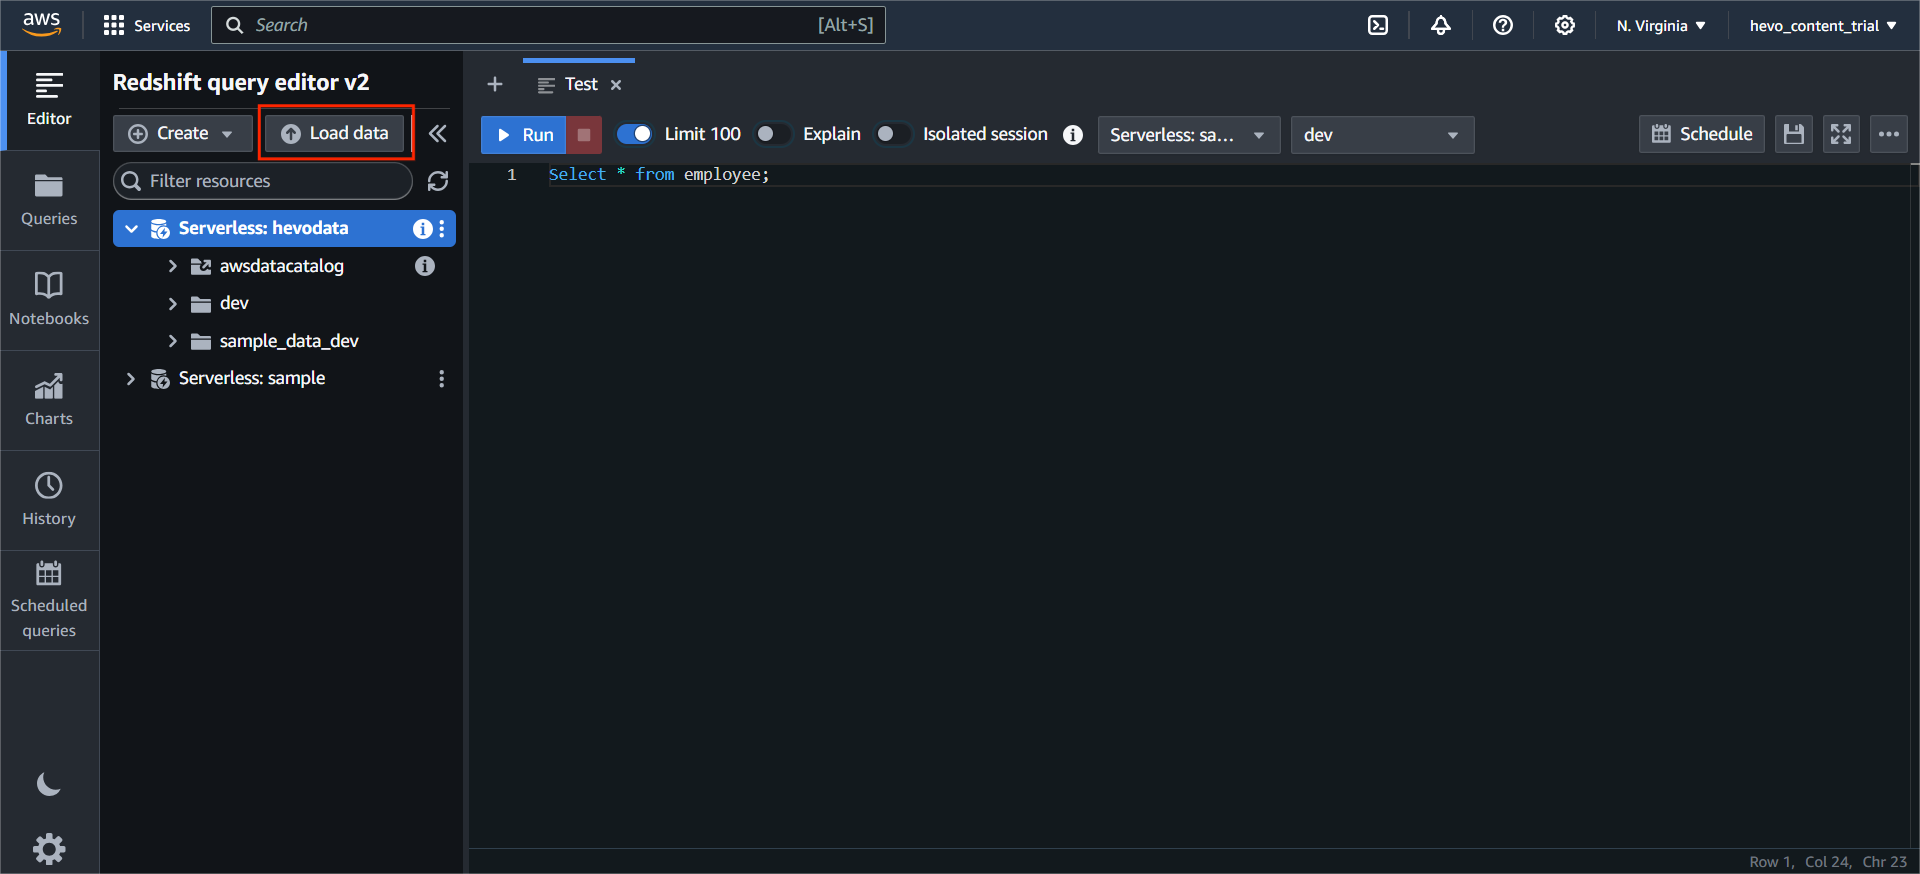
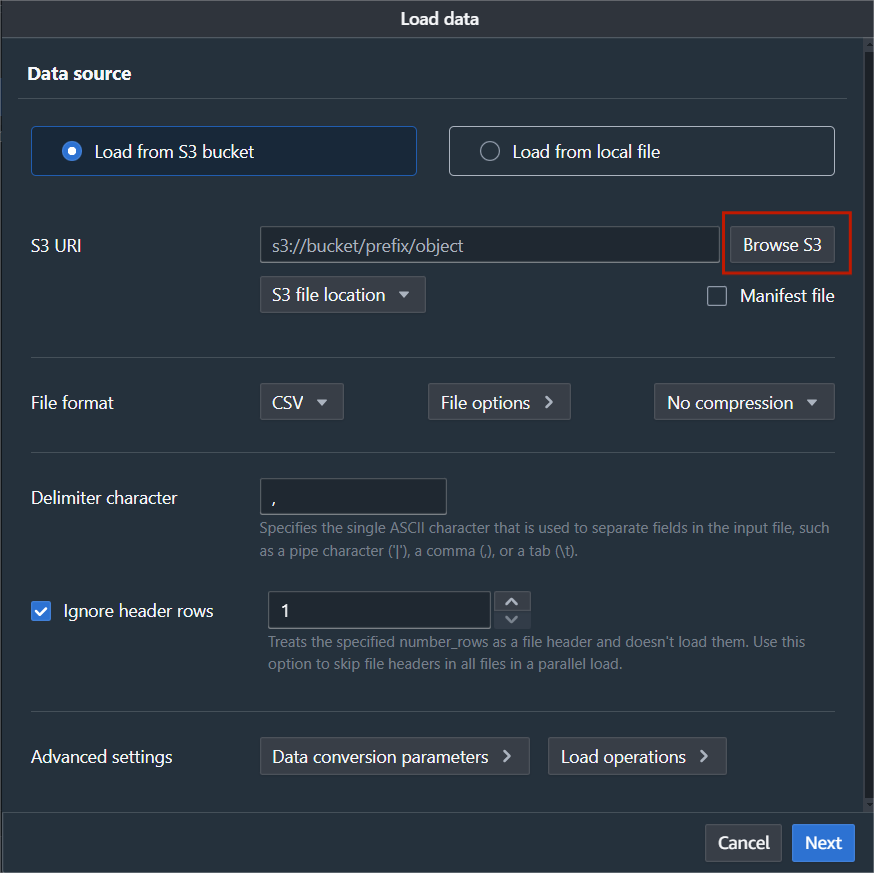
Click on Browse S3 and select the required Bucket.
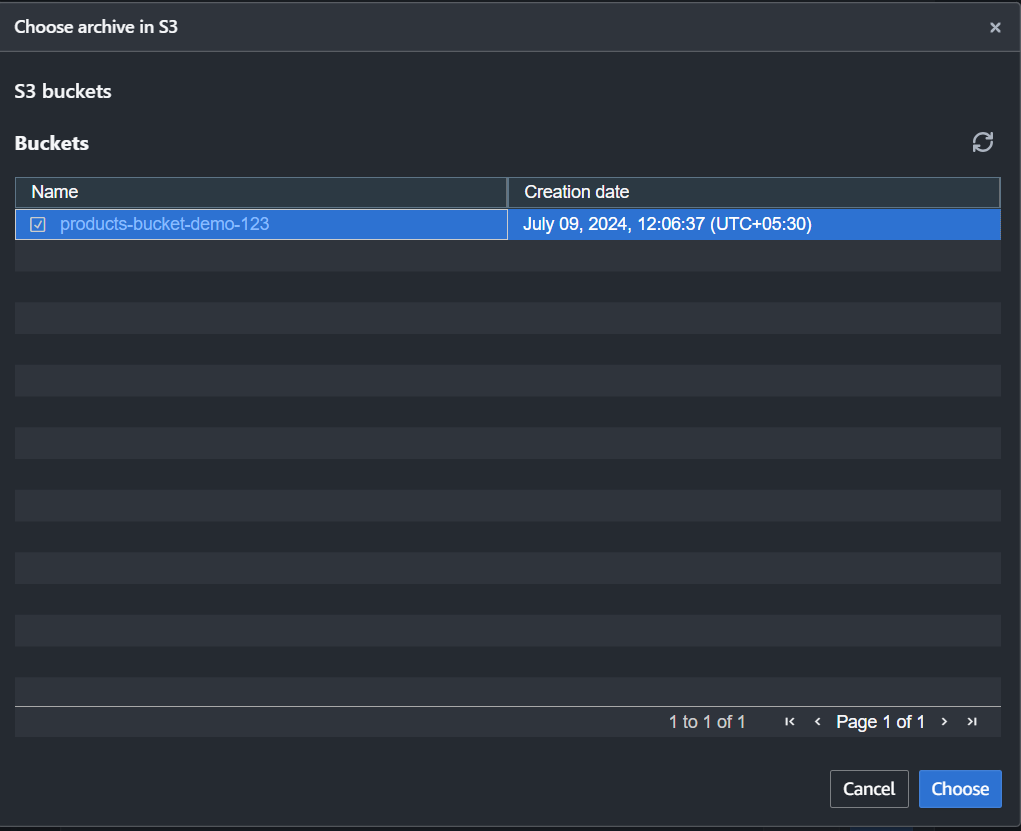
Note: I don’t have a table created, so I will click Create a new table, and Redshift will automatically create a new table.
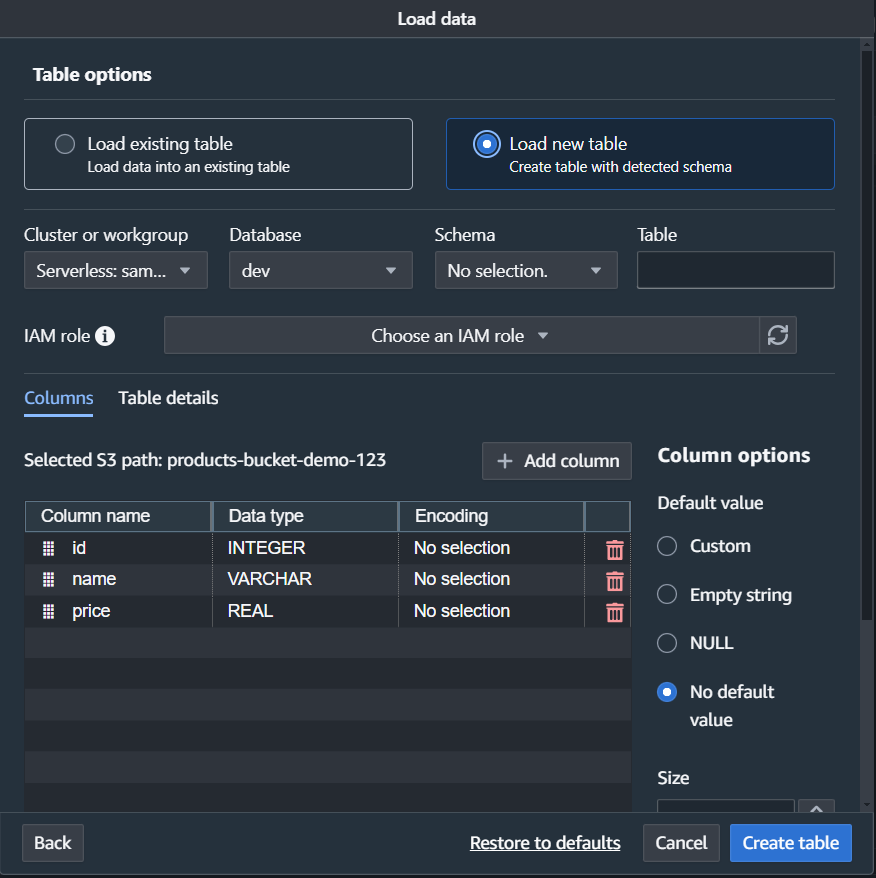
Note: Select the IAM role you just created and click on Create.
Step 3. e) Click on Load Data.
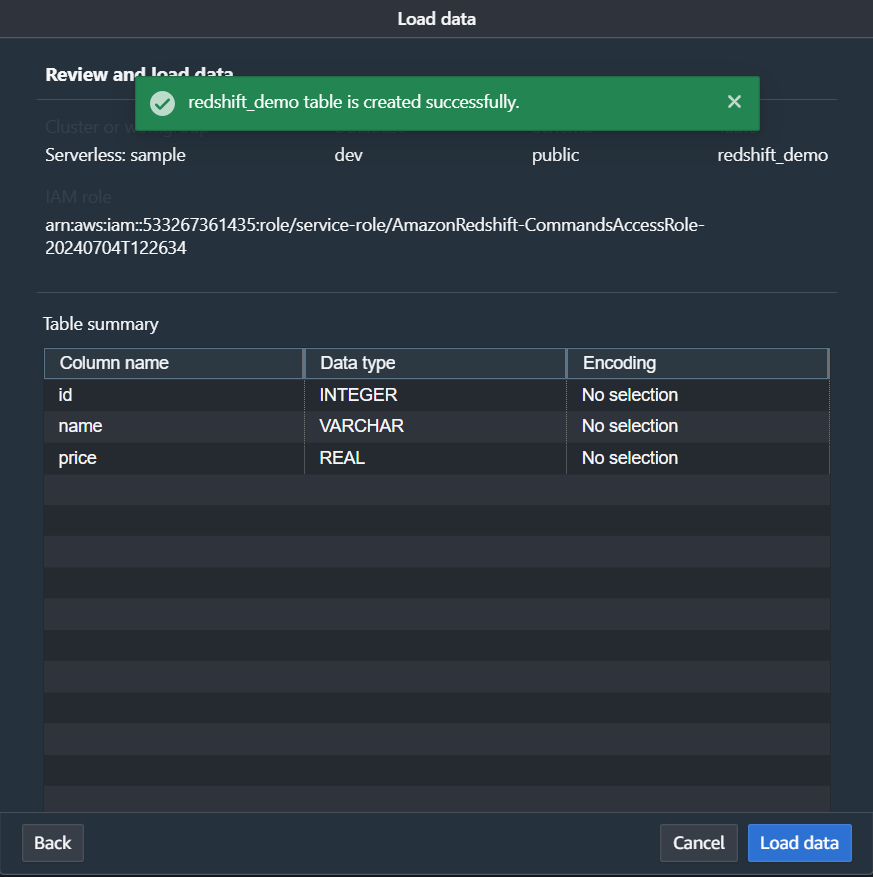
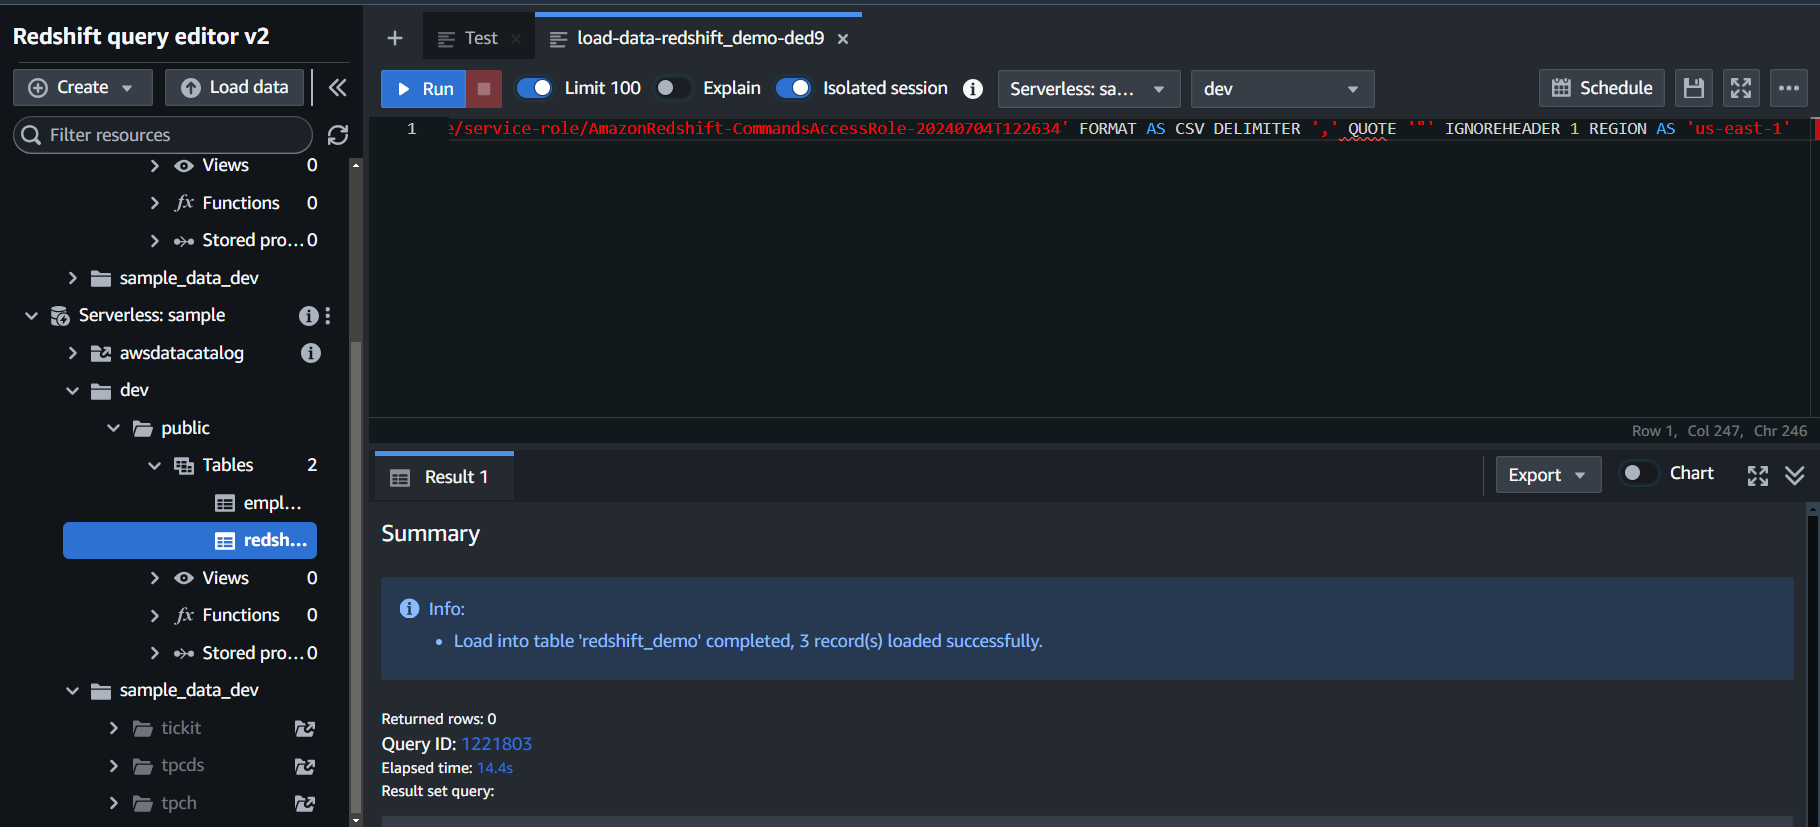
A Query will start that will load your data from S3 to Redshift.
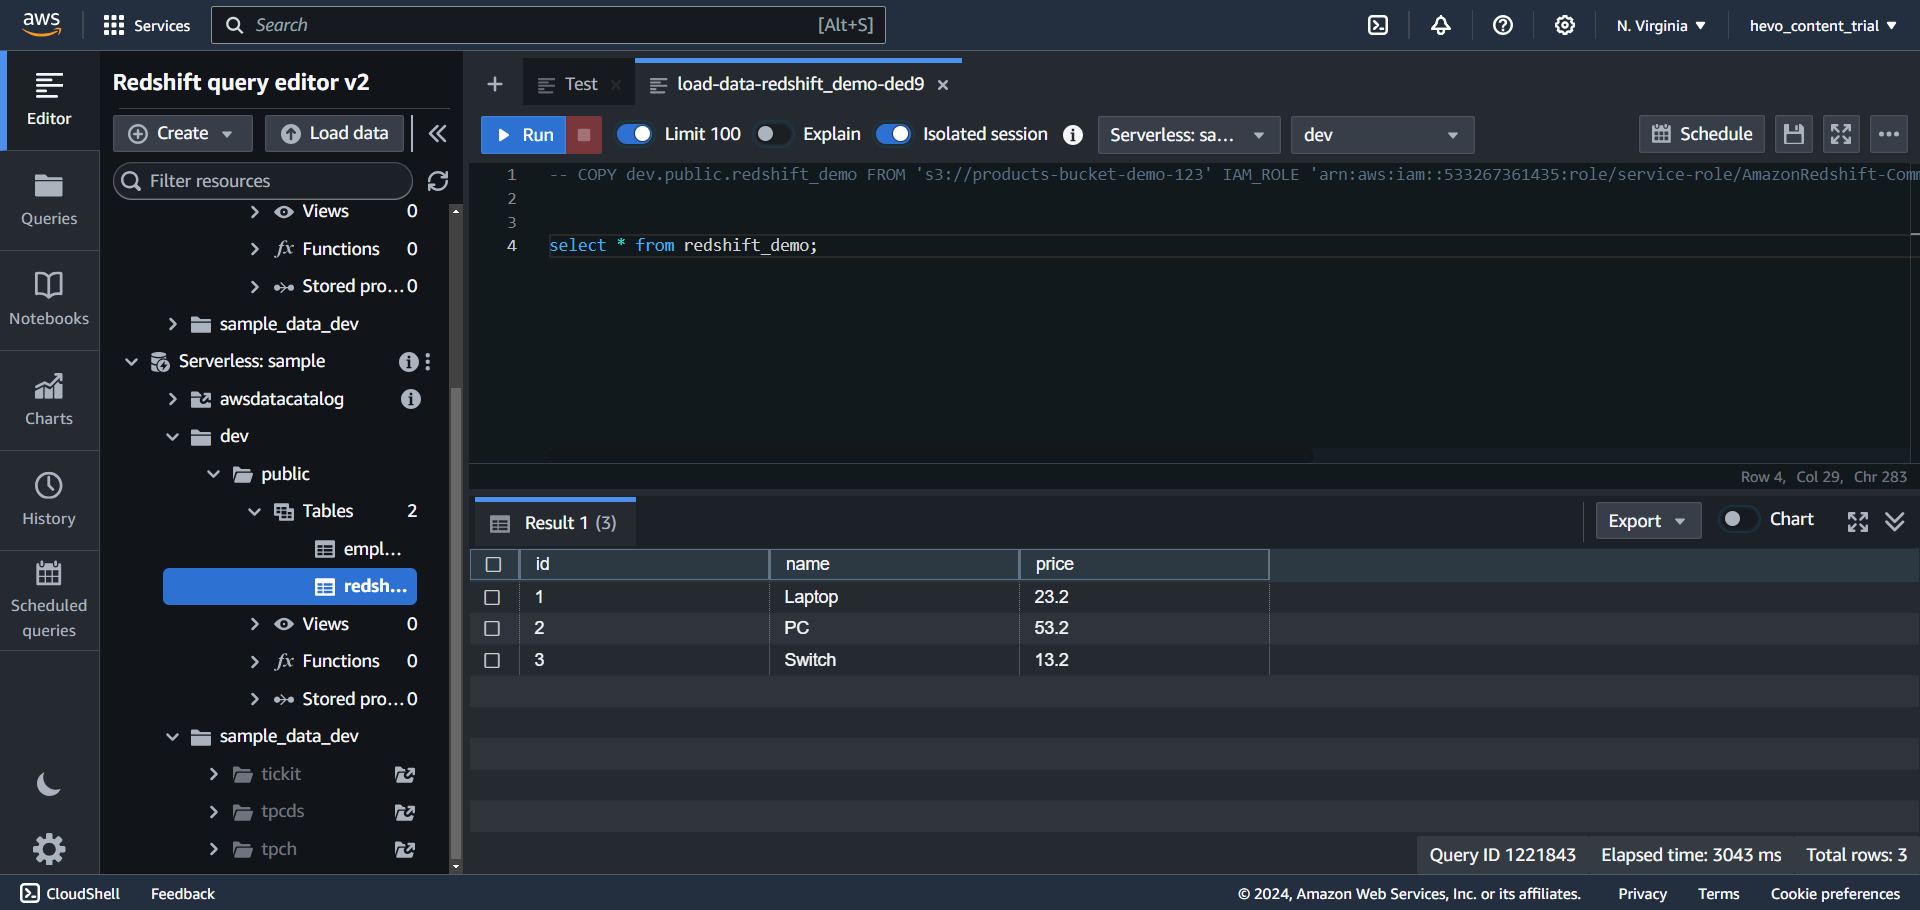
Step 3. f) Run a Select Query to view your table.
Limitations of Using Custom ETL Scripts
These challenges have an impact on ensuring that you have consistent and accurate data available in your Redshift in near Real-Time.
- The Custom ETL Script method works well only if you have to move data only once or in batches from PostgreSQL to Redshift Migration.
- The Custom ETL Script method also fails when you have to move data in near real-time from PostgreSQL to Redshift.
- A more optimal way is to move incremental data between two syncs from Postgres to Redshift instead of a full load. This method is called the Change Data Capture method.
- When you write custom SQL scripts to extract a subset of data, often those scripts break as the source schema keeps changing or evolving.
Method 3: Using Hevo Data to connect PostgreSQL to Redshift
Prerequisites:
- Access to PostgreSQL credentials.
- Billing Enabled Amazon Redshift account.
- Signed up for the Hevo Data account.
Step 1: Create a new Pipeline
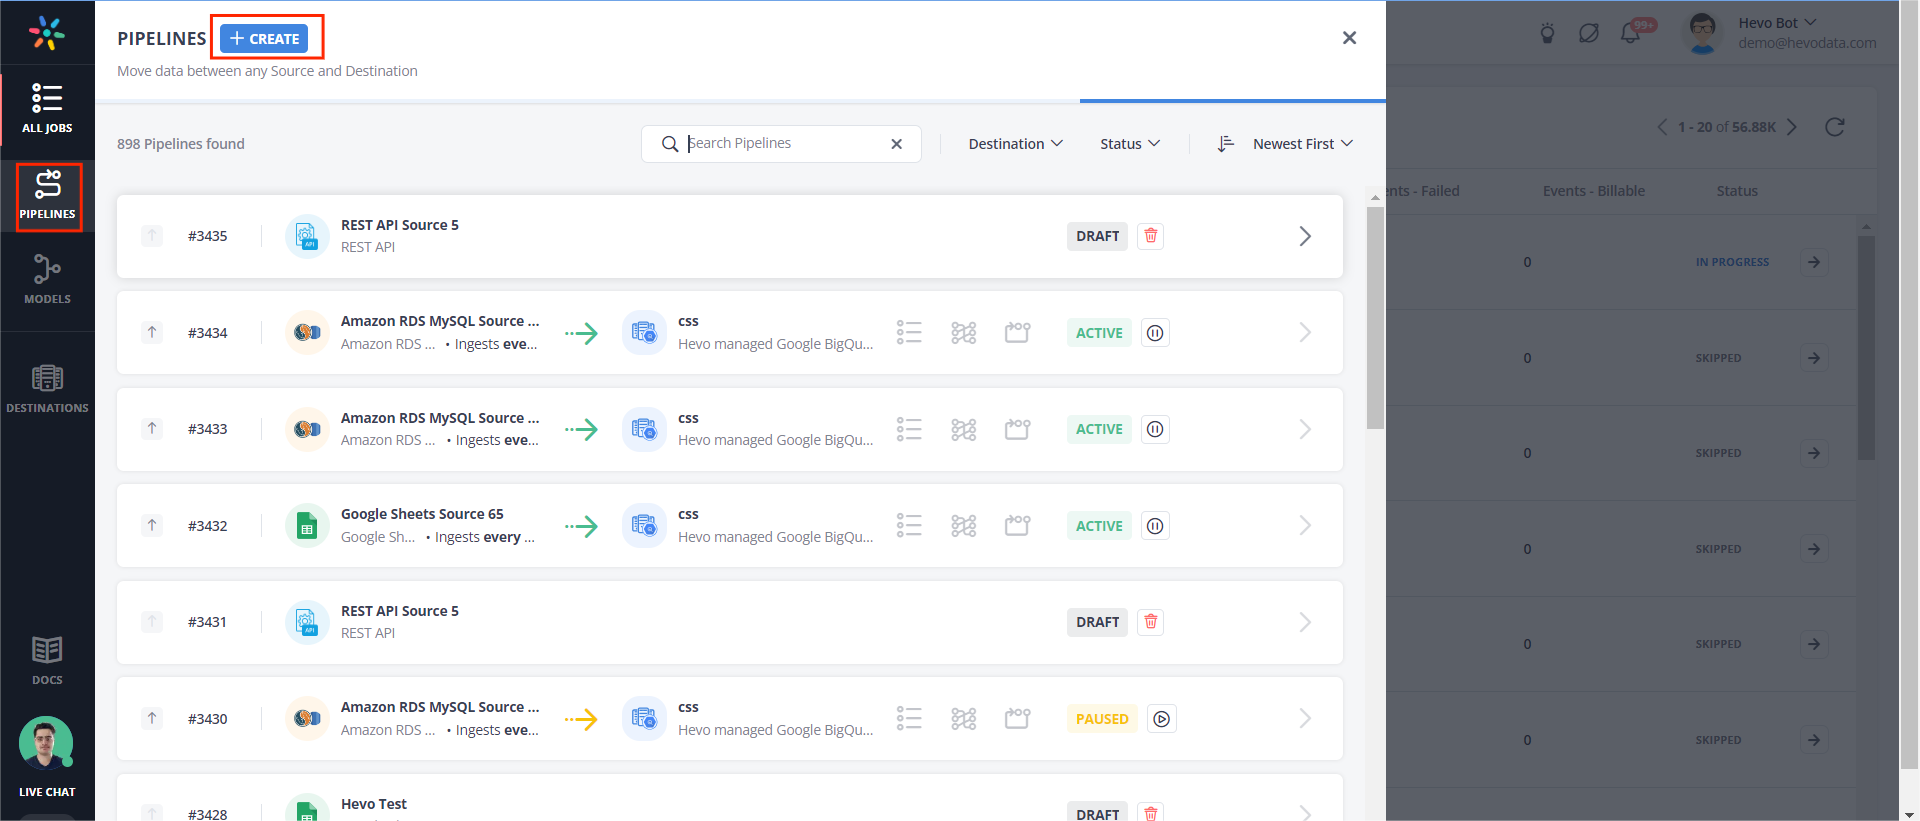
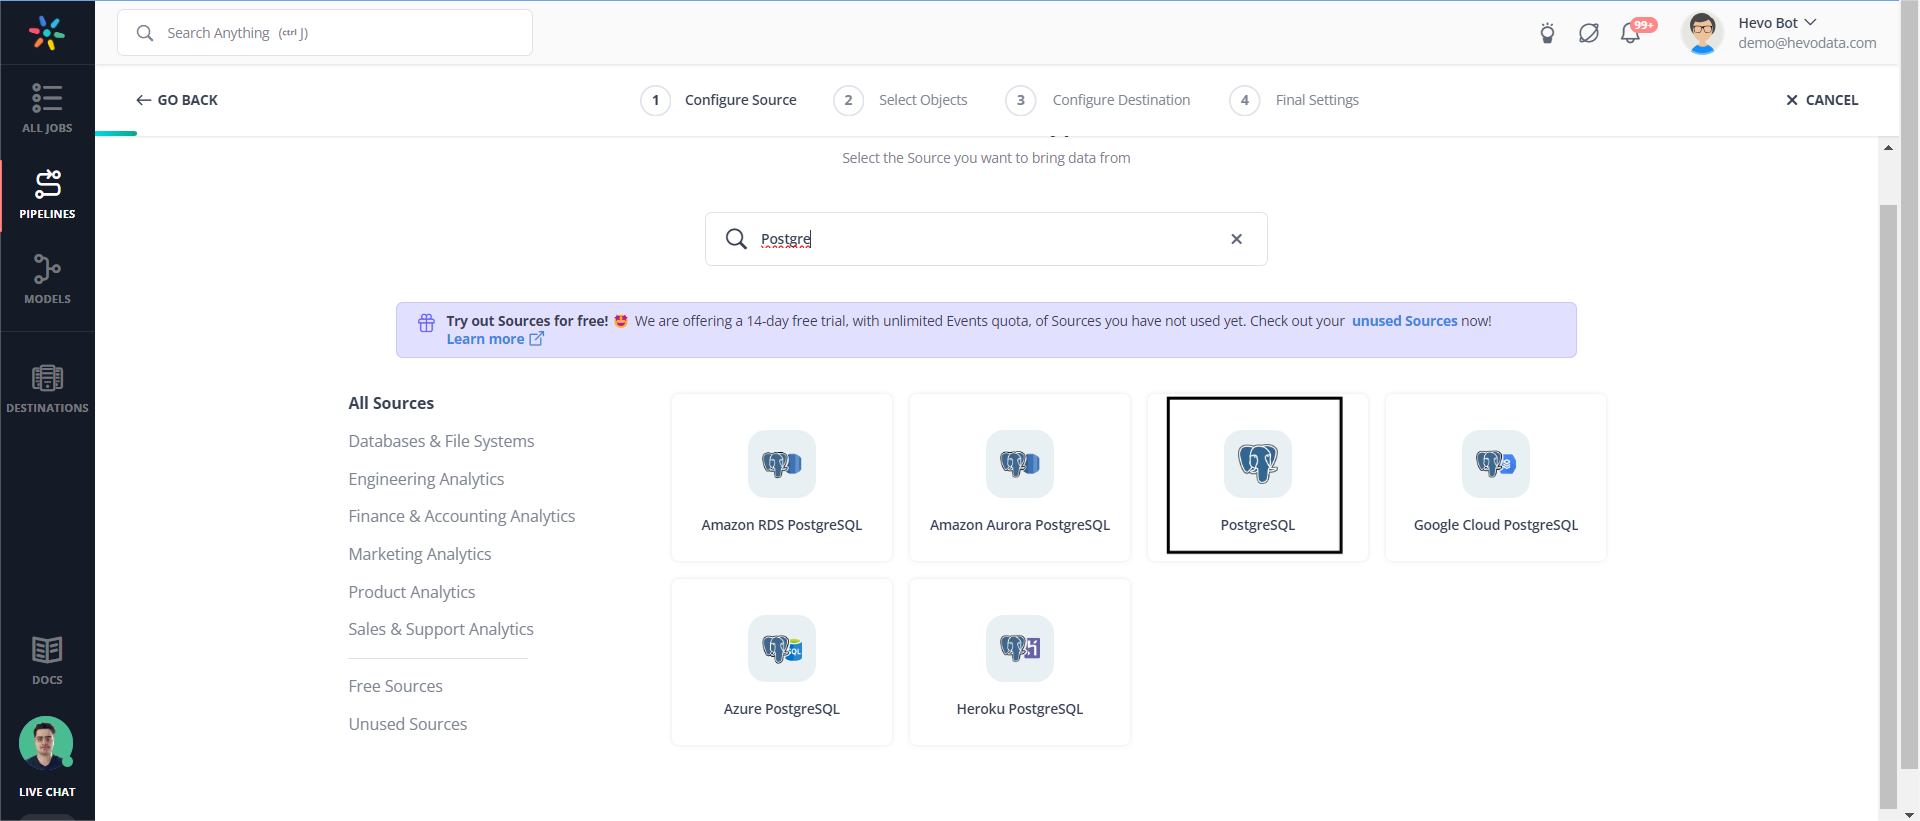
Step 2: Configure the Source details
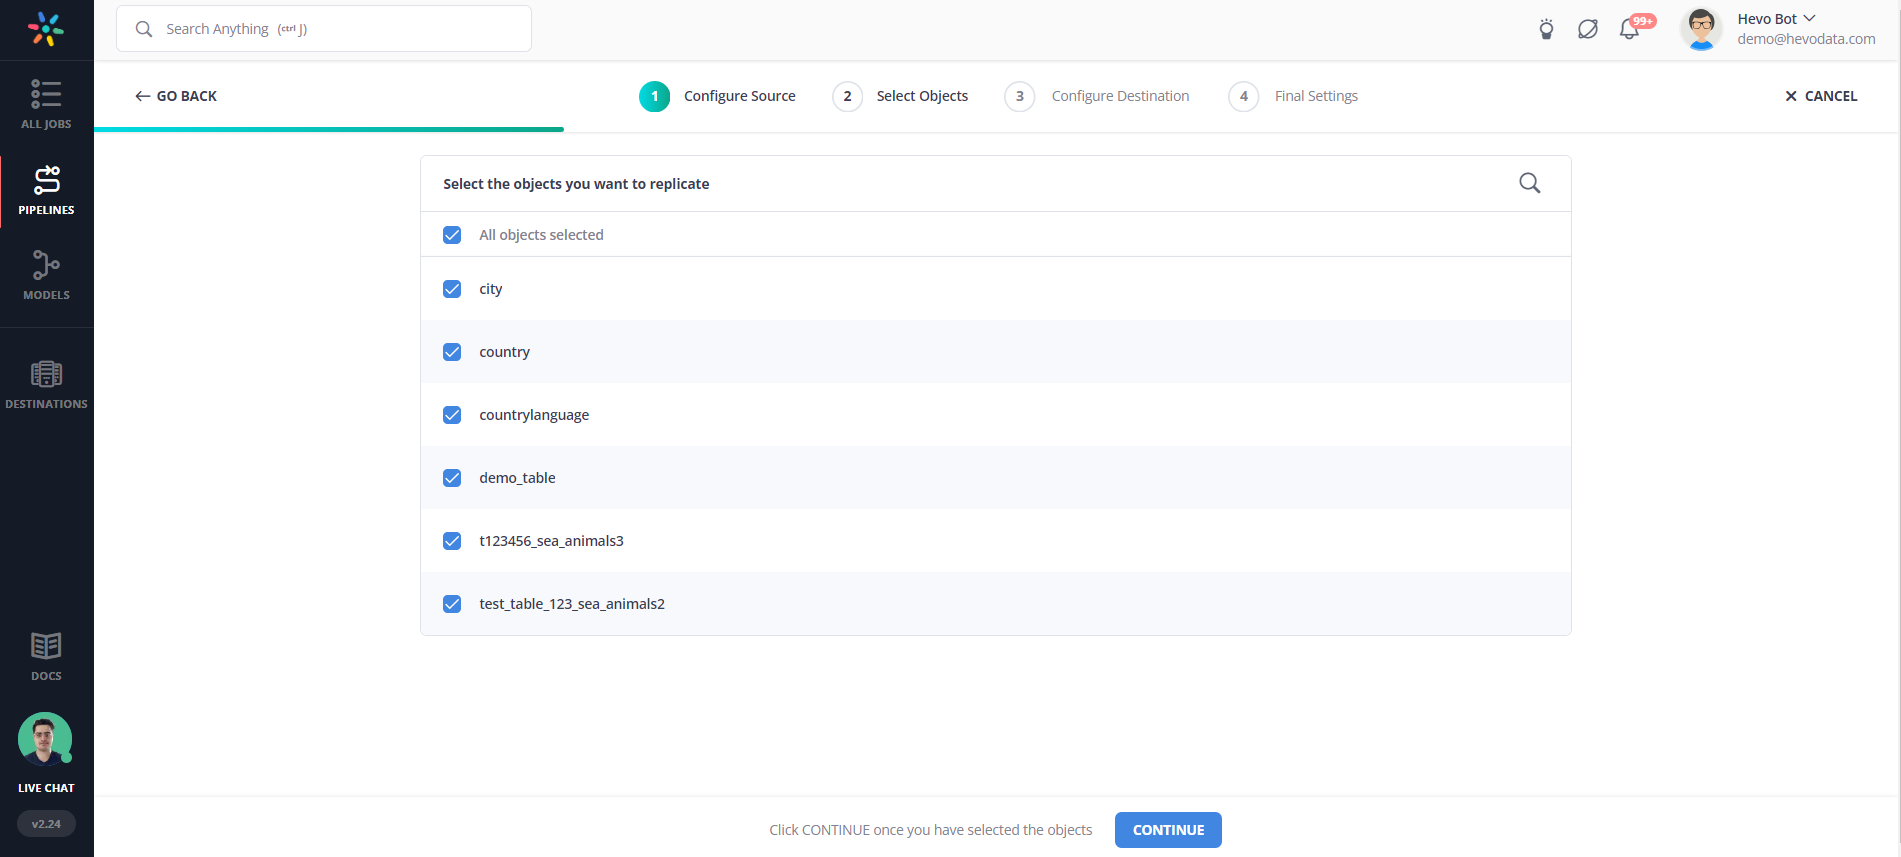
Step 2. a) Select the objects that you want to replicate.
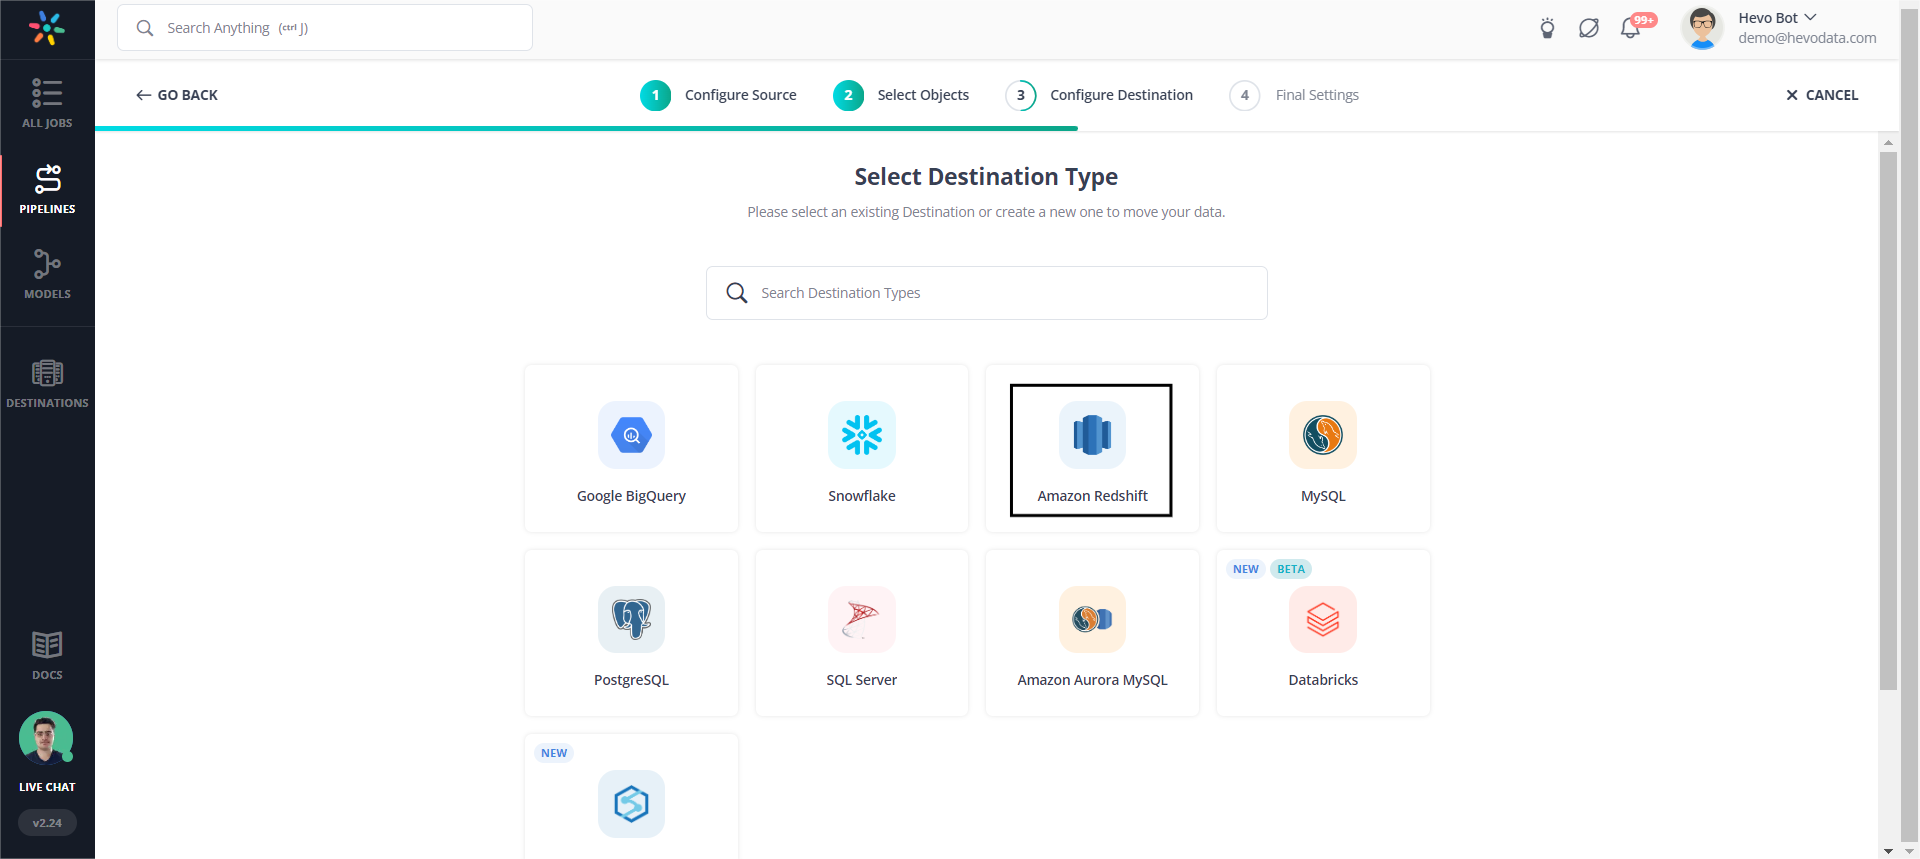
Step 3: Configure the Destination details.
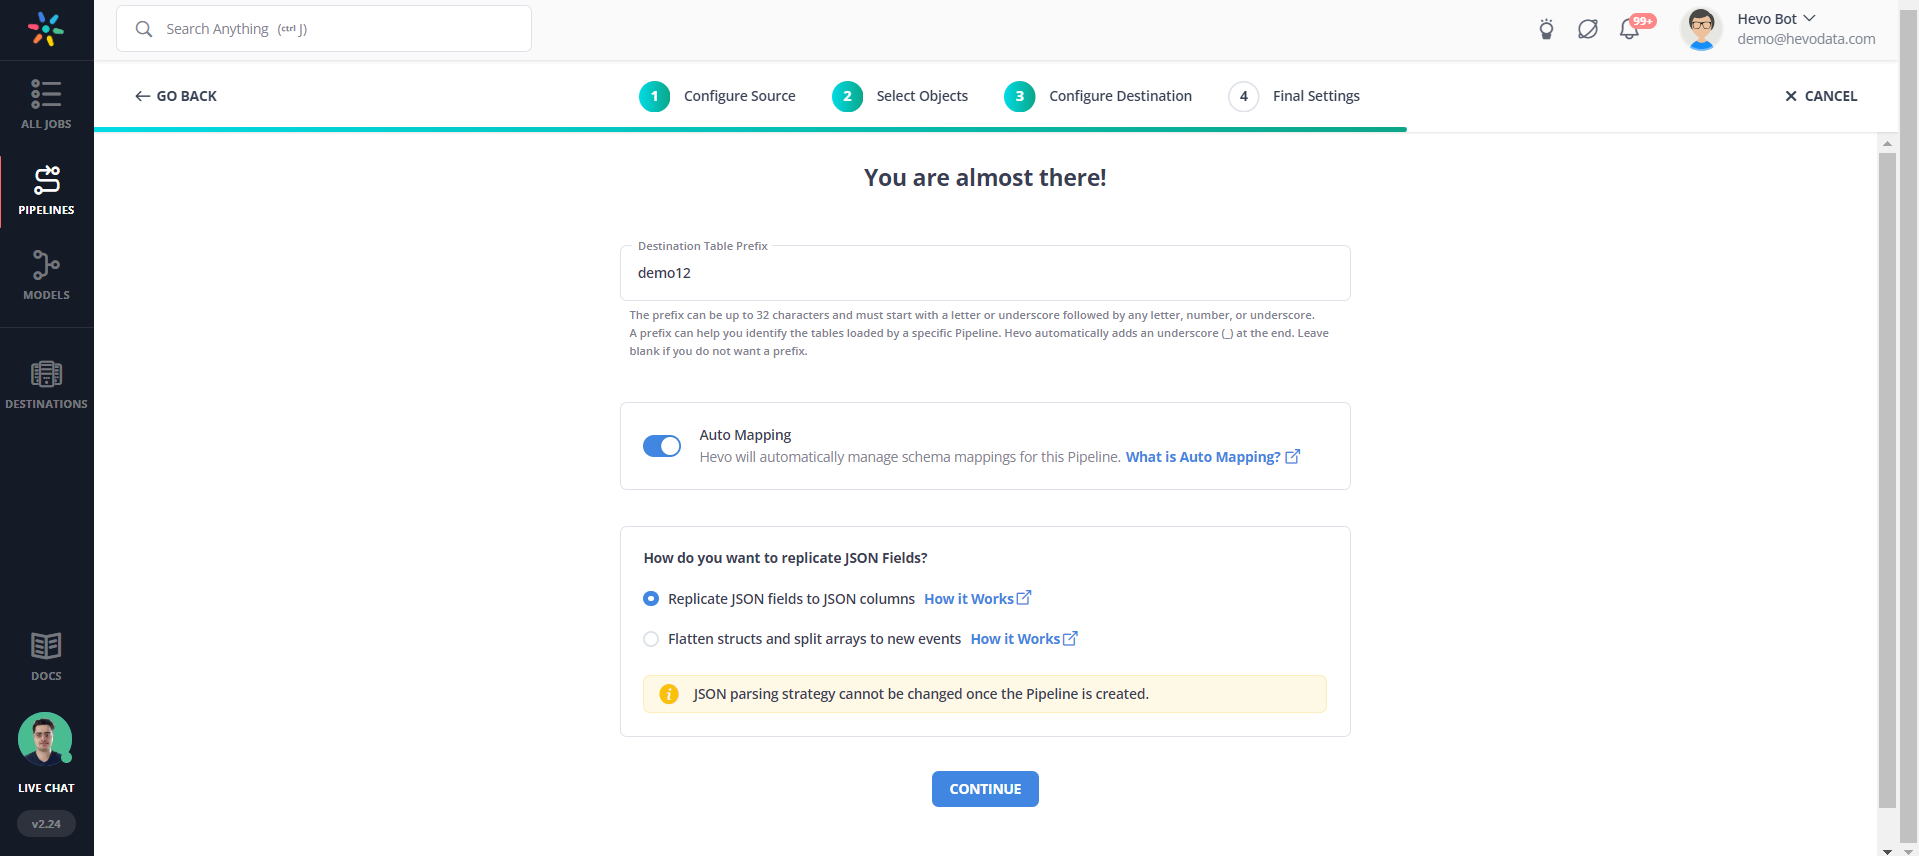
Step 3. a) Give your destination table a prefix name.
Note: Keep Schema mapping turned on. This feature by Hevo will automatically map your source table schema to your destination table.
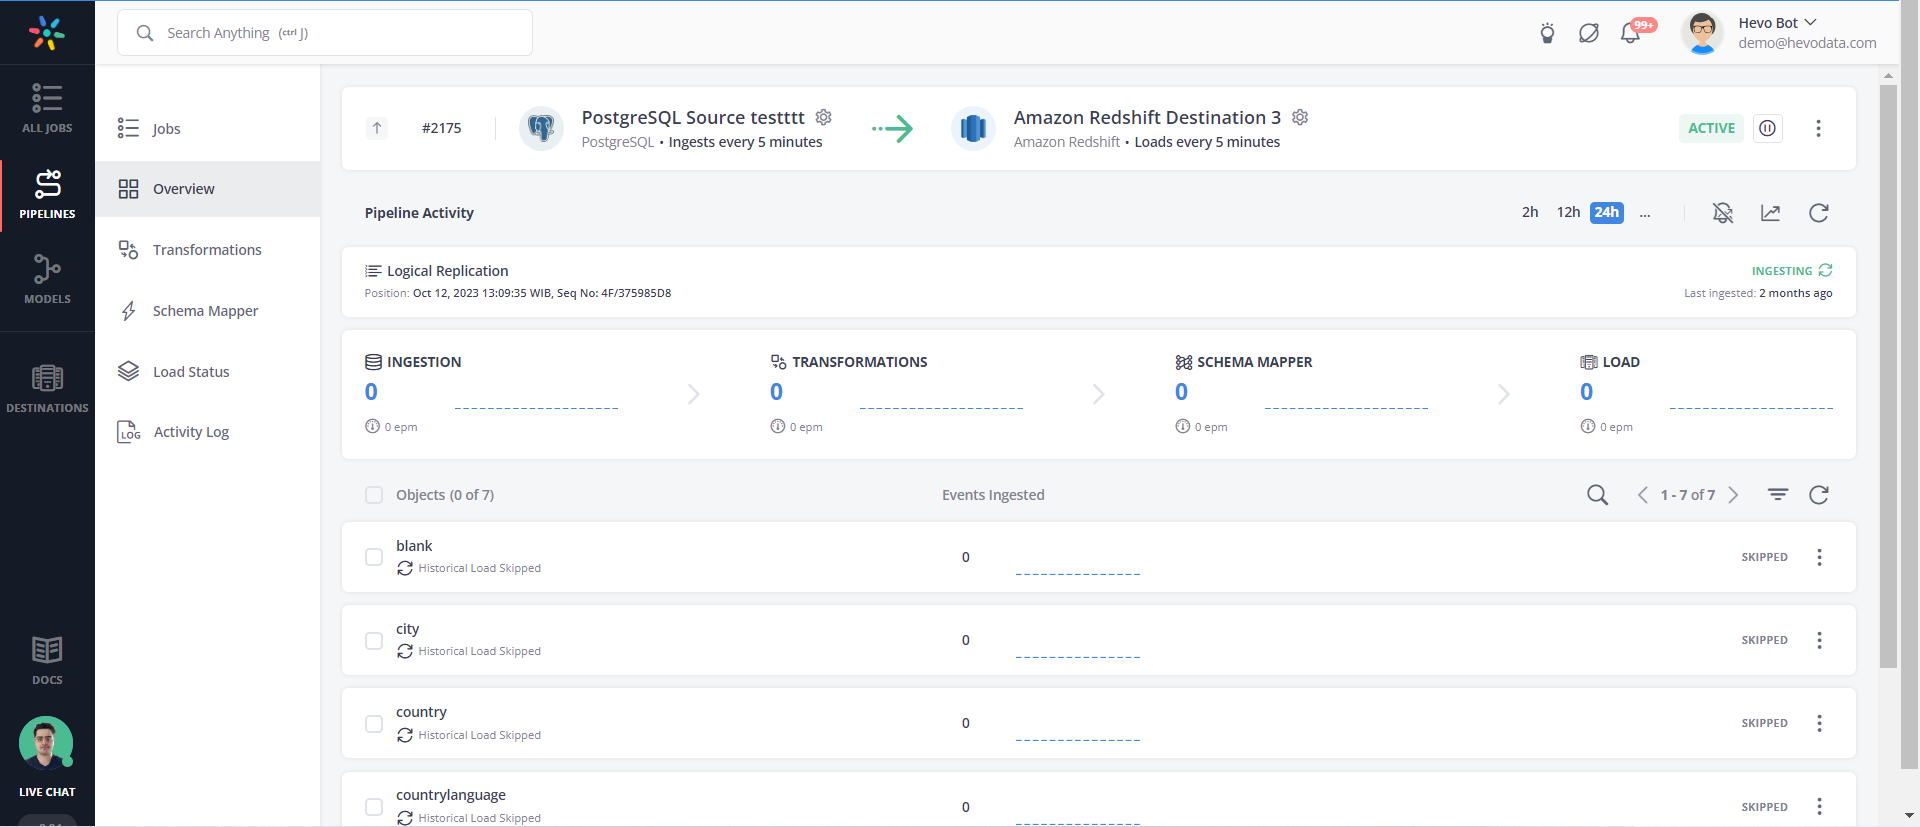
Step 4: Your Pipeline is created, and your data will be replicated from PostgreSQL to Amazon Redshift.
Amazon Redshift vs PostgreSQL: What’s the Difference?
Before moving your data, it’s important to understand how Amazon Redshift and PostgreSQL differ in terms of performance, scalability, and use cases. This comparison will help you choose the right tool for your analytics and storage needs.
For a detailed breakdown, check out this blog on Amazon Redshift vs PostgreSQL Comparison.
Additional Resources for PostgreSQL Integrations and Migrations
- How to load data from PostgreSQL to biquery
- Postgresql on Google Cloud Sql to Bigquery
- Migrate Data from Postgres to MySQL
- How to migrate Data from PostgreSQL to SQL Server
- Export a PostgreSQL Table to a CSV File
Conclusion
This article details two methods for migrating data from PostgreSQL to Redshift, providing comprehensive steps for each approach.
The manual ETL process described in the second method comes with various challenges and limitations. However, for those needing real-time data replication and a fully automated solution, Hevo stands out as the optimal choice. Try a 14-day free trial to explore all features, and check out our unbeatable pricing for the best plan for your needs.
FAQ on PostgreSQL to Redshift
1. How to transfer data from Postgres to Redshift?
The following are the ways by which you can connect Postgres to Redshift
1. Manually, with the help of the command line and an S3 bucket
2. Using automated Data Integration Platforms like Hevo.
2. Is Redshift compatible with PostgreSQL?
Well, the good news is that Redshift is compatible with PostgreSQL. The slightly bad news, however, is that these two have several significant differences. These differences will impact how you design and develop your data warehouse and applications. For example, some features in PostgreSQL 9.0 have no support from Amazon Redshift.
3. Is Redshift faster than PostgreSQL?
Yes, Redshift works faster for OLAP operations and retrieves data faster than PostgreSQL.
4. How to connect to Redshift with psql?
You can connect to Redshift with psql in the following steps
1. First, install psql on your machine.
2. Next, use this command to connect to Redshift:
psql -h your-redshift-cluster-endpoint -p 5439 -U your-username -d your-database
3. It will prompt for the password. Enter your password, and you will be connected to Redshift.
Want to take Hevo for a spin? Sign Up for a 14-day free trial and experience the feature-rich Hevo suite firsthand. Check out our transparent pricing to make an informed decision!
Share your understanding of PostgreSQL to Redshift migration in the comments section below!


