


In today’s marketplace, in most cases, you will find that businesses have a different database to store transactions such as Amazon RDS, and a Warehouse such as Snowflake for carrying out Analytics. In this blog, we will discover to set up Amazon RDS to Snowflake Integration. They do this to avoid impacting query and read performance on their primary database when performing Big Data Analytics.
Table of Contents
What are the Methods to Connect Amazon RDS to Snowflake?
Now that you have gained a basic understanding of Amazon RDS and Snowflake, let’s discuss the main highlight of this article i.e. how to load data from Amazon RDS to Snowflake.
Method 1: Using Hevo Data to Move Data from Amazon RDS to Snowflake
Hevo allows you to effortlessly move data from Amazon RDS to Snowflake in real time, without any coding required. With Hevo’s Data Pipeline, your data is enriched and transferred automatically and securely.
Get Started with Hevo for Free!Method 2: Writing Custom Scripts to Move Data from Amazon RDS to Snowflake
In this method, you have to manually create and export DB snapshots before losing data to Snowflake. But this method of exporting snapshots by AWS is supported in few regions only.
Method 1: Using Hevo Data to Move Data from Amazon RDS to Snowflake
Hevo’s RDS MariaDB, MySQL, and PostgreSQL connectors will allow you to get the data into Snowflake using a fully managed setup.
Hevo is the only real-time ELT No-code data pipeline platform that cost-effectively automates data pipelines that are flexible to your needs. With integration with 150+ Data Sources (40+ free sources), we help you not only export data from sources & load data to the destinations but also transform & enrich your data, & make it analysis-ready.
Sign up here for a 14-Day Free Trial!Since Hevo is an official Snowflake Data Pipeline Partner, you can entrust us with your data transfer process and enjoy a hassle-free experience. This way, you can focus more on Data Analysis, instead of data consolidation. You can use Hevo to connect Amazon RDS to Snowflake by following 2 simple steps:
- Step 1) Authenticate Source: Connect and configure your RDS engine as a source for Hevo and select a suitable replication mode from the following:
- Load selected tables only
- Load data via Custom Query
- Load data through logs.
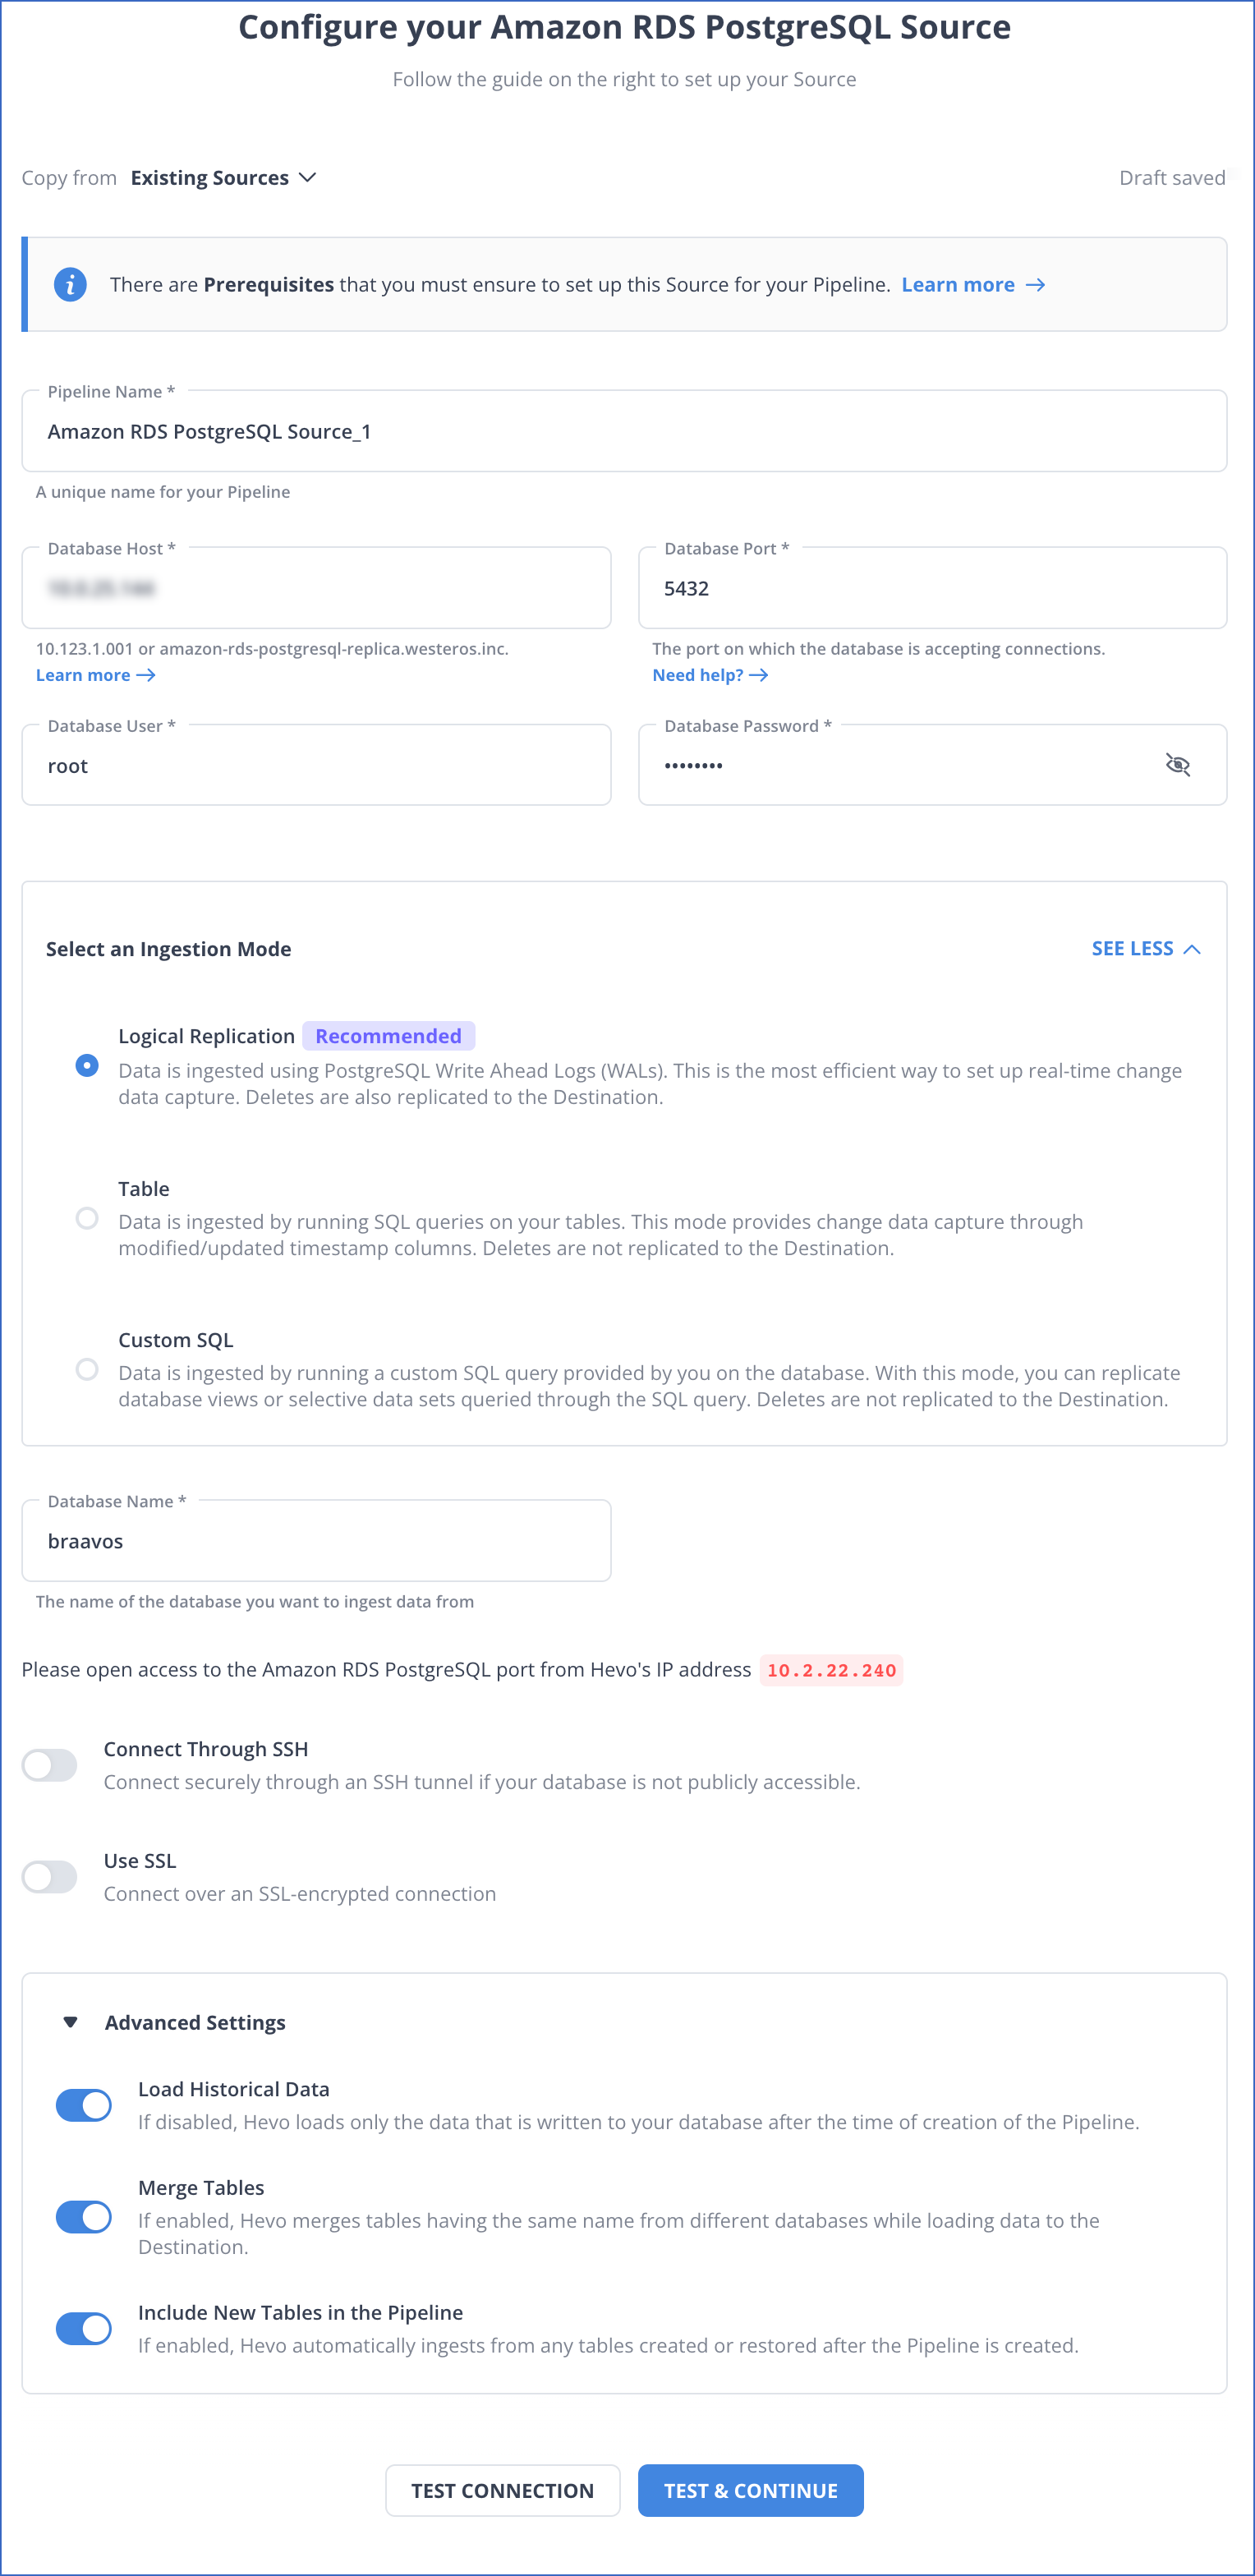
- If you are using a PostgreSQL connector to connect Amazon RDS as a Source, then configure the Amazon RDS PostgreSQL source page as shown below:
- Step 2) Configure Destination: In a Hevo Worksheet, add Snowflake as a destination and assign the required Role Permissions. Next, obtain your Snowflake account and region names. Finally, Configure your Snowflake Warehouse as shown in the below image.

Learn more about configuring Snowflake as a Hevo destination. With this, you have successfully set up Amazon RDS to Snowflake integration using Hevo Data.
With continuous Real-Time data movement, Hevo allows you to combine Amazon RDS data along with your other data sources and seamlessly load it to Snowflake with a no-code, easy-to-setup interface. Try our 14-day full-feature access free trial!
The combination of Hevo and Snowflake has worked best for us. One of the biggest reasons why I would recommend Hevo is because of its lowest price-performance ratio as compared to the competition.
Emmet Murphy, Staff Software Engineer, Deliverr
Hevo is the only real-time ELT No-code Data Pipeline platform that cost-effectively automates data pipelines that are flexible to your needs. The unique combination of features differentiates Hevo from its competitors, including Fivetran.
Method 2: Writing Custom Scripts to Move Data from Amazon RDS to Snowflake
Prerequisites:
- Active, running a virtual Warehouse.
- The following is a representative row in the table we are going to be using.
{ "brand": "Apple", "device": { "phone": { "model": [ { "array_element": "iPhone 11 Pro" }, { "array_element": "iPhone XR" }, { "array_element": "iPhone XS" }, { "array_element": "iPhone XS Max" } ] }, "name": "iPhone" } }
These are the steps involved in this method:
Step 1: Exporting Amazon RDS DB Snapshot Data to Amazon S3
You can export DB snapshot data to an Amazon S3 bucket. When you export a DB snapshot, Amazon RDS extracts data from a database or table in the snapshot and stores it in an Amazon S3 bucket in your account in an Apache Parquet format that is compressed and consistent.
By default, all data in the snapshot is exported. However, you can choose to export specific sets of databases, schemas, or tables.
To export DB snapshot data to Amazon S3:
- Create a manual snapshot of a DB instance.
- Create an AWS Identity and Access Management (IAM) policy that grants the snapshot export task access to the S3 bucket.
The following AWS CLI command creates an IAM policy named ExportPolicy and grants access to your S3 bucket.aws iam create-policy –policy-name ExportPolicy –policy-document ‘{ “Version”: “2012-10-17”, “Statement”: [ { “Effect”: “Allow”, “Action”: [ “s3:ListBucket”, “s3:GetBucketLocation” ], “Resource”: [ “arn:aws:s3:::*” ] }, { “Effect”: “Allow”, “Action”: [ “s3:PutObject*”, “s3:GetObject*”, “s3:DeleteObject*” ], “Resource”: [ “arn:aws:s3:::<YOUR_BUCKET_NAME>”, “arn:aws:s3:::<YOUR_BUCKET_NAME>*” ] } ] }’
- Create the IAM role which Amazon RDS will assume to access your Amazon S3 buckets.
The following example shows using the AWS CLI command to create a role named rds-s3-export-role.aws iam create-role –role-name rds-s3-export-role –assume-role-policy-document ‘{ “Version”: “2012-10-17”, “Statement”: [ { “Effect”: “Allow”, “Principal”: { “Service”: “export.rds.amazonaws.com” }, “Action”: “sts:AssumeRole” } ] }’
- Attach the IAM policy that you created to the IAM role that you created.
aws iam attach-role-policy --policy-arn <YOUR_POLICY_ARN> --role-name rds-s3-export-role
Replace <YOUR_POLICY_ARN> with the policy ARN
- Open the Amazon RDS console and in the navigation pane, choose Snapshots. In the list of snapshots, choose the snapshot that you want to export and export it to Amazon S3.

NOTE: When you export a DB snapshot to an Amazon S3 bucket, Amazon RDS converts data to, exports data in, and stores data in the Parquet format.
Step 2: Loading data to Snowflake
- Create a file format object that specifies the Parquet file format type.
create or replace file format parquet_format type = 'parquet';
- Create an S3 Stage using the SnowSQL CLI client.
create or replace stage rds_stage file_format = parquet_format credentials = (aws_key_id=...,aws_secret_key=...) url = 's3://<YOUR_BUCKET_NAME>';
- Create a target relational table on Snowflake for the S3 data.
create or replace temporary table type = 'parquet'; ( brand varchar default null, device varchar default null, phone variant default null );
- Load the Amazon S3 data into the Snowflake table.
/* Note that all Parquet data is stored in a single column ($1). */ /* Cast element values to the target column data type. */ copy into amazon_rds_snapshot from (select $1:brand::varchar, $1:device:name::varchar, $1:device:phone.model::variant from @rds_stage/<filename>.parquet);
- Verify by running the following query on the relational table:
select * from amazon_rds_snapshot;
Limitations of using Custom Scripts to Connect Amazon RDS to Snowflake
- Exporting snapshots is only supported in the following AWS Regions:
- Asia Pacific (Tokyo)
- Europe (Ireland)
- US East (N. Virginia)
- US East (Ohio)
- US West (Oregon)
- Not all engine versions are supported for exporting snapshot data to Amazon S3. This feature is supported on:
- MariaDB
- MySQL
- PostgreSQL
- The S3 bucket must be in the same AWS Region as the snapshot.
- You would additionally need to set up cron jobs to get real-time data into Snowflake.
- In case you need to clean, transform and enrich data before loading to Snowflake, you could need to build additional code to accommodate this.
Don’t feel like doing this yourself?
Chances are the limitations of this method to load data from RDS to Snowflake will make it a non-starter as a reliable ETL solution. Alternatively, there is a simpler way to get data from RDS to Snowflake.
What Can You Achieve By Replicating Data from Amazon RDS to Snowflake?
By replicating your data from Amazon RDS to Snowflake, you will be able to help your business stakeholders with the following:
- Data Analytics: By Amazon RDS to Snowflake replication, you can combine transactional data from RDS with other data sources in Snowflake for comprehensive analysis. You can also create custom dashboards through Snowflake using visualization tools like Tableau and Power BI
- Business Process Automation: Automated workflows can be triggered in Snowflakes by changes in RDS’s data when you connect Amazon AWS to Snowflake. You can carry out real-time data integration and also integrate with external systems for better business analytics and decision support.
- Healthcare: In the healthcare sector, you can combine patient records from RDS with clinical data in Snowflake to improve patient care, identify treatment opportunities, and conduct research activities effectively.
Conclusion
This blog talks about the two methods you can use to set up a connection from Amazon RDS to Snowflake: using custom ETL scripts and with the help of a third-party tool, Hevo. It also gives a brief overview of Amazon RDS and Snowflake highlighting their key features and benefits before diving into the setup process. Now, the manual approach of connecting Amazon RDS to Snowflake will add complex overheads in terms of time, and resources. Such a solution will require skilled engineers and regular data updates. Furthermore, you will have to build an in-house solution from scratch if you wish to transfer your data from Amazon RDS to Snowflake or another Data Warehouse for analysis.
Find out how to move data from AWS RDS MSSQL to Snowflake to enhance your data operations. Our resource provides simple steps for effective migration and integration.
Hevo Data provides an Automated No-code Data Pipeline that empowers you to overcome the above-mentioned limitations. You can leverage Hevo to seamlessly transfer data from Amazon RDS to Snowflake in real-time without writing a single line of code. Hevo’s Data Pipeline enriches your data and manages the transfer process in a fully automated and secure manner. Hevo caters to 150+ data sources (including 40+ free sources) and can directly transfer data from these sources to Data Warehouses, Business Intelligence Tools, or any other destination of your choice in a hassle-free manner. It will make your life easier and make data migration hassle-free.
Learn more about HevoWant to take Hevo for a spin? Sign up for a 14-day free trial and experience the feature-rich Hevo suite firsthand.
What are your thoughts on moving data from RDS to Snowflake? Let us know in the comments.
FAQ
How to Migrate Data from RDS to Snowflake?
Use AWS Data Pipeline or Hevo Data to extract data from RDS and load it into Snowflake. You can export RDS data as CSV, store it in S3, and then load it into Snowflake using Snowflake’s COPY INTO command.
How Do I Transfer Data from AWS to Snowflake?
First, export your data to Amazon S3, then use Snowflake’s external stage feature to load data from S3 to Snowflake using the COPY INTO command.
How to Load Data from Database to Snowflake?
Extract data from the source database (e.g., MySQL, PostgreSQL), transform if necessary, and then use Snowflake’s SnowSQL CLI or ETL tools like Hevo to load the data into Snowflake.

Share it with your connections.
-
 Share To X
-
 Share To LinkedIn
-
 Share To Facebook
-
 Copy Link


