

ChatGPT has transformed the way businesses look at AI to support their functions. It has started showing its power by automating customer support and improving customer experience. dbt (data build tool) is just like that.
You can create your own transformations with dbt using SQL SELECT statements. As a result, anyone without substantial training in other programming languages can perform data transformation. Wouldn’t that make your professional life easy?
I will walk you through the details on how to use dbt redshift including the setup and loading of data. You will also understand the main use cases of dbt redshift. Alright! Ready to dive into the pool of dbt-redshift?
Table of Contents
Overview of Redshift
Amazon Redshift, offered by Amazon Web Services (AWS), is a cloud data warehousing service that helps corporations manage large amounts of data and produce valuable insights. Amazon Redshift provides you with a wide variety of features that can assist you meet the needs of your business requirements.
Some popular features include its parallel processing abilities, automated data compression to reduce storage space requirements, columnar storage that makes the data easy to query by only considering specific columns, and many more.
Harness the full power of dbt Core in a no-code solution with Hevo Transformer. Effortlessly join, modify, and aggregate data, while automating your transformations and tracking changes with Git.
✅ Instant Data Integration – Connect and auto-fetch tables in minutes
✅ Simplified dbt Workflows – Build, test, and deploy models without hassle
✅ Git Version Control – Collaborate and manage changes seamlessly
✅ Real-Time Previews – Transform, test, and deploy faster than ever
How to Get Started with dbt and Redshift
In this section, I will introduce you to the three steps to start using dbt redshift. The steps are:
- Setting up a Redshift cluster
- Loading data into your Redshift account
- Connecting dbt Cloud and Redshift
Setting Up a Redshift Cluster
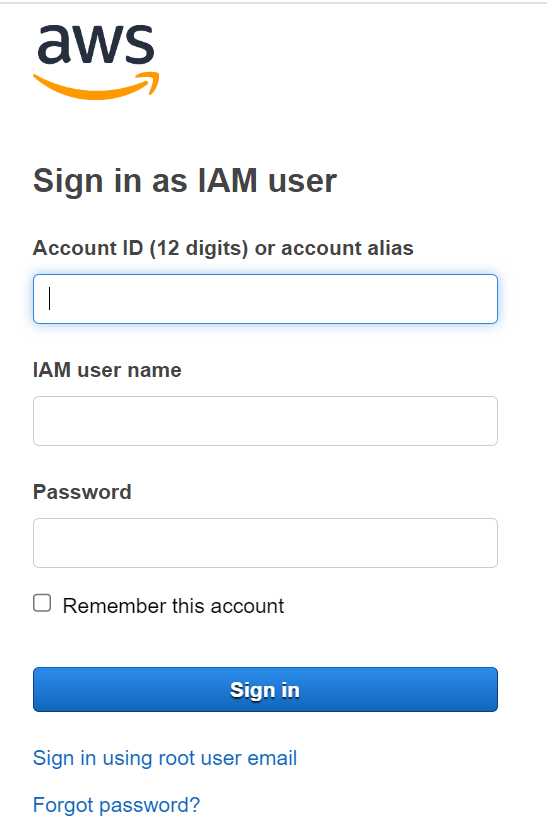
Let’s begin dbt Redshift setup by logging into your AWS account and configuring Redshift.
Access AWS Console
- Log into your AWS account using either the root user or an IAM user with sufficient permissions.
Create Redshift Instance with CloudFormation
- Navigate to the AWS CloudFormation service in the AWS Management Console.
- Use a CloudFormation template to provision a Redshift instance. Ensure the template includes specifications like instance type, node type, and security settings.
- Proceed through the CloudFormation setup, ensuring all necessary configurations are accurate. Agree to create IAM resources with custom names as required.
- Click “Create Stack” to initiate the deployment. Wait for the status to change to “CREATE IN PROGRESS”.

Access Stack Outputs
- Once the stack status shows “CREATE COMPLETE”, go to the CloudFormation stack’s “Outputs” tab.
- Note down essential details such as the cluster endpoint, database name, master username, and password provided in the outputs. Keep this information accessible for subsequent steps.
Access Amazon Redshift
- Navigate to the AWS Management Console and search for “Redshift”.
- Confirm that your newly created Redshift cluster is visible under the “Cluster overview” section.
- Select the cluster name to view detailed information.
Query Data
- Choose “Query Data” to access the query editor. Opt for the v2 version of the editor for this guide.
- If necessary, set up a database account by selecting “Configure account” in a sandbox environment.
Establish Connection
- Utilize the credentials obtained from the CloudFormation stack outputs to establish a connection to your Redshift cluster.
- Click on the cluster name from the list and proceed to “Create Connection”.
- Enter the provided credentials (cluster endpoint, database name, master username, password) to establish the connection successfully.
Start Querying
- With the connection established, utilize the query editor to execute SQL queries against your Redshift cluster seamlessly.
Following these steps ensures you can deploy and configure a Redshift cluster using AWS CloudFormation, access essential connection details, and begin querying data using the Amazon Redshift query editor effectively.
Loading Data into your Redshift Account
We will now add our test data to the S3 bucket that was created by our Cloudformation template. A cheap and convenient alternative to Redshift for storing data is S3 buckets.
- The data used in this course is kept in a public S3 bucket as CSV files. To download these files, enter one of the following URLs. To utilize them in the subsequent steps, download these to your computer.
- jaffle_shop_customers.csv
- jaffle_shop_orders.csv
- stripe_payments.csv
- Upload the files using the S3 bucket that you prepared using CloudFormation. Enter “S3” in the search box at the top and then click S3. Sample data will already be there in the file; you can disregard it or use it for additional modeling research.
- Select the name of the bucket as S3 bucket. If you have more than one S3 bucket, this will be the bucket that was listed under Workshopbucket on the Outputs page. The bucket will be prefixed with dbt-data-lake.
- Select Upload, and add the three files to the UI.
- The name of the S3 bucket you need to save looks like s3://dbt-data-lake-xxxx. You will need it for the next section.
- Select your cluster, enter Redshift in the search bar, and then click Query data.
- Execute the following query in your query editor to build the schemas that will house your raw data. To execute each one separately, highlight the statement, then select Run. You might have to enter them separately into the user interface if you are using the Classic Query Editor. These schemas should be accessible under dbtworkshop.
create schema if not exists jaffle_shop;
create schema if not exists stripe;- Use the following statements to build the tables in your schema after running these queries. These will be added to the corresponding schemas as tables.
create table jaffle_shop.customers(
  id integer,
  first_name varchar(50),
  last_name varchar(50)
);

create table jaffle_shop.orders(
  id integer,
  user_id integer,
  order_date date,
  status varchar(50),
  _etl_loaded_at timestamp default current_timestamp
);

create table stripe.payment(
  id integer,
  orderid integer,
  paymentmethod varchar(50),
  status varchar(50),
  amount integer,
  created date,
  _batched_at timestamp default current_timestamp
);- We must copy the data from S3. Update the region, iam role, and S3 location as necessary. The S3 and iam roles can be found in your Cloudformation stack outputs.
copy jaffle_shop.customers( id, first_name, last_name)
from 's3://dbt-data-lake-xxxx/jaffle_shop_customers.csv'
iam_role 'arn:aws:iam::XXXXXXXXXX:role/RoleName'
region 'us-east-1'
delimiter ','
ignoreheader 1
acceptinvchars;

copy jaffle_shop.orders(id, user_id, order_date, status)
from 's3://dbt-data-lake-xxxx/jaffle_shop_orders.csv'
iam_role 'arn:aws:iam::XXXXXXXXXX:role/RoleName'
region 'us-east-1'
delimiter ','
ignoreheader 1
acceptinvchars;

copy stripe.payment(id, orderid, paymentmethod, status, amount, created)
from 's3://dbt-data-lake-xxxx/stripe_payments.csv'
iam_role 'arn:aws:iam::XXXXXXXXXX:role/RoleName'
region 'us-east-1'
delimiter ','
ignoreheader 1
Acceptinvchars;- Confirm that you can use the following code snippets to execute a select * from each of the tables.
select * from jaffle_shop.customers;
select * from jaffle_shop.orders;
select * from stripe.payment;
Now, you have loaded training data into a Redshift instance. In the next section, we will go over the procedures to link dbt Cloud and Redshift.
Connecting to dbt Cloud and Redshift
Let’s begin this part by setting up a dbt Cloud account.
- Go to dbt Cloud.
- Create a new dbt Cloud account and send yourself an email to confirm it if you don’t already have one.
- You can start a new project from your existing dbt Cloud account if you already have one:
- Projects can be accessed by clicking the gear symbol at the top right.
- Press “+ New Project.” “Setup a New Project” page will appear.
- In the dbt Project Name column, enter Analytics. Later, you will have the option of renaming this project.
- Then click Next.
Next, let’s configure the connection between dbt Cloud and Redshift.
- Select Redshift to set up your connection.
- Write Redshift or another short title for the name.
- Enter the settings for Redshift. Use the credentials you saved from the CloudFormation template as a reference.
- The whole hostname is your hostname. Be careful to remove any leading slashes at the end and the http:// at the beginning. 5439 is the port.
- It uses the dbtworkshop database.
- Set your credentials for development. The dbt Cloud will connect to Redshift using these credentials. These credentials will be (according to your CloudFormation output):
- Username: dbtadmin
- Password: the one you chose previously in the instruction manual
- Schema: You’ll see that a name for your schema was automatically generated for you. This is typically written as dbt first-initial>last-name>. When using the Cloud IDE to run dbt, your models will be created in this schema, which is directly connected to your development environment.
- Towards the bottom, select Test Connection. This demonstrates that your Redshift cluster can be accessed via dbt Cloud.
- Click Next if the connection test is successful. You might need to double-check your Redshift settings and credentials if it doesn’t work.
Now, you can Initialize your repository and start development using Redshift dbt.
- Use Git to version control your code when developing on dbt Cloud.
- You can set up a managed repository hosted by dbt Cloud. Or, connect directly to a supported git provider to connect to a repository.
- An excellent approach to test out dbt without having to set up a new repository is through managed repositories.
- To leverage capabilities like automation and continuous integration, it is ultimately preferable to connect to a supported git provider.
To create a managed repository:
- Choose Managed under Add repository from.
- Name your repository something like bbaggins-dbt-quickstart.
- Select Create. The creation and importation of your repository will take a short while.
- Click Continue when you see Successfully imported repository.
You can now create your project and begin work on dbt Redshift after setting up a repository:
- Select Develop in the upper left corner. Your project may spin up slowly the first time since it needs to establish a git connection, clone your repository, and test the warehouse connection.
- Click Initialize your project to the left of the file tree. This creates a folder structure for you using example models.
- Click on Commit to make your initial commitment. Use the first commit’s commit message. By doing this, you can open a branch to add new dbt code. Create the first commit to your managed repository.
- You should now be able to run dbt run and directly query data from your warehouse. In the IDE, paste the warehouse-specific code that follows:
- BigQuery
- Databricks
- Redshift
- Snowflake
select * from `dbt-tutorial.jaffle_shop.customers`
- In the command line bar at the bottom, type dbt run and click Enter. We will explore what happens in the next section of the tutorial.
And, that’s it. Next, let’s understand some use cases of dbt with Redshift.
Use Cases of dbt Redshift
To Create a Data Lakehouse with dbt Redshift
Having a lot of crucial SQL business logic stuffed into one or two SQL files is one of the worst forms of technical debt you might experience. Additionally, there is no way to validate the reports that these files produce on a regular basis with each new bucket of data.
There are times when you only want to send new data into the data lake. This could be for saving money on replicating your complete database every day. The raw JSON blob transformation is still under source control. Also, since it is fragile and challenging to test, this source transformation won’t take place until the data reached Redshift.
Let’s look into the steps to implement this transformation using dbt Redshift:
- You should keep Redshift, but use ELT (Extract, Load, Transform) instead of ETL (Extract, Load, Transform).
- This may be done by building Kinesis Firehoses that direct our DynamoDB and Kinesis streams’ raw data into their respective Redshift tables. Create other tables using the dbt converted data after that.
- A Lambda function that is connected to each of the Firehoses extracts the primary keys from the data blobs. It adds a timestamp for when they were handled. By choosing this use case, you can significantly reduce your monthly AWS spending.
To Chart Upgrades, Downgrades, New Revenue, and Net Churn
This use case of dbt Redshift is applicable when you need to chart anything. It entails using dbt and Mode Analytics to store and analyze data directly in Amazon Redshift. You can combine these numbers once the important parameters of new revenue, churned revenue, upgrades, and downgrades are taken into account.
The configuration you’ll need to obtain precise and comprehensive data and create great charts with it is as follows:
- An AWS Redshift database to keep all of your data.
- Tools like Hevo Data to synchronize data from Stripe (or your invoicing platform) to Redshift.
- Dbt to organize the unstructured, unprocessed data that is synced from Stripe into Redshift into clean database “views” you can query to produce attractive displays.
- Sinter to keep your charts up to date by scheduling dbt queries to run every day (or more frequently).
- Mode analytics to query the clean database views are fetched by dbt to produce stunning charts.
To Provide Efficient QuickSight Reports
- This use case of dbt Redshift supports you to deliver effective QuickSight reports. So, Redshift is used as a data warehouse to combine data from external sources such as Microsoft Dynamics 365, AWS Pinpoint, and AWS DynamoDB.
- After the data has been ingested into Redshift, use dbt to convert it into a format that AWS QuickSight can easily read.
- Each report or visualization in QuickSight has a fact table. You can efficiently query the necessary data using this method.
Also, read about Redshift CASE Statements, What is Data Build Tool(dbt)?, Top dbt Alternatives and Competitors – Ranked by G2 to get a better understanding of dbt Redshift.
With this section, we have come to the end of dbt Redshift. Let’s recall the key pointers.


Key Takeaways
dbt redshift enables data engineers to transform data and create dashboard views. To start using dbt Redshift, you need to set up a Redshift cluster. Then, load data into your Redshift account and connect dbt cloud and Redshift. You can create a Data Lakehouse by connecting dbt redshift.
That’s just one of the many use cases offered by this integration. Other use case is presenting chart upgrades, downgrades, new revenue and net churn. dbt redshift is also helpful to provide efficient QuickSight reports. Discover tools for Redshift data modeling that optimize your database for performance and scalability. Explore more at Data Modeling in Redshift.
Tools like dbt that emerge each day enable the data analytics industry to leverage the power of data. Hevo Data is one such company that provides automated data pipeline solutions for your needs.
Sign up for a 14-day free trial and simplify your data integration process. Check out the pricing details to understand which plan fulfills all your business needs.
Frequently Asked Questions
1. Does dbt work with Redshift?
Yes, dbt works with Redshift. You can use dbt to transform data in Redshift, creating models, and automating data workflows.
2. What is ETL in Redshift?
ETL in Redshift is the process of extracting data, transforming it, and then loading it into Amazon Redshift. Tools like Hevo help automate ETL, making it easier to move data efficiently.
3. What is a dbt model?
A dbt model is a SQL file that defines a transformation for your data. dbt compiles these models and runs them to update or create tables in your database.
Share it with your connections.
-
 Share To LinkedIn
-
 Share To Facebook
-
 Share To X
-
 Copy Link


