The exponential data growth has increased the demand for tools that make data processes, such as data collection, integration, and transformation, as smooth as possible. These tools and technologies can help you evolve your methods of handling organizational data.
Among these tools, you can leverage Snowflake and dbt to address some of these crucial data processes. These tools also accommodate your business needs and enable your teams to derive insights and make informed decisions.
In this article, you will explore how to start with Snowflake dbt integration to achieve big data transformations and storage solutions. Let’s begin by understanding why you should integrate it with Snowflake.
Table of Contents
Why Should You Integrate Snowflake and dbt?
Snowflake, a cloud-based data storage solution, and dbt, a data transformation platform, offer a powerful solution for enhanced data management. A Snowflake dbt integration facilitates the development of robust and efficient data pipelines.
Snowflake dbt Integration: Overview of the Architecture
Here are some reasons why you should consider integrating Snowflake and dbt:
- Scalability: Snowflake’s cloud-based architecture and elastic nature allow it to scale seamlessly alongside your growing data volumes. dbt complements this by handling large-scale, complex data transformations efficiently. This integration ensures your data pipelines remain scalable and cost-effective as your business grows.
- Faster Data Workflows: By leveraging Snowflake’s powerful processing capabilities, dbt provides faster, more efficient automated data workflows, boosting your overall performance.
- Robust Data Governance: Together, Snowflake and dbt provide a strong foundation for data governance. While Snowflake’s security features and access controls ensure data privacy, dbt’s comprehensive documentation and lineage tracking capabilities help enhance data quality management.
- Active User Communities: Snowflake and dbt have established user communities that readily offer many resources and best practices. With access to the shared knowledge and expertise, your data teams can stay ahead of the curve and continuously optimize data workflows.
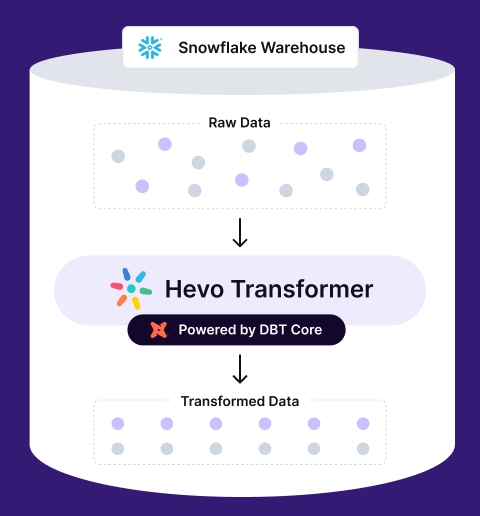
Seamlessly join, aggregate, and modify your data on Snowflake. Automate dbt workflows, version control with Git, and preview changes in real-time. Build, test, and deploy transformations effortlessly, all in one place.
🔹 Instant Data Warehouse Integration – Connect in minutes, auto-fetch tables
🔹 Streamlined dbt Automation – Build, test, and run models with ease
🔹 Built-in Version Control – Collaborate seamlessly with Git integration
🔹 Faster Insights – Preview, transform, and push data instantly
What Are the Steps Involved in Setting up dbt with Snowflake?
Now that you know how beneficial Snowflake dbt integration can be for your organization, let’s explore how you can start setting up dbt (Data Build Tool). There are two variants of dbt: dbt Cloud and dbt Core.
dbt Cloud is a SaaS offering that provides a managed environment for running dbt, enabling your data teams to easily build, test, and deploy analytics code. However, it is a paid option. On the other hand, dbt Core is an open-source command-line interface (CLI) that you can install in your Python environment and run using a terminal.
Process to Set up dbt Cloud with Snowflake
There are two main scenarios when you are establishing a data pipeline between your dbt Cloud project and Snowflake:
Scenario 1: Creating a New Project
If you are setting up a new dbt Cloud project, the platform guides you through connecting to your data platform during the project creation process. Here’s a simplified breakdown:
- Click the “+” icon and select New Project.
- Select “Snowflake” as your data platform from the available options.
- Provide your Snowflake credentials, such as account name, username, password, warehouse, database, and schema.
- Click on Test Connection to ensure dbt Cloud can access your Snowflake instance.

Snowflake dbt Integration: Username/Password Authentication
Scenario 2: Working with Existing Project
If you already have a dbt project that you want to connect to a data platform in dbt Cloud, you’ll need to configure a connection profile manually. Here’s how:
- Navigate to the existing project in dbt Cloud.
- Select the Account Settings option from the Settings icon.
- Click on Edit after selecting the desired project.
- Navigate to the Connections tab.
- Click on Add Connections and select Snowflake.
- Provide the necessary credentials, click on Test Connection, and then Save to establish the connection.
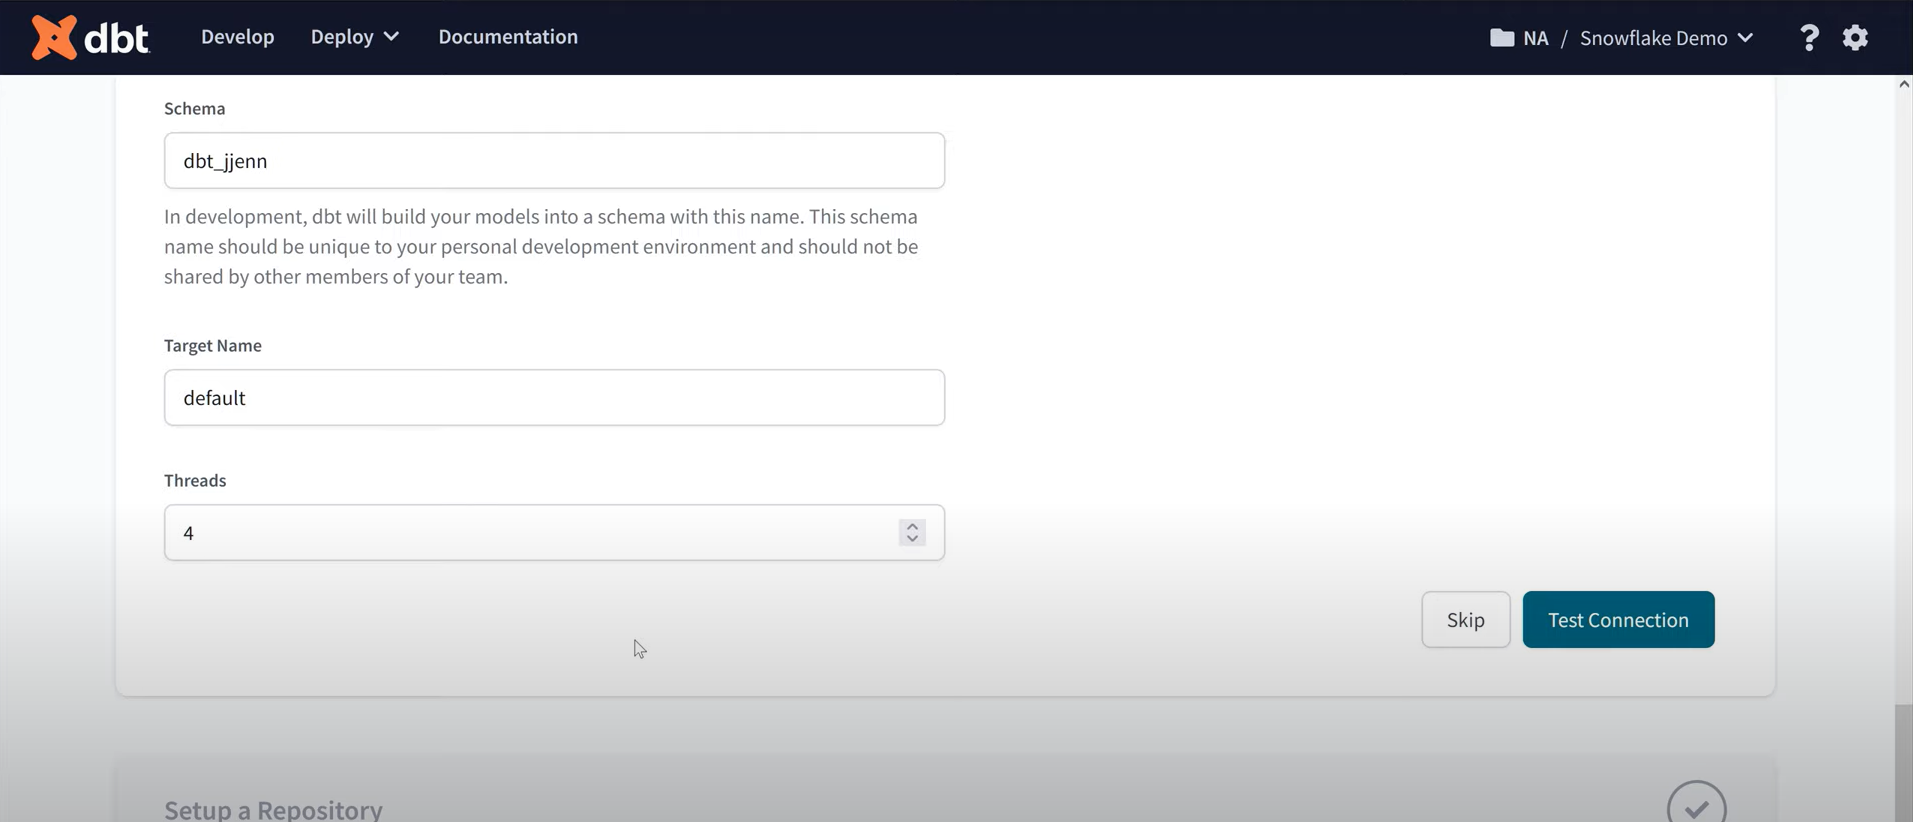
After successfully establishing the connection, you can specify the Git repository to store all your dbt code and start modeling using the cloud environment.
Process to Set up dbt Core with Snowflake
Before you begin, you must install Python on your system. You can download Python and follow the installation instructions. Once you have Python up and running, follow the steps below:
Step 1: Create and Activate Virtual Environment
- Use virtual environments (venv) to namespace pip modules. Create a new environment using the command below:
python -m venv dbt-env - Activate the virtual environment for your specific operating system.
For Mac and Linux:
source dbt-env/bin/activate For Windows:
dbt-env\Scripts\activate Step 2: Create an Alias
- Activate your dbt environment automatically by creating an alias for the source command in your shell’s configuration file using the following command.
alias env_dbt='source <PATH_TO_VIRTUAL_ENV_CONFIG>/bin/activate'
Step 3: Install the Adapter
- Decide on the adapter you want to use and install it using the following command.
python -m pip install dbt-core dbt-ADAPTER_NAME
So, if you choose Snowflake as the adapter, then your command will be,
python -m pip install dbt-core dbt-snowflakeThis step will install dbt-core and dbt-snowflake.
- Create a Git Repository to store your dbt code and clone it to your local machine.
Step 4: Initialize a dbt Project
- Use the following command to create a new dbt project directory. You can replace “my_dbt_project” with your desired project name.
dbt init my_dbt_project- Navigate to the project using cd my_dbt_project and create a file named profiles.yml.
Step 5: Configure Your dbt Connection
- Edit the projects.yml file to configure dbt with your Snowflake credentials, which include account name, password, database, warehouse, and schema. Below is a sample of what this looks like:
my-snowflake-db:
  target: dev
  outputs:
    dev:
      type: snowflake
      account: [account id]
      # User/password auth
      user: [username]
      password: [password]
      role: [user role]
      database: [database name]
      warehouse: [warehouse name]
      schema: [dbt schema]
      threads: [1 or more]
      client_session_keep_alive: False
      query_tag: [anything]
      # optional
      connect_retries: 0 # default 0
      connect_timeout: 10 # default: 10
      retry_on_database_errors: False # default: false
      retry_all: False  # default: false
      reuse_connections: False # default: false (available v1.4+)
This will establish the connection between Snowflake and dbt Core, allowing you to begin modeling and running your dbt codes to perform data transformation.
What Best Practices Should You Implement While Using dbt with Snowflake?
Using the dbt Snowflake combination, you can build a robust data pipeline and streamline your data storage, transformation, and analysis tasks. Below are five best practices to help your teams achieve a smooth, secure, and efficient data workflow.
- Utilize Zero-Copy Clones: Leverage Snowflake’s zero-clones to create isolated development and testing environments. This fosters collaboration and reduces the risk of impacting the production data.
- Create a Shared Staging Database: Establish a central staging database to store intermediate data generated by your dbt models. This promotes organization and simplifies lineage tracking.
- Implement Least Privilege Access Controls: Practice granular access controls using Snowflake roles and permissions. Grant your teams only the privilege they need to perform their tasks, minimizing the risk of data breaches.
- Use Dynamic Data Masking: This helps you protect sensitive data (Personally Identifiable Information) in your data warehouse at the table, column, or row level, ensuring compliance with data regulations.
- Automate Testing and Documentation: Integrate automated testing into your dbt development process to ensure high data quality. Also, maintain up-to-date documentation of your dbt models to facilitate collaboration and understanding.
Use Cases of Snowflake dbt Integration
Various organizations across industries utilize the Snowflake dbt integration to simplify their workflows and gain valuable insights. Here are some use cases using this combination of tools.
- Environmental, Social, and Governance (ESG) teams can use Snowflake dbt integration for rapid prototyping while developing custom metadata solutions for their organizations. This helps in phasing out old on-premises systems.
- Finance automation platforms can use Snowflake and dbt platforms to standardize core metrics, automate transformation jobs, and build a 360-degree view of customer data.
- Organizations can choose Showfalke because of its native SQL capabilities to redevelop dimensional models and deploy dbt for data transformation.
Conclusion
You can leverage the dbt Snowflake integration and establish an effective data transformation and management system for your organization. This article provides the benefits of this integration and outlines steps to set up dbt Cloud and Core with Snowflake. It also explores best practices to help you optimize your experience with dbt and Snowflake platforms.
Find out how to connect dbt to Snowflake effectively. Our resource offers simple steps for setting up and optimizing your data transformation processes. Hevo with its strong integration, allows you to not only export & load data but also transform & enrich your data to make it analysis-ready. Try a 14-day free trial and experience the feature-rich Hevo suite firsthand. Also, check out our unbeatable pricing to choose the best plan for your organization.
FAQs
1. Is dbt still relevant on Snowflake with Dynamic Tables?
dbt remains relevant alongside Snowflake’s Dynamic Tables. While Dynamic Tables offer some transformation capabilities, dbt provides more by excelling in areas like version control, modularity, testing, and documentation. For complex workflows and robust data governance, dbt offers a more comprehensive solution that complements Snowflake’s data warehousing abilities.
2. How is your Snowflake structure set up with dbt?
dbt models typically map to Snowflake schemas, which organize your data logically. Within these schemas, dbt creates tables to hold the transformed data. dbt can also leverage Snowflake views for complex transformations, with sources pointing to raw data for those transformations.
3. What is the difference between dbt and Snowflake?
dbt (data build tool) is an analytics engineering tool for transforming data within a warehouse, while Snowflake is a cloud data warehousing platform that stores and manages data. Essentially, dbt focuses on data transformation, and Snowflake handles data storage and querying.


