

In a data-driven economy, organizations that want to expand should constantly prioritize enhancing the customer experience. As a result, corporate executives must ensure that the organization has the tools necessary to deliver exceptional client experiences. To better understand the customer base and enhance the conversion rate, companies are incorporating the use of a CRM into their businesses. However, they are only as useful as the data amassed, so it’s critical to record everything from initial customer contact through detailed descriptions of all communications.
This article will explain the steps to connect Drip to Snowflake along with a brief introduction to both with their key features. It also explains the limitations of connecting Drip to Snowflake.
Table of Contents
Prerequisites
- Fundamental understanding of integration
- An active Snowflake and Drip account
- IP whitelisting
What is Drip?
Drip is an email CRM marketing platform for e-commerce marketers. It can be used to create new leads by delivering compelling forms at a pre-decided time and geographical area. Drip also allows you to send out persuasive promotional emails, SMS messages, support emails, and follow-ups to consumers who abandoned their shopping carts.
Drip derives its name from the mode of communication of the same name, i.e., drip marketing. It’s a type of direct marketing technique in which marketing content is periodically delivered to potential consumers over a certain length of time. This strategy is typically employed in prolonged sales cycles, such as high-ticket products or enterprise-level sales, non-profit membership, or nurturing possibly broader or longer client lifecycles or lifetime values.
Use Hevo’s no-code data pipeline platform, which can help you automate, simplify, and enrich your data replication process in a few clicks. You can extract and load data from 150+ Data Sources, including Drip, straight into your Data Warehouse, such as Snowflake or any Database.
Why Hevo?
- Incremental Data Load: Hevo allows the transfer of data that has been modified in real-time. This ensures efficient utilization of bandwidth on both ends.
- Live Support: Our team is available round the clock to extend exceptional support to our customers through Chat, Email, and Support Calls.
- Automapping: Hevo provides you with an automapping feature to automatically map your schema.
Explore Hevo’s features and discover why it is rated 4.3 on G2 and 4.7 on Software Advice for its seamless data integration. Try out the 14-day free trial today to experience hassle-free data integration.
Get Started with Hevo for FreeKey Features of Drip
- Marketing Automation: If you’re running a marketing campaign, this Drip feature is perfect for you. It prioritizes and concentrates on email marketing, which is where e-commerce businesses should put their efforts.
- Personalization: Another essential purpose that Drip features strive to fulfill is personalization. Drip offers extensive segmentation based on activities, such as clicks, sales, emails opened, and more, which allows you to reach clients depending on their preferences.
- Integrations: One of Drip’s most significant features is the ability to integrate with other programs. Drip partners with over 100 companies to improve workflow functionality.
- Tracking Actions Influenced by Behavior: Drip’s customer insights can be used to trigger numerous marketing activities depending on your customers’ activity, such as scheduled email campaigns, retargeting, and more.
- A/B testing: It doesn’t matter how good you are at creating emails; you won’t know what works unless you test it. Drip has an A/B testing feature that allows marketers to test two versions of the same page simultaneously and compare the results.
What is Snowflake?
Snowflake is a cloud data warehouse platform that is offered as a SaaS solution to the users. It leverages the ANSI SQL protocol that allows it to handle structured and semi-structured data formats like JSON, XML, and Parquet.
Snowflake employs shared disk architecture, which allows all compute nodes in the platform to access a common data repository for persisting data. Snowflake also executes queries utilizing MPP compute clusters, which use shared-nothing architecture to store a subset of the complete data set locally on each node in the cluster, which helps with performance control. In a shared-nothing configuration, each computational node has its own private memory and storage or disk space.
Key Features of Snowflake
- Scalability: Snowflake’s multi-cluster architecture facilitates separate computing and storage resources. This design allows it to scale up and down in accordance with business needs.
- Better Analytics: By switching from nightly batch loads to real-time data streams, Snowflake helps optimize your analytics workflow. Providing safe, concurrent, and controlled access to your data warehouse throughout your organization may improve the quality of your analytics.
- Cloning: Another key aspect of the Snowflake cloud data warehouse is cloning. The zero-copy functionality in Snowflake allows you to quickly clone any database or table without having to produce a new copy.
Drip to Snowflake Connection Process
Method 1: Drip to Snowflake Integration Using Hevo’s Method
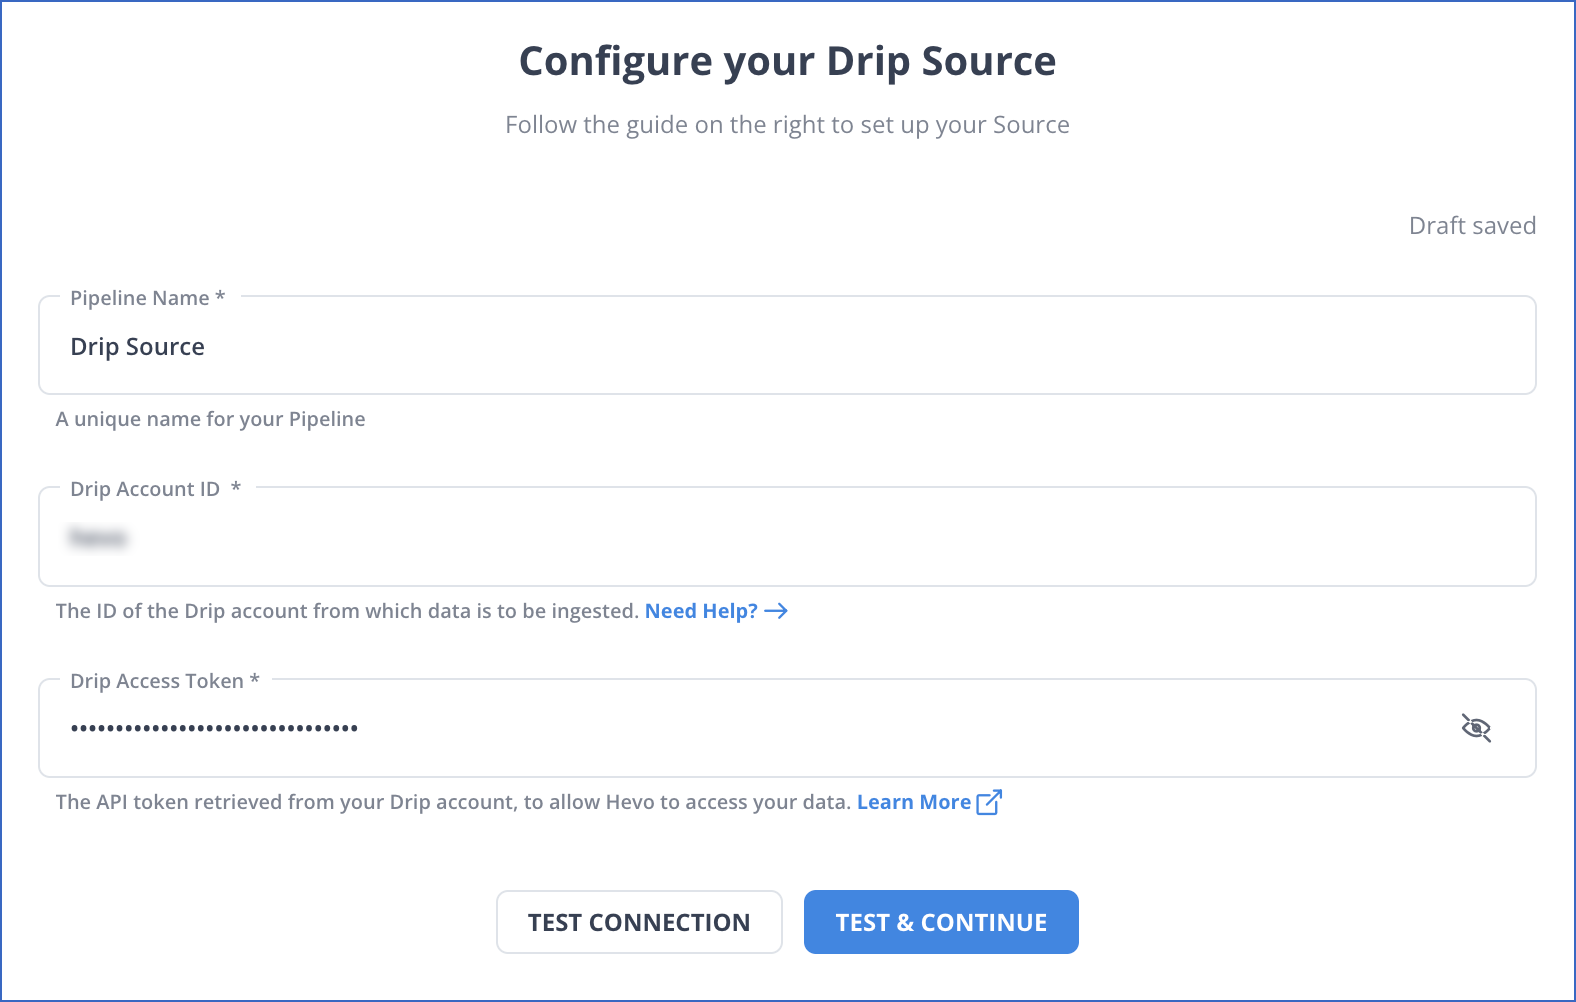
Step 1: Configure Drip as a Source
Step 2: Configure Snowflake as the Destination

Hence, your data will be replicated.
Method 2: Drip to Snowflake Integration using Manual method
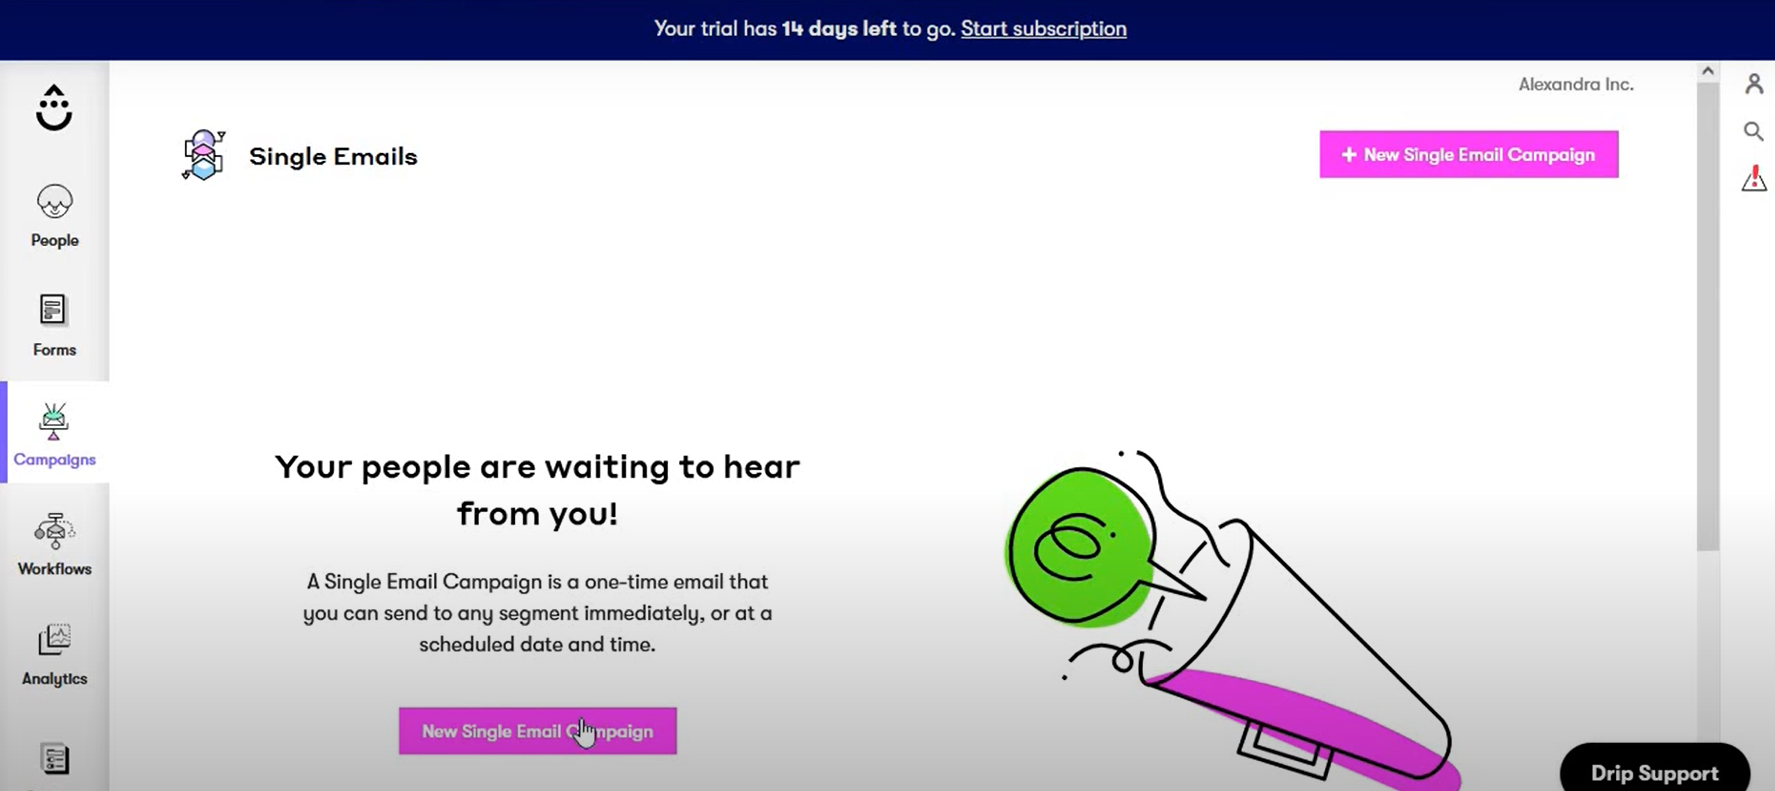
Step 1: Exporting Data from Drip
1) For Exporting People List
The first step in Drip to Snowflake Integration is to create a CSV file, follow these steps:
- Step 1: Navigate to People > Active to connect Drip to Snowflake.
- Step 2: Use the filter to select the export section you want, or leave it blank to export the whole list.
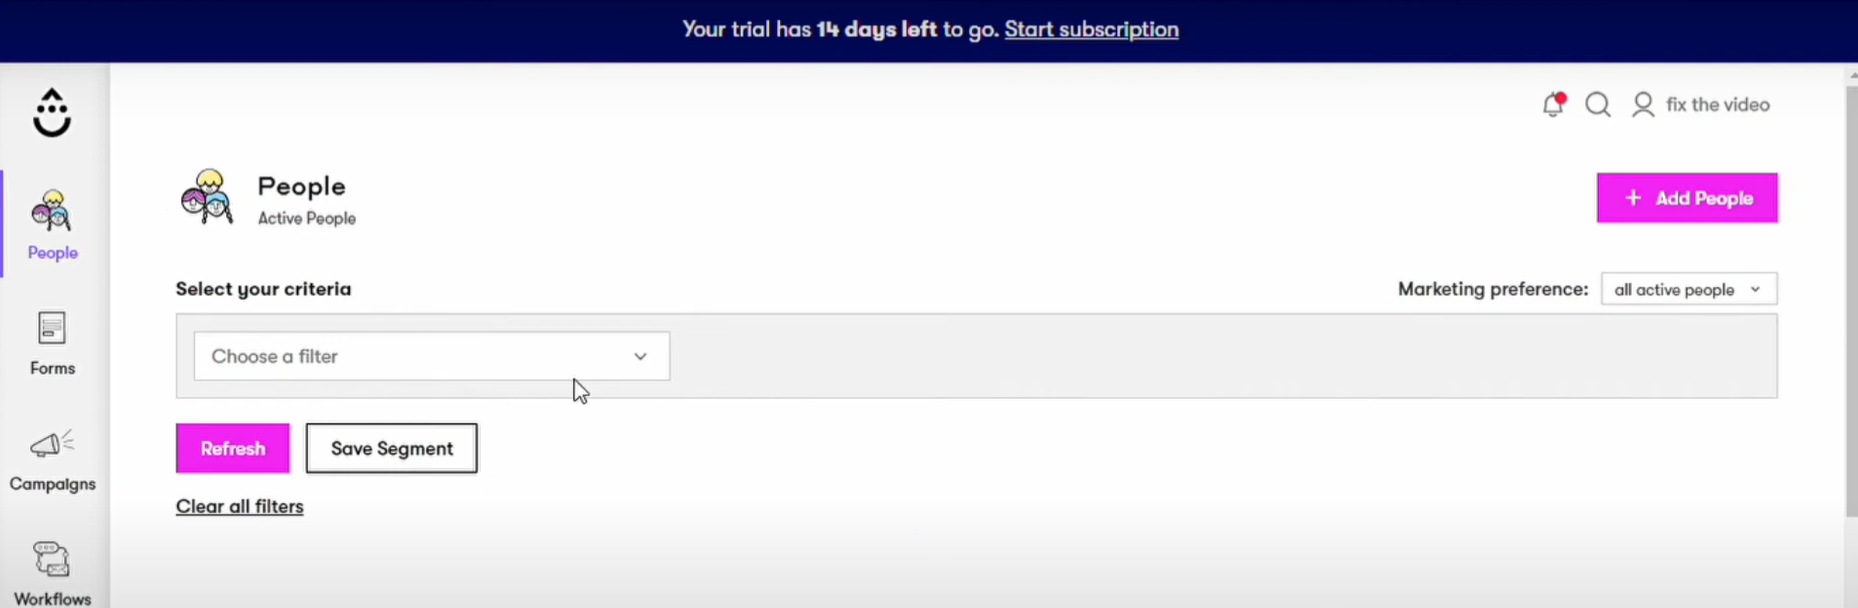
- Step 3: Select Actions > Export to CSV from the drop-down menu.
- Step 4: Click the Okay button to connect Drip to Snowflake.
An email with a link to the CSV file will be sent to the email address you use to log in, which can be found in Settings > User Settings.
2) Export Account-wide Data
The next step in Drip to Snowflake Integration is to export account-wide data, follow these steps:
- Step 1: Go to Settings > Account > Export Account from the drop-down menu.
- Step 2: Click Export Account > Okay to connect Drip to Snowflake.
An email with a link to the CSV file will be sent to the email address you use to log in, which can be found in Settings > User Settings.
An Account Export contains the following information:
- Templates
- People List
- Email Series Campaigns
3) Export Analytics
The next step in Drip to Snowflake Integration is to generate an Email Metrics report for a specific campaign and export the contact list to a CSV file, follow these steps:
- Step 1: Select Email Metrics from the drop-down menu in Analytics.
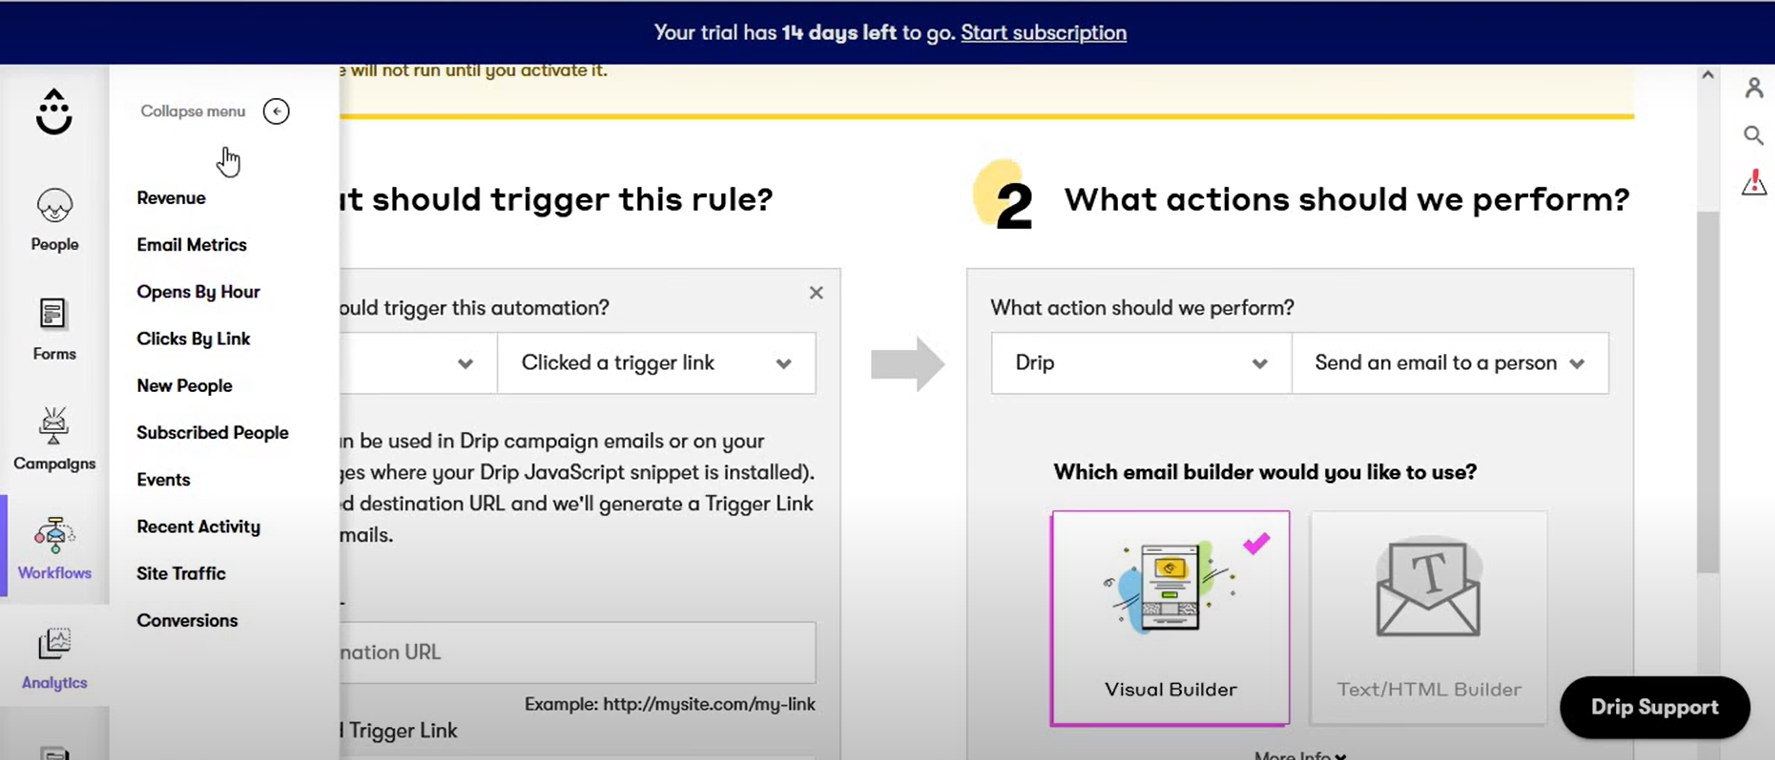
- Step 2: Choose between a single email campaign, an email series, or a workflow email.
- Step 3: Choose a specific email address.
- Step 4: Select the date range for the report and then click Apply.
- Step 5: Select CSV as your export format.
The next step in Drip to Snowflake Integration is to download email metrics in bulk to a CSV file, follow these steps:
To access Email Metrics, go to Settings > Analytics > Email Metrics.
- Step 1: Select Bulk Download from the menu bar.
- Step 2: Choose between a single email campaign, a series of emails, or a workflow email.
- Step 3: Select a start date by clicking Start Date and using the calendar.
- Step 4: Select an end date by clicking End Date and using the calendar.
- Step 5: Select “Download Report” from the drop-down menu in Drip to Snowflake connection.
In both scenarios, an email with a link to the CSV file will be sent to the email address you use to log in, which can be found in Settings > User Settings.
Step 2: Importing Data via the Snowflake Web Interface
1) Start Loading Data
The next step in Drip to Snowflake Integration is to download data.
- Step 1: Click on Data > Databases.
- Step 2: To see the items in a database, click on the database’s link.
- Step 3: Click on the table by selecting a row and then loading it, or by selecting the table name and then clicking the load button.
- Step 4: The data loading wizard appears, which will insert data into the table you requested in Drip to Snowflake connection.
Choosing Preferred Warehouse
The next step in Drip to Snowflake Integration is to choose preferred warehouse.
- Step 1: Because Snowflake stores data in warehouses, choose one from the drop-down menu.
- Step 2: After that, click the Next button to connect Drip to Snowflake.
2) Loading Files
The next step in Drip to Snowflake Integration is to load files.
- Step 1:Click Load files from your computer, followed by the Select Files option.
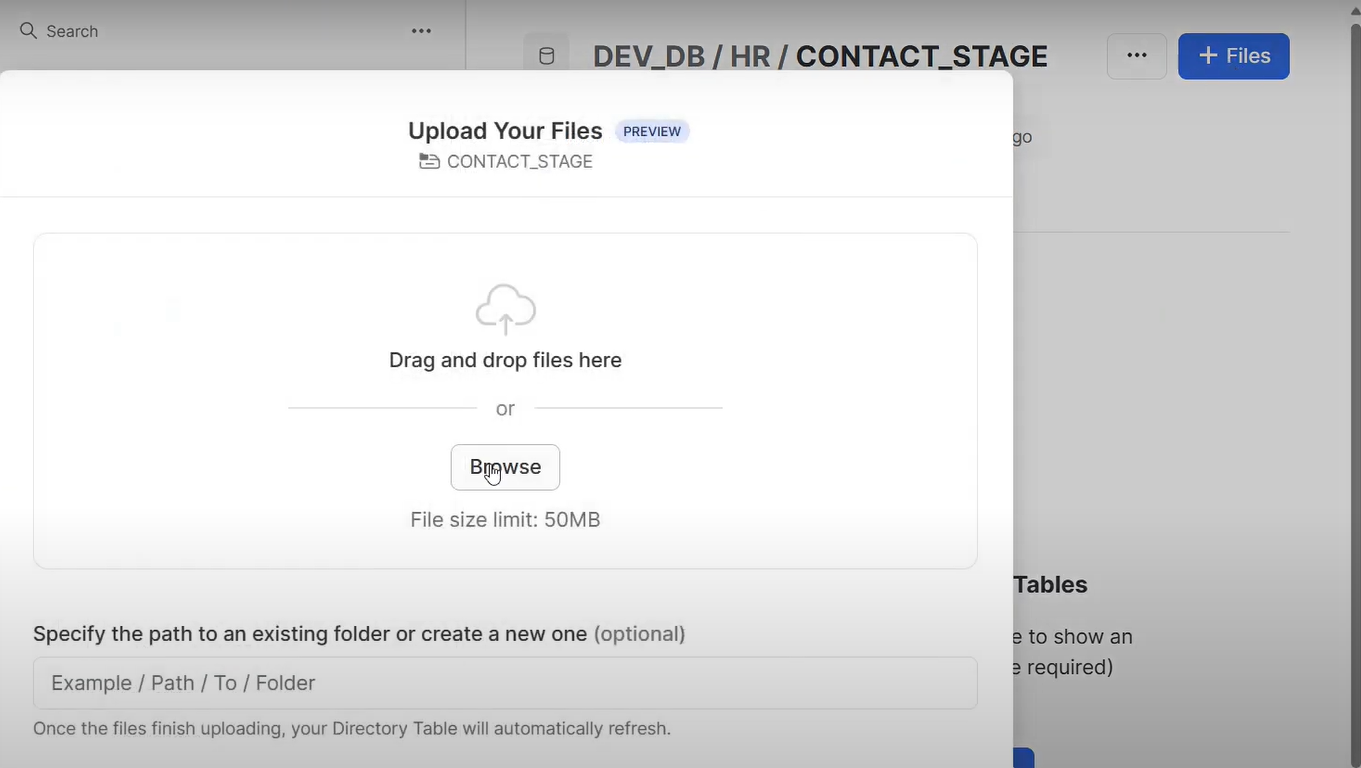
- Step 2: After selecting one or more local data files, click the Open option.
- Step 3: After that, press the Next key to connect Drip to Snowflake.
3) Choosing a File Format
The next step in Drip to Snowflake Integration is to choose a file format.
For an already existing file format:
- Step 1: Select an existing file format, then click Next.
To Create a New File Format:
- Step 1: Click the plus (+) symbol next to the drop-down list.
- Step 2: Fill in the fields on the screen to match the format of your data files.
- Step 3: Click the Finish button.
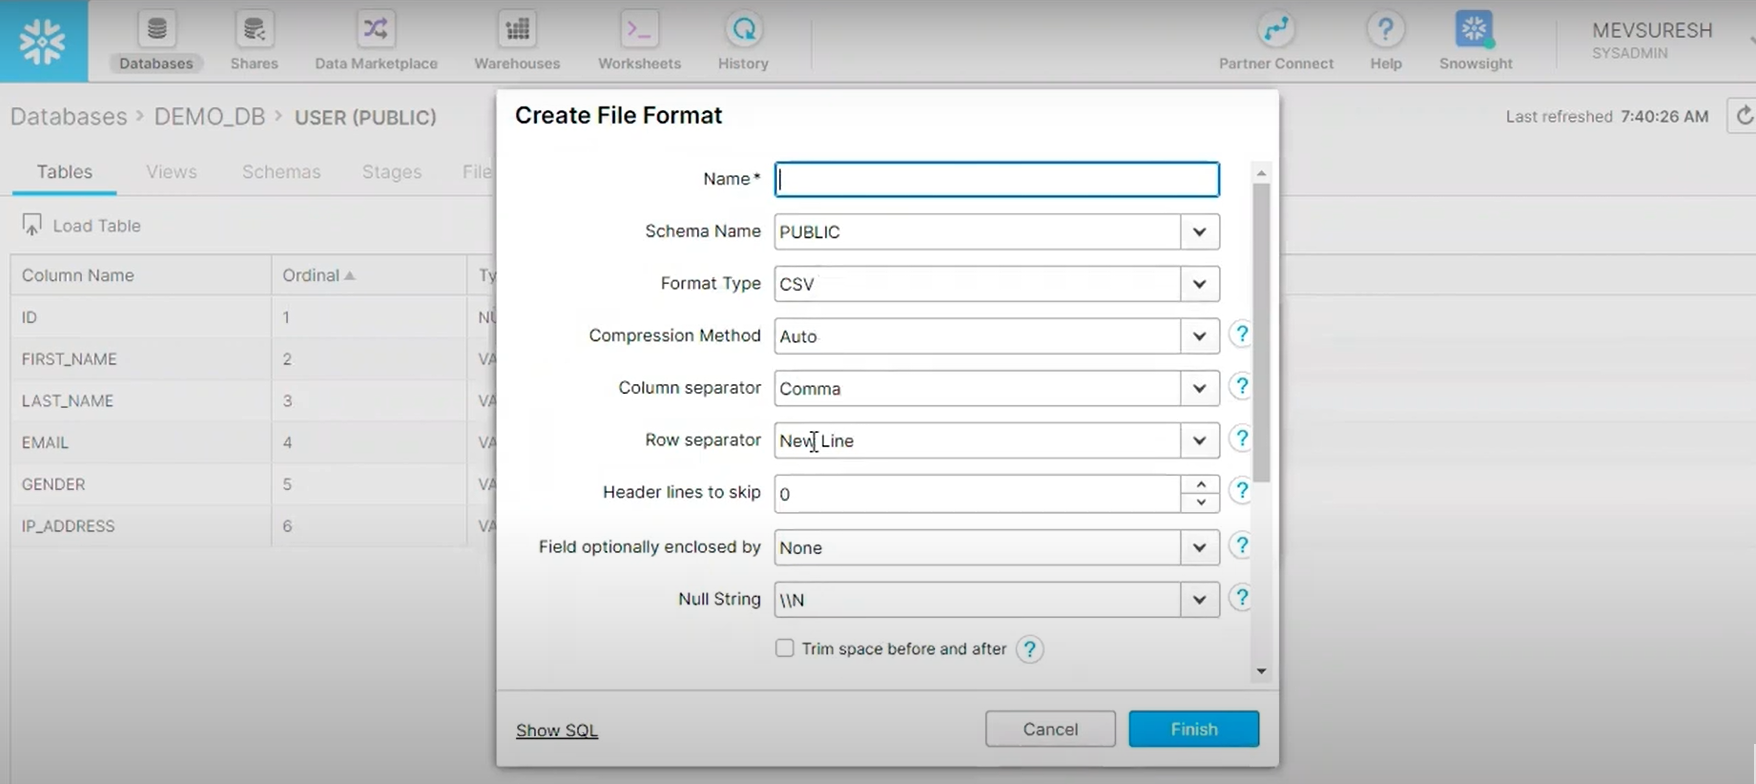
- Step 4: Choose your new named file format from the drop-down list.
- Step 5: Then hit the Next button.
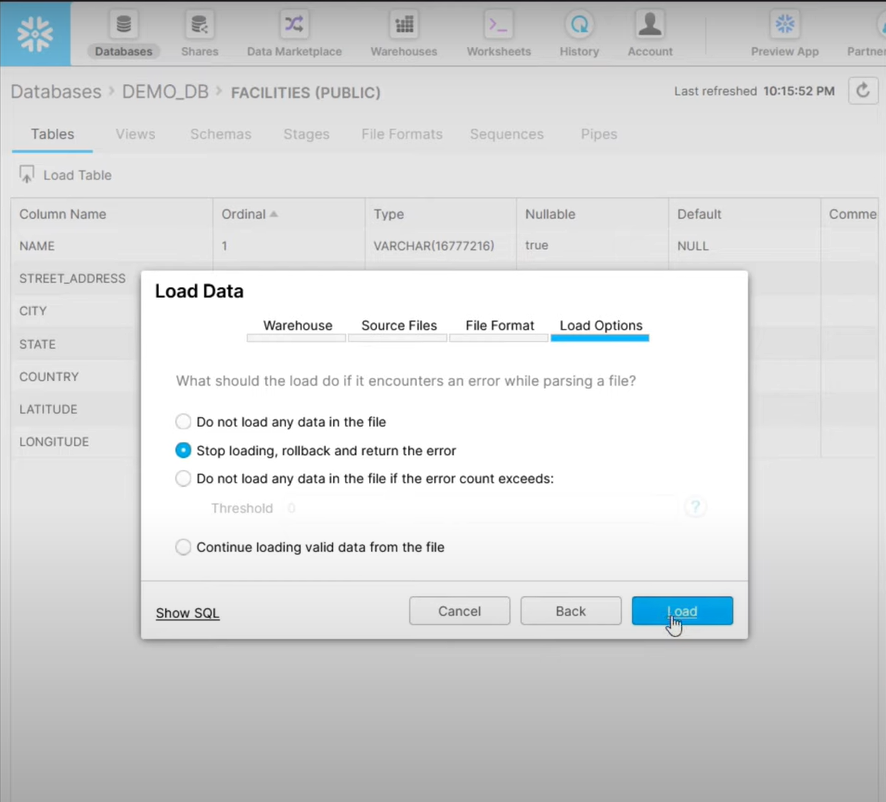
4) Configuring Load Options
The next step in Drip to Snowflake Integration is to configure load options.
- Step 1: If the data files include errors, specify how Snowflake should respond.
- Step 2: Choose the Load option. Snowflake imports data into your chosen table using the warehouse you choose.
- Step 3: After that, click the OK button. The data loading wizard terminates.
Limitations of Drip to Snowflake Connection
Connecting Drip to Snowflake manually is a straightforward method, especially when you are not working with big data and do not need real-time information. But, in this competitive market, obtaining real-time data can uniquely position you to achieve your business goals. A manual process can also increase your effort in cleaning the data since human errors are a major concern for obtaining quality data. To eliminate data quality issues due to human error, you must leverage no-code or low-code ETL platforms.

Conclusion
Connecting Drip to Snowflake can allow users to take advantage of the scalability functionalities of the latter, which shall help you analyze data with BI and machine learning techniques to make better decisions. The article discusses an easy and intuitive way to connect Drip to Snowflake. However, as it is a laborious and time-consuming approach, switching to ETL pipeline technologies like Hevo Data for efficient and real-time data migration will prove valuable.
Try a 14-day free trial and experience the feature-rich Hevo suite firsthand. Also, check out our unbeatable pricing to choose the best plan for your organization.
Frequently Asked Questions
1. Will I lose any data during the transfer?
With reliable ETL tools, the possibilities of data loss are remote, but any integration requires monitoring for and validating after the transfer process.
2. How frequently can data be synced?
The data sync frequency will depend on the ETL tool. For example, some ETL tools will permit near-real-time sync, while some others might allow batch updates on a daily or weekly basis.
3. Is real-time data syncing possible with Drip and Snowflake?
Yes, you can even sync updated information on what’s going on in marketing using a suitable ETL tool to get near real-time syncing.
Share it with your connections.
-
 Share To LinkedIn
-
 Share To Facebook
-
 Share To X
-
 Copy Link


