MySQL replication, or more specifically, MySQL master-slave replication, is crucial for maintaining data availability by allowing real-time data copying between the source and its destination. It also serves as a dependable backup solution, ensuring a quick recovery in the event of disasters or hardware failures.
In this article, we have extensively explored the MySQL master-slave replication process, providing you with a comprehensive step-by-step guide to help you implement and achieve replication in your company.
Table of Contents
What Is MySQL Master Slave Replication?
MySQL master-slave replication is the process of copying data from a primary database (master) to one or more secondary databases (slaves). The master handles all write operations, while slaves replicate the data, ensuring high availability and load balancing.
The slave servers stay synchronized with the master and serve as read-only copies, aiding in disaster recovery. MySQL supports different replication types such as asynchronous, semi-synchronous, and group replication. They offer flexibility based on application needs.
Master-slave replication is a popular technique for distributing workloads and improving load balancing, high availability, and backup capabilities in large-scale applications across servers.
Migrating your data from MySQL doesn’t have to be complex. Relax and go for a seamless migration using Hevo’s no-code platform. With Hevo, you can:
- Effortlessly extract data from MySQL and other 150+ connectors.
- Tailor your data to the destination’s needs with features like drag-and-drop and custom Python scripts.
- Achieve lightning-fast data loading, making your data analysis-ready.
Try to see why customers like ThoughtSpot and Postman have upgraded to a powerful data and analytics stack by incorporating Hevo!
Get Started with Hevo for FreeWhy Is Master-Slave Replication Important?
- High Availability: Ensures data remains accessible even if the master server fails by allowing read access from the slave server.
- Load Balancing: Distributes read operations to the slave, reducing the load on the master server and improving performance.
- Backup Support: Enables backups from the slave without affecting the master server’s operations.
- Disaster Recovery: Provides a failover mechanism to recover data in the event of a server crash quickly.
- Scalability: Facilitates scaling by adding more slave servers to handle increased traffic.
How To Set Up MySQL Master Slave Replication?
Prerequisites
- Two servers running Ubuntu 20.04. Both should have a non-root administrative user with
sudoPrivileges and a firewall configured with UFW. Follow our initial server setup guide for Ubuntu 20.04 to set up both servers. - Ensure MySQL is installed on each server. While writing this guide, we have assumed that you’re using the latest version of MySQL available from the default Ubuntu repositories, which, as of this writing, is version 8.0.25. To install this on both servers, follow our guide on How to Install MySQL on Ubuntu 20.04.
Check out how to optimize your slave databases using efficient MySQL Joins.
For this tutorial, let’s assume the master is called root@repl-master and the slave is called root@repl-slave.
For this setup, let’s assume the IP addresses for the master and slave are as follows: Master server: 12.34.56.111
Slave server: 12.23.34.222
- Setting Up The Master
- Create A New User For Slave
- Move Data From Master To Slave
- Configure Slave Server
- Import Data Dump
- Start Slave Server
- Test MySQL Master Slave Replication
Step 1. Setting Up The Master
The first step is to install and configure the master server. If you have not installed MySQL, then you can install MySQL using the following command:
 root@repl-master:~# sudo apt-get update
 root@repl-master:~# sudo apt-get install mysql-server mysql-client -y
 root@repl-master:~# sudo mysql_secure_installation
You can also read through our guide on Installing MySQL on Ubuntu 20.04: 6 Easy Steps for more insights.
Once you have installed MySQL successfully, use the following command to edit the MySQL configuration file:
root@repl-master:~# sudo nano /etc/mysql/mysql.conf.d/mysqld.cnfNext, in the same file, locate the line containing ‘bind-address = 127.0.0.1 and replace it with the IP address of your master replication server. So, the line will look like:
Next, find the following lines in the file:
server-id = 1
log_bin = /var/log/mysql/mysql-bin.log
You will see that the above lines have been commented. Simply uncomment these lines and exit the edit interface by pressing CTRL + X. Then, save the changes and restart the MySQL service for the changes to take effect.
Restart MySQL service using the following command:
root@repl-master:~# sudo service mysql restartStep 2. Create a New User for Slave
The next step is to create a new user for your slave server. Use the following command to create it:
root@repl-master:~# mysql -uroot -p;
mysql> CREATE USER ‘slave’@’12.34.56.789‘ IDENTIFIED BY ‘SLAVE_PASSWORD‘;
mysql> GRANT REPLICATION SLAVE ON . TO ‘slave’@’12.34.56.222 ‘;
mysql> FLUSH PRIVILEGES;
mysql> FLUSH TABLES WITH READ LOCK;
You can use the following command to know the current status of the master server:
mysql> SHOW MASTER STATUS;This command also tells the slave to follow the master from this position.
Step 3. Move Data From Master to Slave
You can start moving data from the master to the slave after the position has been marked. Use the following command to create a MySQL dump file in order to accomplish this:
root@repl-master:~# mysqldump -u root -p –all-databases –master-data > data.sqlTo copy the dump file to the slave, use the following command:
scp data.sql root@12.34.56.222Unlock the tables using the following command:
mysql> UNLOCK TABLES; Step 4. Configure Slave Server
Now, all you need to do is configure the slave server and test if replication is working. Ensure MySQL is installed.
Open the configuration file in your slave server and update these lines:
root@repl-slave:~# sudo nano /etc/mysql/mysql.conf.d/mysqld.cnfThe slave server requires the same IP address binding and the same two lines must be uncommented as on the master server.
Now, restart the MySQL server using the following command:
root@repl-slave:~# sudo service mysql restartStep 5. Import Data Dump
Use the following command to import the dump file to the slave server:
root@repl-slave:~# mysql -uroot -p < data.sqlOnce the data is done importing, you need to stop MySQL on the slave server using the following command:
root@repl-slave:~# mysql -uroot -p;
mysql> STOP SLAVE;
You have now imported the dump files and updated the master’s IP address, password, log file name, and position to enable communication between the master and slave without any issues.
Step 6. Start Slave Server
Next, use the Start Slave command to start operating the slave server.
START SLAVE;Step 7. Test MySQL Replication Master Slave
To test whether your MySQL master-slave replication works, simply create a database on your master server and verify that it is replicated on the slave server. If you can see the database in the slave, then it is working fine.
Create a test database in a master server called sampledb.
CREATE DATABASE sampledb;Now, log in to your slave server and list the databases. If you see the sampledb there, then the master-slave replication process is working fine.
Login to your slave server and use the following command to list all databases:
show databases;Using Hevo’s No-code Data Pipeline for Seamless MySQL Replication
Hevo Data, an automated no-code data pipeline, provides a hassle-free solution and helps you replicate your data from MySQL to any database, data warehouse, or destination of your choice within minutes. Hevo is fully managed and completely automates the process of not only loading data from your desired source but also enriching the data and transforming it into an analysis-ready form without having to write a single line of code.
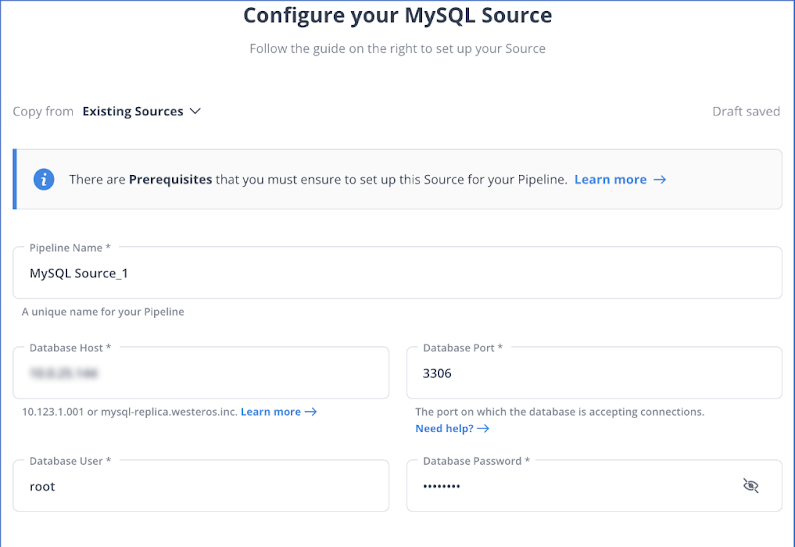
Configure MySQL Source To Replicate Your Data

With continuous real-time data movement, load your data from MySQL to your destination warehouse with Hevo’s easy-to-setup and no-code interface.
Advantages of MySQL Master Slave Replication
- Data Redundancy and Reduced Downtime: The slave server keeps a backup of your data. If the master server fails, the slave server can take over, ensuring uninterrupted access and minimizing downtime.
- Load Balancing: Read-intensive queries can be distributed among multiple slave servers, creating ample space for write operations to be carried out on the master server, thereby boosting the overall performance of the servers.
- Better Read Performance: Since read queries are offloaded to multiple slave servers, allowing the master server to focus on write queries, this separation of read and write operations optimizes performance, especially in read-heavy workloads.
- Horizontal Scaling: The replication setup allows for horizontal scaling by adding more slave servers to the architecture. This scalability is particularly useful in cases where read loads increase without requiring changes to the database system.
- Disaster Recovery: The slave servers act as hot backups. In the event of data loss or corruption on the master server, a slave server can be promoted to master, minimizing the impact and catalyzing the recovery process.
Limitations of Master Slave Replication
- Single Point of Failure: If the master database fails, writes are completely halted until failover is manually or automatically managed.
- Replication Lag: Slaves are not perfectly in sync with the master, which can be caused by network latency or high write loads, causing stale reads.
- Read-Only Slaves: Slaves typically handle only read operations, signifying that write operations must always go through the master, which can create a bottleneck.
- Complexity in Failover: Promoting a slave to a master in case of failure often requires manual intervention or additional automation tools.
- Risk of Data Loss: If the master crashes before replication is complete, recent transactions may be lost, resulting in data inconsistency.
Check out how to overcome replication challenges with MySQL Partitioning strategies.
Conclusion
In this guide, we walked you through the steps to set up MySQL master-slave replication. Gaining a clear understanding of this process is crucial, especially when you’re planning a data migration from platforms like Salesforce to MySQL, as it helps maintain consistency and reliability across your data systems.
The step-by-step guide is specifically designed to help beginners understand the process and begin testing the replication process in their environment. But this process requires extensive hard work as you manually configure many details. If you want to overlook this hardship and experience a hassle-free process, then consider giving Hevo a try.
Here are some essentials for a deeper dive into MySQL Replication:
- MySQL Master Master Replication: 4 Easy Steps
- MySQL GTIDs Replication Set Up: 8 Easy Steps
- MySQL BinLog Based Replication: 2 Easy Methods
Sign up for a free 14-day trial to streamline your data integration process. You may examine Hevo’s pricing plans and decide on the best plan for your business needs.
FAQs
1. How to set up database replication in MySQL?
To set up database replication in MySQL:
– Configure the my.cnf file on the master and slave servers with appropriate server-id and log-bin settings.
– Use CHANGE MASTER TO command on the slave server to connect and replicate data from the master server.
2. What is MySQL replication?
MySQL replication is a process that allows data from one MySQL database server (known as the master) to be copied automatically to one or more MySQL database servers (known as slaves).
3. What is the default replication in MySQL?
In MySQL, the default replication mechanism is asynchronous replication. This means that transactions committed on the master server are asynchronously copied to one or more slave servers.
4. How to setup MySQL group replication?
To set up MySQL Group Replication:
– Configure MySQL servers with server-id, gtid_mode, and enforce_gtid_consistency in my.cnf.
– Start MySQL servers and use CREATE USER and GRANT statements for group replication, then execute SET GLOBAL group_replication_bootstrap_group=ON; START GROUP_REPLICATION;


