


Business data has never been this continuous and vast. Amidst all this, what has become an essential requirement is storing and analyzing the data and integrating platforms that specialize in both areas. This would be central to unlocking all that you have in your data assets. In such a scenario, holding large volumes of data without hassle in a Cloud Data Warehouse such as Snowflake and integrating with powerful BI tools like Sisense makes sense.
This blog will guide you on Sisense Snowflake integration, compare their core features, highlight the three most popular integration methods, and summarize what you should expect from this dynamic duo. Let’s get started!
Table of Contents
Prerequisites
- An active Snowflake Account.
- An active Sisense Subscription.
- Working knowledge of Databases and Data Warehouses.
Introduction to Snowflake
Snowflake is a cloud-based data warehousing tool that was founded in 2012. Storage, reporting, and analysis are the key factors of the leading cloud computing-based data warehousing solution, allowing firms to store and analyze structured and semi-structured data easily.
Its platform that hosts the services offered is comprised of Microsoft Azure, Amazon S3, and Google Cloud, accommodating cross-platform and cross-regional flexibility. Its approach helps organizations share their data safely, thus getting rid of operational complexity and accelerating business value at scale.
Control your Snowflake spend – our pricing calculator makes cost estimation effortless.
Key Features of Snowflake
Snowflake runs on cloud infrastructure and has some of the best key features that make it a distinct Cloud Data Warehouse:
- Snowflake has separate layers of storage and computing to scale up and down resources while in operation.
- Through its multi-cluster architecture, it aids in running several queries without interference, hence smooth ETL/ELT processes and faster report delivery.
- Snowflake encrypts data and supports dynamic data masking, two-factor authentication, and SSO to ensure client data safety.
Need a fast ETL tool for Snowflake? Hevo’s intuitive platform streamlines the process. Check out key features of Hevo:
- Ensure secure, consistent, and zero data loss with Hevo!
- Eliminate the need for manual schema mapping with the auto-mapping feature.
- As your data sources expand, Hevo grows with you by processing millions of records with near-zero latency.
Learn why Greenly.Earth takes data-driven decisions with Hevo to quickly set up an ingestion pipeline.
Sign up here for a 14-Day Free Trial!Introduction to Sisense

Sisense is an AI-driven (Artificial Intelligence) end-to-end BI (Business Intelligence) solution that provides insights on complex data for the smooth working of business operations and achieving better results. It infuses analytics into every workflow, process, or application and delivers rapid ROI (Return On Investment) reports. Further, it consolidates, stores, and accumulates data.
Key Features of Sisense
Sisense has gained wide popularity in the market. Some of the key features of Sisense include:
- Easy-to-use reports interface with Ad-hoc data analysis.
- Provides a wide range of widgets, including gauges, charts, and graphs.
- Does not require programming or SQL (Structured Query Language) writing for complex business queries.
- Collect data in large volumes from multiple sources at high speed.
- Creates robust dashboards for any device with additional features to customize easily.
Methods to Set Up Sisense Snowflake Integration
Sisense Snowflake integration will enable users to access the collected information in the databases, tables, and views for better reporting, analysis, and other activities. Check out some of the different methods to set up Sisense Snowflake integration.
- Method 1: Sisense Snowflake Integration by Creating Live Connection
- Method 2: Sisense Snowflake Integration using ElasticCube
- Method 3: Sisense Snowflake Integration for Cloud Data Teams
Method 1: Sisense Snowflake Integration by Creating Live Connection
Prerequisites
- A connection string responsible for identifying the Snowflake database and its credentials is required. It is essential to add the warehouse name (warehouse=<name>) and database name (db=<name>) in the connection string.
- If you can’t provide user credentials, opt for Key-Pair credentials for authentication.
Follow the steps to add a Snowflake live connection in Sisense:
- Step 1: To create a new live model, go to the Data page section. Open a live model or click +Live
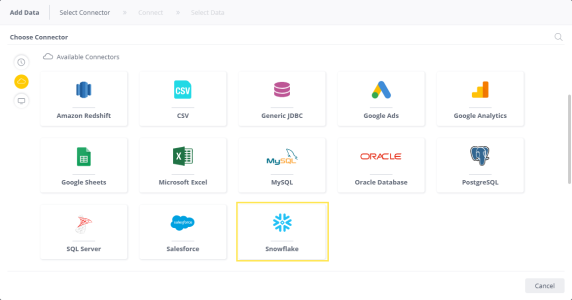
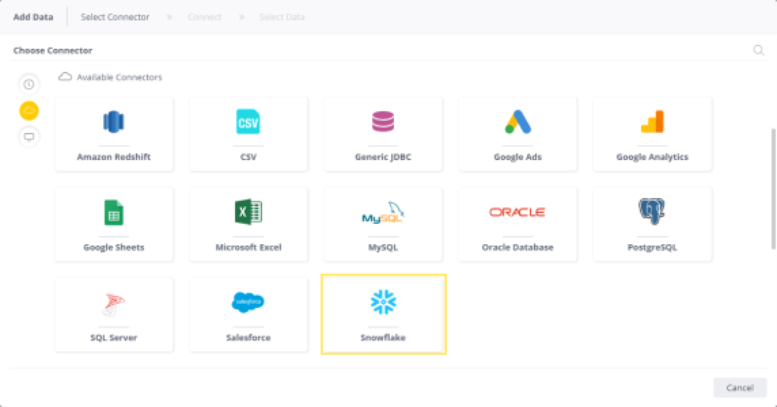
- Step 2: Under the Model Editor section, click +Data, and the Add Data dialog box will pop up.
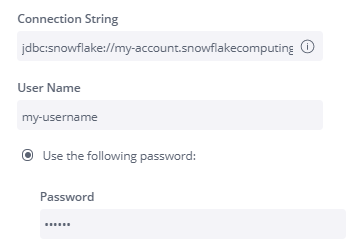
- Step 3: Select Snowflake in the Add Data dialog box and Add your connection string to your Snowflake database.
- Step 4: Fill Snowflake user name and password
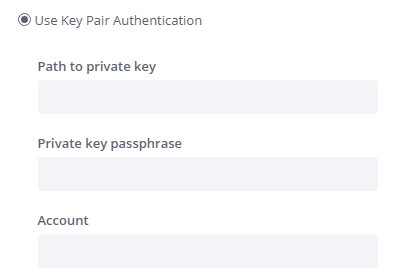
or use the Key Pair value by selecting Use Key Pair Authentication.
- Step 5: Click next to view all the tables and views associated with Snowflake.
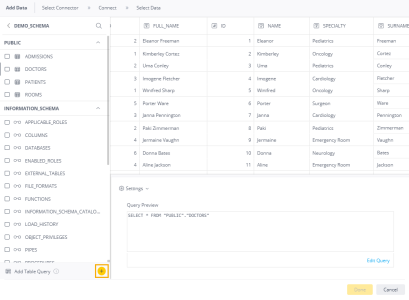
- Step 6: Choose the relevant table or view from the Table list you want to work on.
- Step 7: After selecting the tables, click on Done, and it will be added to your schema.
Method 2: Sisense Snowflake Integration by using ElasticCube
This method will teach you how to set up the integration using the desktop ElastiCube Manager.
- Step 1: In the Data page, open an ElastiCube or click +ElasticCube to create a new ElastiCube.
- Step 2: From the Tables list, select the relevant table or view you want to work with. When you select the table or view, a new option, Add Import Query, appears at the bottom of the list.
- Step 3: In the Model Editor, click +Data. The Add Data dialog box will appear, and you should select Snowflake.
- Step 4: In the Connection String, enter your connection string to your Snowflake database.
- Step 5: Fill Snowflake username and password
OR use the Key Pair value by selecting Use Key Pair Authentication.
- Step 6: Click next to view all the tables and views associated with Snowflake.
- Step 7: Choose the relevant table or view from the Table list you want to work on.
- Step 8: After selecting the tables, click on Done, and it will be added to your schema.

Method 3: Sisense Snowflake Integration for Cloud Data Teams
Make sure to have a Snowflake account with an Account Admin Role before you begin connecting Sisense for Cloud Data Teams to Snowflake.
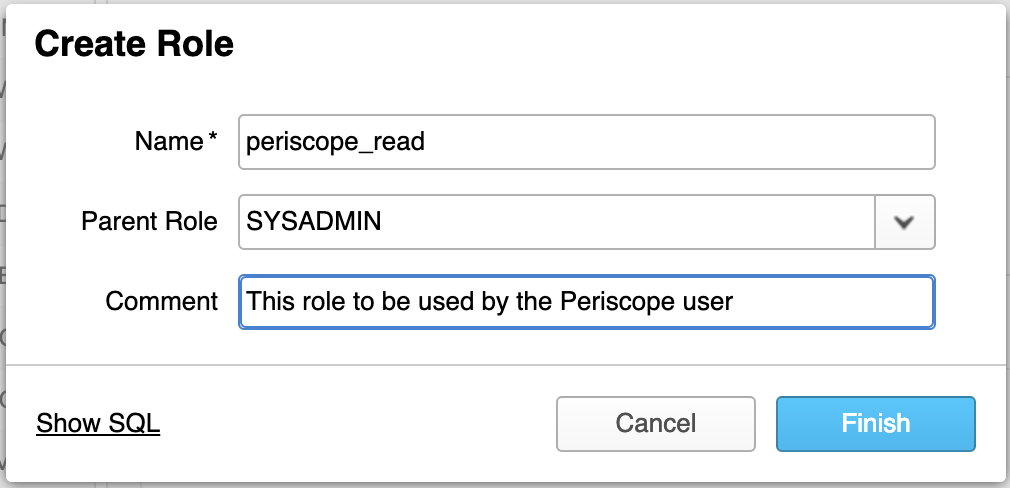
Step 1: Setting up a Sisense Role
- Create a Sisense role to make sure you have permission to access the database that has to be connected. Any permission granted to the new role will be inherited by the parent role.
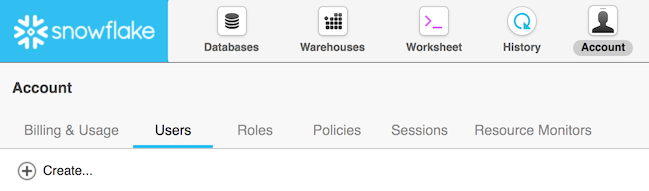
Step 2: Setting up a Sisense User
- Go to the User section within the Snowflake Account tab to add a new user for Sisense.
- Add a name to the account and choose a password.

- Do not miss filling in the user preferences. In the default namespace section, add the database name you want to connect.
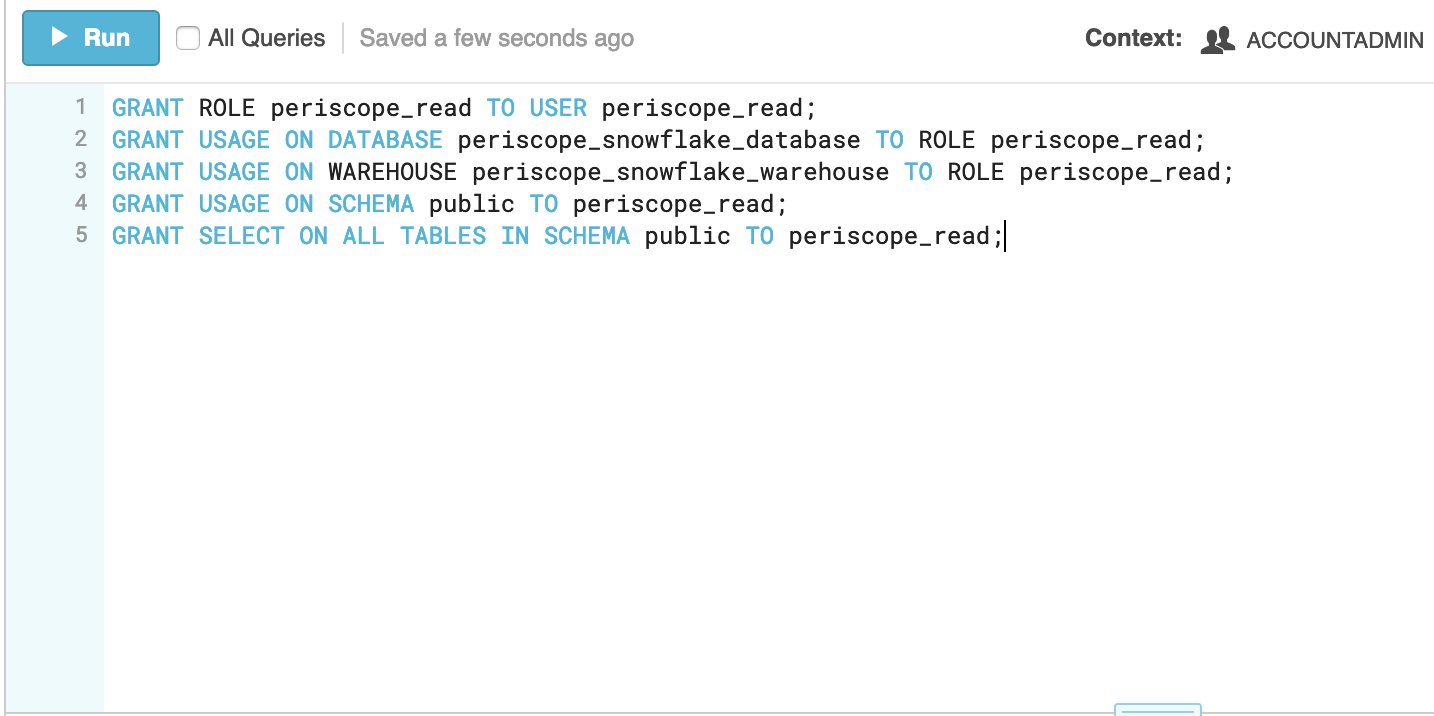
Step 3: Configuring Permissions for Sisense Roles
- Log in with the Account Admin role and open Snowflake’s Worksheet tab.
- As visible in the screenshot, run a few commands and substitute your warehouse and database information. Make sure that every command gets executed.
- However, there is a setting in the worksheet according to which only the first command will be executed.
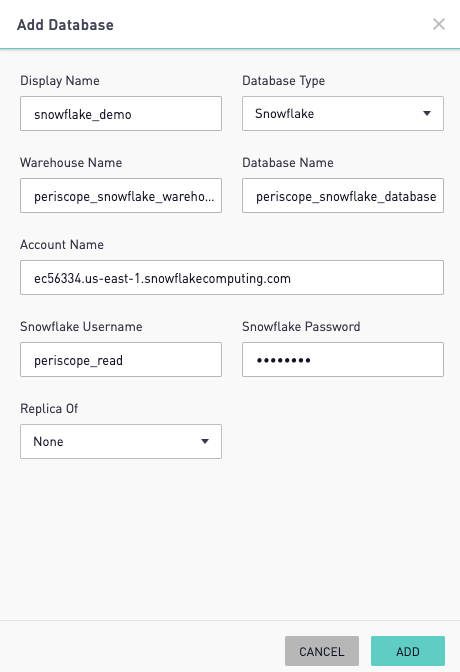
Step 4: Adding DB Credentials
- Go to the address bar of your browser and copy the account name as visible in the Image.

- Select a display name and fill in all the credentials. Now press the add button to complete the connection.
Benefits of Setting Up Sisense Snowflake Integration
Some of the benefits of setting up Sisense Snowflake integration include:
- Allows you to easily create rich, interactive dashboards and adapt to changing user needs.
- It enhances the user experience and provides non-technical users access to analytics and control over data models.
- R and AI Exploration Paths, NLQ, Insight Miner, and other tools to do advanced analytics on your data can be used.
- You can quickly scale up and down in real-time to match spikes in hit rates.
Conclusion
In this blog, we learned about the various methods of integrating Sisense and Snowflake. Sisense’s advanced analytics and Snowflake’s robust data warehousing capabilities make them a powerful duo for businesses to take advantage of their seamless integration for real-time data insights.
Businesses can use automated platforms like Hevo Data to handle the ETL process and transfer data from a source of your choice to a data warehouse, BI tools, or any other desired destination without having to write any code. It will provide you with a hassle-free experience.
Get a 14-day free trial now and experience the feature-rich Hevo suite firsthand. You can also have a look at the unbeatable pricing that will help you choose the right plan for your business needs.
Share your experience of learning about Sisense Snowflake integration in the comments section below!
Frequently Asked Questions
Does Sisense support large-scale data extraction from Snowflake?
Yes, Sisense is built to manage huge datasets. When employed with Snowflake, true-time analytics can be processed on large datasets with almost negligible latency and much better query performance.
Can I run real-time queries of Snowflake data in Sisense?
The positive part is that Sisense allows real-time data querying from Snowflake, so you get live analytics and insights without extracting or moving data.
Is Sisense for Snowflake cloud-agnostic in multi-cloud environments?
Yes, it supports a multi-cloud environment, so Sisense can be easily implemented across all AWS, Azure, or Google Cloud for building and scaling across platforms.

Share it with your connections.
-
 Share To X
-
 Share To LinkedIn
-
 Share To Facebook
-
 Copy Link


