


You need Real-Time High-Quality data from all your data sources in a central repository to empower your business decisions with data. Traditional On-premise Data Warehouse solutions are limited in terms of Scalability and Performance, and they necessitate ongoing maintenance. Snowflake is a more Cost-Effective and Instantly Scalable solution with best-in-class Query Performance. It’s a one-stop-shop for Cloud Data Warehousing and Analytics, with complete ANSI SQL support for Data Analysis and Transformations.
The ability to create and manage users is one of Snowflake’s most fundamental features. This is a critical component in establishing a secure and auditable instance that requires little maintenance. One of the areas where folks struggle is Snowflake CREATE Users.
In this article, you will learn the three most prevalent methods for Snowflake Create Users and present simple SQL code to make the process run smoothly.
Table of Contents
What is Snowflake?
Snowflake is the first Cloud Data Warehouse solution in the world, based on the infrastructure of the customer’s choice of Cloud Provider (AWS, Azure, or GCP). Snowflake SQL follows the ANSI standard and offers conventional Analytics and windowing features. Snowflake’s syntax has various variances, but there are also some similarities.
The integrated development environment (IDE) used by Snowflake is entirely web-based. Visit XXXXXXXX.us-east-1.snowflakecomputing.com. After logging in, you’ll be sent to the main Online GUI, which acts as an IDE, where you can start interacting with your Data Assets. Get a better understanding of Snowflake by taking a look at its key features.
Our Snowflake pricing calculator is your key to smarter data warehousing decisions.
Migrating your data from MySQL on Amazon RDS to Snowflake doesn’t have to be complex. Relax and go for a seamless migration using Hevo’s no-code platform. With Hevo, you can:
- Effortlessly extract data from 150+ connectors.
- Tailor your data to Snowflake’s needs with features like drag-and-drop and custom Python scripts.
- Achieve lightning-fast data loading into Snowflake, making your data analysis ready.
Try to see why customers like EdApp and Harmoney have upgraded to a powerful data and analytics stack by incorporating Hevo!
Get Started with Hevo for FreeUser Roles in Snowflake: What is the Hierarchy?
Each Snowflake trial account comes with a set of basic roles. You might have different users for each of these responsibilities, or you could have some users that do many functions.
1) AccountAdmin
This is the most senior position in the organization. The account administrator is the parent role of SYSADMIN and SECURITYADMIN, and has access to every component of the online interface. This position should be given to one or two people in the company.
2) SysAdmin
The individual who initiates the trial will be assigned to this role by default. Those who are building Warehouses or Databases should use this position. This role has the ability to provide other roles Object Privileges.
3) Public
Unless otherwise specified, this is the default role for all users added to the account.
4) SecurityAdmin
Any security privileges for objects, users, and roles can be granted and modified by the user in this role. They will also inherit the USERADMIN’s rights.
5) UserAdmin
This role has the ability to make new Users and Roles. They can also make changes to users and roles that they control.
A Snowflake-native app to monitor Fivetran costs

How to Use the Snowflake CREATE USERS Command?
This command creates a new user in the system or substitutes an existing one. Users can only be created by user administrators (users with the USERADMIN position or higher) or other roles having the CREATE USER capability on the account.
Syntax of Snowflake CREATE USERS Command
CREATE [ OR REPLACE ] USER [ IF NOT EXISTS ] <name>
  [ objectProperties ]
  [ objectParams ]
  [ sessionParams ]
Key Usage Parameters of Snowflake CREATE USERS Command
<Name> User identifier; must be unique inside your account. Unless the entire identification string is wrapped in double quotes (e.g. MyObject), the identifier must begin with an alphabetic character and cannot contain spaces or special characters. The case is also taken into account when using identifiers contained in double quotations.
The user does not enter into Snowflake with this value; instead, the user logs in with the value supplied for the LOGIN NAME attribute. If the user name/identifier is not explicitly supplied, the user name/identifier is used as the default login name.
Optional Parameters:
- PASSWORD =
<'string'> - LOGIN_NAME =
<string> - DISPLAY_NAME =
<string> - FIRST_NAME =
<string> , MIDDLE_NAME = <string> , LAST_NAME = <string> - EMAIL =
<string> - MUST_CHANGE_PASSWORD =
TRUE | FALSE - DISABLED =
TRUE | FALSE - SNOWFLAKE_SUPPORT =
TRUE | FALSE - DAYS_TO_EXPIRY =
<integer> - MINS_TO_UNLOCK =
<integer> - DEFAULT_WAREHOUSE =
<string> - DEFAULT_NAMESPACE =
<string> - DEFAULT_ROLE =
<string> - DEFAULT_SECONDARY_ROLES =
( 'ALL' ) - MINS_TO_BYPASS_MFA =
<integer> - RSA_PUBLIC_KEY =
<string> - RSA_PUBLIC_KEY_2 =
<string> - COMMENT =
'<string_literal>' - NETWORK_POLICY =
<string> - TAG
( tag_name = 'tag_value' [ , tag_name = 'tag_value' , ... ] )
Examples Queries of Snowflake CREATE USERS Command
Create a user with all of the default properties, a default role, and a simple password that the user must update after their first login:
create user user1 password='abc123' default_role = myrole default_secondary_roles = ('ALL') must_change_password = true;


3 Key Uses Cases/Approaches for Snowflake Create Users
1) Snowflake Create Users with Single Sign On (SSO)
This method is the most popular among Enterprise Users and the most user-friendly, but it necessitates the use of an external Identity Provider, or “IdP,” as security professionals refer to it.
Among the most prevalent IdPs are:
- Azure Active Directory (AD)
- Google GSuite
- Okta
The following is the simplified SQL query for Snowflake Create Users with SSO:
// set context
USE ROLE SECURITYADMIN;

// Create user with SSO authentication
CREATE USER LANE_PRYCE
 LOGIN_NAME   = 'lane.pryce@scdp.com'
 DISPLAY_NAME = 'Lane Pryce'
 FIRST_NAME   = 'Lane'
 LAST_NAME    = 'Pryce'
 EMAIL        = 'lane.pryce@scdp.com'
 DEFAULT_ROLE = FINANCIAL_CHIEF;

// grant usage on the default role
GRANT ROLE FINANCIAL_CHIEF TO USER LANE_PRYCE;
A few more notes about this script:
- The LOGIN NAME must exactly match the email address used by your Identity Provider. When the user tries to log in, any mismatch or fresh email will result in a failed SSO attempt. Even if you make the mistake of including a single space at the end of this, login issues will occur as a result, so be careful.
- You are removing the ability for this user to log in with a password entirely by not specifying one. If you want to give someone the ability to use a password in the future, simply modify the user’s password and require them to change it. This gives them the option of using SSO or Password Authentication, which is important if your client tool doesn’t support SSO (like Power BI, until recently).
- If your user is using non-Snowflake client tools to authenticate with SSO, setting a DEFAULT WAREHOUSE next to the DEFAULT ROLE is a good idea. Some SSO Technologies don’t enable users to choose their Warehouse after connecting, thus this can save time (and it’s what I do at Hashmap).
- Remember to Grant Role a=Access after you’ve created your user.
2) Password-based Snowflake Create Users
This is the most typical method for new Snowflake Create Users. It has certain flaws, but it is Straightforward and Effective.
Run the following SQL in Snowflake to create a user with password-based authentication:
There are a few things to keep in mind when reading this script:
// set context
USE ROLE SECURITYADMIN;

// create user with password authentication
CREATE USER PEGGY_OLSON
 PASSWORD             = 'randomly-generated-password'
 LOGIN_NAME           = 'peggy.olson@scdp.com'
 DISPLAY_NAME         = 'Peggy Olson'
 FIRST_NAME           = 'Peggy'
 LAST_NAME            = 'Olson'
 EMAIL                = 'peggy.olson@scandp.com'
 MUST_CHANGE_PASSWORD = TRUE
 DEFAULT_ROLE         = COPY_WRITER;

// grant usage on the default role
GRANT ROLE COPY_WRITER TO USER PEGGY_OLSON;- The USERADMIN role, which derives from SECURITYADMIN, was recently introduced to Snowflake’s list of default roles and is designed to be used to create users. If you don’t require this level of granularity, you should use SECURITYADMIN. Feel free to change it to suit your needs.
- You can choose a user naming convention that suits your needs. It is recommended not to use “@” because you will be forced to double-quote your user object names all of the time. Instead, you can use FIRSTNAME LASTNAME as it works nicely in almost every situation.
- It is not essential to specify the LOGIN NAME and DISPLAY NAME because they will both inherit the value you use to name the user object. For novice users, this is a challenging concept, therefore describing each one clearly is a good practice, even if you don’t plan to utilize different values.
- After a user is created, you must provide that User Access to the Default Role. Snowflake does not offer access to a user’s default role automatically. If a user can’t access their default role, they won’t be able to log in. Remember to always provide new users access to their default role to avoid making a terrible first impression.
3) Snowflake Create Users based on Key Pairs
This last option is rarely used on its own (and is frequently used in conjunction with Service Accounts), but it is a critical security feature for Snowflake Users who require a secure connection method from a programmatic source.
If you use dbt User, Key Pair Authentication is a perfect complement to a Snowflake Instance with SSO support to avoid continuous external browser popups during development.
Use the following SQL to create a user with Key Pair Authentication:
// set context
USE ROLE SECURITYADMIN;

// Create user with SSO authentication
CREATE USER BERTRAM_COOPER
 LOGIN_NAME     = 'bertram.cooper@scdp.com'
 DISPLAY_NAME   = 'Bert Cooper'
 FIRST_NAME     = 'Bertram'
 LAST_NAME      = 'Cooper'
 EMAIL          = 'bertram.cooper@scdp.com'
 RSA_PUBLIC_KEY = 'your private key here - no newlines please'
 DEFAULT_ROLE   = SENIOR_PARTNER;

// grant usage on the default role
GRANT ROLE SENIOR_PARTNER TO USER BERTRAM_COOPER;
A few things to keep in mind regarding this process:
- If SSO is enabled, your user will be able to log in using SSO as well. They won’t be able to log in using Password Authentication until you provide them with a Password.
- If you’re just adding keypair authentication to an existing user, use ALTER USER BERTRAM COOPER_SET RSA_PUBLIC_KEY=’your key‘; instead.
- Setting a new public key with ALTER USER RODGER_STERLING SET RSA_PUBLIC_KEY_2=’your new key’; allows you to rotate your keys. This allows you to rotate your keys without obstructing access to the previous one.
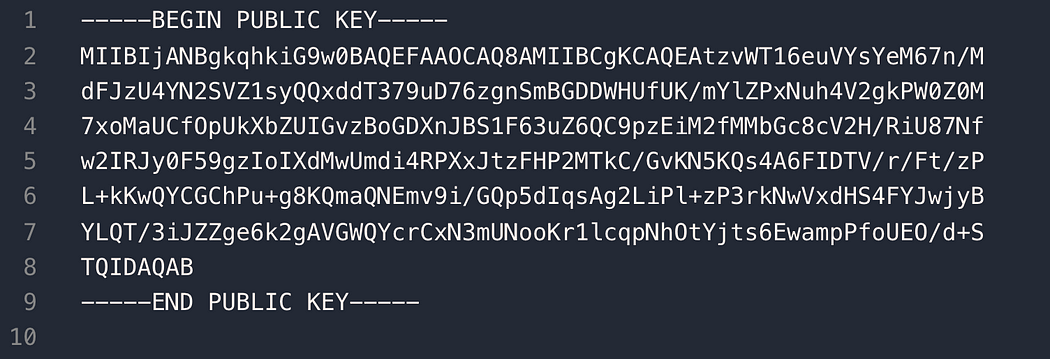
- In the past, you might have faced a lot of trouble formatting the RSA_PUBLIC_KEY value. The most important thing to remember is that newlines should be deleted and just the most important information should be included. You’ll want to copy lines 2 through 8 from the image below, delete all new lines, and paste the line directly into your SQL environment.
- On Snowflake, you might haven’t been able to successfully use an RSA key pair generated with ssh-keygen. Snowflake appears to be a fan of keys created using openssl. The code used in this example is accessible below, but you should research it first to make sure you understand what you’re getting yourself into.
#!/bin/bash

# generate private key
openssl genrsa 2048 | openssl pkcs8 -topk8 -inform PEM -out snowflake_bertram_cooper_keypair

# generate public key
openssl rsa -in snowflake_bertram_cooper_keypair -pubout -out snowflake_bertram_cooper_keypair.pubHow to Set up Snowflake Create Users with Web UI?
If you aren’t already using Single Sign-On (SSO) and know which users will need access to your Snowflake account, now is a good opportunity to get them set up. Organizations managing users across multiple platforms often find that the top IAM solutions for enterprise streamline this process by syncing identities, roles, and access policies into Snowflake automatically via SCIM.
This can be done at various points throughout the Deployment Process, or even on an as-needed basis when users require access. Users who will be assigned to any Admin responsibilities should be added so that they can assume ownership of such positions.
You can add users to the account using a SQL Query using the Web Interface found in the “Account” section. You must supply a Username and Password for each user throughout this process. You should also identify the Default Settings for each user during this procedure. This comprises the default warehouse, the default namespace (Database and Schema), and the user’s default role. The ALTER USER command can be used to modify these defaults at a later time.
Conclusion
This article has exposed you to the various Snowflake Create Users to help you improve your overall decision-making and experience when trying to make the most out of your data. In case you want to export data from a source of your choice into your desired Database/destination like Snowflake, then Hevo Data is the right choice for you!
Sign up for a 14-day free trial and simplify your data integration process. Check out the pricing details to understand which plan fulfills all your business needs.
Frequently Asked Questions (FAQs)
1. How to create a user in a Snowflake account?
You can create a user in Snowflake using the CREATE USER command and specifying details like username, password, and default role.
2. Can sysadmin create users in Snowflake?
Yes, a sysadmin can create users in Snowflake by running the appropriate CREATE USER command.
3. Can we create a user without a password in Snowflake?
Yes, Snowflake allows user creation without a password if you’re using SSO or other authentication methods.

Share it with your connections.
-
 Share To X
-
 Share To LinkedIn
-
 Share To Facebook
-
 Copy Link


