


Snowflake is a popular Data Warehouse that allows businesses to easily store and process enormous amounts of data. It also provides a variety of analytical solutions that are intended to be faster and easier to use than traditional tools.
Snowflake is a popular choice among larger enterprises since it uses its own unique SQL Query Engine, which allows it to analyze data more quickly while also introducing a variety of new capabilities that you won’t find with typical data storage providers.
Roles are unique in Snowflake since they are the only objects that may be awarded privileges. It is not feasible for grant role to user snowflake any privileges directly. Before a user can do anything in Snowflake, they must be allocated a role, and that role must have privileges provided to it. In this blog, you’ll learn how Snowflake Grant Role to Use.
Table of Contents
Prerequisites
This is what you need for this article:
- A Snowflake Account
What is Snowflake?
Snowflake is a popular Cloud Data Warehouse solution. It provides businesses and individuals with a platform for data storage. Snowflake scales well to meet the changing storage needs of businesses. It also comes with a number of data analytics tools to help its users to extract insights from their data. Such insights can support the decision-making processes within businesses. Snowflake is also easy to use, making it a suitable cloud data storage option for individuals with little technical skills.
Key Features of Snowflake
Some of Snowflake’s distinguishing qualities are as follows:
- Scalability: Snowflakes’ Multi-Cluster Shared Data Architecture divides computation and storage resources. This method allows users to scale up resources when big volumes of data must be loaded fast and scale back down after the process is finished without interfering with other activities.
- Semi-Structured Data Support: By employing the VARIANT schema on the Read data type, Snowflake’s architecture enables the storage of Structured and Semi-Structured data in the same area. VARIANT has the ability to hold both structured and semi-structured data.
- Security: Snowflake includes a number of security features that range from how users access Snowflake to how data is stored. You can manage Network Policies by whitelisting IP addresses to restrict access to your account. Snowflake supports a number of authentication techniques, including Two-Factor Authentication and SSO with Federated Authentication.
Elevate your data management and integration with Hevo’s seamless Snowflake connectivity. Here’s how Hevo transforms your Snowflake experience:
- You can connect and sync data to Snowflake from 150+ sources with just a few clicks
- You can keep your Snowflake data fresh and current with real-time synchronization and updates.
- You can monitor and control your Snowflake data integrations through an intuitive, easy-to-use interface.
Ready to enhance your Snowflake data integration? Explore the capabilities of Hevo now!Also read about our 2000+ happy customers like Hornblower, Deliverr and many more.
Give Hevo a try to Enhance your Snowflake IntegrationWhat are Snowflake Roles?
Snowflake roles allow you to manage access to the data stored in your Snowflake account. Instead of allowing every user to access and even modify the data, only the selected ones are allowed to. This is good for the safety and integrity of data. It can also create trust among the data users.
With Snowflake, you can create a role hierarchy. This will make it easy for you to re-use roles and grant them to different users. It will also save you from running multiple SQL statements. You can also modify and revert roles assigned to different users.
There are different types of roles in Snowflake, both system and custom roles. By default, any user who creates an account in Snowflake is assigned the PUBLIC role. Any data assigned to this role can be accessed by anyone. The USERADMIN role focuses on managing users. The SYSADMIN role focuses on managing the system objects. This role also allows users to grant similar privileges to other users. This is done using the Snowflake grant role to a user command.
A Snowflake-native app to monitor Fivetran costs.

Snowflake Grant Role to User Command
The Snowflake grant role to user command is used to grant a Snowflake role to a user. After running the command, the specified user is allowed to run all the operations associated with the role.
The command that takes the Snowflake Grant Role to User, Syntax:
GRANT ROLE <name> TO USER <user_name> }The Snowflake Grant Role to User parameters are described below:
- <name>- This is the identifier of the role that is to be granted. If there are spaces or special characters in the identifier name, the string should be enclosed within double-quotes. Identifiers written inside double quotes are also case-sensitive.
- <user_name>- The name of the Snowflake user to which the role is to be granted.
To demonstrate how to use the Snowflake Grant Role to User command, we will be using a project called “Sample Project”. We will create roles, grant them privileges, and assign them to different users. They are listed below:
Creating Roles
We will create three roles for the project, that is, the administrator, the engineer, and the analyst. We will use the SECURITYADMIN system role for this as it allows us to manage object grants on the platform.
The following commands will help us to create the three roles:
USE ROLE SECURITYADMIN;
CREATE role sample_administrator
CREATE role sample_engineer
CREATE role sample_analyst
Applying Privileges to the Roles
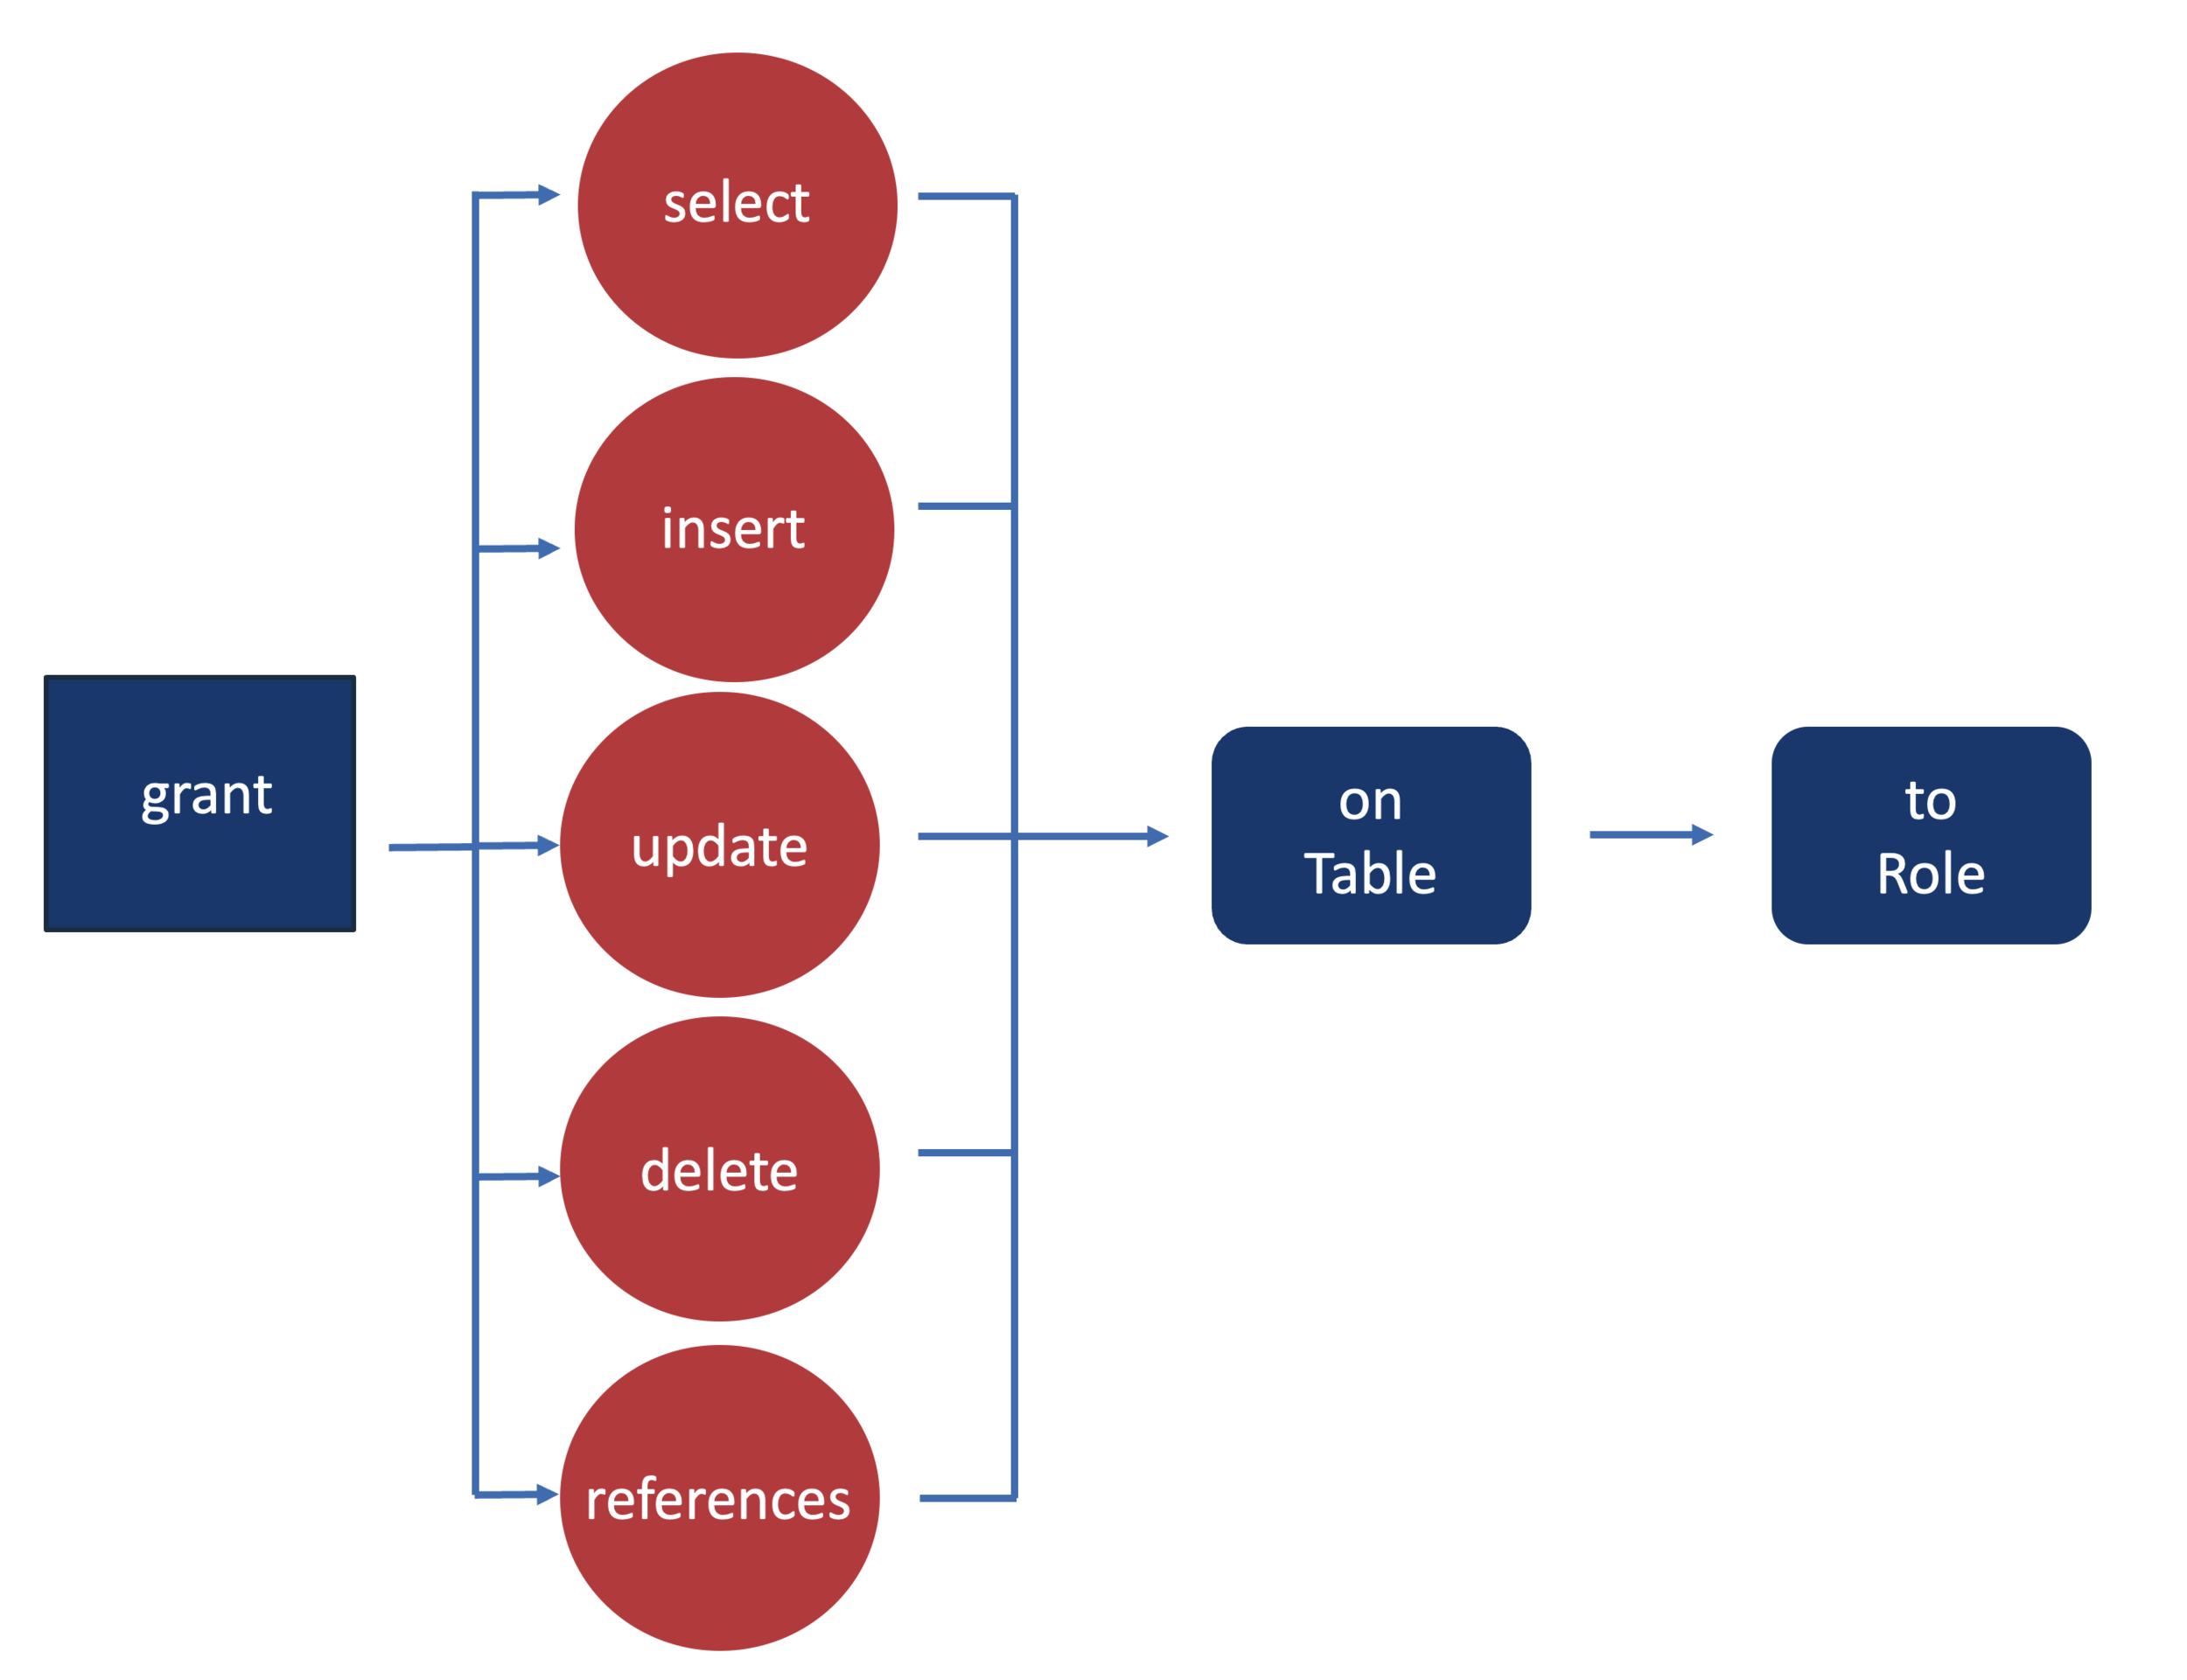
It’s now time to apply privileges to the roles. The privileges will determine what the roles can do. We will grant the engineer privileges to use the sample database and run select statements on all tables. The following command will help us to achieve this:
USE ROLE SECURITYADMIN;
GRANT USAGE ON DATABASE sample TO role sample_engineer;
GRANT SELECT ALL FUTURE TABLES IN SCHEMA sample.dataset TO ROLE sample_engineer;
The analyst will be responsible for adding new data and analyzing it. Thus, we will grant him privileges to use the database, insert data into tables and views, and create new tables and views.
The following commands can help us to grant the privileges:
GRANT INSERT ON ALL FUTURE TABLES IN SCHEMA sample.dataset TO role sample_analyst;
GRANT USAGE on DATASET sample_etl TO role sample_analyst;
GRANT CREATE TABLE, CREATE VIEW ON SCHEMA sample_dataset TO role sample_analyst;
Grant Roles to New Users
We should now create some users and grant them the roles. The users can then begin to use the data stored in Snowflake. To create the users and grant them roles, we will use the USERADMIN system privilege which focuses on user management. The following commands will help us to create the users:
USE ROLE USERADMIN;
CREATE USER user1;
CREATE USER user2;
CREATE USER user3;
We can then use the Snowflake grant role to a user command to grant the roles to the users. We will use the SECURITY ADMIN system privilege for this as shown below:
GRANT ROLE sample_administrator TO USER user1;
GRANT ROLE sample_engineer TO USER user2;
GRANT ROLE sample_analyst TO USER user3;
The user user1 is now the Administrator, user2 the Engineer, and user3 the Analyst.
What Does the GRANT ROLE Statement Do?
The grant role statement attaches a privilege to an object. You can use it to create a role hierarchy in Snowflake. It is used with the following syntax:
GRANT ROLE < from_role > TO ROLE < to_role >;For example, in our case, the administrator can be granted the analyst role using the following command:
GRANT ROLE sample_analyst TO ROLE sample_administrator;The administrator role has been given a USAGE privilege on analyst role.
After a role grant, all the privileges of the inherited role (granted from) are made available to the inheriting role (granted to). When a role is granted another role, it has the privileges of that role at all times.
That is how to use the Snowflake grant role to a user command.
Limitations of Snowflake Grant Role to User
- Future scholarships will not be funded for:
- Data exchange
- Replication of data
- Row access policies and masking policies
When renaming or changing tables, future grants are not applied.
On each securable object type, no more than one future grant of the OWNERSHIP privilege is permitted.
- Managed access schemas include the following:
- A future grant of the OWNERSHIP privilege on objects can only be applied to a schema owner’s subordinate role (i.e. the role that has the OWNERSHIP privilege on the schema).
- Before transferring ownership of a managed access schema to a new role, any open future grants of the OWNERSHIP permission must be canceled using REVOKE privileges>… THE ON FUTURE keywords are used in conjunction with the FROM ROLE keywords.
Conclusion
You may reuse roles and grant them to multiple users by using a Snowflake role hierarchy without having to run a lot of SQL operations. The Snowflake Grant Role to User command can be used to assign Snowflake roles to users. It grants the user all of the rights that come with their Snowflake position.
To meet the growing storage and computing needs of data, you would need to invest some of your Engineering Bandwidth in integrating data from all sources, cleaning and transforming it, and finally loading it to a Cloud Data Warehouse like Snowflake for further Business Analytics.
Share your experience of learning about the Snowflake Grant Role to User in the comments section below. We would love to hear from you!
FAQs
1. What is granting a role to a user in Snowflake?
Granting a role to a user enables the user to perform all operations allowed by the role .
2. What is the syntax for grant role to user?
GRANT ROLE <name> TO USER <user_name> }
3. What is the difference between users and roles in Snowflake?
Roles are assigned to users to grant them the ability to perform actions required for business functions in Snowflake. A user can be assigned multiple roles.

Share it with your connections.
-
 Share To X
-
 Share To LinkedIn
-
 Share To Facebook
-
 Copy Link


