


 Key Takeaways
- REST API ETL tools automate the ETL process of extracting, transforming, and loading data from RESTful APIs into data warehouses, eliminating manual pulls and reducing integration errors.
- The top tools in 2026 are Hevo Data, Airbyte, Fivetran, Stitch Data, and Matillion, each suited to different team sizes, budgets, and technical needs.
- Hevo Data is best for no-code setup with full visibility. Airbyte suits teams needing open-source flexibility. Fivetran works best for low-maintenance pipelines. Integrate.io fits API-centric workflows with reverse ETL needs. Skyvia is a strong fit for smaller teams that need transparent pricing and no-code setup.
- Key selection criteria include API connectivity, real-time vs. batch processing, transformation capabilities, ease of use, pricing transparency, scalability, and security compliance.
- No-code interfaces have made these tools accessible beyond data engineers, allowing business and ops teams to manage pipelines independently.
- Centralizing API data in a warehouse improves data quality, enables advanced analytics, and creates a single source of truth across CRMs, SaaS tools, and cloud platforms.
Your CRM holds customer data. Your payment gateway holds transaction data. Your SaaS tools hold everything else. None of it talks to each other without someone manually holding it together.
That problem is more widespread than most teams acknowledge. 80% of organizations operate in silos, each with their own data systems and practices. And as cloud adoption grows, Gartner puts worldwide cloud spending at $723.4 billion in 2025; the number of disconnected APIs and SaaS tools only increases.
REST API ETL tools solve this directly. They connect to your APIs, extract the data, and load it into your warehouse through an automated data pipeline on schedule, without manual intervention.
In this post, we cover the 10 best REST API ETL tools for 2026, what each does well, where it falls short, and which kind of team it fits best. We evaluated each platform across G2 ratings, verified user reviews, and hands-on performance.
The criteria that mattered most: connector depth, schema handling, transformation flexibility, pricing transparency, and how much ongoing maintenance the tool actually requires. Tools that looked good on a feature list but created operational overhead in practice didn’t make the cut.
Hevo connects to any REST API as a source, syncs data on a schedule you control, and loads it into your warehouse without a single line of code.
- Your API connections stay live without manual maintenance or custom scripts
- Your JSON responses are parsed and mapped automatically — no schema wrangling needed
- Your pipelines keep running even when API structures change upstream
- Your data stays protected — SOC 2 Type II, HIPAA, and GDPR compliant out of the box
Trusted by 2,000+ data teams. Rated 4.4/5 on G2.
Try Hevo for FreeTable of Contents
10 Best REST API ETL Tools: Overview
Here is a quick comparison of the top REST API ETL tools across use case and pricing.
| Tool | Best For | Pricing |
| Hevo Data | Teams wanting no-code REST API pipelines with transparent pricing | Free + Paid |
| Airbyte | Teams needing open-source flexibility and custom API connectors | Free + Paid (Cloud) |
| Fivetran | Fully managed, low-maintenance API data replication at scale | Paid |
| Stitch Data | Small to mid-sized teams needing fast, simple API pipeline setup | Paid |
| Matillion | Cloud-native teams needing strong transformation on API data | Paid |
| Apache Airflow | Engineering teams orchestrating complex, custom API workflows | Free (Open-source) |
| Talend | Enterprise teams needing extensive data transformation capabilities | Free + Paid |
| Integrate.io | Teams building API-centric pipelines with low-code transformation | Paid |
| Skyvia | SMB and mid-market teams needing no-code API integration with transparent pricing | Free + Paid |
| Rivery | Teams wanting a user-friendly cloud platform for API automation | Paid |
Hevo connects to 150+ sources, replicates data in real time, and gets your first pipeline live in minutes.
Get a DemoWhat are API ETL Tools?
API ETL tools are software solutions designed to pull data from various APIs, transform it into a usable format, and load it into a central data warehouse, database, or analytics platform. They act as a bridge between multiple data sources and a unified destination.
Businesses today pull data from CRMs, marketing tools, and payment gateways. Without automation, this creates silos and inefficiencies. API ETL tools solve this by unifying and standardizing data using an API Integration tool approach, enabling faster and more reliable decisions.
Key benefits of API ETL tools:
- Data integration: API ETL tools consolidate data from multiple APIs into one central system, eliminating silos and ensuring teams work with consistent datasets.
- Automated workflows: Instead of manually extracting data from each source, API ETL tools automate the extraction, transformation, and loading process. This saves time and reduces human errors. Teams can focus more on insights rather than repetitive tasks.
- User-friendly interface: Most API ETL platforms offer no-code or low-code setups. Non-technical users can design and manage data pipelines seamlessly across the organization.
- Scalability: API ETL tools are built to handle large datasets without disrupting workflows, making them future-proof for operations at scale.
What are REST API ETL Tools?
REST API ETL tools are specialized solutions designed to extract, transform, and load data from RESTful APIs into target systems such as databases, data warehouses, or analytics platforms.
Organizations depend on data from SaaS platforms, cloud services, and third-party applications. REST API ETL tools enable seamless integration of live data into internal systems, providing a structured way to connect, manage, and move API-based data efficiently.
Key features of REST API ETL tools:
- Real-time data access: By directly connecting with RESTful web services, these tools ensure that data is always up to date. Real-time access enables organizations to track changes as they happen, supporting faster responses and more accurate reporting.
- Standardized data handling: Using standard HTTP methods like GET, POST, PUT, and DELETE, REST API ETL tools ensure consistency in data operations. You can work with multiple APIs while maintaining uniformity across systems.
- Improved data quality: These tools feature built-in features for cleansing, validating, and enriching data. Businesses can access accurate, high-quality information loaded into their systems, reducing errors downstream.
- Business agility: With continuous access to updated, trustworthy data, decision-making becomes faster and more informed. Businesses adapt quickly to market changes and maintain a competitive edge.
Step-by-Step Guide to Pull Data from Public APIs within Minutes:
Prerequisites:
- Access to Hevo’s product. You can go to Hevo and create a new account for Free.
- API URL that you want to access.
Step 1: Set up your Public API as a source
Step 1. a) Create a new Pipeline
Step 1. b) From the list of sources, search for REST API and configure your REST API source by filling in the required credentials.
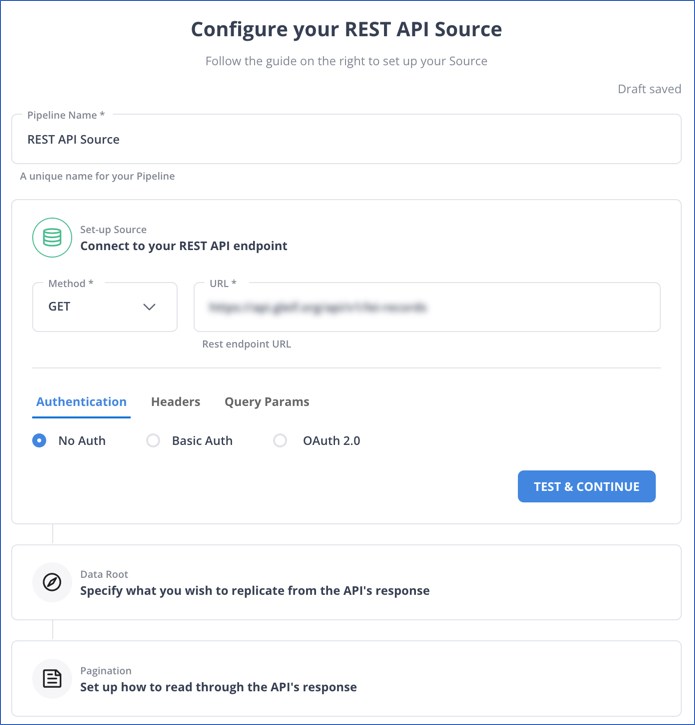
Note: If you want to access a public API, you can keep the Authentication as No Auth
Step 2: Configure your Destination
Step 2. a) Next step is to configure your destination.
Note: For this guide I’ll pick my destination as Snowflake you can pick any destination from the vast number of options that Hevo provides.
Step 2. b) Search for Snowflake in the destinations window, and fill in the required credentials.
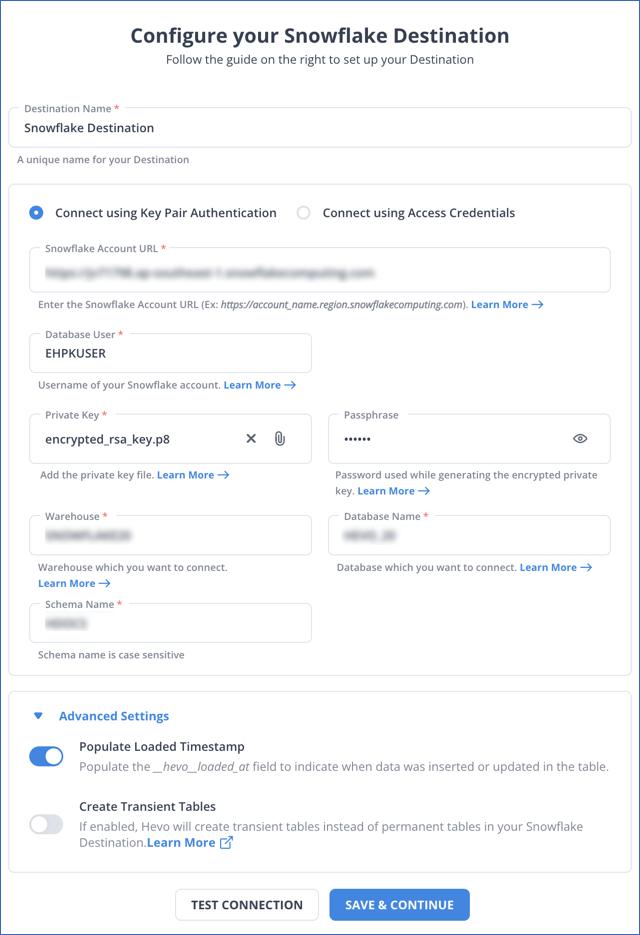
With these two simple and easy steps, you have successfully connected your public API to your destination.
Looking for the best ETL tools to connect your data sources? Rest assured, Hevo’s no-code platform helps streamline your ETL process. Try Hevo and equip your team to:
- Integrate data from 150+ sources(60+ free sources).
- Utilize drag-and-drop and custom Python script features to transform your data.
Top Public APIs ETL Tools
1. Hevo Data
Rating: 4.3(G2)
Hevo is a no-code, fully managed data pipeline platform built for teams that need to move data from REST APIs into their warehouse without writing a single line of code. Setup is simple and takes a few minutes, pipelines are transparent end-to-end, and the platform handles authentication, pagination, schema mapping, and error recovery automatically, so your pipelines keep running reliably even when something upstream breaks.
What sets Hevo apart is its real-time replication engine. Unlike batch-only tools that sync on a fixed schedule, Hevo pushes data continuously, giving your analytics team access to fresh, warehouse-ready data at all times. It also includes built-in transformation capabilities, so you can clean and enrich data mid-pipeline without needing a separate tool.
With 150+ connectors, support for 2,000+ data teams across 40+ countries, and transparent event-based pricing, Hevo is built to scale with your stack without surprising you on your monthly bill.
Key Features:
- SOC 2 Type II, HIPAA, and GDPR compliant
- No-code pipeline setup with drag-and-drop interface, accessible to technical and non-technical users alike
- Real-time data replication with automatic schema detection and drift handling
- Built-in data transformation using drag-and-drop or Python scripting
- Auto-healing pipelines with intelligent retries and fault-tolerant architecture
- 150+ connectors, including REST API, Snowflake, BigQuery, Redshift, and more
- Full pipeline observability through unified dashboards, logs, and anomaly detection
What makes Hevo unique?
- No-Code Platform: Hevo requires no coding knowledge, making it accessible for users at all technical levels.
- Real-Time Data Replication: Hevo enables real-time data updates, ensuring that your data warehouse is always current.
- Built-in Data Transformation: Hevo provides data transformation capabilities, allowing users to clean and enrich data during the ETL process.
2. Airbyte
Rating: 4.5(G2)
Airbyte is an open-source data integration platform designed for engineering teams that want full control over their pipelines. It supports syncing data from a wide range of sources, including REST APIs, to data warehouses and lakes, with the option to self-host for free or use the managed cloud version.
Its biggest strength is its connector library. Airbyte has one of the largest collections of community-built and certified connectors available, and its Connector Development Kit (CDK) lets teams build custom connectors for any source not already supported. This makes it a strong choice for teams integrating niche or proprietary APIs.
The tradeoff is operational overhead. Self-hosted Airbyte requires Kubernetes expertise, ongoing maintenance, and infrastructure spend. Teams without dedicated DevOps capacity often find the managed cloud version a more practical entry point.
For teams evaluating alternatives before committing to a paid plan, it is worth reviewing a broader list of open-source ETL tools to understand what is available.
Key Features:
- 350+ connectors with open-source CDK for building custom API connectors
- Self-hosted (free) or fully managed cloud deployment options
- Capacity-based pricing on higher tiers for more predictable costs
- dbt integration for in-warehouse transformations
- SOC 2, GDPR, and ISO 27001 compliant on cloud plans
Pros and Cons:
| Pros | Cons |
| Strong community support | Can require technical expertise for setup |
| Open-source and customizable | Limited out-of-the-box connectors |
3. Fivetran
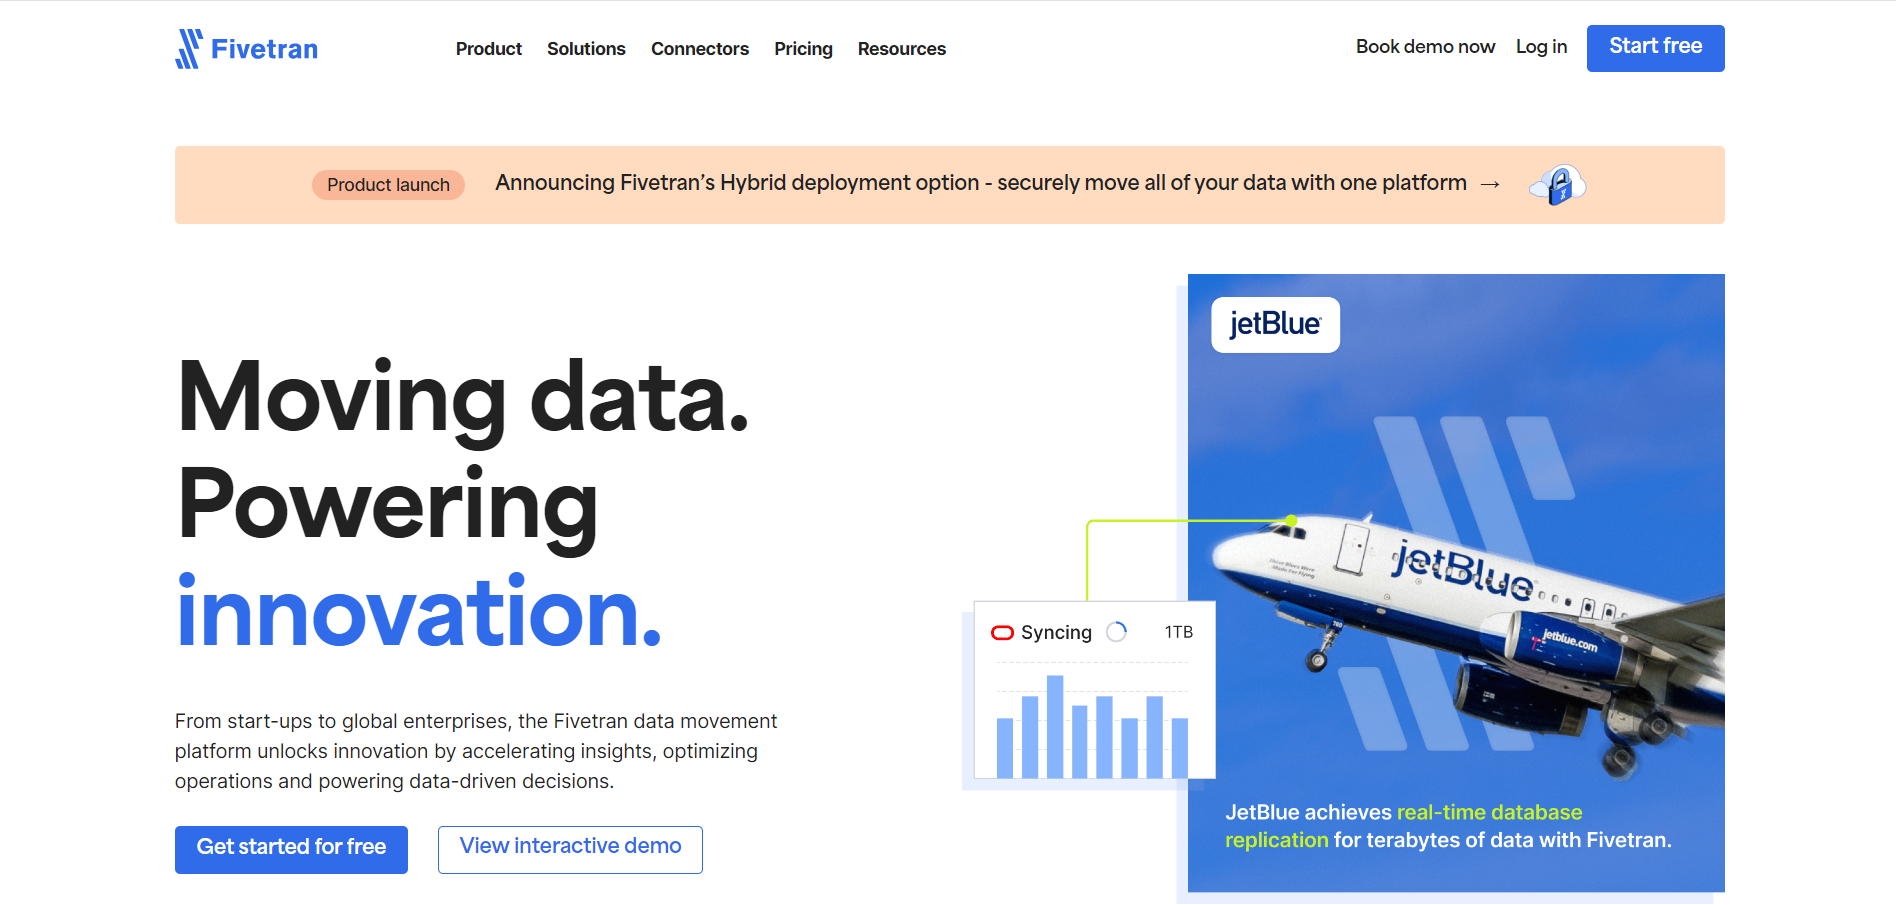
Rating: 4.2(G2)
Fivetran is a fully managed ELT platform built for teams that want reliable, hands-off data replication from APIs and databases into their warehouse. Its connectors are maintained in-house, which means stronger SLA guarantees and more consistent sync reliability compared to community-maintained alternatives.
Fivetran is best known for its pre-built connector library of 500+ sources and its automated schema migration, which keeps pipelines running without manual intervention when source APIs change. It is a particularly strong fit for enterprise teams that prioritize uptime and compliance over cost flexibility.
The main drawback is pricing. Since March 2025, Fivetran moved to per-connector Monthly Active Row (MAR) billing, which can make costs harder to predict and more expensive as data volumes or connector counts grow.
Key Features:
- 500+ pre-built, in-house maintained connectors
- Automated schema migration when source APIs change
- Change Data Capture (CDC) for near real-time database replication
- SOC 2, ISO 27001, HIPAA, and GDPR compliant
- Deep integrations with Snowflake, BigQuery, Redshift, and Databricks
Pros and Cons:
| Pros | Cons |
| Quick setup with pre-built connectors | Pricing can be high for large data volumes |
| Automated schema migrations | Limited customization options |
4. Stitch Data
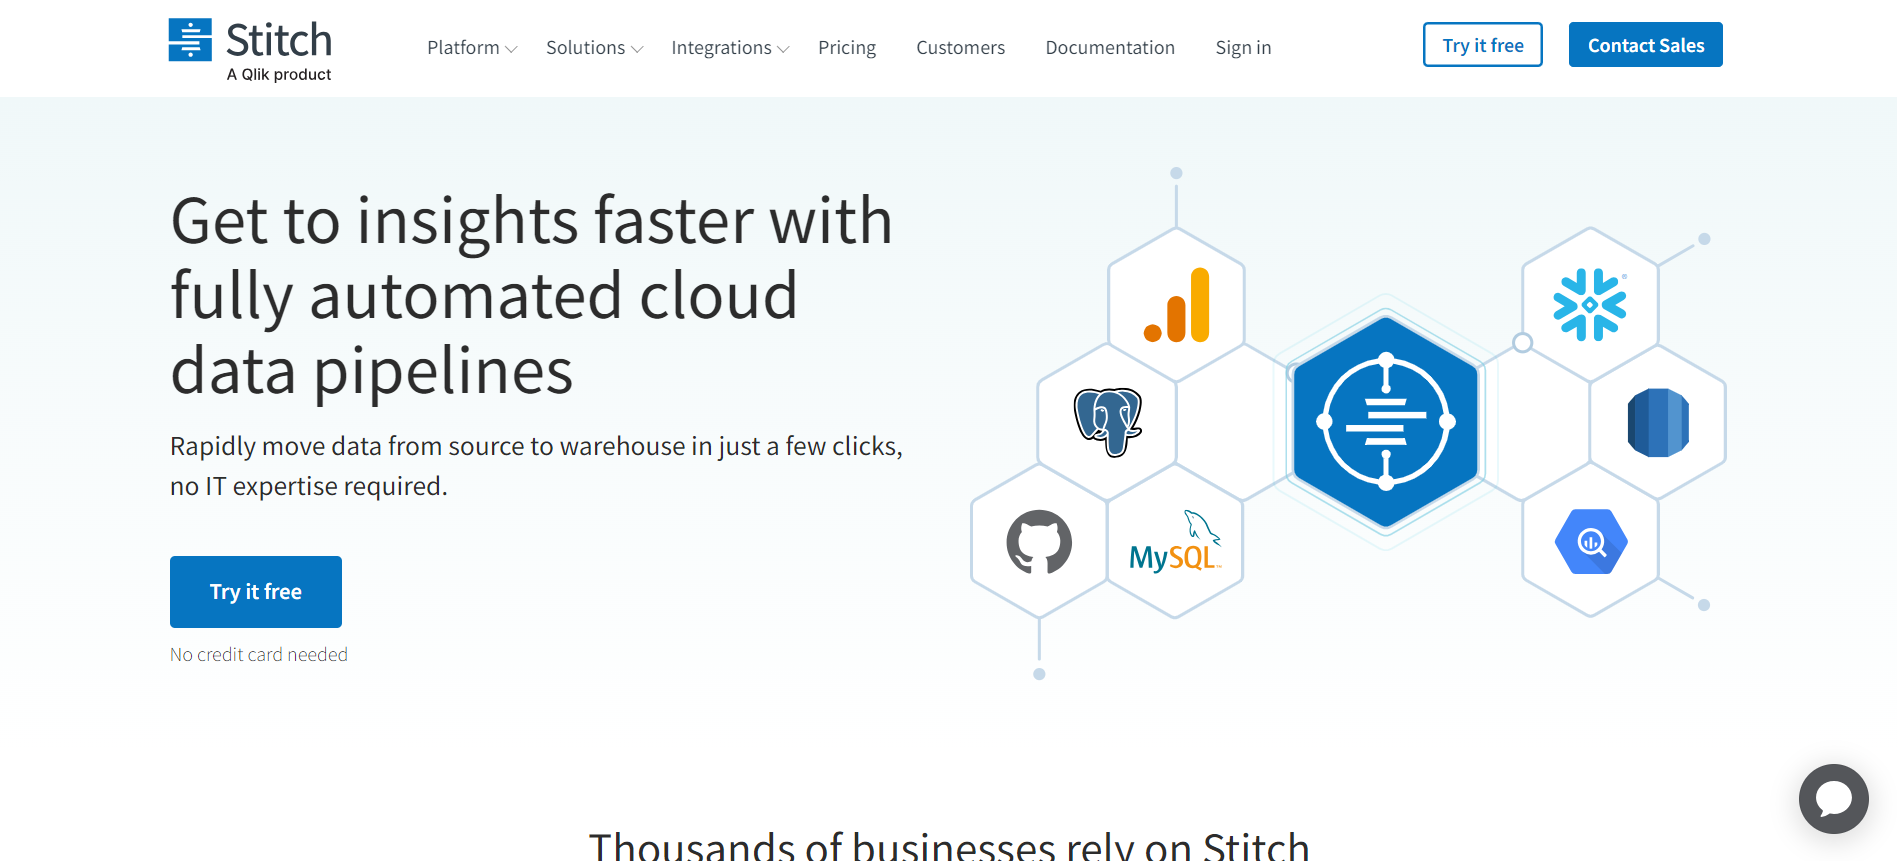
Rating: 4.4(G2)
Stitch Data is a cloud-based ETL service designed for simplicity. It allows teams to replicate data from dozens of API sources to their data warehouse in minutes, with minimal configuration required. It is now part of the Qlik ecosystem following Talend’s acquisition.
Stitch is a good fit for small to mid-sized teams that need straightforward API-to-warehouse pipelines without the complexity of enterprise platforms. Its Singer-based open-source framework means there is a broad community of connectors available, though maintenance quality across those connectors can vary.
Where Stitch falls short is in transformation capabilities. It is primarily a raw data loader, meaning teams will need a separate tool like dbt to handle in-warehouse transformations after the load step.
Key Features:
- 100+ integrations with SaaS tools, databases, and APIs
- Simple, guided pipeline setup with no coding required
- Singer-compatible open-source connector framework
- Replication logs and monitoring for pipeline visibility
- Supports major warehouses including Snowflake, Redshift, and BigQuery
Pros and Cons:
| Pros | Cons |
| User-friendly interface | Limited transformation features |
| Supports a variety of sources | Pricing can be high for larger datasets |
5. Matillion
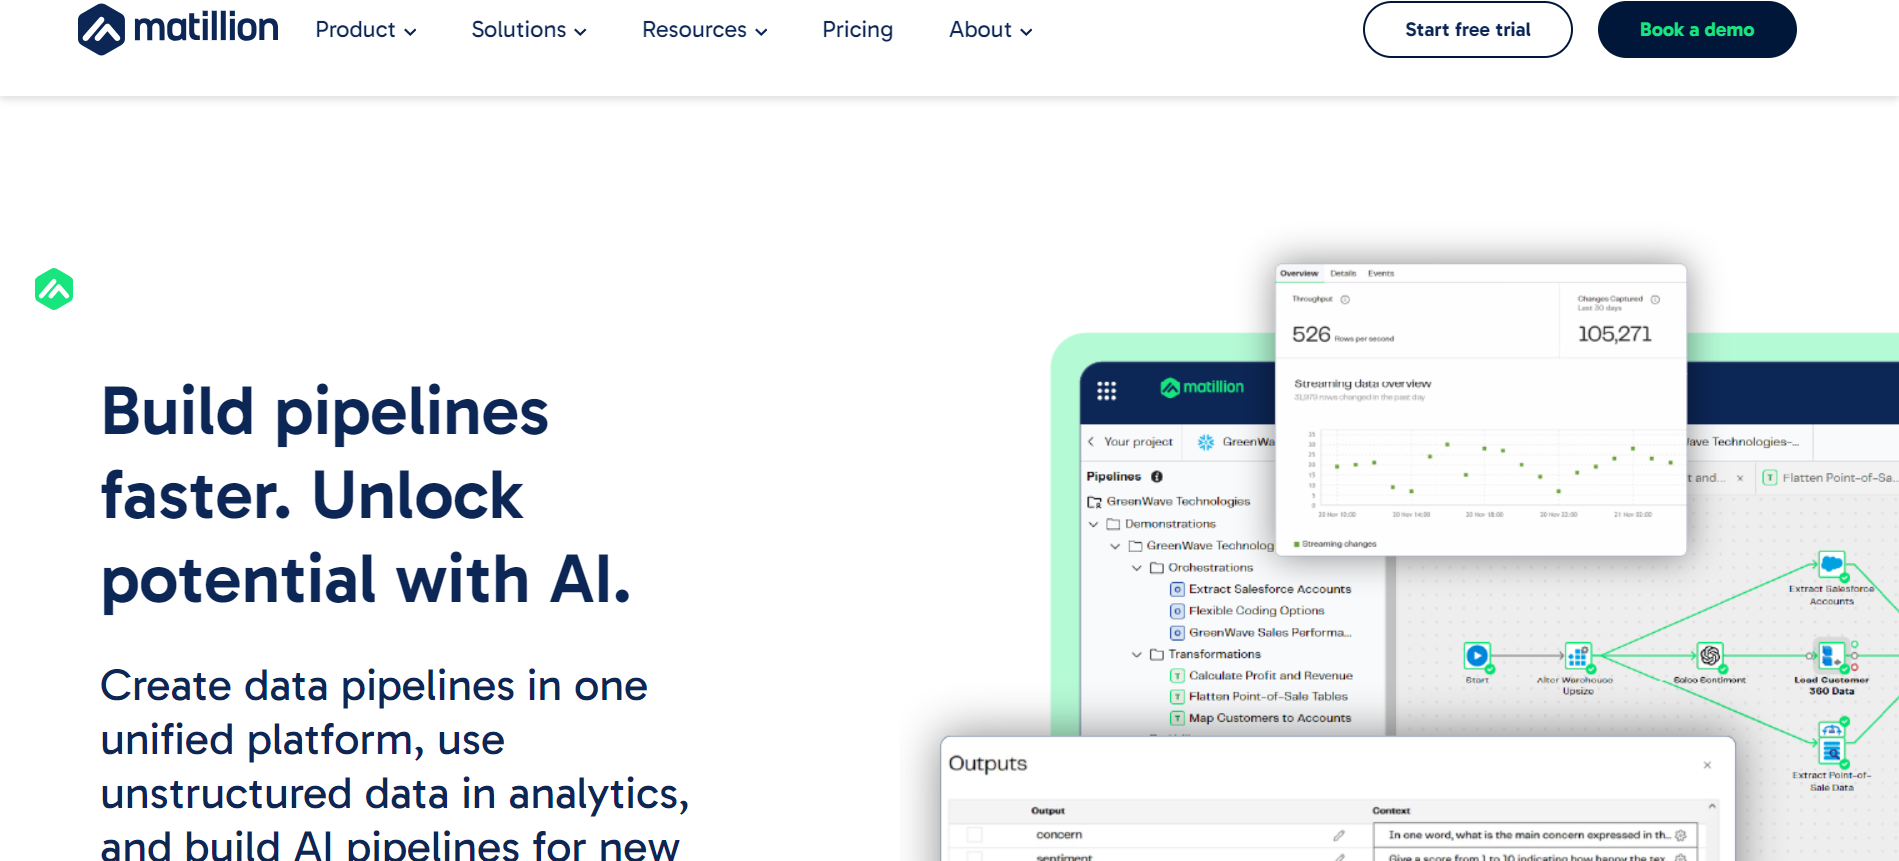
Rating: 4.4(G2)
Matillion is a cloud-native ETL and transformation platform built for teams that need more than just data movement. It combines data ingestion from APIs and other sources with powerful in-warehouse transformation capabilities, making it an end-to-end option for SQL-centric data teams.
It is widely used by teams on Snowflake, BigQuery, and Redshift who want to build, orchestrate, and document complex data pipelines within a single platform. Matillion’s visual pipeline builder makes it accessible to analysts and engineers alike, while its support for dbt and Python gives more advanced teams the flexibility they need.
The main consideration is cost and complexity. Matillion uses credit-based pricing that can be hard to estimate upfront, and it requires a reasonable level of technical familiarity to get the most out of its transformation features.
Key Features:
- Visual, low-code pipeline builder with support for SQL and Python transformations
- Native integrations with Snowflake, BigQuery, Redshift, and Azure Synapse
- Built-in orchestration and job scheduling
- Generative AI features for pipeline building and vector database connectivity
- SOC 2 Type II and GDPR compliant
Pros and Cons:
| Pros | Cons |
| Easy integration with cloud platforms | Requires some technical knowledge |
| Robust transformation capabilities | Higher cost for small businesses |
Hevo automates your entire REST API data flow from source to warehouse.
Get a Demo6. Airflow
Rating: 4.3(G2)
Apache Airflow is an open-source workflow orchestration platform originally built at Airbnb. While it is not a dedicated ETL tool, it is widely used by data engineering teams to schedule, monitor, and orchestrate complex data pipelines that pull from REST APIs and other sources.
Airflow uses Python-based DAGs (Directed Acyclic Graphs) to define workflows, giving engineers precise control over pipeline logic, dependencies, and error handling. This makes it highly flexible but also highly technical. It is best suited for teams that already have strong Python expertise and want a customizable orchestration layer on top of existing ingestion tools.
Managed options like Astronomer and AWS MWAA reduce the infrastructure burden, but Airflow still requires significantly more engineering investment than purpose-built ETL platforms.
Key Features:
- Python-based DAG authoring for fully customizable workflow logic
- Rich operator library for connecting to REST APIs, databases, and cloud services
- Built-in scheduler, retry logic, and pipeline monitoring UI
- Large open-source community with extensive plugin ecosystem
- Managed options available via Astronomer and AWS MWAA
Pros and Cons:
| Pros | Cons |
| Highly customizable workflows | There is a Steep learning curve for beginners |
| Strong community and support | Requires technical setup |
7. Talend
Rating: 4.0(G2)
Talend, now part of Qlik, is a comprehensive data integration platform that covers ETL, data quality, data governance, and master data management in a single suite. It supports connecting to a wide range of APIs and data sources across on-premises, cloud, and hybrid environments.
Talend is built for enterprise teams that need more than just pipeline movement. Its data quality and governance features make it a strong choice for organizations in regulated industries that need end-to-end control over how data is collected, cleaned, and documented before it reaches the warehouse.
The tradeoff is complexity. Talend has a steep learning curve, its open-source Talend Open Studio is no longer actively maintained at the community level, and advanced features require a paid Qlik Talend license that is typically priced for enterprise budgets.
Key Features:
- Comprehensive ETL, ELT, data quality, and governance capabilities in one platform
- 1,000+ pre-built connectors for APIs, databases, and cloud platforms
- Visual job designer with drag-and-drop pipeline building
- Native support for hybrid and multi-cloud deployments
- Active metadata management and data lineage tracking
Pros and Cons:
| Pros | Cons |
| Active community and support | Can be complex to set up |
| Extensive data transformation tools | Requires a license for advanced features |
8. Integrate.io
Rating: 4.3/5 (G2)
Integrate.io is a cloud-based ETL/ELT platform built specifically for API-driven data integration. It supports connecting to REST APIs, databases, and SaaS tools, and includes a low-code pipeline builder that lets teams move, transform, and sync data without writing custom scripts.
Where Integrate.io stands out is its focus on API-to-warehouse workflows. The platform handles authentication, pagination, and schema mapping natively, and its built-in transformation layer means teams can reshape data mid-pipeline without a separate tool. It also supports reverse ETL, making it a practical choice for teams that need to push warehouse data back into operational systems.
Key Features:
- Low-code pipeline builder with native REST API support
- Built-in ETL and ELT transformation capabilities
- Reverse ETL support for syncing warehouse data back to SaaS tools
- Pre-built connectors for databases, cloud platforms, and SaaS sources
- SOC 2 Type II and GDPR compliant
| Pros | Cons |
| Native handling of API authentication, pagination, and schema mapping | No public pricing — requires a sales call |
| Built-in reverse ETL removes the need for a separate sync tool | Overly complex for teams with simple ingestion needs |
9. Skyvia
Rating: 4.8/5 (G2)
Skyvia is a cloud-based no-code data platform that covers data integration, backup, and query in a single interface. It connects to REST APIs and a broad range of SaaS and database sources, making it a practical option for teams that want API pipeline management without engineering overhead or enterprise-level pricing.
Its biggest advantage for smaller teams is transparent, tiered pricing that scales with usage rather than requiring a custom quote. Skyvia also handles JSON parsing, field mapping, and scheduling natively, so REST API data lands in your warehouse clean and on schedule without manual configuration after setup.
Key Features:
- No-code pipeline setup with visual field mapping for REST API sources
- Supports OAuth 2.0, API key, and Basic authentication out of the box
- Data backup and restore capabilities alongside integration workflows
- Transparent, usage-based pricing with a free tier available
- Connects to Snowflake, BigQuery, Redshift, and major SaaS platforms
| Pros | Cons |
| Transparent pricing with a usable free tier | Limited transformation support beyond basic field mapping |
| No-code JSON parsing delivers clean, warehouse-ready data out of the box | Not built for high-volume or enterprise-grade workloads |
10. Rivery
Rating: 4.7(G2)
Rating: 4.7 (G2)
Rivery is a cloud-based ELT platform that combines data ingestion, transformation, and orchestration in a single interface. It supports connecting to REST APIs and 150+ other sources, with built-in logic layers that allow teams to build end-to-end data workflows without switching between tools.
What makes Rivery stand out is its unified approach. Most ETL tools handle ingestion only, leaving transformation and orchestration to separate tools. Rivery brings all three together, making it a strong fit for teams that want to reduce tool sprawl and manage their entire data workflow in one place.
Pricing is usage-based on Rivery Units, which can make cost estimation tricky for teams with variable data volumes. It is also positioned at a higher price point, which can be a barrier for smaller teams or startups.
Pros and Cons:
| Pros | Cons |
| Supports a wide range of data sources | Pricing can be high for small businesses |
| User-friendly interface | Limited customization options |
Factors to Consider When Selecting the Right REST API ETL Tool
Here is a detailed breakdown of what to evaluate before committing to a REST API ETL solution in 2026:
1. Does it connect to the APIs you actually use?
The tool should support a wide range of REST API authentication methods including OAuth 2.0, API keys, and Bearer tokens, and handle pagination, rate limiting, and schema changes automatically. As organizations now average hundreds of SaaS applications, your ETL tool needs to connect to both common and niche APIs without requiring custom engineering for each one.
2. Can it clean and shape data before it reaches your warehouse?
Look for tools that can cleanse, enrich, and reshape API responses before loading them into your target system. With AI and analytics workloads increasingly depending on high-quality, structured data, transformation is no longer optional. Strong in-pipeline or in-warehouse transformation support reduces your dependency on additional tools like dbt.
3. Does it support real-time data or only scheduled syncs?
Choose a tool that supports both batch and streaming pipelines so you can adapt to different API data refresh needs. In 2026, real-time data access is increasingly a baseline requirement, particularly for teams building AI-powered workflows, live dashboards, or event-driven architectures that cannot tolerate hour-old data.
4. Can non-technical teams build and manage pipelines without engineering help?
A no-code or low-code interface allows business and analytics teams to build and manage pipelines without involving a data engineer at every step. As more organizations push toward self-service data access, tools that require heavy technical setup create bottlenecks that slow down the entire team. The best REST API ETL tools today let non-technical users connect sources, map fields, and schedule syncs without writing a single line of code.
5. Can you predict your monthly bill before it arrives?
With per-connector and volume-based pricing models becoming increasingly complex, transparent pricing is more important than ever. Look for tools where you can accurately forecast monthly costs based on your data volume, number of connectors, and sync frequency, without hidden overages or tier-gated features.
6. Will it handle your data volume as you grow?
Your ETL tool should handle increased API data loads without pipeline degradation or unexpected cost spikes. As businesses grow and add more data sources, scalable tools ensure API extractions remain fast and reliable, whether you are processing five million or five hundred million events per month.
7. Does it meet the compliance standards your business requires?
Ensure the tool encrypts data in transit and at rest, supports secure authentication methods, and complies with regulations relevant to your industry such as GDPR, HIPAA, or SOC 2. With data governance failures affecting a growing share of organizations, compliance can no longer be treated as an afterthought or reserved for enterprise-tier plans.
8. Is it built to feed your AI and analytics workflows?
This is a 2026 addition worth evaluating. As teams build AI pipelines, RAG systems, and agentic workflows, the ETL tool needs to deliver clean, real-time, and well-structured data to support model training and inference. Tools that offer low-latency replication, strong data quality controls, and support for vector database destinations are better positioned for AI-driven data stacks.
Why should you migrate from Public API’s to Data Warehouse?
- Data migration to a data warehouse will allow organizations to bring information from multiple APIs into one single source, which will help make such information much more accessible and easier to analyze.
- Enhanced Data Analysis: A data warehouse supports advanced analytics, which helps businesses to gain actionable insights from large datasets efficiently.
- Data Quality and Consistency: ETL helps in maintaining quality and consistency of data, and it makes the process of keeping proper and accurate records and reports relatively easy.
Conclusion
Moving data from public APIs to the data warehouse is important data management and analysis. Advanced ETL tools, such as Hevo, Airbyte, and Fivetran, can help organizations streamline their data integration processes and ensure access to the most updated information.
Discover powerful data extraction tools to streamline data retrieval from various sources for analytics and integration. Learn more at Data Extraction Tools.
When selecting an appropriate ETL solution, compatibility, scalability, and user-friendliness become matters of consideration, and in return, you are optimizing the entire data strategy to drive valuable insights. Then, investment in the appropriate tools will enable businesses to extract more value from their data assets while the data landscape continues to evolve.
FAQ on Best API ETL Tools
1. What is ETL in API?
ETL in API stands for extracting data from different APIs and then transforming the same into a suitable format so that it can be loaded into a target system like data warehouse, thereby enabling effective consolidation and analysis of data from multiple sources.
2. What are the 4 types of ETL tools?
a. On-Premises ETL Tools
b. Cloud-Based ETL Tools
c. Open-Source ETL Tools
d. Real-Time ETL Tools
3. What is the difference between API and ETL tools?
APIs are interfaces that allow the communication between different software systems and facilitate exchanges of data, while ETL tools extract data from different sources, transform it, and load it into a centralized repository where the data is analyzed.
4. Why should you migrate from public APIs to a data warehouse?
Migrating API data to a data warehouse brings all your information from multiple sources into one central location, making it far easier to access, analyze, and act on. A warehouse also supports advanced analytics that individual API sources cannot, giving your team the ability to run queries across datasets and surface insights that would otherwise stay hidden. It also improves data quality and consistency, ensuring your reports and records stay accurate over time.

Share it with your connections.
-
 Share To X
-
 Share To LinkedIn
-
 Share To Facebook
-
 Copy Link


