


Tableau is one of the most popular visual analytics tools that allow you to create effective reports, charts, and dashboards for making data-driven decisions. It comprises a rich set of tools and templates that non-technical users can easily use for creating interactive dashboards and charts in less time.
Along with its vast collection of tools and widgets, Tableau also can connect with external databases via in-built connectors or drivers that allow users to fetch data from any external databases to gain meaningful insights. It not only connects with external databases but also can connect with external servers and applications via API services. One such API service that Tableau supports is OData, which allows users to fetch data from any external data servers or applications.
In this article, you will learn about Tableau, OData, and how to implement the Tableau OData Connect.
Table of Contents
What is Tableau?

Developed by Pat Hanrahan, Christian Chabot, and Chris Stolte in 2003, Tableau is the business intelligence that allows you to build interactive visualizations in the form of reports and dashboards. Tableau is a market-leading analytics solution for modern business intelligence that enables data professionals to explore data, create dashboards to get meaningful insights, and share visualizations across the different departments of the organization for collaboration.
The tableau product suite comprises four products such as Tableau Desktop, Tableau Online, Tableau Server, and Tableau Reader, where each product suite allows users to combine multiple data sources for creating effective data representations by exploring different datasets. Because of such features and functionalities, Tableau is being used by more than 64,200 companies worldwide.
Hevo is the perfect ETL tool for seamlessly integrating your Tableau data. It automates the data transfer and transformation process to your destination.
Here’s how Hevo can be of help:
- Real-Time Data Synchronization: Updates data in real-time to reflect changes across all systems.
- Error Detection and Handling: Monitors pipelines for errors, providing alerts and automated corrections.
- Automated Data Transformation: Applies consistent rules for data cleaning, normalization, and enrichment.
Join our 2000+ happy customers like Thoughspot, and Hornblower and empower your data management with us.
Get Started with Hevo for FreeWhat is OData?

Introduced by Microsoft in 2007, OData (Open Data Protocol) is a standard REST-based protocol that provides users with a set of best practices for creating, configuring, and consuming interoperable and queryable REST APIs. In other words, OData provides a unified way of describing data and the data model for achieving interoperability between data sources, applications, services, and clients, making it more flexible than other REST-based web services.
You can query, update, and fetch data present in external data sources, applications, and servers with OData. Since OData has a standardized REST interface model, it allows you to concentrate on your business logic while developing custom RESTful APIs, rather than worrying about how to define status codes, HTTP methods, and URL conventions.
Tableau OData Integration Set-up Process
- By establishing the Tableau OData Connect, you can easily fetch data from any external data sources and databases via APIs.
- After implementing a connection, you can create dashboards and reports while maintaining live connectivity with any external data source. As a result, when the data in the external data source is updated or changed, the dashboard created in Tableau with the Tableau OData Connect will also change because of the live connectivity.
- With the OData service, you can export several tables or data from external data sources and refresh the data further in reporting tools like Tableau to get live or recent data.
- In other words, the direct connection feature of OData when used with the Tableau OData Connect allows you to get the most up-to-date reporting information of the specified data source, which can then be easily imported into third-party reporting tools for implementing data visualization.
Connection Prerequisites for Tableau OData Integration
For establishing the Tableau OData connect, you have to satisfy certain prerequisites.
- You should have a service URL to access all fields from your preferred data source.
- Make sure that you have installed and configured the Tableau Desktop on your local machine to enable a successful Tableau OData Connect
Creating an OData Service
Third-party applications like Tableau use an OData service to read data from an external data source or application via a source URL. Now, you have to create and configure a new OData service in order to obtain a source URL that enables Tableau to connect with the desired data source. For this integration tutorial, you will connect to the Mendix platform for fetching or reading data via the OData service.
- For creating and configuring a new OData service with the Mendix platform, open the Studio Pro IDE and create a new folder named “OData Services.”
- Now, right-click on the new folder and select the “Add other” option. Then, select “Published OData Service” from the displayed options.

- A new “Add Published OData Service” dialogue box will pop up, asking you to name the service. Now, you can enter the name as Asset and click on the “OK” button.

- You can navigate to the General settings to confirm whether the new OData service is added in the name of “Assets.” As shown in the above image, you can find the configuration information, such as Service Name, Version, Location, and Namespace, in the General settings.
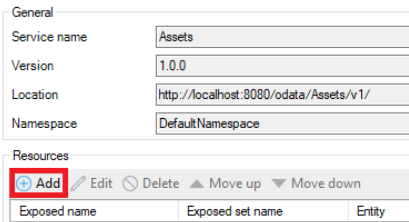
- Now, click on the Add option under the Resources, as shown in the above image.
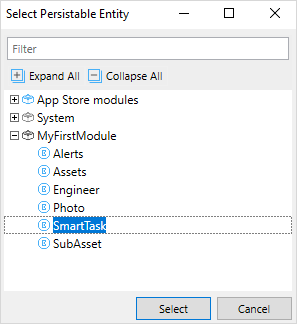
- A “Select Persistable Entity” dialogue box will pop up, in which you have to select the appropriate entity. In this case, you have to select two entities – SmartTasks and Engineers – from which you will fetch live data for creating dashboards in the further steps. Since you cannot select two entities simultaneously, you have to select one entity at a time.
- Initially, you can select the SmartTasks entity and click on the “Select” button.
- For adding the Engineers entity, you have to again click on the Add option under the “Resource,” as followed in the previous steps. Now, select the Engineers entity and click on the “Select” button.
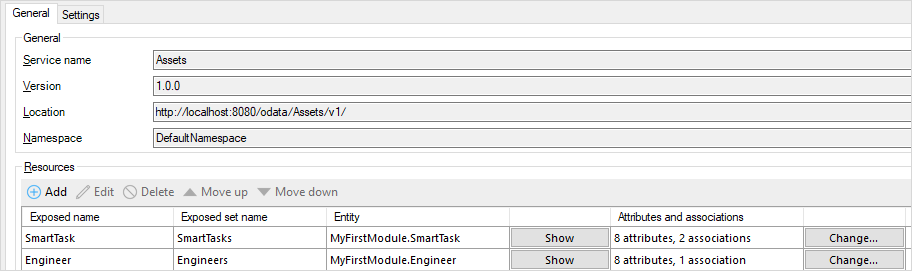
- After selecting two entities – SmartTasks and Engineer –they are added to the “Resources” section, as shown in the above image.
Establishing Tableau OData Connect
- Now, the data present in the Mendix platform is ready to be fetched by the Tableau Desktop. You can connect to an OData service from the Tableau Desktop and import the underlying data like you would for any other data source in Tableau.
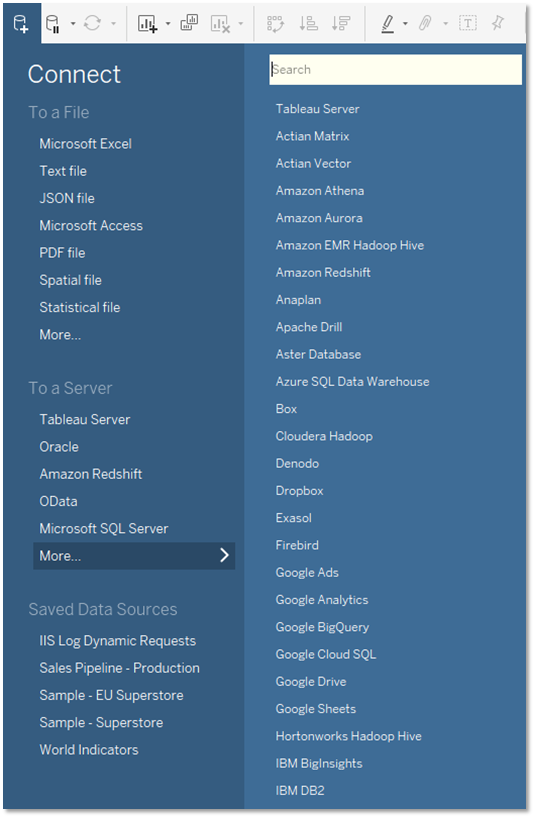
- Open your Tableau Desktop and click on the “Connect” menu. Then, in the “To a Server” section, click on OData.
- Now, a server connection dialog box will pop up, in which you have to enter the server connection details such as Server URL, Authentication preference, Username, and Password.
- In the Server field, you have to enter the server address for the SmartTasks entity. The appropriate server address for the SmartTasks entity is http://localhost:8080/odata/Assets/v1/SmartTasks, where Assets is the name of the OData service and SmartTasks is the name of the entity from which you will fetch data. Now, you successfully connected to the SmartTasks entity.
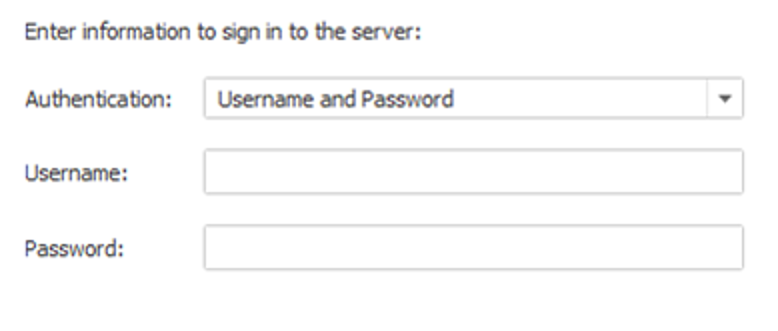
- In the Authentication dropdown, you can select the “Username and Password” option to authentically connect to the OData service.
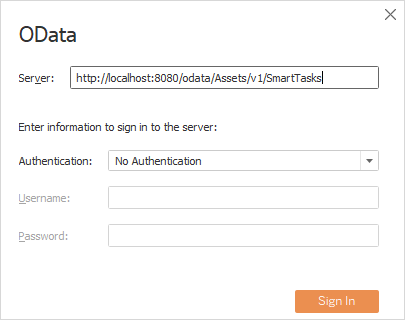
- You can also connect to the OData service without authentication. To connect without any authentication, click the No Authentication option in the dropdown menu. After filling in all the required fields, click on the “Sign In” button.
- Since Tableau Desktop has a limitation that it can only connect to one resource at a time using the native OData connection, you cannot simultaneously connect with entities such as SmartTasks and Engineer.
- For connecting to the Engineers entity, follow the same steps you did for the SmartTasks entity. The only field you have to change is the Server address. In the server address field, enter http://localhost:8080/odata/Assets/v1/Engineer for connecting to the Engineers entity.

- Now, the SmarTasks data source is loaded into your Tableau workspace, as shown in the above image.

- You can change the name of the server address to “SmartTasks” for better readability.
- Now, you are all set to visualize the fields of the imported data. Click on the File menu and open a new sheet named “Sheet 1.”
- You have to perform some field alterations to correctly segment the dimension and measure values.
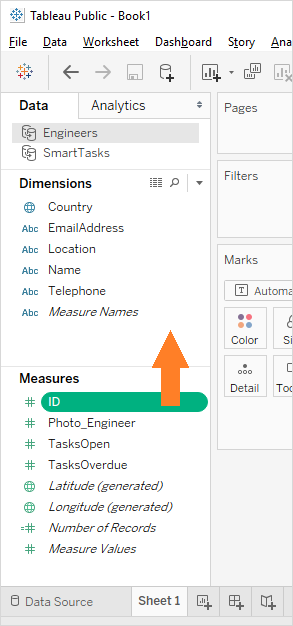
- From the Data pane on the left side, drag the ID field from the “Measures” segment and drop it into the “Dimension“ segment, as shown in the above image.
- Then, click on the “Engineers” entity in the Data pane. To perform field alterations for the Engineers entity, drag the SmartTask_Engineer field from the measures segment and drop it into the dimensions segment.
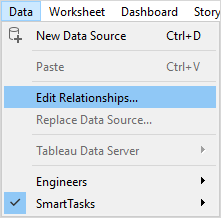
- For defining the relationship between two data entities, such as SmartTasks and Engineer, you have to navigate to Data > Edit Relationships.

- The Relationship window will pop up, prompting you to fill in the appropriate information, as given below.
- You have to select the SmartTasks option in the Primary data source dropdown menu.
- Then, select Engineers for the Secondary data source.
- Click on the Custom radio button.
- Remove the default mappings.
- Finally, select the Add button and click on OK.

- Now, select the ID option for the Primary data source field and the SmartTask_Engineer option for the Secondary data source field in the Add/Edit Field Mapping window. After selecting the appropriate entities, click OK to save the field mapping.

- For visualizing the Engineers entity’s data, drag the Name field from the dimensions and drop it into the Rows segment on the right-hand side of the Tableau workspace.

- Then, select SmartTasks in the data pane and drag the Number of Records field from Measures and drop it to the column section by keeping SmartTask_Engineer as a linking field.
- Now, the horizontal bar chart is created based on the SmartTasks and Engineers entity.
By following the above-given steps, you successfully implemented the process of Tableau OData integration.
Conclusion
In this article, you learned about Tableau, OData, and how to implement the Tableau OData integration process. This article mainly focused on integrating and fetching data from the Mendix platform for visualizing data present within different entities. However, you can also integrate Tableau with external databases like MySQL to fetch data from MySQL tables for implementing effective visualizations using Tableau tools and templates.
Hevo Data with its strong integration with 150+ Data Sources (including 60+ free sources) allows you to not only export data from your desired data sources & load it to the destination of your choice, but also transform & enrich your data to make it analysis-ready so that you can focus on your key business needs and perform insightful analysis using BI tools.
Want to take Hevo for a spin? Sign Up for a 14-day free trial and experience the feature-rich Hevo suite first hand. You can also have a look at our Hevo pricing that will help you choose the right plan for your business needs!
Share your experience of learning about Tableau OData Connect in the comments below! We’d love to hear from you.
Frequently Asked Questions
1. What is OData in Tableau?
OData (Open Data Protocol) in Tableau allows users to connect to and visualize data from OData sources.
2. Can Tableau pull data from SAP?
Yes, Tableau can pull data from SAP.
3. Can we get data from API in Tableau?
Yes, you can get data from APIs in Tableau.
Share it with your connections.
-
 Share To LinkedIn
-
 Share To Facebook
-
 Share To X
-
 Copy Link


