


 Key Takeaways
AWS Glue and Snowflake integration creates a powerful, serverless ETL solution for modern data pipelines. This combination handles both batch and streaming data processing while maintaining data quality through built-in validation tools.
Organizations gain unified data access and automated workflows without infrastructure management headaches. Implementation requires proper configuration of IAM roles and job parameters, but delivers significant ROI through improved analytics capabilities.
For a seamless integration without technical complexity, Hevo Data’s no-code platform offers a faster, more accessible alternative to connect AWS and Snowflake environments.
AWS Glue is a Cloud-optimized ETL (Extract, Transform, and Load) Service from Amazon Web Services (AWS). It allows you to organize, locate, move, and transform all your datasets across your business. Although it gives you the best results when used independently, it is always recommended to integrate with a reliable data warehouse. AWS Glue Snowflake Integration makes sure that your data is securely stored in a centralized location.
This article will introduce you to AWS Glue and Snowflake Integration. It will also provide a comprehensive guide that you can use while setting up this Integration.
Table of Contents
Introduction to AWS Glue

AWS Glue is serverless which means that you don’t need to take the headache of provisioning and managing servers, and you get charged only for the time taken by your ETL Jobs. It even comes with a visual interface that allows you to define your ETL jobs without writing a single line of code.
Key Features of AWS Glue
1. Automated Data Catalog: Data and its actual catalog are automatically discovered, making any repository a central place for organization and access.
2. Adaptable ETL Capability: AWS glue has visual interfaces for ETL jobs, whereas custom transformations can be done using Python and Scala.
Introduction to Snowflake

Snowflake is a data warehouse solution that is provided as a SaaS (Software-as-a-service) offering. It uses AWS, Azure, or Google Cloud in the background (you need to select one of these Cloud Service Providers, and the region while signing up).
Stay on top of your Snowflake expenses with our pricing calculator!
Key Features of Snowflake
- It de-hyphenates compute and storage, allowing you to pay separately for the two.
- Like other data warehouses, it uses columnar storage for parallel query execution.
Migrate your data into Snowflake seamlessly with Hevo. Our platform offers both pre and post-load transformations, ensuring your data is ready for analysis.
- Easy Integration: Connect and migrate data into Snowflake in minutes without any coding.
- Flexible Transformations: Use simple drag-and-drop transformations or custom Python scripts.
- Pre and Post-Load Transformations: Transform your data at any stage of the migration process.
Join over 2000 satisfied customers, including companies like Cure.Fit and Pelago, who trust Hevo for their data management needs.
Get Started with Hevo for FreePrerequisites
Here are the prerequisites for setting up AWS Glue Snowflake Integration:
- A Snowflake account (you can sign up for a 30-day free trial, which will be sufficient for this tutorial).
- An AWS account (Note that AWS Glue ETL jobs are not covered under the free tier, so you will incur a nominal charge while following this tutorial. I’ll be providing instructions for keeping this cost as low as possible. If it all works out in the first attempt for you, your total cost should be < $0.1).
PART 1: AWS Glue Configuration for AWS Glue Snowflake Integration
AWS Glue needs configuration before setting up this Integration. Follow the steps below to configure AWS Glue:
Step 1: Creating the IAM Role
If you don’t have a suitable IAM Role already, you will need to create one. Follow the steps below to create a suitable IAM Role:
- Step 1.1: On the AWS Console, go to Services > IAM.
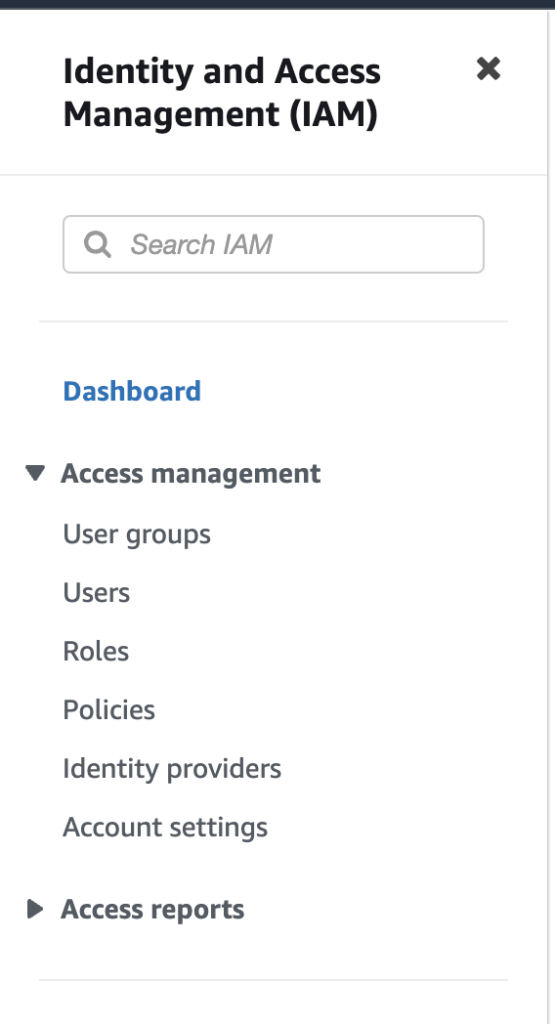
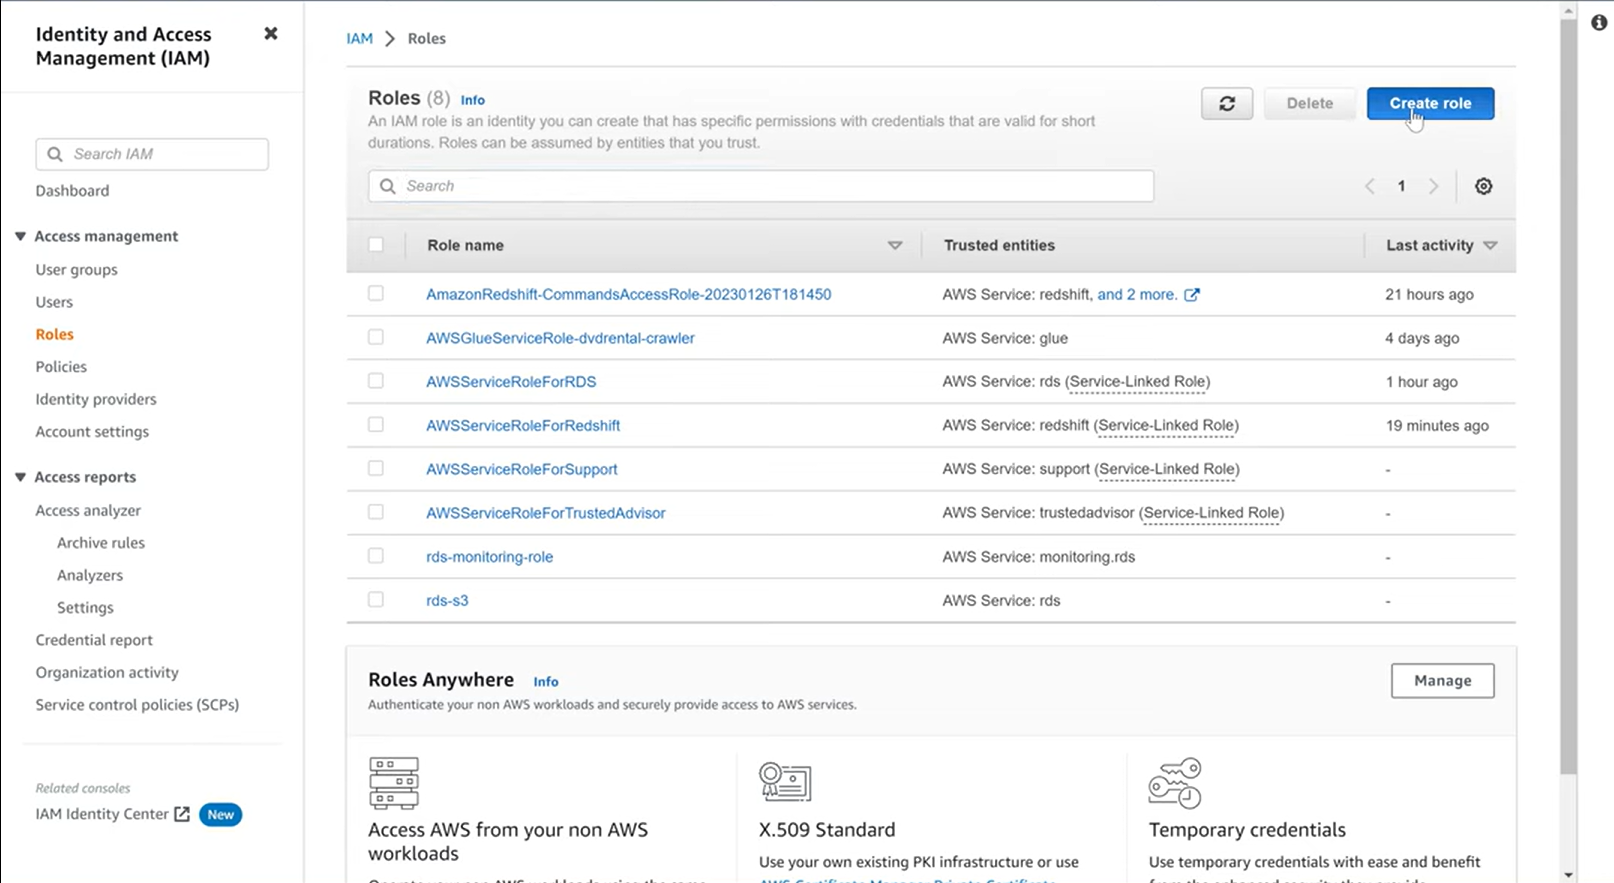
- Step 1.2: Click on “Roles” from the left menu, and then click on “Create role”.
- Step 1.3: In the subsequent screen, choose “AWS service”, and for the use case, select “Glue” from the list below, and click on “Next: Permissions”.

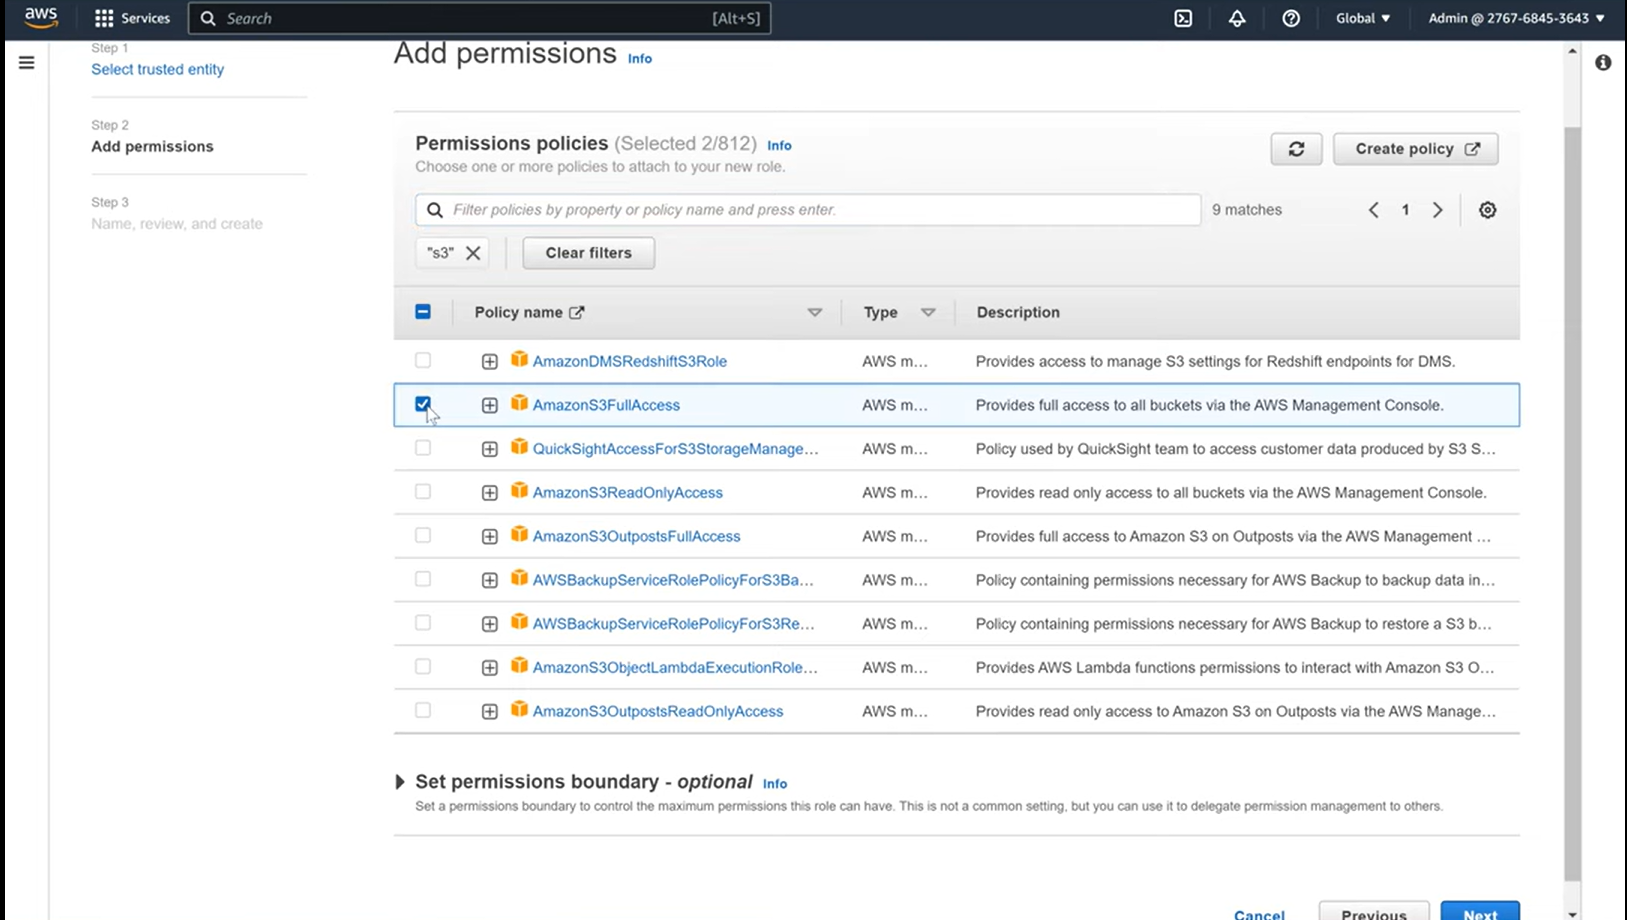
- Step 1.4: On the permissions screen, search for Glue, and add all the permissions. Then search for S3 and add the “AmazonS3FullAccess” permission.
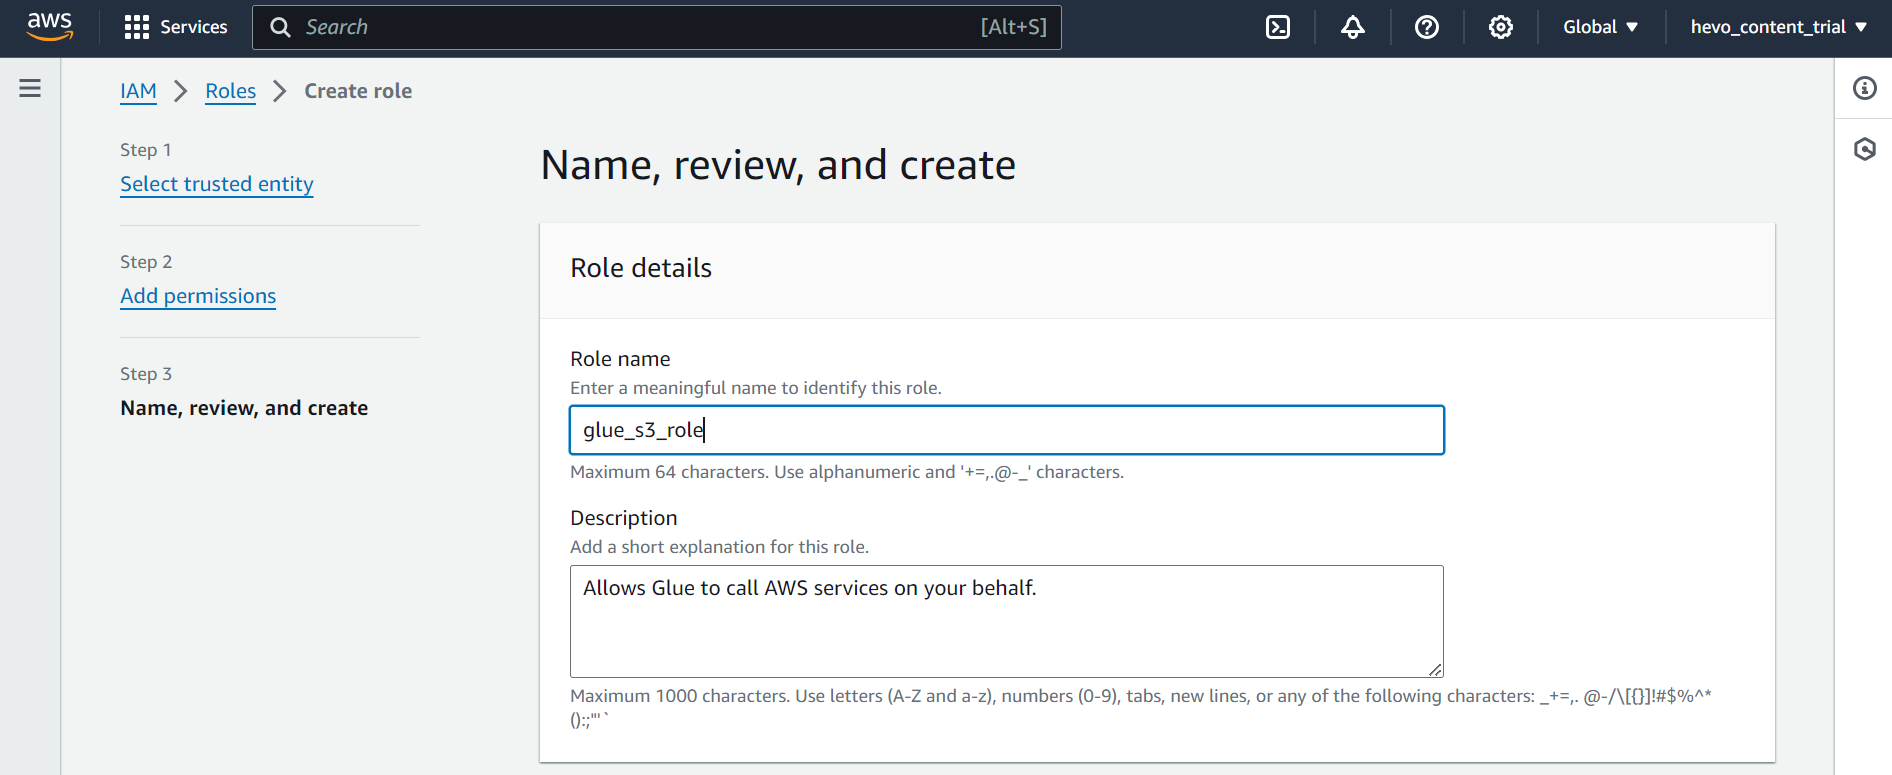
- Step 1.5: In the final “Review” screen, provide a suitable name for your role (let’s call it “glue_s3_role”), and click on “Create Role”.
Step 2: Adding JDBC Connector to S3
- Step 2.1: You will need to download the Snowflake JDBC Connector jar file. You can download it from here. For instance, you can download version 3.9.2.
NOTE: JDBC stands for Java Database Connectivity, and in very simple terms, is an API that allows Java programs to access a database.
- Once downloaded, upload the jar file to a bucket in S3. If you don’t have an S3 bucket, then create one (in the same region where you wish to run your Glue jobs).
- After the upload is done, note down the S3 URI of the jar file. It will be used in the integration part.
You have successfully configured AWS Glue for AWS Glue Snowflake Integration.
PART 2: Snowflake Configuration for AWS Glue Snowflake Integration
Similar to AWS Glue, Snowflake also needs to be configured. Once you create a Snowflake account, follow the steps below to configure it:
Step 1: Creating a New Data Warehouse
Follow the steps below to create a new Data Warehouse:
- Step 1.1: Within Snowflake, go to the “Warehouses” tab and click on “Create”. Give it a suitable name (here let’s call it “glue_integration_test”).
- Step 1.2: Leave all other setup parameters to their default values, except for the Size parameter, where you can opt for the X-Small size, to save credits.
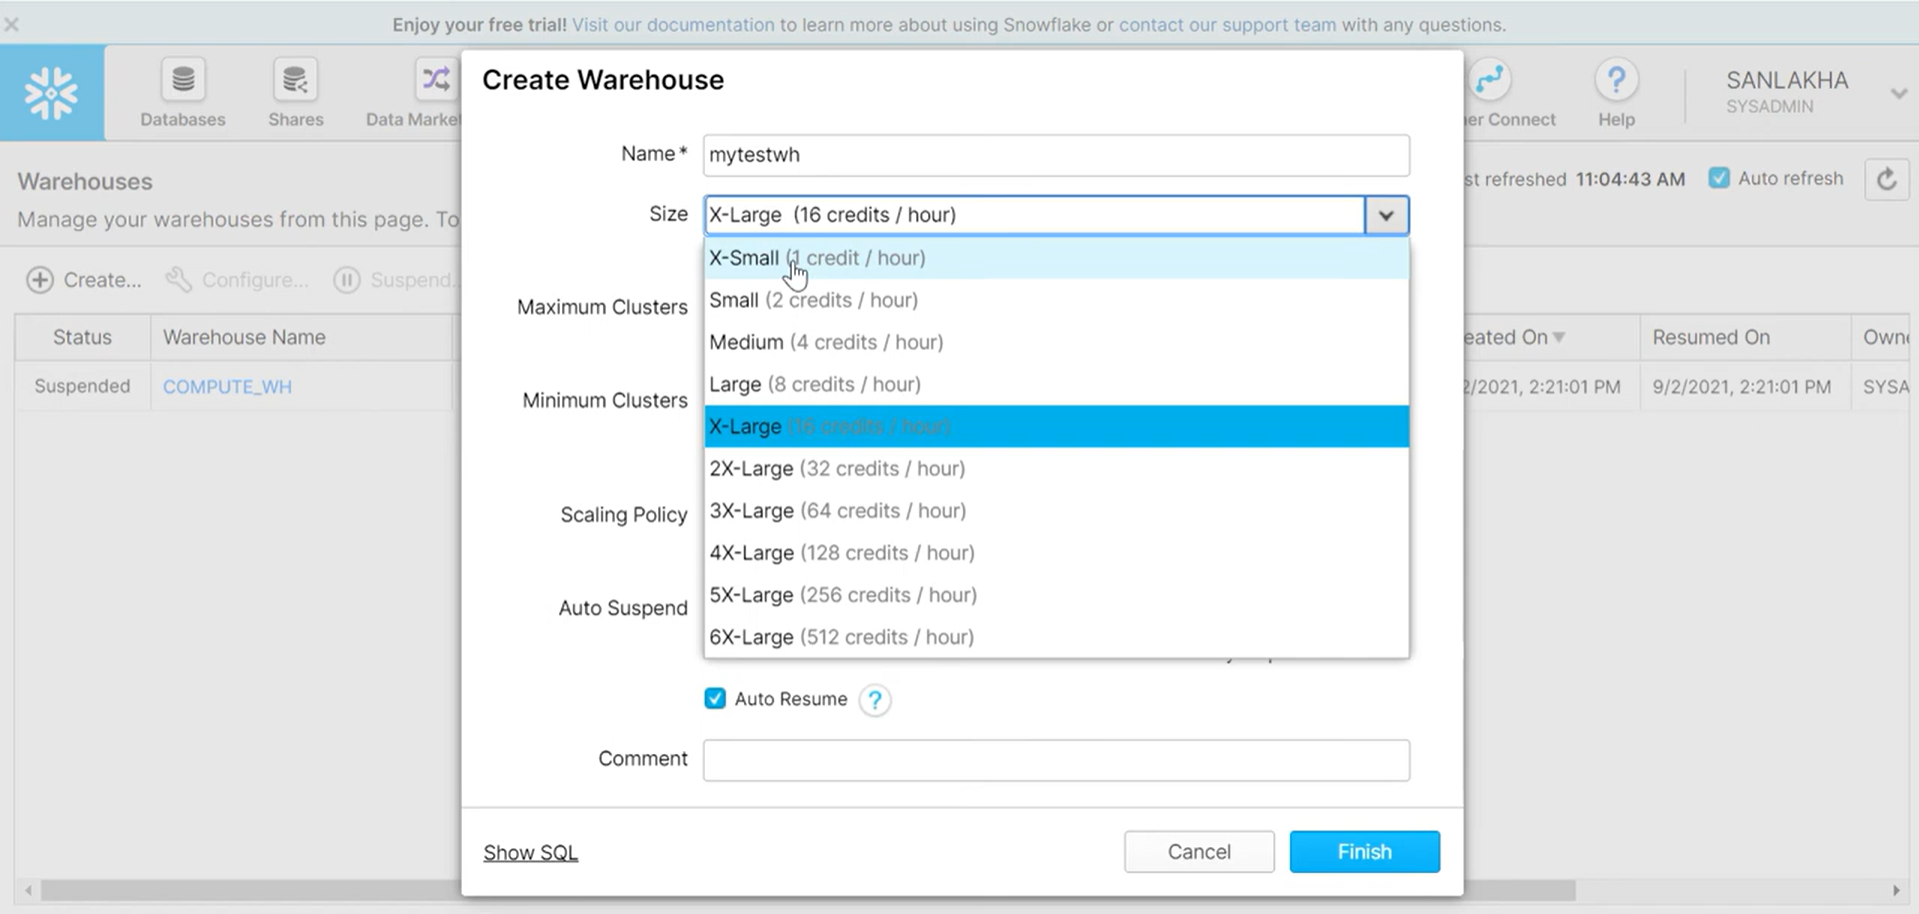
- Step 1.3: Click on “Finish” once done. Your Data Warehouse will be created.
Step 2: Creating a New Database
- Step 2.1: Go to the “Databases” tab, and click on ‘Create’. Give it a suitable name. I’ll call it “glue_integration_test_db” and click on “Finish”.

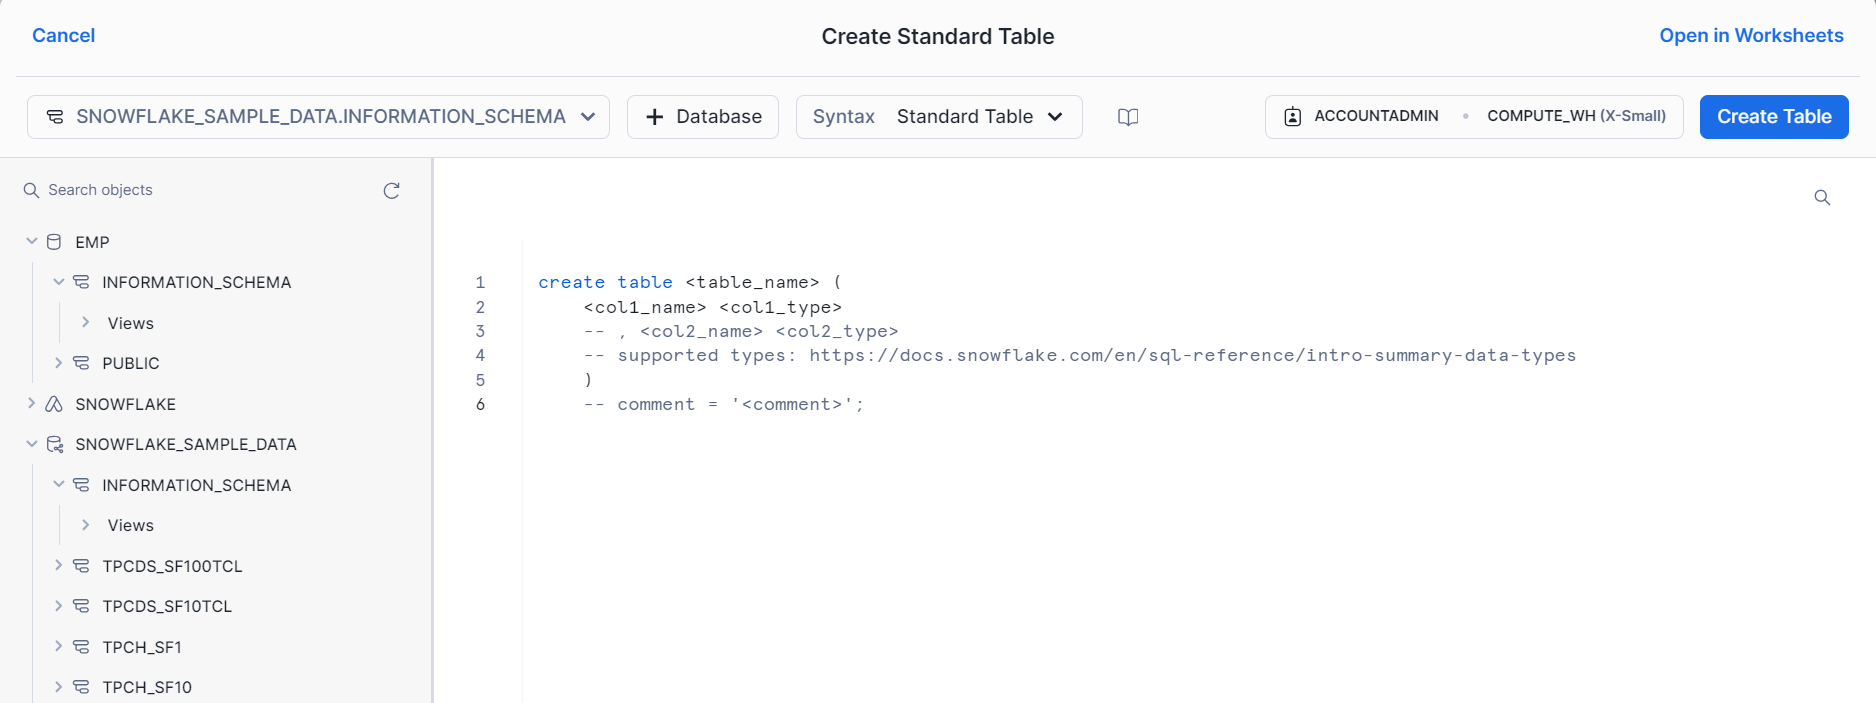
Step 3: Creating a New Table
- Step 3.1: Click on the Database just created. Click on “Create”. The table creation popup opens up.
- Step 3.2: Give the table a suitable name (here, let’s call it “glue_integration_test_table”).
- Step 3.3: Click on “Finish.” Your table will be created.
You have successfully configured Snowflake for AWS Glue Snowflake Integration.
Part 3: Steps to Set Up AWS Glue Snowflake Integration
Listed below are the steps to setup the Integration:
- Step 1: Creating a Connection between AWS Glue and Snowflake
- Step 2: Creating a Connection from Snowflake to S3 ETL Job
- Step 3: Creating a Connection from S3 to Snowflake S3 Job
Step 1: Creating a Connection between AWS Glue and Snowflake
Follow the steps below to create a connection between AWS Glue and Snowflake:
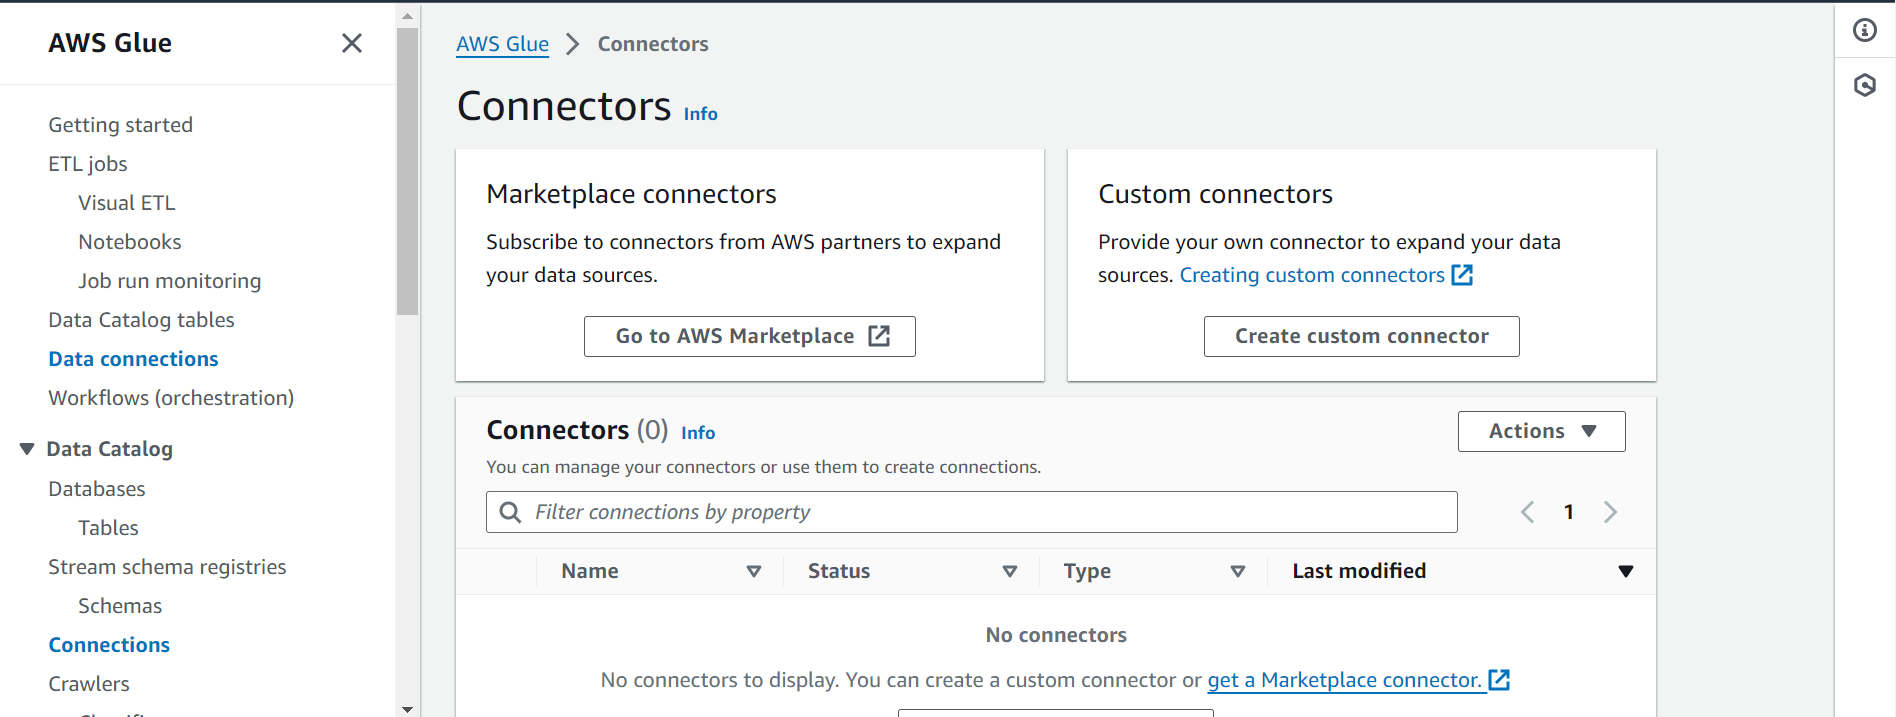
Step 1.1: Creating a Connector
Now, in order to interface with Snowflake, we first need to create a Connector. Go to AWS Glue, and click on “AWS Glue Studio” from the left menu. Once in the glue studio, click on “View Connectors” and then click on “Create Custom Connector”.
In the form that opens up, enter the following:
- For the connector S3 URL, enter the S3 URI of the JDBC Connector noted in the AWS Setup section.
- Give the connector a name. I’ll call it ‘snowflake_jdbc_connector’
- Set ‘JDBC’ as the connector type.
- For the class name, enter “net.snowflake.client.jdbc.SnowflakeDriver”.
- For the JDBC URL base, enter
jdbc:snowflake://<your_snowflake_account_info>/?user=${Username}&password=${Password}&warehouse=${warehouse}- In place of <your_snowflake_account_info>, enter the actual Snowflake account URL (it will be the format <account_identifier>.snowflakecomputing.com. It can have some variations. For instance, here the Snowflake account is based on AWS and is in the us-east-2 region (Ohio). Therefore, the account info looks like: abcdefg.us-east-2.aws.snowflakecomputing.com, abcdefg representing the account identifier.
- For URL parameter delimited, enter ‘&’.
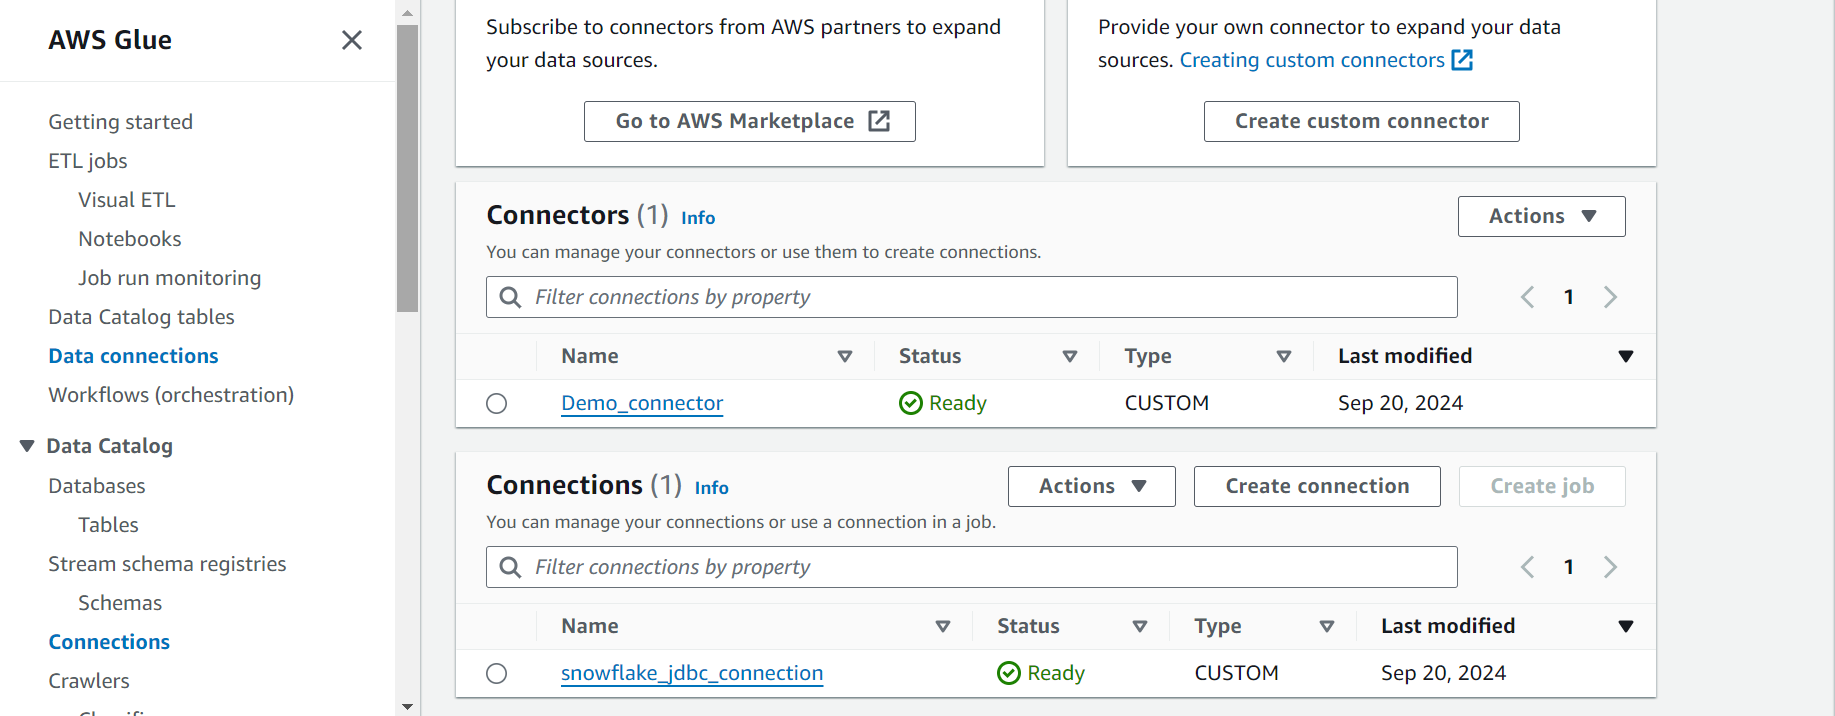
Step 1.2: Creating a Connection
Once your Connector is created, follow the steps below to create a connection:
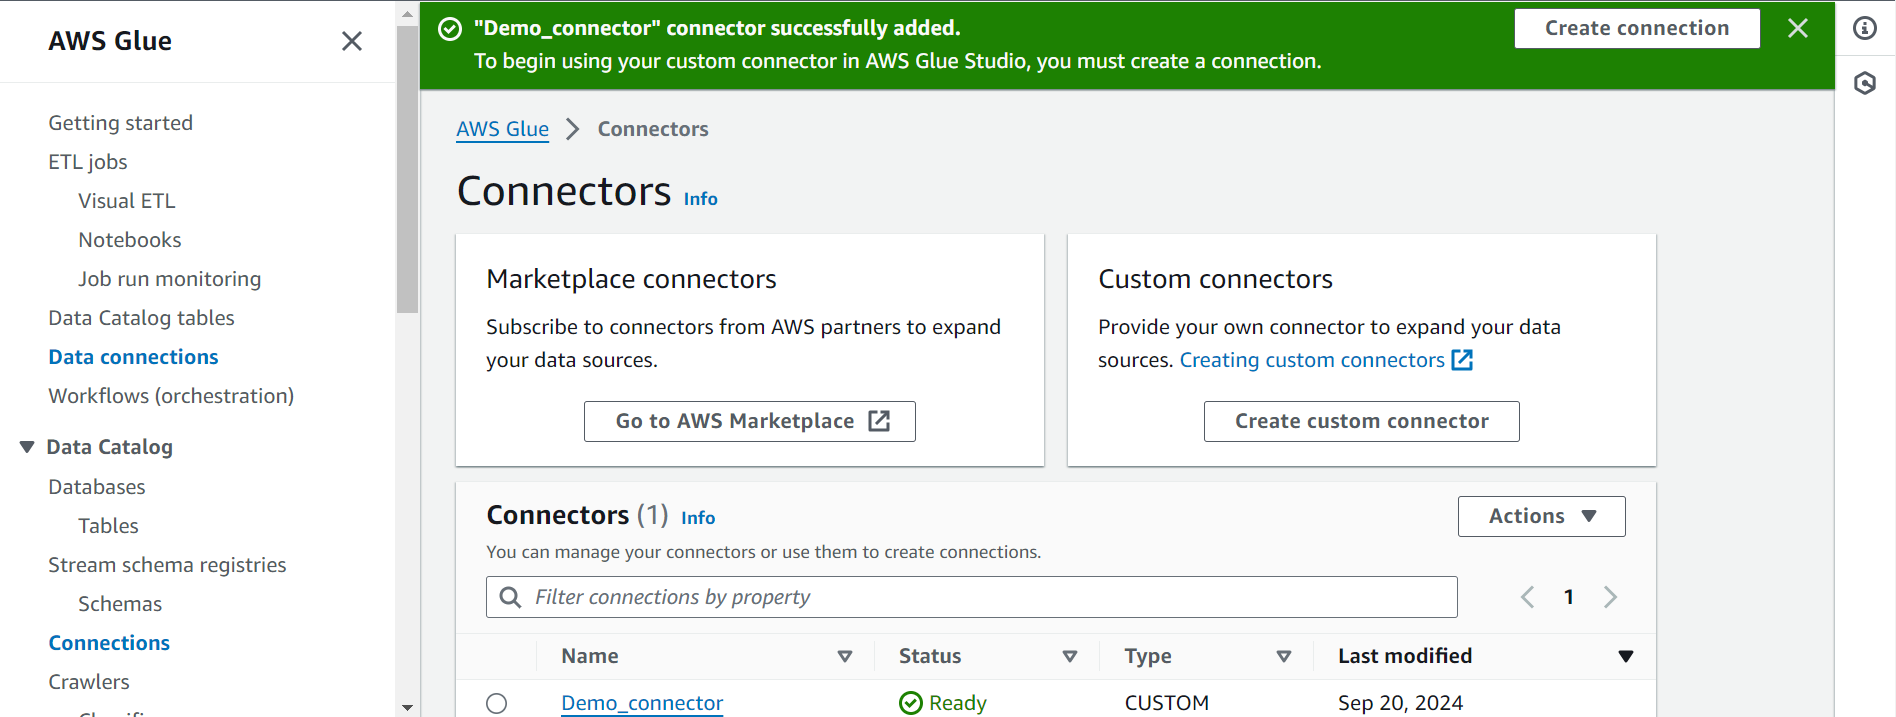
- Click on the connector you created in the last step, and click on “Create Connection”.
- In the form that opens up, provide a name to the connection, and an optional description (here, let’s the connection name be “snowflake_jdbc_connection”).
- Next, in the “Connection Options” tab, choose the credentials type as default and then enter values for the Snowflake username, password, and Warehouse (enter the name of the Warehouse created in the Snowflake Configuration section above).
- Once your credentials and Warehouse values are entered, click on “Save Changes”. Your connection will successfully be created.
Step 2: Creating a Connection from Snowflake to S3 ETL Job
Follow the steps below to create a connection between Snowflake and S3 ETL Job for AWS Glue Snowflake Integration:
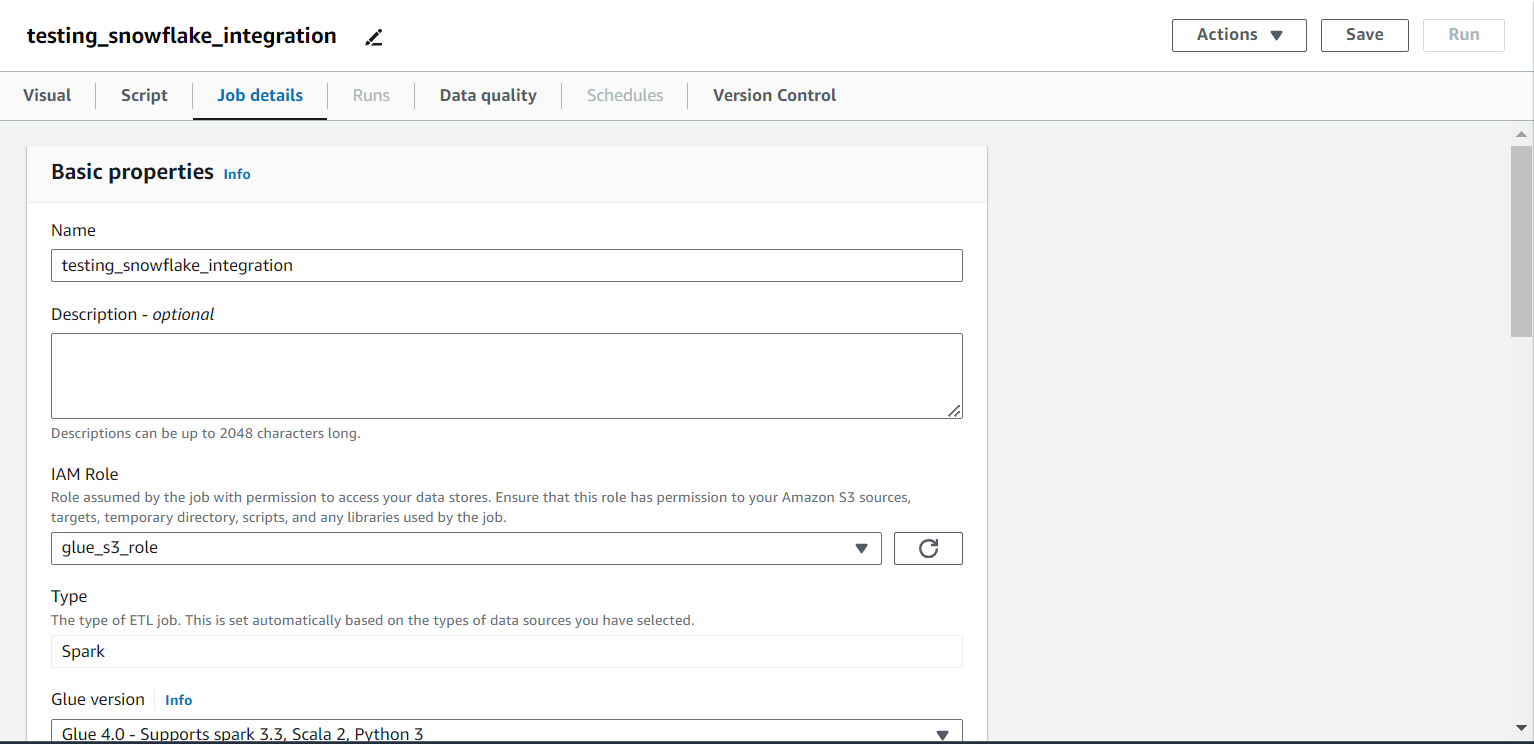
Step 2.1: Setting Up Job Details
- Once the connection is created, click on the connection, and click on “Create Job”.
- Go to the “Job Details” tab, and fill the form as follows:
- Give it a name (in this article, let’s name it “testing_snowflake_integration”).
- For the IAM Role, select the role created in the AWS Setup step.
- Type, Glue version, Language, and Worker type can be left as default.
- The number of workers can be set to 2 instead of 10. This can help save the cost. Each worker (DPU) contributes to the cost. Minimum 2 are required.
- Job bookmark can be set to “Disable” since we won’t care about the state information.
- The number of retries can be set to 0, again for saving cost.
- Job timeout can be reduced to a lower value (say 5), again to make sure that you don’t end up spending a lot in case something goes wrong.
- Click on “Save” (top-right) as shown in the image below.
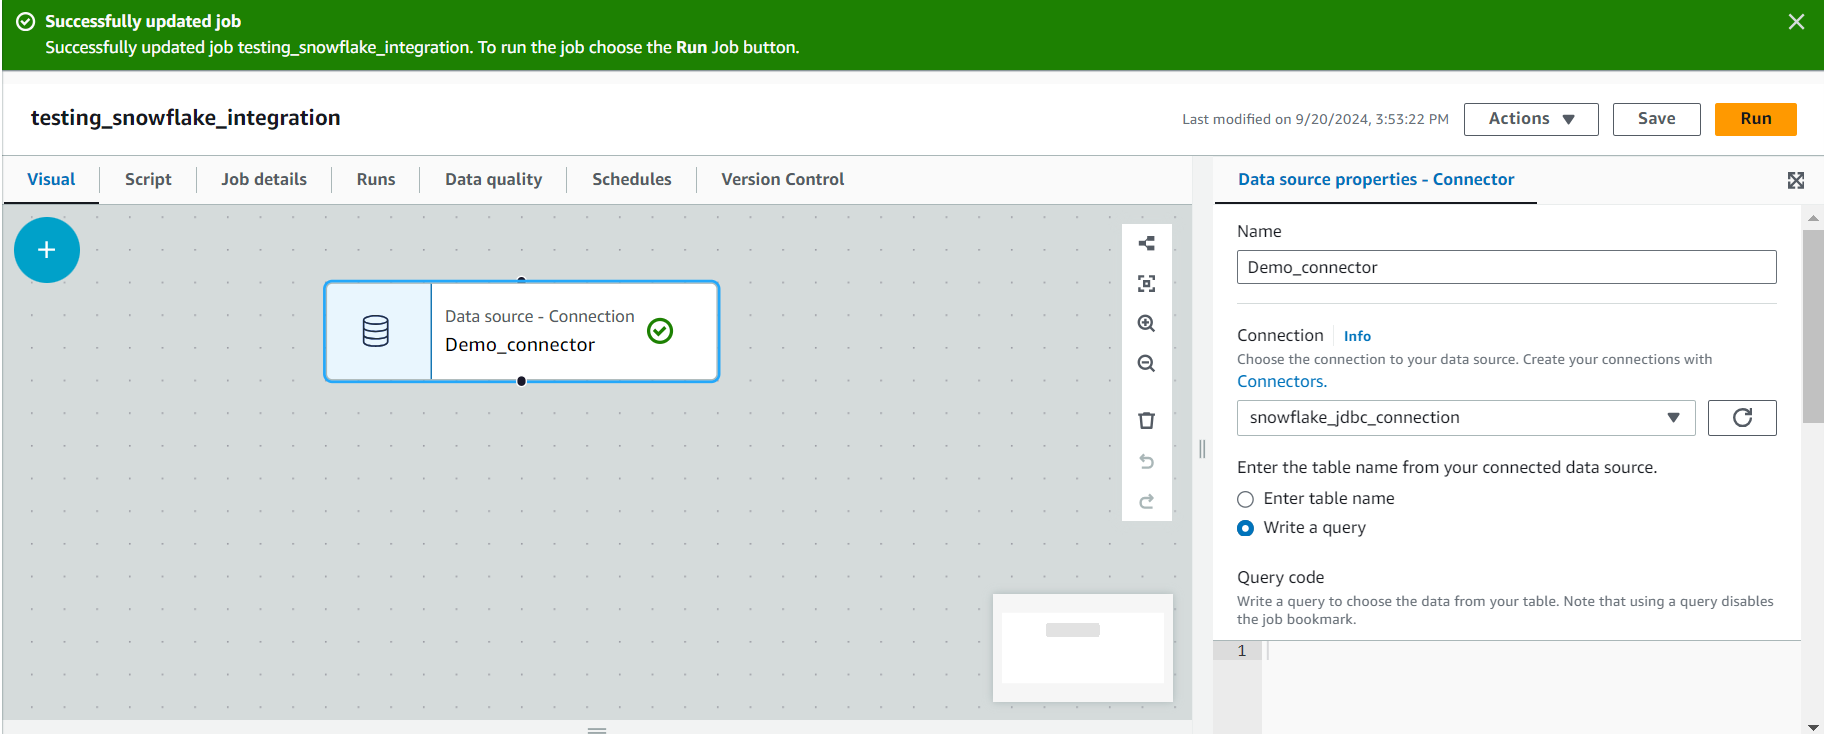
Step 2.2: Creating the Job Visually
Follow the steps below to create the Job visually:
- Go to the “Visual” tab. You will see that a node for the snowflake JDBC connector has already been created.
- Click on it and click on the “Data source properties – Connector” tab.
- Select “Write a query” and copy the following in the query code:
SELECT * from SNOWFLAKE_SAMPLE_DATA.WEATHER.DAILY_14_TOTAL LIMIT 10- You are basically querying 10 items from the daily_14_total table in the weather schema of the snowflake_sample_data DB. This DB is available to you whenever you create your free Snowflake account as shown in the image below.
- Next, click on “Target” and select ‘Amazon S3’. Click on it, and within “Node Properties”, select the above data source within the “Node Parents” dropdown. You will see an arrow linking the source to the target.
- Next, within “Data Target Properties – S3”, set the format to JSON, and set the S3 Target Location to a bucket or a directory within a bucket in S3 where you wish to store the data fetched from Snowflake as shown in the image below. Make sure your IAM Role has access to that bucket.
- Now, click on “Save” in the top right, and then click on “Run”. You can observe the status in the “Runs” tab. If all goes well, you should see the “Succeeded” status, with an execution time in the ballpark of 1 minute as shown in the image below.
You should also be able to see the file created in S3, as shown in the image.
If you download the file and open it in an editor, you will see that it is actually the JSON version of the table entries.

Step 3: Creating a Connection from S3 to Snowflake S3 Job
This is the final step to set up AWS Glue Snowflake Integration. Follow the steps below to create a connection from S3 to Snowflake S3 Job:
Step 3.1: Modification of the Connector
This step requires a slight modification of the Connector. Go to the connector, click on “Edit” and change the JDBC URL Base to:
jdbc:snowflake://<your_snowflake_account_info>/?user=${Username}&password=${Password}&warehouse=${warehouse}&db={db_name}You are essentially just adding the Database name as an additional field. Similarly, edit the connection, and provide the value of the table created in the “Snowflake Setup” section, for the db_name parameter.
Step 3.2: Creating the Job Visually
Now, create a new Job. The job details will be similar to what you filled in Step 2: Creating a Connection from Snowflake to S3 ETL Job. Follow the steps below to create the Job visually:
- In the “Visual” tab, remove the snowflake_jdbc_connector node that appears by default.
- Click on the “Source” tab and select “Amazon S3”.
- Click on the node, and in the “Data Source Properties – S3” tab, set the source type as “S3 Location”, S3 URL as the URL of the JSON saved in the previous step, and data format as “JSON” as shown in the image below.
- Next, from the “Target” tab, select the “JDBC Connector”.
- Click on the node that appears and within the node properties, select “Amazon S3” from the dropdown. This should establish a connection between the source and the target.
- Within the data target properties, choose the connection defined earlier from the dropdown, and in the “Table name” field, mention the name of the table created in the “Snowflake Setup” section.
- Now, save this job, and click on “Run”. Monitor the status in the “Runs” tab. If all goes well and the job status is “Succeeded”, you should be able to see the data populated in your Snowflake table.
Note: If this table is not empty, then data will be appended to it. This means that if you run the job twice, the table will contain 20 rows. Also, note that the column names are important. If instead of V and T, you had left the column names to the default C1 and C2, you would have gotten an error like the one below:
An error occurred while calling o87.pyWriteDynamicFrame. Glue ETL Marketplace: JDBC Data Sink: Column “V” not found in schema Some(StructType(StructField(C1,StringType,true), StructField(C2,StringType,true)))
That’s it. You have successfully set up AWS Glue Snowflake Integration.
Conclusion
This blog covers AWS Glue Snowflake Integration and provides a step-by-step process for manually setting up this integration. All the configuration steps are effective, though they do require much technical expertise. You would also have to develop a custom in-house solution should you wish to extract data from AWS Glue and transfer it to Snowflake or some other data warehousing solution for analysis.
To overcome all these challenges, use automated pipeline platforms that help you seamlessly integrate data from source to destination, ensuring data security.Hevo is also an automated pipeline that helps you effortlessly integrate your data from source to destination effectively.
Want to take Hevo for a spin? Sign up for a 14-day free trial and experience the feature-rich Hevo suite firsthand.
Share your experience of setting up AWS Glue Snowflake Integration in the comments section below!
FAQ on AWS Glue Snowflake
Does AWS Glue support Snowflake?
Yes, AWS Glue supports Snowflake. You can use AWS Glue to extract, transform, and load data into Snowflake, as well as to read data from Snowflake for processing or analysis.
Is AWS Glue an ETL tool?
Yes, AWS Glue is an ETL (Extract, Transform, Load) tool. It automates the process of discovering, preparing, and combining data for analytics and data processing.
What is AWS Glue compatible with?
AWS Glue is compatible with various AWS data stores such as Amazon S3, Amazon RDS, Amazon Redshift, and DynamoDB. It also supports external databases like MySQL, PostgreSQL, Oracle, and Snowflake, and can interact with other data sources via JDBC.
Does Snowflake integrate with AWS?
Yes, Snowflake integrates with AWS. It can be deployed on AWS infrastructure and integrates with AWS services like Amazon S3 for data storage, AWS Glue for ETL, and Amazon Redshift Spectrum for querying data.


