


Unlock the full potential of your BigQuery data by integrating it seamlessly with Azure Synapse. With Hevo’s automated pipeline, get data flowing effortlessly—watch our 1-minute demo below to see it in action!
As businesses continue to generate massive amounts of data, the need for efficient and scalable data storage and analysis solutions becomes increasingly important. Two popular options for data warehousing are Google BigQuery and Azure Synapse Analytics, both of which offer powerful features for processing large datasets. By connecting BigQuery to Azure Synapse, you can leverage the best of both worlds.
This article provides a step-by-step process to transfer data from Google BigQuery to Azure Synapse.
Table of Contents
What is GoogleBigQuery?

Google BigQuery is a fully managed, serverless data warehouse that lets you run massive-scale queries in seconds using SQL. The architecture of the product is developed for real-time processing and analysis of big volumes of data, so the whole system is quite productive for analytics.
Key Features:
- Serverless Architecture: Automatic management of infrastructure to save you from worrying about resource management.
- Real-Time Analytics: It allows real-time data ingestion and analysis to derive insights from a live data stream.
- Scalability: It scales up seamlessly to handle petabytes of data, offering high-performance scale automatically without having to deal with a lot of manual scaling.
What is Azure Synapse?
Azure Synapse Analytics is a cloud-based analytics service developed by Microsoft that integrates big data and data warehousing. It enables you to query and analyze data from big data and data warehousing in multiple sources in one place—one platform.
Key Features:
- Integrated Analytics: Data warehousing, big data, and integration are combined into a single service. Therefore, it allows you to have end-to-end analytics.
- On-demand query: allows running on-demand queries using both serverless and provisioned resources most flexibly and cost-effectively.
- Unified Experience: It unifies the workspace for data preparation, data management, and machine learning, which really streamlines the overall analytics process.
Prerequisites
- For BigQuery (Source):
- Access a BigQuery project with one or more datasets containing at least one table.
- An active billing account is linked to your GCP project, as Hevo writes incremental data to temporary tables using streaming inserts.
- You are granted permission to access the BigQuery Data Editor, Data Viewer, and Job User at the dataset level.
- For Azure Synapse (Destination):
- An Azure account with an active subscription for which billing is enabled exists.
- A user in your subscription with the Contributor role in Azure RBAC exists to create the required Synapse resources.
- The Azure Synapse Analytics instance is running.
- A dedicated SQL pool (data warehouse) is available.
Our latest blog dives into Azure Synapse vs BigQuery, highlighting the key differences to help you choose the right data warehouse solution for your needs
Method 1: BigQuery to Synapse using Hevo Data
Hevo Data provides a seamless BigQuery Azure Synapse Integration without having to deal with lengthy pieces of code in just two steps. As Hevo is a centrally managed platform, there would be no need for manual interventions.
Method 2: Manual BigQuery Azure Synapse Integration
This method involves manually setting up the BigQuery Azure Synapse connection using the copy data tool.
Method 1: BigQuery to Synapse using Hevo Data
Step 1: Configure Google BigQuery as your Source
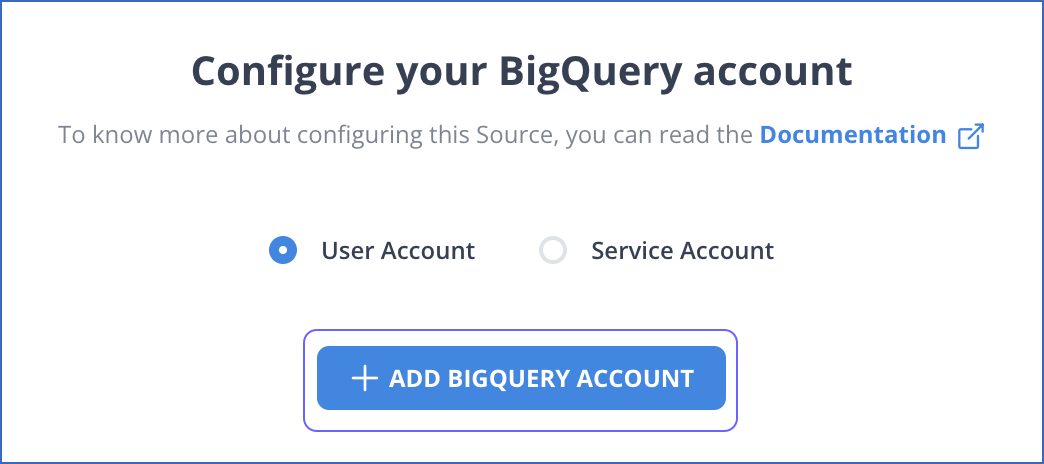
- Step 1.1: In the Configure your BigQuery Account page, connect to your BigQuery data warehouse using one of the following ways:
- To connect with a User Account, do one of the following:
- Select a previously configured account and click CONTINUE.
- Click + ADD BIGQUERY ACCOUNT and perform the following steps to configure an account:
- To connect with a User Account, do one of the following:
- To connect with a Service Account, do one of the following:
- Select a previously configured account and click CONTINUE.
- Attach the Service Account Key JSON file that you created in Google Cloud Platform (GCP) and click CONFIGURE BIGQUERY ACCOUNT.

- Step 1.2: In the Configure your BigQuery Source page, specify the following:
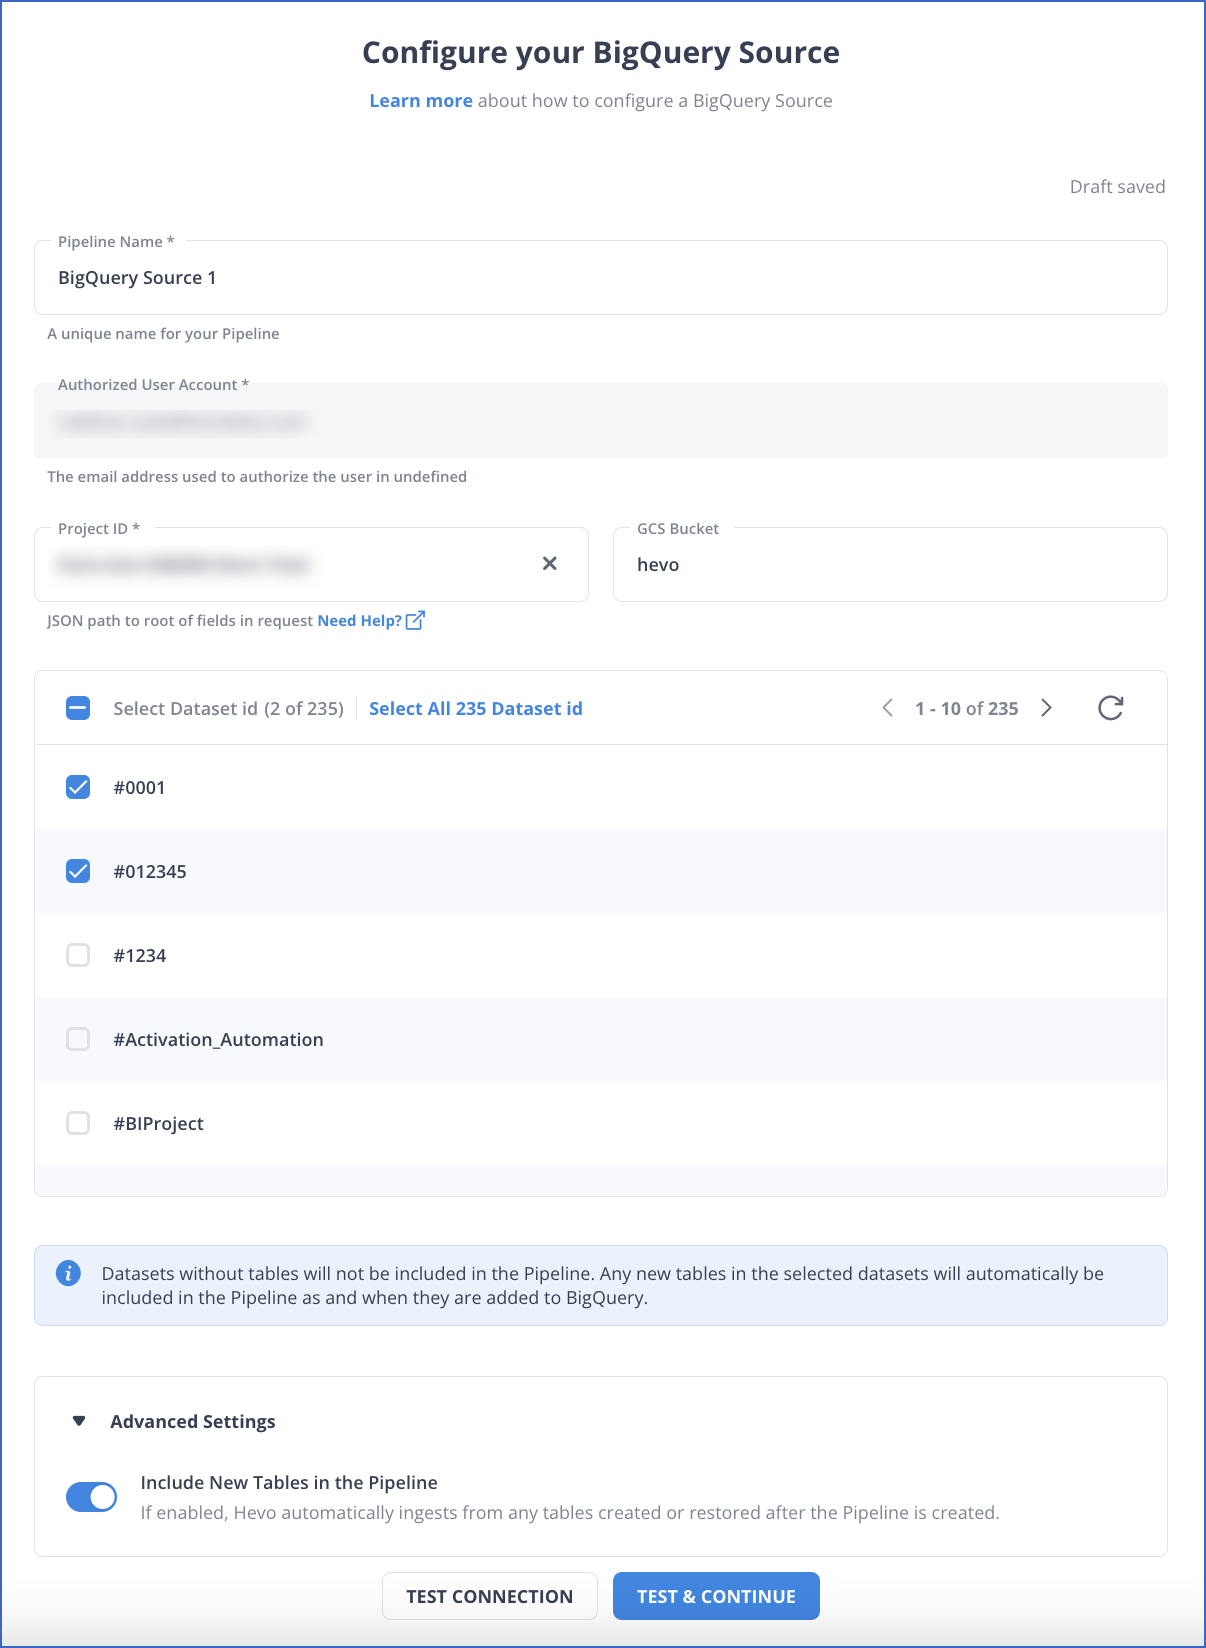
- Step 1.3: Click TEST & CONTINUE.
Step 2: Configure Azure Synapse as your Destination
- Step 2.1: In the Configure your Azure Synapse Analytics Destination page, specify the following:

- Step 2.2: Click TEST CONNECTION.
- Step 2.3: Click SAVE & CONTINUE.

Method 2: Manual BigQuery Azure Synapse Integration
PART 1: Creating a Linked Service from BigQuery to Azure
- Step 1: Log in to Azure Synapse Analytics and navigate to your Synapse workspace, where you need to replicate your data. Click on the Manage button present on the left side vertical menu. Click on the Linked Service and then the “+ New” button.

- Step 2: Search for BigQuery and select the connector as your source.

- Step 3: Enter the Connection name and provide the BigQuery project ID, Client ID, Client Secret, and the Refresh Token. For the Authentication Type, this article considers “User Authentication,” which uses OAuth 2 authorization to connect your Google user account to Azure Synapse Analytics.

PART 2: Generating Client ID, Secret, and Refresh Token
- Step 1: Open Google Console and select the existing BigQuery project from which you need the data. Click on the Credentials tab.
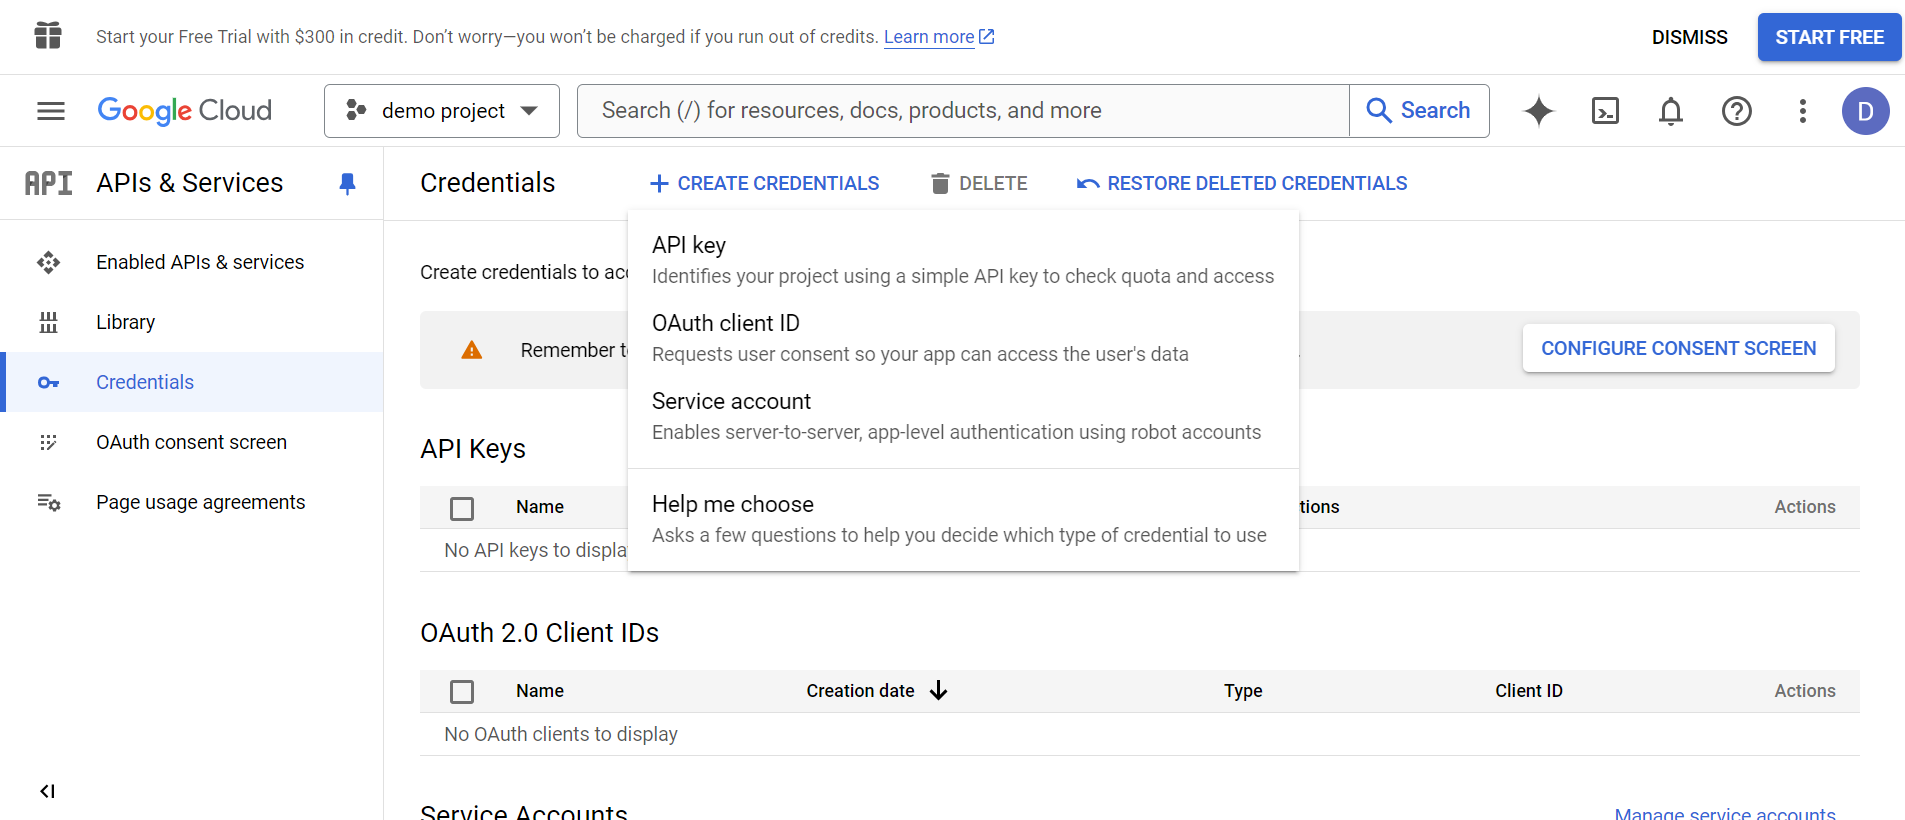
- Step 2: Navigate to CREATE CREDENTIALS > OAuth ClientID and set the application type as Desktop. Enter the name of the app and click on the CREATE button.
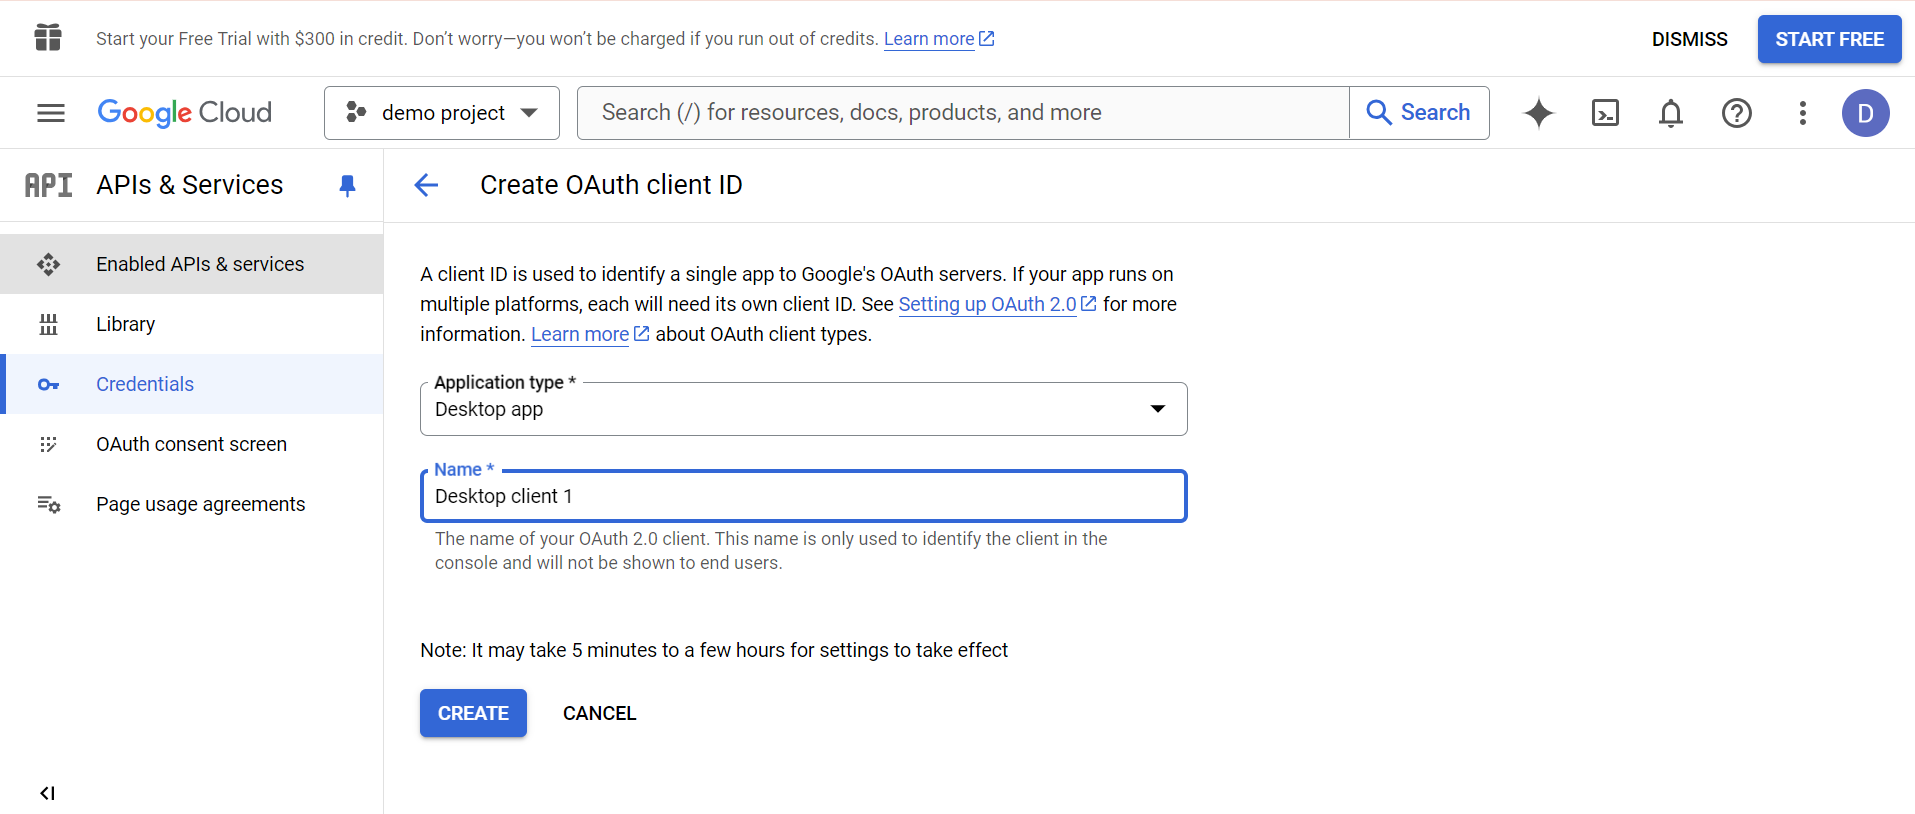
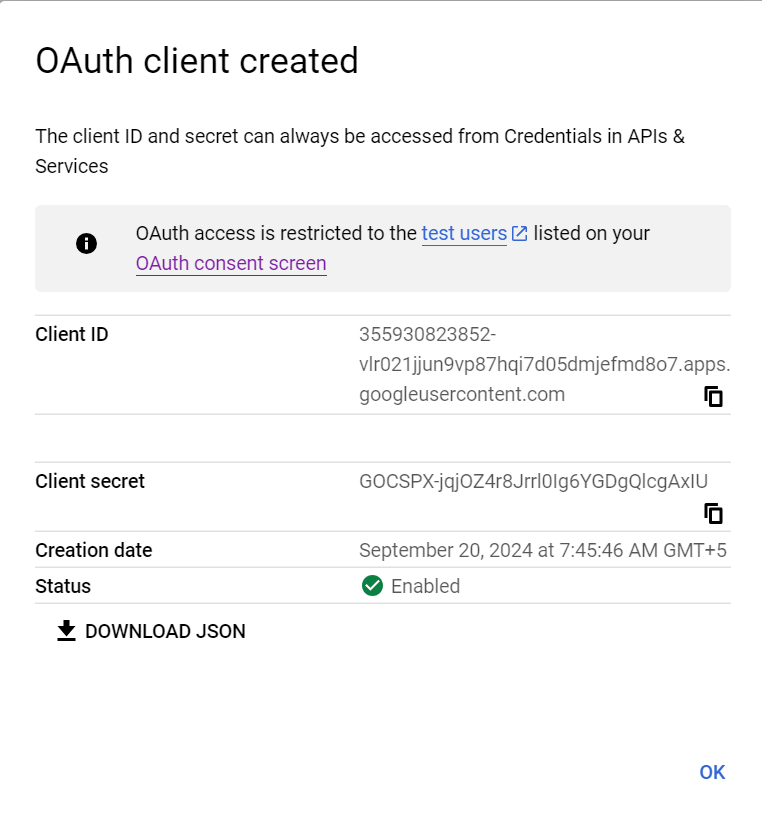
- Step 3: A window will appear on the screen with your ClientID and Client Secret. Copy them and save them for later use.
- Step 4: Add the client ID to the following URL and then open it in your browser.
https://accounts.google.com/o/oauth2/v2/auth?client_id=<Your-client-Id>&redirect_uri=urn:ietf:wg:oauth:2.0:oob&state=GBQAUthTest&access_type=offline&scope=https://www.googleapis.com/auth/bigquery&response_type=code- Step 5: To get the authorization code, Google will now ask you to select the Google account you used to generate credentials. Choose the account and click on the Allow button to grant access. Now, copy the authorization code displayed before you.
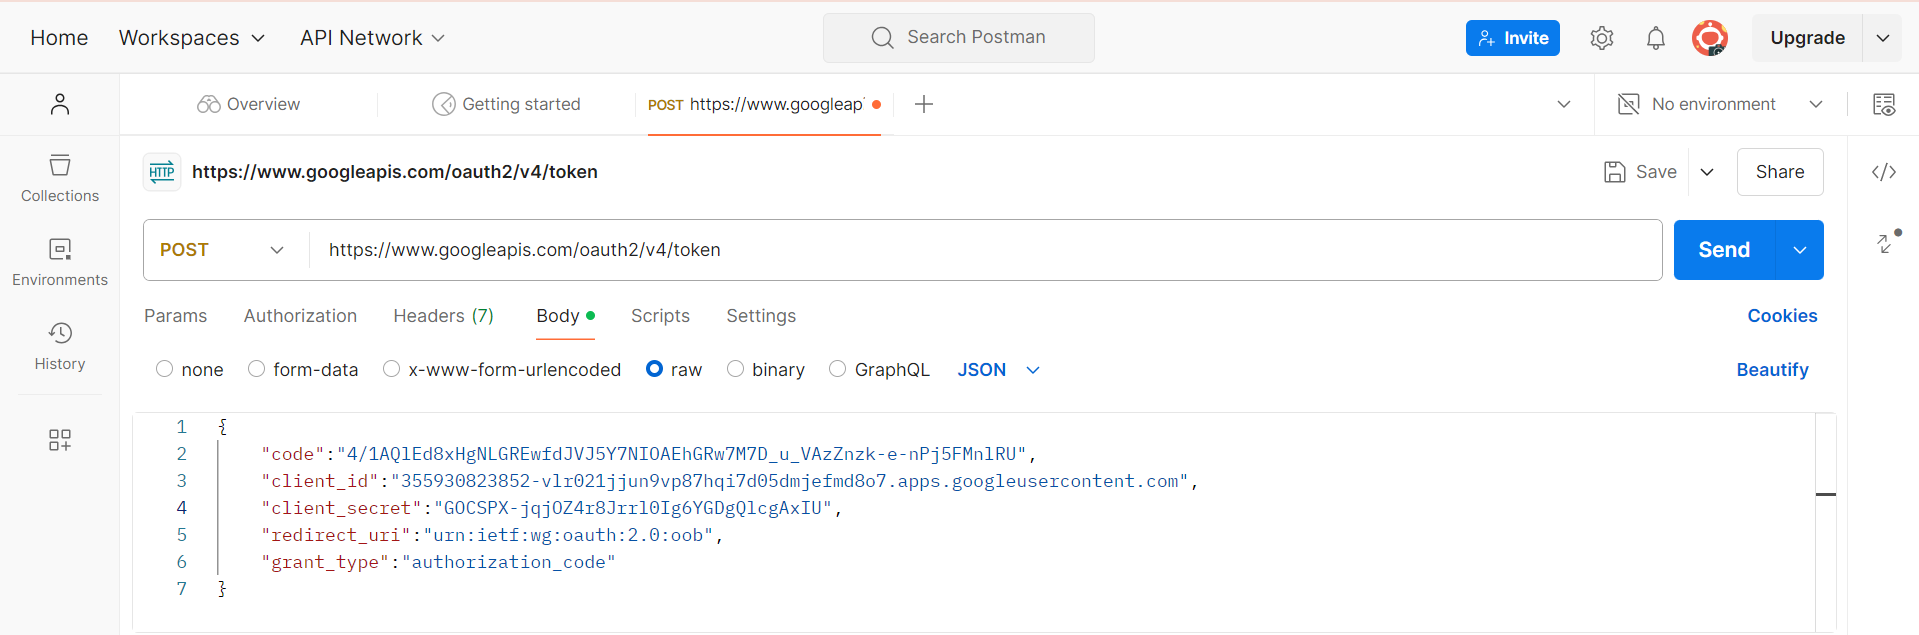
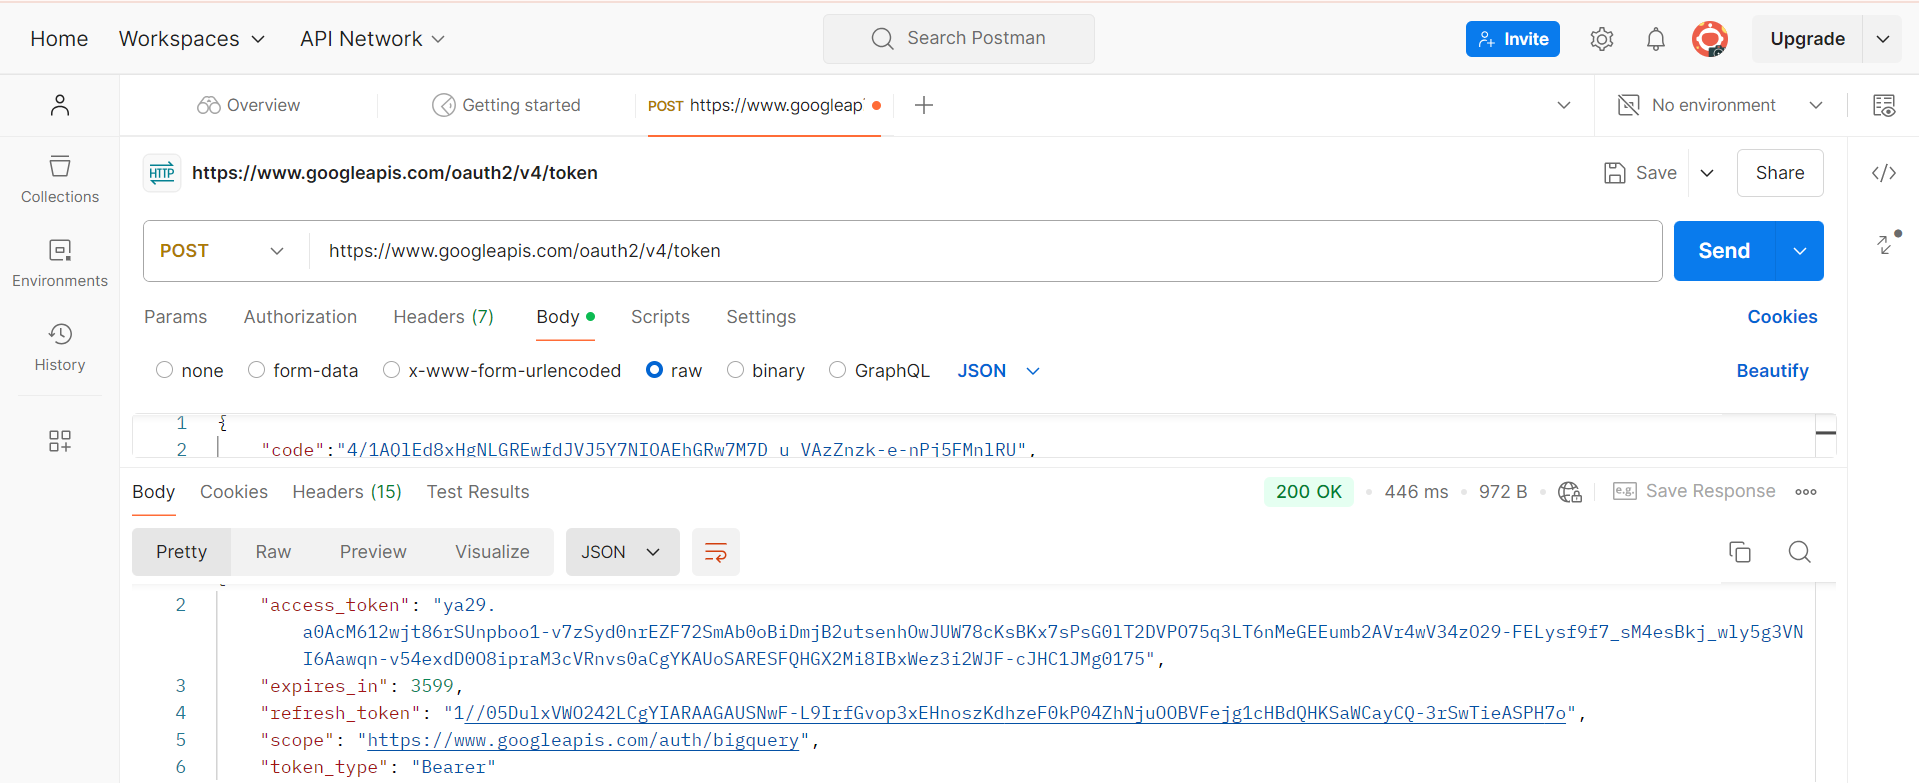
- Step 6: In another tab, go to your Postman account and send a POST request as shown below for the URL: https://www.googleapis.com/oauth2/v4/token. For the “code,” enter the authorization code in the above step. After a successful response of 200, you will get the required Refresh Token.
Finally, add the Client ID, Client Secret and the Refresh Token Azure Synapse Analytics and click the Test Connection button. After a successful test, click on the Create button to save the BigQuery to the Azure connection.
PART 3: Building BigQuery to Azure Synapse Pipeline using Copy Data Tool
To get started with the Copy data tool, follow the simple steps:
- Step 1: In your Azure Synapse workspace, click the Integrate option on the left vertical menu and go to + > Copy Data Tool.
- Step 2: Enter the Task name for your BigQuery to Azure pipeline. You can also schedule the pipeline to run at a specific time by clicking the Schedule option. Once done, click on the Next button.

- Step 3: Select the BigQuery to Azure connection you created using Linked Service and click Next.
- Step 4: Choose the tables you want to replicate or write a query to get the required data and click the Next button.

Apply any filters according to your business need, click the Validate button and then the Next button.

- Step 5: Select the destination where you want to replicate the data inside your Synapse workspace and click on the Next button. Here, an SQL Pool is selected as an example.
- Step 6: You can now map the fields of the source table to the destination table and set the data types as well. Once you’ve done this, click the Next button.
- Step 7: If you need to stage your Big data, then you can select the staging location and its path. You can also choose “Polybase” when dealing with large data sets and want multiple queries to be processed parallelly. Once done, click on the Next button.

- Step 8: You will now get the summary of your pipeline and can edit the source and destination names. Click on the Next button, and the BigQuery to Azure pipeline will reach the completion phase. Once satisfied with the pipeline, click the Finish button to complete the BigQuery to Azure integration.

This manual approach of connecting BigQuery to Azure can be fruitful for the following scenarios:
- Single-Use Data Transfer: Compared to BigQuery, Azure’s consumption-based pricing might seem attractive. Though, a long-term data pipeline integration service can be expensive. Hence, the Copy Data Tool is excellent for short-term & one-time BigQuery to Azure data replication.
- No Data Transformation Required: As the Copy Data Tool offers little to no data transformation features, it isn’t advised to use it on clean, analysis-ready data.
- Integrations Within Azure: Standalone Copy Data Tool will not be enough if you need to integrate with data sources outside the Azure Ecosystem. Thus, due to its limited integrations, it is best applicable only for connecting to Azure-based data sources.
However, setting up manual connections and writing custom code to replicate data from Google BigQuery to Azure Synapse is cumbersome. Frequent breakages, pipeline errors, and lack of data flow monitoring make scaling such a system a nightmare.
An automated tool like Hevo Data is an efficient and economical choice that takes away months of manual work.
Benefits of replicating data from BigQuery to Azure Synapse
Transferring data from Google BigQuery to Azure Synapse allows you to leverage the following features:
- Azure Synapse is optimized for Big Data, so replicating data from BigQuery to Synapse can enable faster data processing and analysis.
- Azure Synapse is a part of the larger Azure ecosystem, so replicating data from BigQuery to Synapse can enable integration with other Azure services, such as Azure Machine Learning and Azure Data Factory.
- Azure Synapse offers a suite of analytics tools, such as SQL Server Analysis Services and Power BI, which can be used to gain insights from replicated BigQuery data.
Learn More:
Key Takeaways
Connecting BigQuery to Azure Synapse using the Copy Data Tool is an effective way to quickly set the integration using a beginner-friendly user interface. However, for raw data that needs multiple data transformations to convert it into an analysis-ready form, this method might not be the most optimal choice! Especially for cases when data needs to be replicated from multiple Non-Azure/Microsoft data sources.
To remedy this, you can simply use no-code cloud-based ETL tools like Hevo Data, which offers 150+ plug-and-play integrations. With Hevo, you will be able to effortlessly connect BigQuery to Azure in a matter of minutes.
Want to take Hevo for a spin? Get a 14-day free trial and simplify your data integration process. Check out the pricing details to understand which plan fulfills all your business needs.
Share your experience learning how to connect BigQuery to Azure Synapse effectively! Let us know in the comments section below!
Frequently Asked Questions
1. How does pricing compare between BigQuery and Azure Synapse?
BigQuery is a pay-as-you-go service that charges for the amount of query data processed and storage. Azure Synapse pricing is based on resources such as DWUs or serverless query usage; therefore, you would need to be more aware of your workload to know which one is cheaper.
2. Can I use BigQuery and Azure Synapse at the same time throughout the migration process?
Yes, one can allow for both platforms to serve side-by-side during the data transition to ensure data consistency before changing completely to Azure Synapse and to test the performance before the switchover.
3. What is the difference between BigQuery and Azure Data Lake?
BigQuery is a fully managed data warehouse service executing SQL-type queries over huge datasets. The Azure Data Lake storage solution is employed when handling large amounts of structured and unstructured data in a big data analytics process.
Share it with your connections.
-
 Share To LinkedIn
-
 Share To Facebook
-
 Share To X
-
 Copy Link


