


Google Data Studio is a great tool for data analysis and visualization. Previously, Google Data Studio users experienced challenges when working with CSV (Comma Separated Values) data. There was no direct way for Google data studio CSV upload. The solution was to import the CSV data into Google Sheets and then set the Google Sheets document as the data source in Google Data Studio. This was a long procedure that added more steps to basic visualization tasks.
However, this changed after Google Data Studio introduced the “File Upload” connector. It allows you to create data sets that you can use to upload many CSV files into a single data source via a simple drag & drop interface.
Prerequisites
This is what you need for this article:
- A Google Data Studio Account.
Table of Contents
What is Google Data Studio?

Data Studio is a tool developed by Google to help its users analyze and visualize data. Data Studio comes with many connectors that you can use to establish connections to various data sources. Additionally, Google Data Studio has hundreds of partner connectors that you can use to establish connections to many other data sources.
After loading your data into Google Data Studio, you will be provided with different tools that you can use to visualize your data. You can use line charts, pie charts, bar charts, or even Google Maps.
Google Data Studio also allows you to invite your colleagues and collaborate on a report. Once the report is complete, you can share it with others via email.
The good thing about Google Data Studio is that it’s simple and can be used for free.
What is a CSV File?
A CSV file refers to a comma-separated values file that allows data to be stored in a tabular format. The name of a CSV file should end with a .csv extension to signal that it is a CSV file.
CSV files can be used with nearly every spreadsheet program, including Microsoft Excel and Google Spreadsheets. However, they are different from other spreadsheet file types in that they can only have one sheet in a file, but they cannot save a column, cell, or row. Also, CSV files don’t allow you to save formulas.
CSV files allow companies to export high volumes of data to more concentrated databases. The CSV files are plain-text files, meaning they are easy to create. This also makes it easy to import a CSV file into a Spreadsheet or any storage database, regardless of the software that you are using.
Online commerce stores use CSV data to import and export important information, like order or customer data, to and from the database.
The ubiquitous structure of CSV files makes them easy to import and export compared to files with an object-oriented or hierarchical structure.
Hevo offers a faster way to move data from databases or SaaS applications into your data warehouse for visualization in a BI tool like Google Data Studio. Hevo is fully automated and, hence, does not require you to code.
Check out some of the cool features of Hevo:
- Completely Automated: The Hevo platform can be set up in just a few minutes and requires minimal maintenance.
- Real-time Data Transfer: Hevo provides real-time data migration, so you can always have analysis-ready data.
- 100% Complete & Accurate Data Transfer: Hevo’s robust infrastructure ensures reliable data transfer with zero data loss.
- Schema Management: Hevo takes away the tedious task of schema management & automatically detects the schema of incoming data and maps it to the destination schema.
Thousands of customers trust Hevo for their ETL process. Join them and experience seamless data migration.
Get Started with Hevo for FreeHow File Upload Works
You may find yourself in a scenario where Google Data Studio does not have a connector to where your data is stored. For example, your data may be stored in Microsoft SQL Server. Google Data Studio does not have a connector to SQL Server. In that case, you can export your SQL Server data into a CSV file, then upload the CSV file into Google Data Studio.
This has been made possible by the Google Data Studio file upload feature. After uploading a file, it is added to a “data set”. You can then use that data set to create a data source.
The data that you create will belong to you, and it cannot be shared. However, you can share the data sources you create from your data sets. They can also be edited just like any other data source. So, your data sources can be used in shared reports and data sources, but only you can access the data set.
Multiple files can be uploaded to a data set. Whenever you add a new file, it is appended to the data set. This means that it is easy for you to update the data as time goes on.
Note that the uploaded data is appended to the data set, not merged, and then stored in Google Cloud storage, meaning that you can use the data with other cloud services.
With file upload, you can use a file dialog or the drag & drop feature to upload files to Data Studio. You can upload up to 100MB of CSV data to the Google Cloud Platform per data set, then access it as a data source across all your reports.
After uploading the data, Google Data Studio will analyze it and break it down into metrics and dimensions that can be used in your reports.
Part 4: Steps to Upload CSV Files to Google Data Studio
Now that you have your .csv file, you can upload it to Google Data Studio by following the steps given below:
Step 1: Log into your Google Data Studio account.
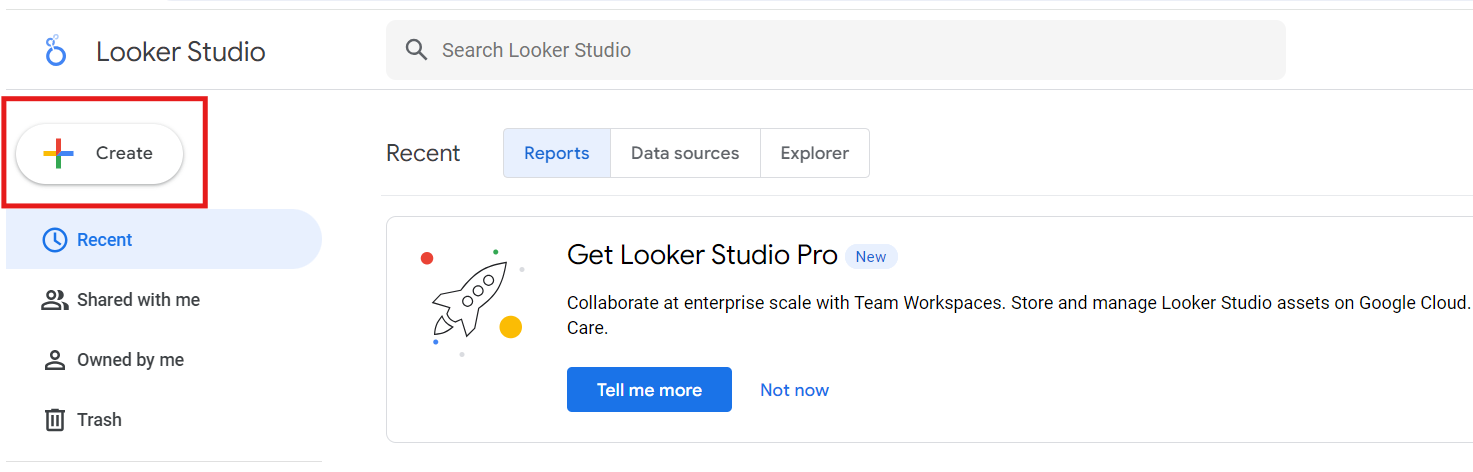
Step 2: Use your Google account to log in. You will be taken to the “Reports” page. Click the “+ Create” button located on the top left corner of the screen.
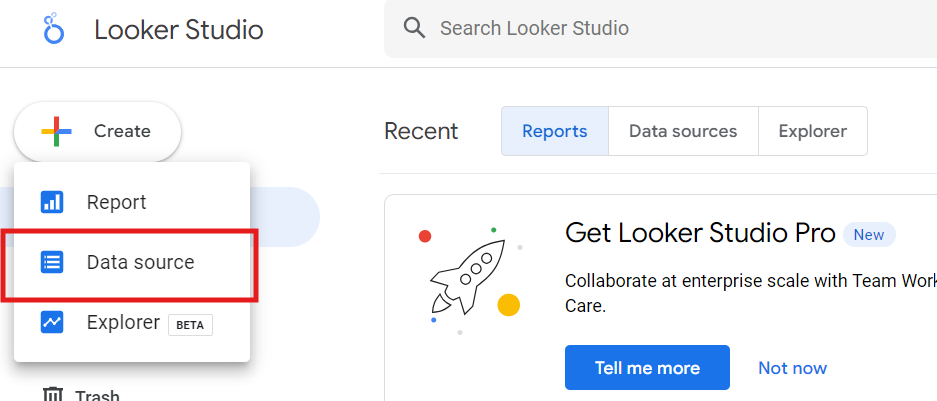
Step 3: A new window with 3 options will pop up. Click “Data source”.
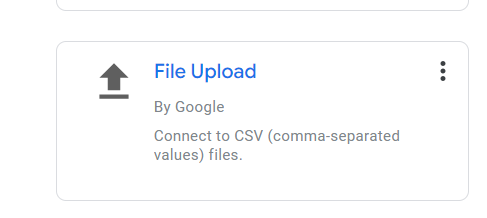
Step 4: You will be taken to a new page that shows the list of Google Data Studio Connectors. Choose “File Upload”.
Step 5: The File Upload window will be opened. Drag and drop your CSV file into the window or click the “CLICK TO UPLOAD FILES” button. Navigate to where you have stored the CSV file on your computer.

Step 6: After Google data studio upload CSV file, it will be shown under the Data Sets column located on the left side of the window.
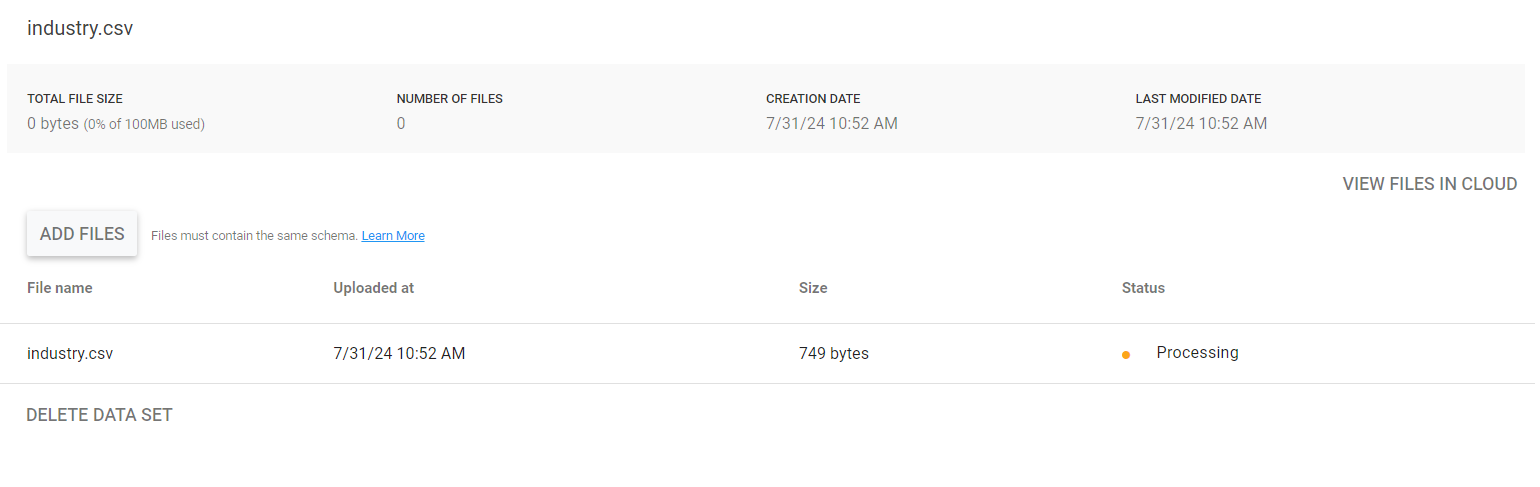
To add more CSV files, click the “ADD FILES” button or drag and drop them into the window.
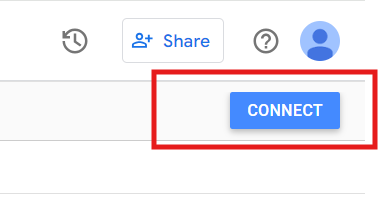
Step 7: Click the “CONNECT” button located on the top right corner of the screen.
Step 8: You will be taken to a window that shows the columns of the dataset. Choose the ones to include and the ones to exclude.
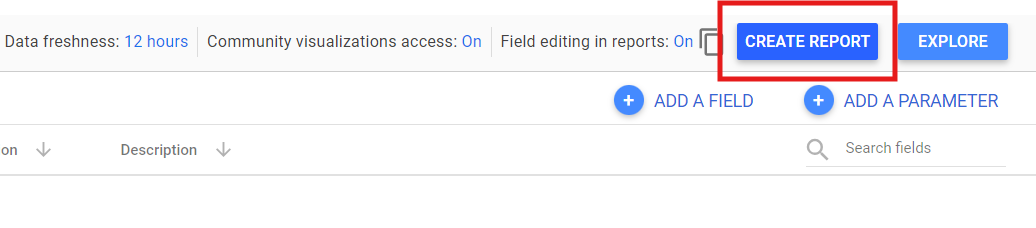
Step 9: To load the dataset into your new report, click the “CREATE REPORT” button located in the top right corner of the screen.
The data set will be loaded into a new report dashboard.
You can use it to create visualizations.
Limitations
Although the Google Data Studio File Upload feature has introduced the ability to upload CSV files into Google Data Studio, it has a number of limitations.
They include the following:
- There is a file size limit of 100MB per data set.
- Errors may arise when uploading your CSV data file to Google Data Studio due to formatting issues in the CSV file.
Conclusion
In this article, you have gained insights into the Google Data Studio File Upload feature and learned more about CSV files. Additionally, you now know how to upload a CSV file into Google Data Studio using this feature, enabling you to enhance your data reporting and visualization.
For an even more streamlined data integration process, consider exploring Hevo, which simplifies data transfer and management with minimal effort. Sign up for a 14-day free trial and experience the feature-rich Hevo suite firsthand.
FAQ on Google Data Studio CSV Upload
How to upload a CSV file in Google Data Studio?
To upload a CSV file in Google Data Studio:
– Create a new Data Source in Google Data Studio.
– Choose “Upload File” as the connector and select your CSV file from your local storage.
How do I upload files to Looker Studio?
To upload files to Looker:
– Navigate to Looker and go to the “Develop” section.
– Click on “Manage Files” and then “Upload a File” to select and upload your file to Looker Studio.
How do I upload a CSV file to Google Classroom?
To upload a CSV file to Google Classroom:
– Open Google Classroom and go to your class.
– Click on the Classwork tab, then “Create” > “Assignment” > “Import from Google – Drive” and select your CSV file.
Share it with your connections.
-
 Share To LinkedIn
-
 Share To Facebook
-
 Share To X
-
 Copy Link


