


 key takeaways
- Heroku Postgres is optimized for transactional workloads, while Google BigQuery is designed for large-scale analytics and SQL-based reporting.
- There are four common methods to move Heroku PostgreSQL data into BigQuery:
- Method 1: Hevo Data
- Method 2: BigQuery Data Transfer Service
- Method 3: Google Cloud Datastream
- Method 4: Custom scripting pipelines
- Hevo is the fastest production-ready option for teams that want automated CDC replication, schema evolution, and low operational maintenance.
- Google Cloud Datastream supports near real-time replication but requires more infrastructure configuration and monitoring ownership.
- BigQuery Data Transfer Service works best for scheduled batch ingestion workflows inside the Google Cloud ecosystem.
- Custom scripting provides maximum flexibility for low-volume or specialized use cases, but introduces engineering overhead and ongoing maintenance.
- Teams implementing modern BigQuery ETL workflows increasingly centralize PostgreSQL, SaaS, and event-stream data inside warehouses for unified analytics and reporting.
Heroku PostgreSQL is where your application data lives. BigQuery is where your analytics team works. Running analytical queries directly against your application database is not just inefficient. It is the wrong tool for the job entirely.
Across r/dataengineering discussions, one principle surfaces repeatedly: “Your application database should not also be your analytics warehouse.” Heroku PostgreSQL was designed for transactional workloads. Heavy analytical queries introduce lock contention, slow down your application, and still do not give you the cross-dataset joins your BigQuery analysis team actually needs.
BigQuery solves a fundamentally different problem. Google positions BigQuery as a serverless enterprise data warehouse designed for large-scale analytical processing across structured and semi-structured datasets. That kind of analytical throughput is not feasible against a live application database without impacting application performance.
The gap between the two systems is the integration problem this post solves. There are four ways to move data from Heroku PostgreSQL to BigQuery in 2026, each suited to a different combination of data volume, refresh frequency, and engineering overhead.
SRunning analytical queries against your application database slows it down and still does not give your team the scale they need. Hevo moves your Heroku PostgreSQL data into BigQuery automatically, so both systems do the job they were designed for.
- Real-time PostgresSQL CDC so BigQuery is always current, not hours behind
- Automatic schema mapping so upstream changes in Heroku never break your pipeline
- Built-in data transformation so data lands clean and analysis-ready
- 24/7 live support on every plan, not just enterprise tiers
Trusted by 2,000+ data teams. Rated 4.7/5 on Capterra and 4.4/5 on G2.
Connect Heroku PostgreSQL to BigQuery in minutesTable of Contents
Heroku for PostgreSQL to BigQuery Integration Methods
There are multiple ways to move data from Heroku PostgreSQL into Google BigQuery, and the right choice depends on your latency requirements, engineering bandwidth, infrastructure preferences, and long-term maintenance tolerance.
Here is a quick comparison of the four most common approaches.
| Method 1: Hevo Data | Method 2: BigQuery Data Transfer Service | Method 3: Google Cloud Datastream | Method 4: Custom Scripting | |
| Setup time | Under 15 minutes | 30 to 60 minutes | 1 to 3 hours | Several days |
| Technical skill required | None. Fully no-code | Moderate. GCP and BigQuery familiarity | High. GCP and CDC expertise | High. Python and SQL proficiency |
| Sync type | Real-time, continuous | Scheduled batch | Real-time CDC | Manual or scheduled batch |
| Data freshness | Near real-time | Depends on schedule frequency | Near real-time | Depends on script run frequency |
| Schema change handling | Automatic | Manual | Partial automation | Manual |
| Ongoing maintenance | Minimal. Fully managed | Moderate | Moderate to High | High |
| Change data capture | Yes. Log-based PostgreSQL CDC | No | Yes. WAL-based CDC | No, unless custom built |
| Cost | Subscription-based | GCP storage and query costs | Usage-based GCP pricing | Engineering time and infrastructure costs |
| Best for | Teams needing fast, production-grade pipelines with low maintenance | GCP-native teams running scheduled batch ingestion | Teams requiring real-time native Google Cloud replication | Low-volume or highly customized workflows |
In short:
- Use Hevo if you want the fastest path to a production-ready pipeline with monitoring, retries, and schema management built in.
- Use BigQuery Data Transfer Service if you already operate heavily inside the Google Cloud ecosystem and batch refreshes are acceptable.
- Use Google Cloud Datastream if you need native CDC-based replication with near real-time ingestion.
- Use custom scripting only when your workflows are highly specialized or your data volume is small enough to justify manual ownership.
As data stacks mature, teams often move beyond one-off PostgreSQL exports and build centralized analytics architectures. That is why many organizations evaluating warehouse replication workflows also compare multiple BigQuery ETL tools before standardizing on a long-term ingestion strategy.Teams running CDC-based architectures also increasingly rely on modern Postgres CDC patterns to reduce warehouse latency and minimize full-table refresh workloads.
Method 1: Using Hevo as a Heroku for PostgreSQL to BigQuery Connector
Hevo can also enrich and transform the data into an analysis-ready form without having to write a single line of code. Its fault-tolerant architecture ensures that the data is handled in a secure, consistent manner with zero data loss.
Using Hevo, Heroku for PostgreSQL to BigQuery Migration can be done in the following 2 steps:
Configure Heroku for PostgreSQL as a Source
- First, you need to log in to your Heroku account.
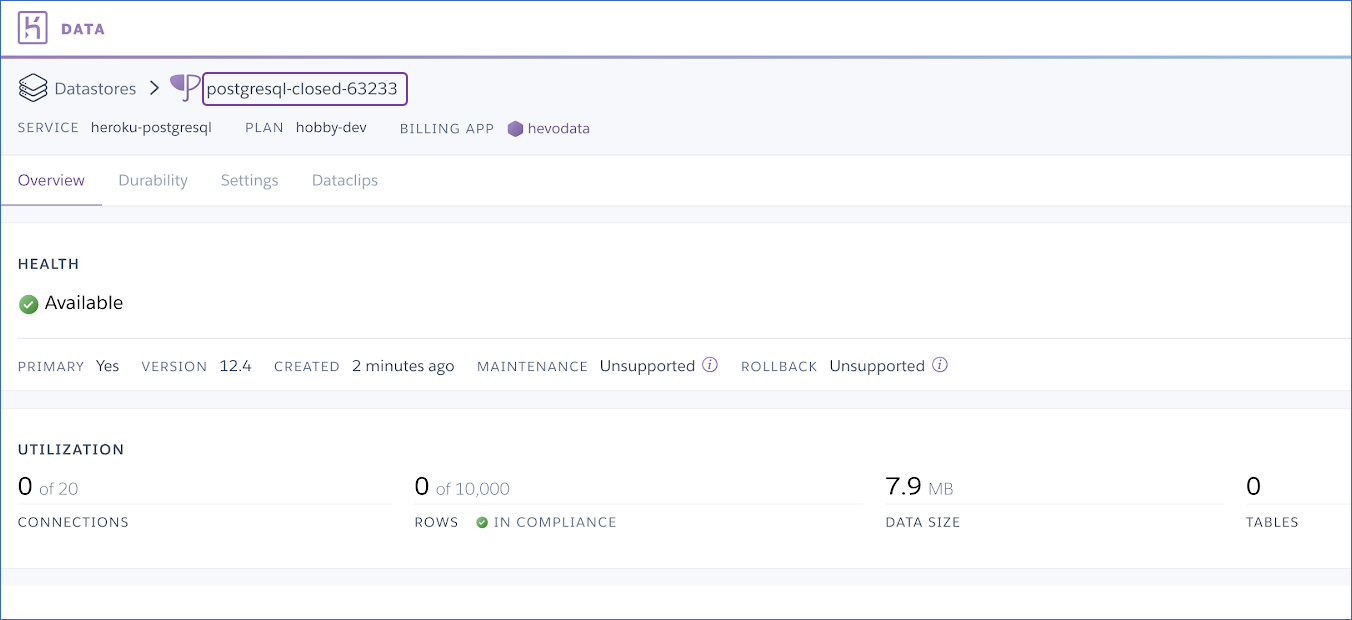
- Next, you need to choose the app containing the PostgreSQL database and open the databases dashboard.
- You can access the DATA tab and click on the PostgreSQL database you wish to use.
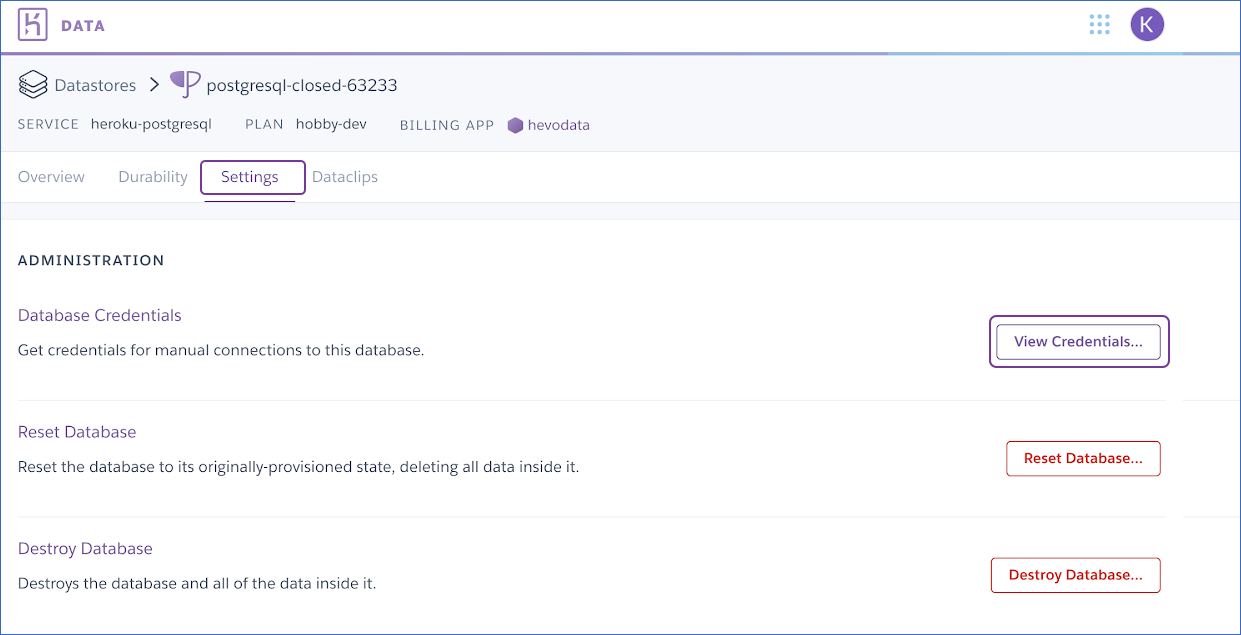
- Next, click on Settings > View Credentials.
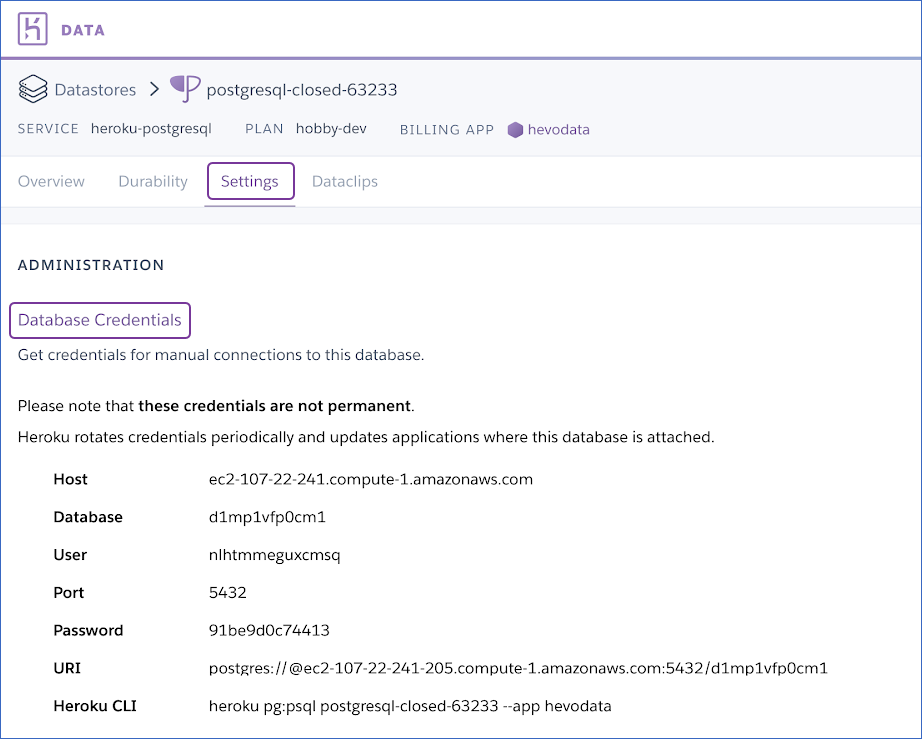
- You can leverage the credentials provided below while setting up your PostgreSQL source in Hevo:
- Next, in the Configure your Heroku PostgreSQL Source page, you need to mention the following:

- Database Host: The Heroku PostgreSQL host’s DNS or IP address.
- Pipeline Name: This depicts a unique name for your Pipeline.
- Database User: The read-only user with permission to read tables in your database.
- Database Port: This refers to the port on which your PostgreSQL server listens for connections. The default value is 5432.
- Database Password: This refers to the password for the read-only user.
- Database Name: The database that you want to replicate.
- Select an Ingestion Mode: This refers to the desired mode by which you want to ingest data from the source. The available ingestion modes are Table, Logical Replication, and Custom SQL.
- For Ingestion Mode as Logical Replication, you must follow the steps provided in each PostgreSQL variant document to set up logical replication.
- For Ingestion Mode as Table, refer to the section, Object Settings, for steps to configure the objects that you want to replicate.
- Connection Settings:
- Use SSL: You can enable it to leverage an SSL-encrypted connection. You can also enable this if you’re using Heroku PostgreSQL databases. To enable this, you need to mention the following:
- Client Certificate: This refers to the client public key certificate file.
- CA File: The file containing the SSL server certificate authority (CA).
- Client Key: The client private key file.
- Connect through SSH: You can enable this option to connect Hevo using an SSH tunnel, as opposed to directly connecting your PostgreSQL database host to Hevo. This lends an additional layer of security to your database by not exposing your PostgreSQL setup to the public. If this option is disabled, you need to whitelist Hevo’s IP address.
- Use SSL: You can enable it to leverage an SSL-encrypted connection. You can also enable this if you’re using Heroku PostgreSQL databases. To enable this, you need to mention the following:
- Click “TEST & CONTINUE” to proceed with setting up the Destination.
Object and Query Mode Settings
Once you have specified the Source connection settings in Step 2 above, do one of the following:
- For Pipelines configured with the “Table” mode:
- In the “Select Objects” page, select the objects you want to replicate and click “CONTINUE”.
- Note: Each object represents a table in your database.
- In the Configure Objects page, specify the query mode you want to use for each selected object.
Note: In Full Load mode, Hevo attempts to replicate the full table in a single run of the Pipeline, with an ingestion limit of 25 million rows.
- For Pipelines configured with the “XMIN” mode:
- In the Select Objects page, select the objects you want to replicate.
- For the selected objects, only new and updated records are ingested using the XMIN column.
- The Edit Config option is unavailable for the objects selected for XMIN-based ingestion. You cannot change the ingestion mode for these objects post-Pipeline creation.
- Click “CONTINUE”.
Note: Each object represents a table in your database.
- For Pipelines configured with the “Custom SQL “mode:
- In the Provide Query Settings page, enter the custom SQL query to fetch data from the Source.
- In the Query Mode drop-down, select the query mode, and click CONTINUE.
You can check the official documentation for more details.
Configure BigQuery as a Destination
To set up Google BigQuery as a destination in Hevo, follow these steps:
- Step 1: In the “Asset Palette”, select “DESTINATIONS”.
- Step 2: In the “Destinations List” View, click “+ CREATE”.
- Step 3: Select Google BigQuery from the “Add Destination” page.
- Step 4: Choose the BigQuery connection authentication method on the Configure your Google BigQuery Account page.
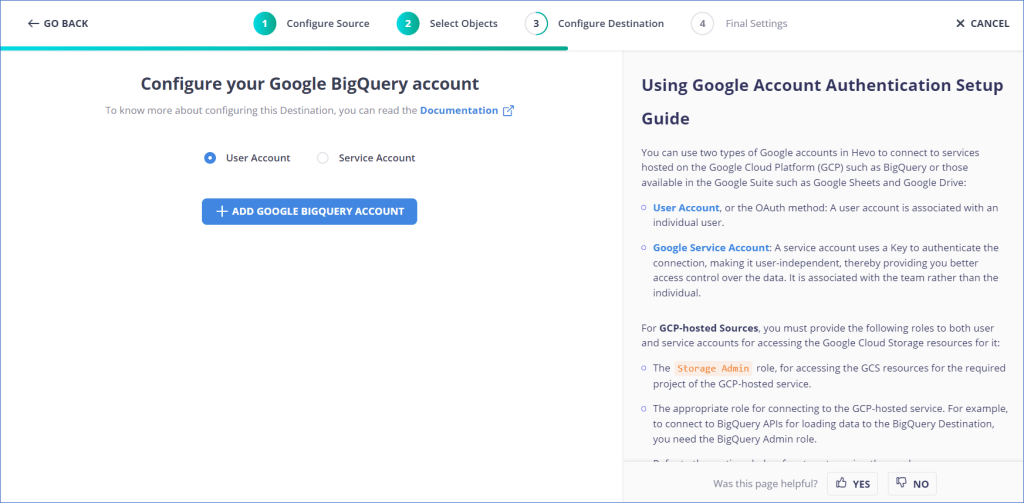
- Step 5: Choose one of these:
- Using a Service Account to connect:
- Service Account Key file, please attach.
- Note that Hevo only accepts key files in JSON format.
- Go to CONFIGURE GOOGLE BIGQUERY ACCOUNT and click it.
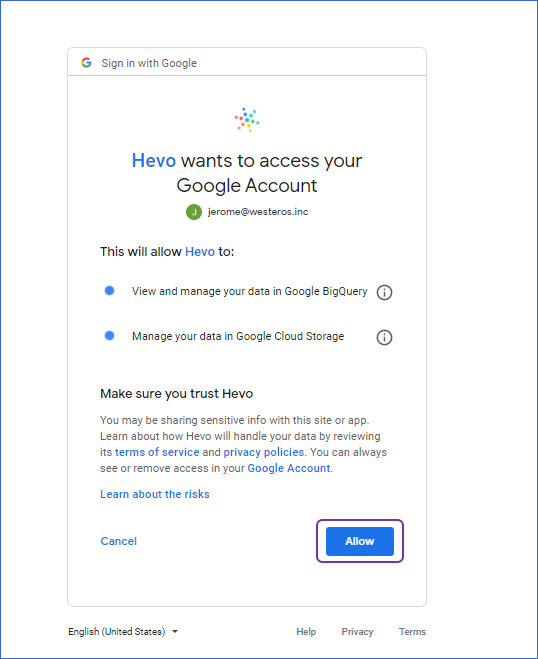
- Using a user account to connect:
- To add a Google BigQuery account, click +.
- Become a user with BigQuery Admin and Storage Admin permissions by logging in.
- To grant Hevo access to your data, click Allow.
- Using a Service Account to connect:
- Step 6: Set the following parameters on the Configure your Google BigQuery page:
- Destination Name: A unique name for your Destination.
- Project ID: The BigQuery Project ID that you were able to retrieve in Step 2 above and for which you had permitted the previous steps.
- Dataset ID: Name of the dataset to which you want to sync your data, as retrieved in Step 3 above.
- GCS Bucket: To upload files to BigQuery, they must first be staged in the cloud storage bucket retrieved in Step 4 above.

- Step 7: Click “Test Connection” to test connectivity with the Amazon Redshift warehouse.
- Step 8: Once the test is successful, click “SAVE DESTINATION” to complete the Heroku for PostgreSQL to BigQuery integration.
Start your free Hevo trial and have Heroku PostgreSQL syncing to BigQuery in minutes

Method 2: Scheduled Batch Loading with BigQuery Data Transfer Service
The BigQuery Data Transfer Service is Google’s native, no-cost option for teams already on GCP. It schedules recurring data loads into BigQuery without third-party tooling. It does not support real-time sync or Postgres CDC, but for teams that need daily or hourly batch loads and want to stay within the GCP ecosystem, it is the most straightforward option available.
Note: BigQuery Data Transfer Service does not offer a native Heroku PostgreSQL connector. This method works in two stages: first export your Heroku PostgreSQL data to Google Cloud Storage, then configure the transfer service to load those files into BigQuery on a recurring schedule.
Prerequisites:
- An active Google Cloud project with BigQuery enabled
- A Heroku PostgreSQL database with network access from GCP
- A GCP service account with BigQuery Data Editor and Storage Admin roles
- A Google Cloud Storage bucket to use as a staging area
Step 1: Enable the BigQuery Data Transfer API
In your Google Cloud Console, navigate to APIs and Services, search for “BigQuery Data Transfer API,” and click Enable. If it is already enabled, proceed to Step 2.
Step 2: Export Heroku PostgreSQL Data to Cloud Storage
Use the Python export script below to extract your Heroku PostgreSQL table and upload it to your GCS bucket. Schedule this script via Cloud Scheduler or Cloud Run to automate recurring exports.
| python import psycopg2 import csv from google.cloud import storage conn = psycopg2.connect( host=”your-heroku-host.amazonaws.com”, database=”your_database”, user=”your_user”, password=”your_password”, port=5432, sslmode=”require” ) cursor = conn.cursor() cursor.execute(“SELECT * FROM your_table”) rows = cursor.fetchall() columns = [desc[0] for desc in cursor.description] with open(“export.csv”, “w”, newline=””) as f: writer = csv.writer(f) writer.writerow(columns) writer.writerows(rows) client = storage.Client() bucket = client.bucket(“your-gcs-bucket”) blob = bucket.blob(“heroku_export/export.csv”) blob.upload_from_filename(“export.csv”) print(“Export complete.”) cursor.close() conn.close() |
Step 3: Create a Transfer from Cloud Storage to BigQuery
- Go to the BigQuery console at console.cloud.google.com/bigquery.
- In the left sidebar, click Data Transfers.
- Click Create a Transfer.
- For Source, select Google Cloud Storage.
- Fill in the following fields:
- Display name: A unique name to identify this transfer, for example “Heroku PostgreSQL to BigQuery.”
- Schedule: Set your preferred frequency, hourly, daily, or custom using cron syntax. Note that a single transfer configuration supports only one run at a time, so avoid overlapping schedules for large datasets.
- Destination dataset: Select the BigQuery dataset where your data will land.
- Destination table: Enter the target table name.
- Cloud Storage URI: Path to your exported files, for example gs://your-gcs-bucket/heroku_export/*.csv.
- File format: Select CSV.
- Skip leading rows: Set to 1 if your CSV includes a header row.
- Click Save.
Step 4: Run and Verify the Transfer
To trigger the transfer immediately, click Run Now from the Transfer Details page. Otherwise it will execute on your configured schedule.
Once the run completes, verify the data landed correctly:
| sql SELECT COUNT(*) FROM `your_project.your_dataset.your_table`; |
Cross-reference the count against your Heroku PostgreSQL source to confirm row parity.
Limitations of the BigQuery Data Transfer Service Method
Export and transfer steps must both be scheduled and maintained separately, adding operational overhead compared to a fully managed pipeline.
No real-time sync. Data freshness is limited by your transfer schedule.
No incremental loading. Without custom filtering logic in your export script, every transfer reloads the full table.
Schema changes in Heroku PostgreSQL require manual updates to both the export script and the BigQuery table schema.
Method 3: Google Cloud Datastream (real-time CDC)
Cloud Datastream is Google’s native change data capture service. It streams new and updated rows from Heroku PostgreSQL directly into BigQuery continuously, without scheduled batch jobs or full-table exports. It is the right choice when your analytics team needs data that is minutes old rather than hours old, and when you want real-time replication without building and maintaining custom postgres cdc infrastructure yourself.
Unlike Method 2 which snapshots and loads, Datastream reads the PostgreSQL write-ahead log (WAL) and ships only changed rows to BigQuery as they happen. This keeps your data pipeline latency low without hammering your Heroku database with repeated full-table scans.
Prerequisites:
- An active Google Cloud project with Datastream API enabled
- Heroku PostgreSQL database with logical replication enabled
- A Heroku PostgreSQL plan that supports logical replication (Standard plan or above)
- A GCP service account with Datastream Admin and BigQuery Data Editor roles
- Network connectivity between GCP and your Heroku database via SSL
Step 1: Enable logical replication
Connect to your Heroku PostgreSQL database using an account with the required replication privileges.
| sql — Check current WAL level SHOW wal_level; — Configure logical replication for Datastream compatibility. SELECT pg_create_logical_replication_slot(‘datastream_slot’, ‘pgoutput’); |
Note: On Heroku PostgreSQL, wal_level is set to logical by default on Standard tier and above. If it is not set to logical, you will need to contact Heroku support or upgrade your plan.
Step 2: Create a publication
Create a publication only for the tables you want to replicate. This allows Datastream to read only the relevant data, lowering the load on the database.
| sql CREATE PUBLICATION datastream_publication FOR TABLE schema_name.table1, schema_name.table2; |
Replace schema_name.table1 and schema_name.table2 with the tables you want to replicate. Note the publication name, you will need it when configuring the Datastream stream.
Step 3: Create a dedicated Datastream user
sql CREATE USER datastream_user WITH REPLICATION LOGIN PASSWORD ‘your_password’; GRANT SELECT ON ALL TABLES IN SCHEMA public TO datastream_user; ALTER DEFAULT PRIVILEGES IN SCHEMA public GRANT SELECT ON TABLES TO datastream_user; |
Part B: Configure Datastream in Google Cloud Console
Step 4: Create a connection profile for Heroku PostgreSQL
In the Google Cloud console, navigate to Datastream and click Connection Profiles, then click Create Profile. Select PostgreSQL as the source type and fill in your Heroku PostgreSQL credentials:
- Hostname: Your Heroku PostgreSQL host (from Settings > View Credentials in Heroku dashboard)
- Port: 5432
- Username: datastream_user (the dedicated user created in Step 3)
- Password: The password set in Step 3
- Database: Your Heroku PostgreSQL database name
For connectivity method, select IP Allowlisting. You must open your source database to accept incoming connections from Datastream’s public IP addresses. Add Datastream’s IP ranges to your Heroku Trusted IP Ranges. Datastream’s current IP ranges are available at Datastream IP allowlists documentation.
Click Run Test to verify connectivity. Confirm the “Test passed” status before proceeding.
Step 5: Create a connection profile for BigQuery
Back in Connection Profiles, click Create Profile and select BigQuery as the destination type. Select your GCP project and the BigQuery dataset where Heroku PostgreSQL data will land.
Step 6: Create a Datastream stream
Navigate to Streams in Datastream and click Create Stream. Configure the following:
- Source connection profile: Select the Heroku PostgreSQL profile created in Step 4
- Destination connection profile: Select the BigQuery profile created in Step 5
- Replication slot: Enter the replication slot name created in Step 1 (datastream_slot)
- Publication: Enter the publication name created in Step 2 (datastream_publication)
- Tables to replicate: Select specific tables or replicate all tables included in your publication
Step 7: Validate and start the stream
Click Validate Stream to run pre-flight checks. Once validation passes, click Create and Start. Datastream will backfill historical data first, then switch to continuous CDC replication. Monitor stream health from the Streams dashboard in the Datastream console.
Limitations of the Cloud Datastream Method
- Schema changes in Heroku PostgreSQL require manual replication slot and publication updates to propagate correctly to BigQuery.
- Requires Heroku PostgreSQL Standard plan or above. Hobby and Mini plans do not support logical replication.
- Initial setup is more involved than Methods 1 and 2, requiring WAL configuration, replication slots, and publications.
- Datastream pricing is consumption-based on data processed. High-volume tables with frequent updates will incur meaningful GCP costs.
Method 4: Custom Python Scripting (Manual/Low Volume)
Custom scripting gives you maximum control over how data is extracted from Heroku PostgreSQL and loaded into BigQuery. There are no third-party pipeline licensing costs, though BigQuery and cloud infrastructure costs still apply.
The tradeoff is clear: you are also responsible for maintaining it. Every schema change in Heroku PostgreSQL, every API update, every edge case in your data, your script needs to handle it. For one-time migrations or low-volume, infrequent transfers with specific transformation requirements, this is a reasonable approach. For ongoing production pipelines, the maintenance burden compounds fast.
Prerequisites:
- Python 3.8 or above installed locally or on a GCP compute instance
- The following Python libraries: psycopg2-binary, google-cloud-bigquery, pandas
- A GCP service account key file (JSON) with BigQuery Data Editor role
- Your Heroku PostgreSQL credentials and SSL certificate
- A BigQuery dataset created in your GCP project
Install the required libraries:
| bash pip install psycopg2-binary google-cloud-bigquery pandas |
Step 1: Connect to Heroku PostgreSQL and Extract Data
The script below connects to your Heroku PostgreSQL database, extracts data from a specified table using an incremental watermark column, and loads it into a Pandas DataFrame for processing.
| python import psycopg2 import pandas as pd from google.cloud import bigquery # Heroku PostgreSQL connection parameters pg_conn_params = { “host”: “your-heroku-pg-host.amazonaws.com”, “port”: 5432, “database”: “your_database_name”, “user”: “your_username”, “password”: “your_password”, “sslmode”: “require” # Required for Heroku PostgreSQL } def extract_from_heroku(table_name, watermark_column=None, last_value=None): “”” Extract data from Heroku PostgreSQL. Uses incremental load if watermark_column and last_value are provided. Falls back to full load if not. “”” conn = psycopg2.connect(**pg_conn_params) if watermark_column and last_value: query = f””” SELECT * FROM {table_name} WHERE {watermark_column} > %s ORDER BY {watermark_column} ASC “”” df = pd.read_sql_query(query, conn, params=(last_value,)) else: query = f”SELECT * FROM {table_name}” df = pd.read_sql_query(query, conn) conn.close() return df |
Note: sslmode: require is mandatory for Heroku PostgreSQL connections. Omitting it will result in a connection error.
Step 2: Load Data into BigQuery
Once your data is in a DataFrame, load it into your BigQuery destination table using the google-cloud-bigquery library.
| python def load_to_bigquery(df, project_id, dataset_id, table_id, write_mode=”append”): “”” Load a Pandas DataFrame into a BigQuery table. write_mode options: “append” or “truncate” “”” client = bigquery.Client(project=project_id) table_ref = f”{project_id}.{dataset_id}.{table_id}” # Set write disposition based on mode if write_mode == “truncate”: write_disposition = bigquery.WriteDisposition.WRITE_TRUNCATE else: write_disposition = bigquery.WriteDisposition.WRITE_APPEND job_config = bigquery.LoadJobConfig( write_disposition=write_disposition, autodetect=True # Auto-detect schema from DataFrame ) job = client.load_table_from_dataframe(df, table_ref, job_config=job_config) job.result() # Wait for job to complete print(f”Loaded {len(df)} rows into {table_ref}”) |
Step 3: Run the Full Pipeline
Tie both functions together into a single pipeline run. For incremental loads, track the last loaded watermark value and pass it on each subsequent run.
| python def run_pipeline(table_name, project_id, dataset_id, table_id, watermark_column=None, last_value=None): print(f”Extracting data from Heroku PostgreSQL: {table_name}”) df = extract_from_heroku(table_name, watermark_column, last_value) if df.empty: print(“No new records found. Pipeline run complete.”) return print(f”Extracted {len(df)} records. Loading to BigQuery…”) load_to_bigquery(df, project_id, dataset_id, table_id) print(“Pipeline run complete.”) # Example usage run_pipeline( table_name=”public.orders”, project_id=”your-gcp-project-id”, dataset_id=”your_dataset”, table_id=”orders”, watermark_column=”updated_at”, last_value=”2026-01-01 00:00:00″ ) |
Step 4: Schedule the Script
For recurring transfers, schedule the script using one of the following options:
- Cron job (Linux/macOS): Add to crontab to run on a schedule
| bash # Run every hour 0 * * * * python /path/to/your/pipeline.py |
- Cloud Scheduler + Cloud Run: Deploy the script as a containerized Cloud Run job and trigger it via Google Cloud Scheduler for a fully managed scheduling approach within GCP
- Airflow: Add the script as a PythonOperator task in an Airflow DAG if your team is already running an orchestration layer
Limitations of the Custom Scripting Method
- Engineering time is the real cost. For teams without dedicated pipeline engineers, the total cost of ownership consistently exceeds managed alternatives within six months.
- No automation out of the box. Scheduling requires additional tooling such as Cloud Scheduler, Airflow, or a cron job.
- No built-in error handling, retry logic, or alerting. Every failure mode requires custom code to catch and recover.
- Schema changes in Heroku PostgreSQL will break the pipeline silently unless you build drift detection logic.
Not viable for real-time or near real-time requirements. Even with incremental queries, polling-based extraction introduces latency proportional to your schedule frequency.
What is the Importance of Heroku for PostgreSQL BigQuery Integration?
The benefit of using Heroku for Postgresql Bigquery connector for integration is two-fold: it allows you to further query offline, and easier analysis for data-driven decision making. As a fully managed service, Google BigQuery enables you to extract the most from data without the admin overhead.
Database forks and follower instances from Heroku for PostgreSQL can turn your data into an agile resource. This can be used for safe experimentation with various use cases. Utilizing Heroku Postgres ETL tools, developers can efficiently migrate and synchronize data across different platforms. Deploying on Heroku Postgres simplifies database management tasks for developers.
With Heroku for PostgreSQL, new data strategies, instances dedicated to analytics, development instances, and data warehousing are ready to go in just a few clicks.
Additional Resources on PostgreSQL to BigQuery Integration.
- How to load data from postgresql to biquery
- Postgresql on Google Cloud Sql to Bigquery
- Migrate Data from Postgres to MySQL
- How to migrate Data from PostgreSQL to SQL Server
- Connecting PostgreSQL to Power BI
Conclusion
In this guide, we’ve walked you through two effective methods to integrate Heroku for PostgreSQL with BigQuery: custom scripts and Hevo’s no-code Data Pipeline solution. While custom scripts offer flexibility, they can be complex and time-consuming. On the other hand, Hevo simplifies the process, enabling real-time data synchronization with minimal effort.
Sign up for a 14-day free trial with Hevo for seamless data integration. Also, check out Hevo’s pricing to choose the best plan for your needs!
FAQ Heroku for PostgreSQL to BigQuery
How to Transfer Data from Postgres to BigQuery?
To transfer data from PostgreSQL to Google BigQuery, you can use several methods depending on your requirements and resources:
1. Using data transfer services such as Hevo, Fivetran
2. Custom ETL Pipeline with Python and Google BigQuery
3. Manual Import and Export
Can I Use PostgreSQL in BigQuery?
BigQuery does not natively support PostgreSQL as a backend database engine. However, you can use BigQuery’s external query capabilities or transfer data from PostgreSQL to BigQuery for analysis. By doing this, you can utilize BigQuery’s powerful data processing and analytics features while keeping PostgreSQL as a source for your data.
Can You Host a PostgreSQL Database on Heroku?
Yes, you can host a PostgreSQL database on Heroku. Heroku offers a managed PostgreSQL service called Heroku Postgres. It provides fully managed PostgreSQL databases, including automatic backups, scaling, and high availability.
What is the easiest way to connect Heroku PostgreSQL to BigQuery?
Hevo Data is the fastest and lowest-maintenance option. No-code setup, automatic schema mapping, built-in Postgres CDC, and a 14-day free trial with no credit card required. Most teams can have pipelines running in under 10 minutes. Start here.
Which method supports real-time sync from Heroku PostgreSQL to BigQuery?
Two options: Hevo Data using continuous Postgres CDC pipelines, and Google Cloud Datastream which reads the PostgreSQL write-ahead log and streams changed rows into BigQuery with sub-minute latency. Both require a Heroku PostgreSQL Standard plan or above for logical replication support.
What are the best PostgreSQL ETL tools for BigQuery integration?
Hevo leads on ease of use and support. For a broader comparison, see this guide to best PostgreSQL ETL tools. For GCP-native teams with no third-party tooling budget, BigQuery Data Transfer Service and Cloud Datastream are strong built-in options.
How do I handle schema changes when syncing Heroku PostgreSQL to BigQuery?
Hevo handles schema drift automatically. Certain schema changes in Heroku PostgreSQL may require updates to publications, stream configurations, or downstream BigQuery tables. BigQuery Data Transfer Service and custom scripting require manual schema updates every time the source changes, which is their biggest maintenance liability at scale.
Want to take Hevo for a spin? Sign Up for a 14-day free trial and experience the feature-rich Hevo suite firsthand. You can also have a look at our unbeatable pricing that will help you choose the right plan for your business needs!
Comment below to tell us about your experience of connecting Heroku for PostgreSQL to BigQuery!
Share it with your connections.
-
 Share To X
-
 Share To LinkedIn
-
 Share To Facebook
-
 Copy Link
