


With the growing demand for software applications, tech businesses can find it difficult to manage several projects. Task Management necessitates a monitoring system to follow a project in a well-organized manner due to the large number of individuals involved. Jira has emerged as a robust Work Management solution for numerous use cases, from Requirements and Test Case management to Agile Software Development.
Jira has grown in popularity over the years, with 180,000+ customers in 190+ countries using it. You can extend Jira’s capability and tailor it to your business needs by using versatile Jira APIs such as REST APIs and Java APIs. You can use Jira APIs to create apps, automate Jira interactions, create Jira issues or build any other form of integration.
So, are you ready to learn more about Jira APIs? If yes, then let’s begin. In this article, you will learn more about Jira and explore the amazing features it offers. In addition, you will understand How to use Jira APIs and learn the detailed steps to create a Jira issue using Jira Cloud REST API. Therefore, read along to unravel the incredible world of Jira APIs.
Looking for a hassle-free way to integrate your JIRA data? Hevo, a no-code data pipeline, makes it effortless.
Key Features:
- Monitor and manage your pipelines in real time
- Simplify data mapping with an intuitive interface.
- Load and sync transformed data instantly into your destination.
Start with Hevo and experience seamless data integration!
Get Started with Hevo for FreeTable of Contents
Introduction to Jira APIs
Jira REST APIs are used to connect with the Jira Server applications remotely. For basic features like issues and workflows, the Jira Server platform provides a REST API. Jira APIs can be used to create apps, automate Jira interactions, or build any other form of integration.
Jira REST APIs use URI routes to give users access to resources (data entities). Your application makes an HTTP request and parses the answer to use a REST API. The Jira REST API communicates in JSON and supports conventional HTTP methods such as GET, PUT, POST, and DELETE. REST APIs are available for application-specific capabilities in Jira Software and Jira Service Management, such as sprints (Jira Software) and client requests (Jira Service Management).
When accessing data on Jira, there are two key security concepts to consider:
- Authentication: It determines the identity of the caller.
- Authorization: It determines which options are available to the caller. The actions that the app or integration can perform are limited by the user’s Jira permissions.
By querying and updating data in your Jira site via the Jira REST API, you can interact with Jira. Jira leverages the user used in the login process to authorize requests to the Jira REST API. For instance, if a user has access to Jira and authority to create issues in Jira, he or she can use the Jira REST API to create an issue. However, if the calling user does not have the authority to perform a specific action in Jira, they will be unable to do so using the Jira API.
One of the following authentication methods can be used with the Jira APIs:
- OAuth: To authenticate users, OAuth leverages request tokens provided by Jira. However, it requires more time and effort to set up this Authentication than the other two Authentication methods, but it is more flexible and secure.
- Basic Authentication: To authenticate, the Basic Authentication method relies on a predefined set of user credentials. Except for tools like personal scripts or bots, it is not recommended to use this Authentication method. It’s easier to set up, but it’s also a lot less secure.
- Cookie-Based Authentication: In the browser, Jira uses Cookie-based Authentication. You can rely on this when using the browser to call the REST API (for example, via JavaScript).
Steps to Create a Jira Issue with Jira APIs
In this section, you will learn how to create a Jira API tutorial on how to create jira issue using Jira Cloud REST API. So, follow the below steps to work with Jira APIs:
- Step 1: Create a Jira Cloud Account
- Step 2: Create the Jira API Token
- Step 3: Create a Basic Auth Header
- Step 4: Develop Your Jira API Call
- Step 5: Create Your Issue
Step 1: Create a Jira Cloud Account
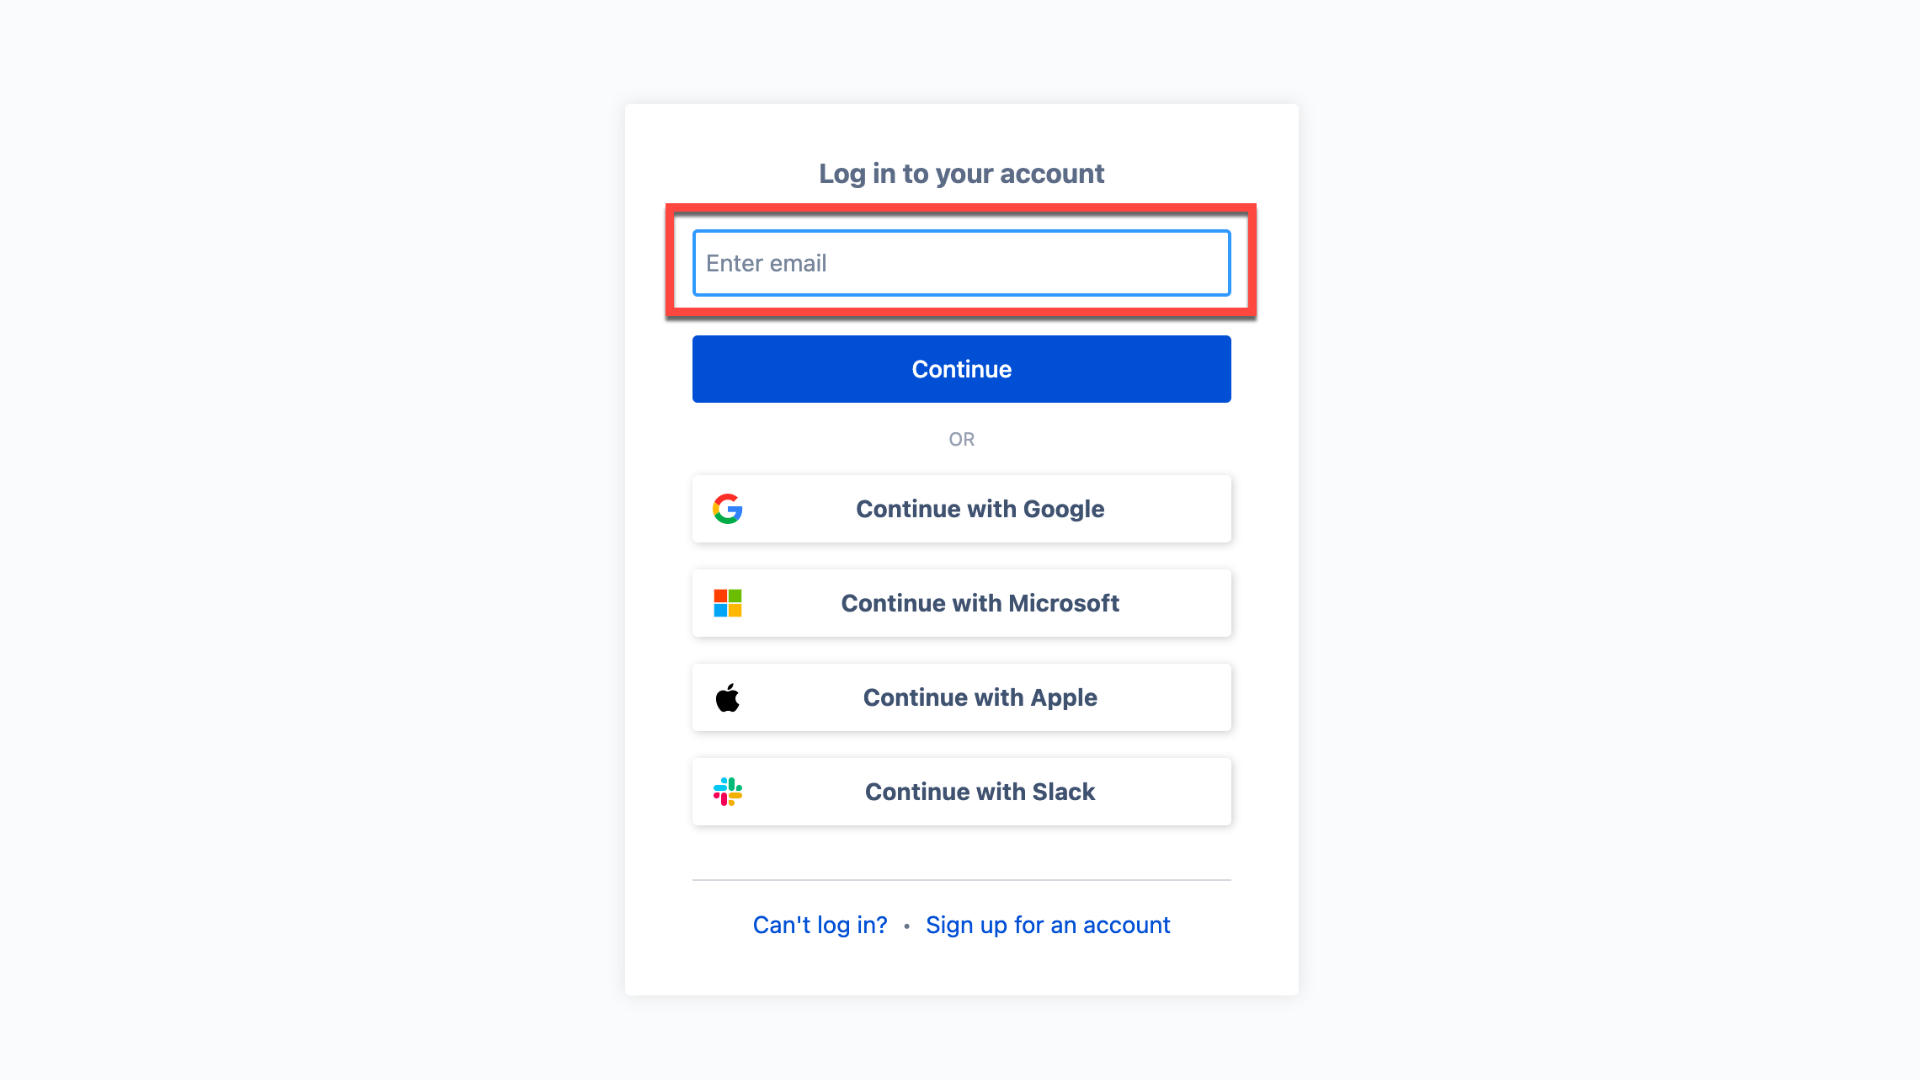
If you already have a Jira Cloud Account then go to the Jira website and log in to your account. However, if you don’t have an account, you can choose the free Jira Cloud plan to try and then enter a site name as shown below. Click on “Continue”.
Step 2: Create the Jira API Token
An API Token is required to authenticate a script or other process with an Atlassian cloud product. Follow the steps below to create a Jira API Token.
- Log in to the Atlassian platform to access Jira Cloud or click here to open the page to create the API token directly.
- Go to Settings → API Tokens and click on “Create API token” as shown below.
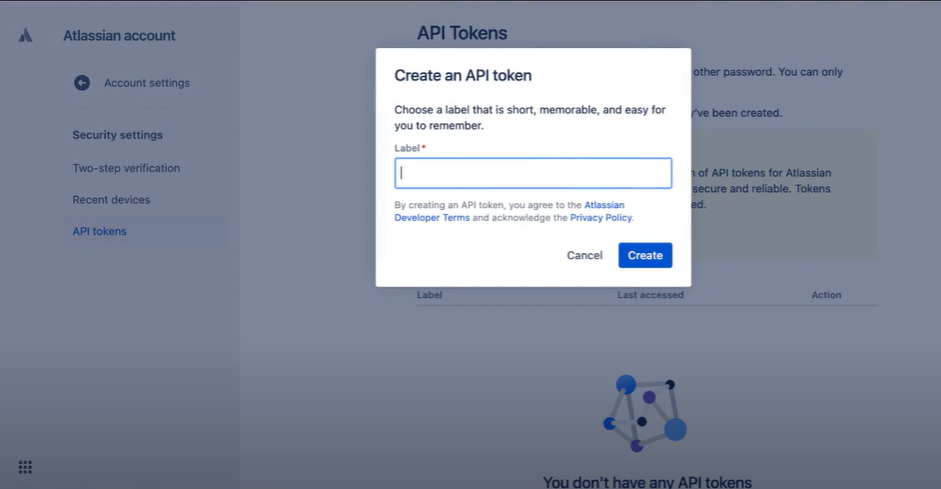
- Enter a distinctive and concise Label for your token in the window that displays, then click Create.
- Copy the token to your clipboard as shown below, then paste it into your script or somewhere else to store it.
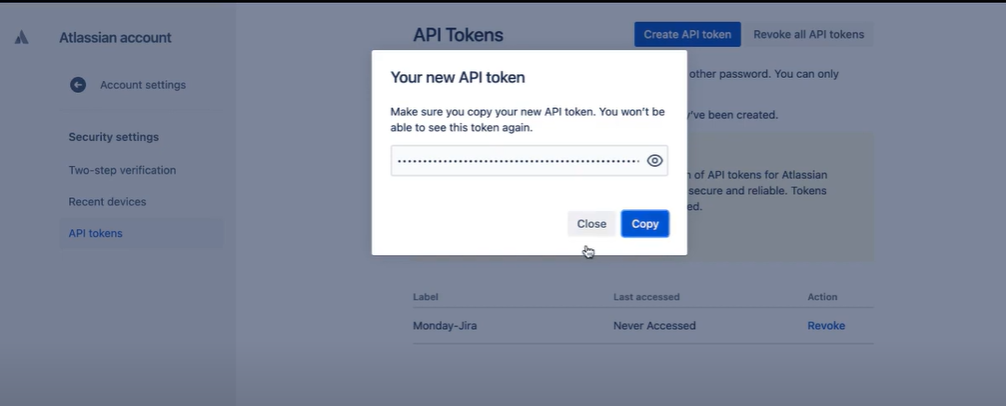
Note: Viewing the same API Token after closing the dialog box is not possible for security reasons. If necessary, you can create a new token by following the above steps.
Step 3: Create a Basic Auth Header
You can now build a basic auth header using your API Token. Any REST API call that requires you to be logged in will require this. Follow the steps below to create a basic auth header:
- Create a string that looks like useremail:api_token.
- Next, encode the string using BASE64 encoding.
For Linux/Unix/MacOS:
echo -n user@example.com:api_token_string | base64Windows 7 and later, using Microsoft Powershell:
$Text = ‘user@example.com:api_token_string’
$Bytes = [System.Text.Encoding]::UTF8.GetBytes($Text)
$EncodedText = [Convert]::ToBase64String($Bytes)
$EncodedText
The base64 encoded output is what you’ll need in the YourEncodedStringHere part of the steps below.
Step 4: Develop Your Jira API Call
In this step, you will create a simple curl command to call your REST API endpoint. You must use your Jira Cloud instance’s /rest/api/3/issue endpoint to create an issue. The call’s structure is as follows:
curl --request POST
  --url 'https://<your-jira-cloud-instance>/rest/api/3/issue'
  --header 'Authorization: Basic YourEncodedStringHere'
  --header 'Accept: application/json'
  --header 'Content-Type: application/json'
  --data '{…}'
In the above script, you are first calling the curl command to inform that you are performing a POST request. In the next line, you will define the URL of the endpoint and then specify the Jira user that will authorize the call using the encoded useremail:api_token string created above.
Next, you will specify the content type of the application i.e JSON. This is where you will enter the actual information that will be utilized to generate your new issue. You can find Jira API examples below:
"fields": {
        "summary": "Hevo is awesome!",
        "issuetype": {
            "id": "10009"
        },
        "project": {
            "key": "TEST"
        },
        "description": {
            "type": "doc",
            "version": 1,
            "content": [
                {
                "type": "paragraph",
                "content": [
                    {
                    "text": "Description - Hevo is a No Code Data Pipeline",
                    "type": "text"
                    }
                ]
                }
            ]
        }
    }
The above script will create an issue in the project with project key TEST with a summary of “Hevo is awesome!” and a description of “Description – Hevo is a No Code Data Pipeline” Calling the issuetype REST API endpoint, as illustrated below, is the simplest approach to get the issue type ids.
curl --request GET
  --url 'https://<your-jira-cloud-instance>/rest/api/3/issuetype'
  --header 'Authorization: Basic YourEncodedStringHere'
  --header 'Accept: application/json'
The above script will provide you with a full list of all issue categories, together with their ids, from which you can choose the one you need.
Step 5: Create Your Issue
Now all you have to do is run your curl command, and if everything went well, you should get something like this:
{
"id":"10052",
"key":"TEST-6",
"self":"https://pvandevoorde.atlassian.net/rest/api/3/issue/10052"
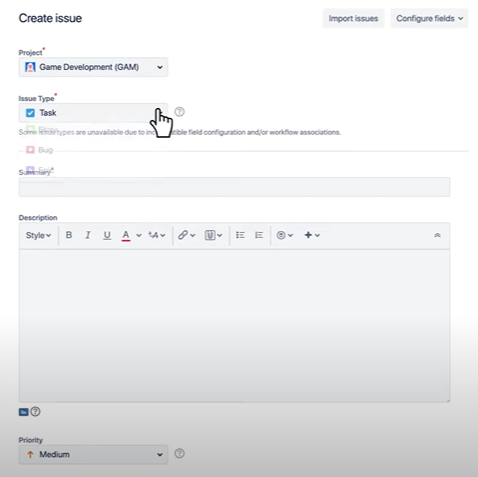
}The issue id, issue key, and REST API endpoint for the issue you just generated are displayed. Alternatively, you may simply look in your Jira instance, as shown below.
Bravo!! You’ve just used the Jira API to create your first issue.
Creating an issue using a project ID and issue type ID
This example uses the project ID and issue type ID rather than the key and name respectively. This is useful if you only have the IDs.
Request
curl \

   -D- \

   -u charlie:charlie \

   -X POST \

   --data {see below} \

   -H "Content-Type: application/json" \

   http://localhost:8080/rest/api/2/issue/
Input data
curl \

   -D- \

   -u charlie:charlie \

   -X POST \

   --data {see below} \

   -H "Content-Type: application/json" \

   http://localhost:8080/rest/api/2/issue/
Response
{

   "id":"39001",

   "key":"TEST-102",

   "self":"http://localhost:8080/rest/api/2/issue/39001"

}
For detailed information and information about Jira, please consult the Jira API documentation.
How to Use Jira APIs?
Expansion
Jira REST API leverages resource expansion to simplify responses by only returning explicitly requested data parts. The expand query parameter allows specifying a comma-separated list of entities to expand by name, avoiding issues from requesting too little (more requests needed) or too much (performance impact).
To find out the expandable fields, take a look at the expand property in the parent object. In the example below, the widgets field is expandable:
{
    "expand": "widgets",
    "self": "http://jira.atlassian.com/rest/api/resource/KEY-1",
    "widgets": { "widgets": [], "size": 5 }
}
To expand nested entities, use dot notation – ?expand=widgets.fringels would expand the widgets collection and the fringels property within each widget.
Pagination
Jira employs pagination to restrict the size of responses for resources that may contain a large number of items. When accessing a paged API, the response will include a values array enclosed within a JSON object alongside paging metadata, as demonstrated below:
{
    "startAt" : 0,
    "maxResults" : 10,
    "total": 200,
    "values": [
        { /* result 0 */ },
        { /* result 1 */ },
        { /* result 2 */ }
    ]
}
Ordering
Certain resources offer the capability to arrange items by a designated field, facilitated through the orderBy query parameter.
Arrangement can occur in ascending or descending order. To designate the order type, employ the “+” or “-” symbols for ascending or descending, respectively. The default ordering is ascending. For instance, using ?orderBy=+name will arrange the outcomes by name in ascending order.
Conclusion
In this article, you explored Jira and Jira APIs. More specifically you learned the key features of Jira that make it so popular among the Developers. In addition, you understood the detailed steps to work with Jira APIs. You created your first issue in Jira using the Jira Cloud REST APIs. Optimize your workflows by mastering the Confluence REST API, enabling seamless interactions with your Confluence data. Check out the details here: Confluence REST API.
Optimize project tracking and data analytics by integrating Jira with Snowflake. Find detailed steps at Jira-Snowflake Integration.
Moreover, extracting complex data from a diverse set of data sources such as Databases, SaaS applications, Cloud Storage, SDK’s, and Streaming Services can be quite challenging and cumbersome, however, a simpler alternative like Hevo can save your day!
Want to take Hevo for a spin?
Sign Up and experience the feature-rich Hevo suite first hand. You can also have a look at the unbeatable Hevo Pricing that will help you choose the right plan for your business needs.
Share your experience with Jira APIs in the comments section below!
FAQs
Is the Jira API free?
Yes, Jira API is free to use, and no additional charges are required.
Who can use Jira API?
The Jira product license is required for authenticating and utilizing the APIs. Only licensed Jira users can utilize the Jira API.
What is the main purpose of Jira?
Jira’s main purpose is to help teams plan, track, and manage their projects and tasks efficiently. It is primarily used for issue tracking and project management, enabling teams to collaborate.
Share it with your connections.
-
 Share To LinkedIn
-
 Share To Facebook
-
 Share To X
-
 Copy Link


