Today, a colossal amount of unstructured data is being generated within organizations. However, handling unstructured data is not as straightforward as structured data. Consequently, organizations need better data management tools to work effectively with unstructured data. While organizations can leverage command interfaces, it requires expertise in interacting with servers. Such workflows can limit organizations from harnessing the power of unstructured data effectively.
To mitigate such challenges, organizations can leverage MongoDB Compass, a Graphical User Interface solution that can assist any user in Creating, Inserting, Updating, Filtering, and even Deleting the documents visually with a click of the buttons. Besides, it becomes complex to query extensive volume data in the command-line interface. The speed of the MongoDB Shell can decrease while processing massive data. Further, the MongoDB Shell works on the database on its own, and users cannot analyze and see the data changes independently. In contrast, in MongoDB Compass, users can visualize their database and its modifications without worrying about the performance.
Table of Contents
Prerequisites
- Understanding of unstructured data.
What is MongoDB?
MongoDB is an open-source unstructured database that allows users to store data in key-value pairs, making it easy to access. Since it is an unstructured database, it has a flexible data structure that makes it easier to use for systems with a large volume of data and high performance.
The data in MongoDB is referred to as Documents, whereas the number of Documents is called a Collection. Each document in the MongoDB Collection is different due to its unstructured format. Consequently, MongoDB is called a schema-less database. MongoDB environment provides a MongoDB Server to start and create several databases.
With Hevo Data, you can easily integrate MongoDB with a wide range of destinations. While we support MongoDB as sources, our platform ensures seamless data migration to the destination of your choice. Simplify your data management and enjoy effortless integrations.
Check out how Hevo can be of help:
- No-Code Data Pipelines: Set up data transfers from MongoDB to your desired destination without writing a single line of code.
- Automated Schema Mapping: Automatically detect and map MongoDB schemas to match the destination structure, ensuring accurate data transfer.
- Secure Data Transfer: Ensure your data is protected during migration with encryption and secure connections.
Explore Hevo’s features and discover why it is rated 4.3 on G2 and 4.7 on Software Advice for its seamless data integration. Try out the 14-day free trial today to experience hassle-free data integration.
GET STARTED WITH HEVO FOR FREEWhat is MongoDB Compass?
MongoDB allows users to interact with the MongoDB Server through two interfaces. The first one is the Mongo shell, which is the simple command-line interface of the MongoDB server.
The other one is the Graphical User Interface (GUI) that allows users to communicate with the MongoDB Server through automated tool functions rather than command-line queries. One such GUI tool is MongoDB Compass, which is used to query and analyze MongoDB data visually.
MongoDB Compass is open-source and is available for operating systems like Linux, Windows, macOS, etc. MongoDB Compass is a perfect alternative to the MongoDB Shell as it is not feasible to carry out complex queries with the MongoDB Shell.
How To Use MongoDB Compass?
- Install the MongoDB Server
- Install the MongoDB Compass
- Create a Database and Insert Data in MongoDB Compass
- Update and Delete Documents in MongoDB Compass
- Query Documents in MongoDB Compass
A) Install the MongoDB Server
To start with the MongoDB Compass, you need to download the MongoDB Server and install it. You can download the latest version of MongoDB Server from the official page.
This tutorial uses the Windows 7 Operating System, but you can use any operating system. To install MongoDB on your system, follow the below steps.
- Step 1: Open the Installation Setup.
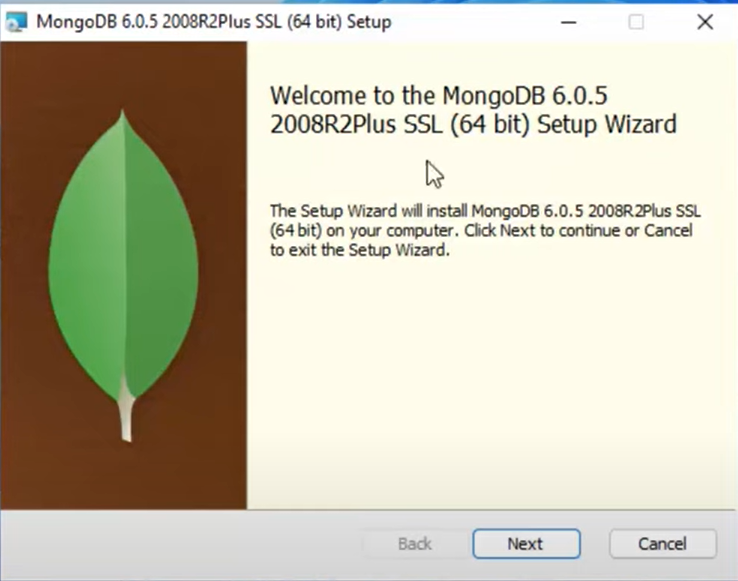
- Step 2: Click on the Next button.
- Step 3: You need to accept the agreement and click Next.
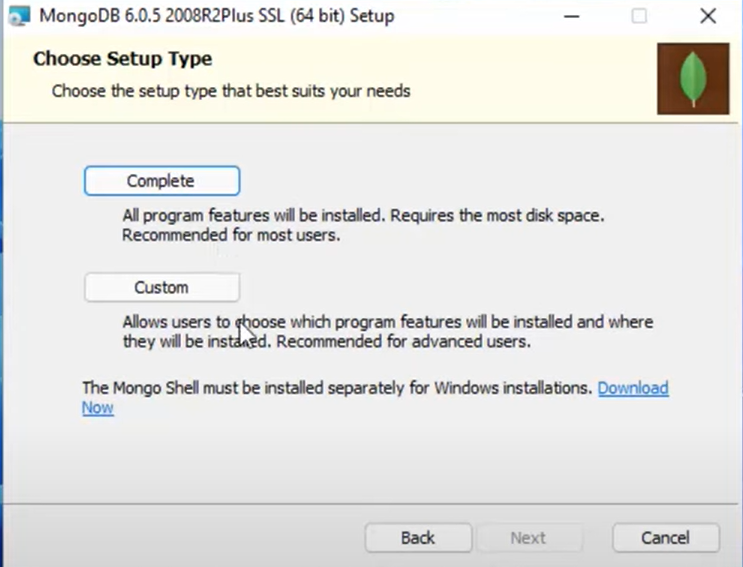
- Step 4: Click on the complete setup option as shown above.
B) Install the MongoDB Compass
To download the MongoDB Compass, follow the below steps:
- Step 1: Download MongoDB Compass. Choose the Community Edition Stable version from the drop-down menu.
- Step 2: Select Windows 7 Operating System and click on the Download button.
- Step 3: Launch the MongoDB Compass Installer, accept the agreement and click on Start using Compass.
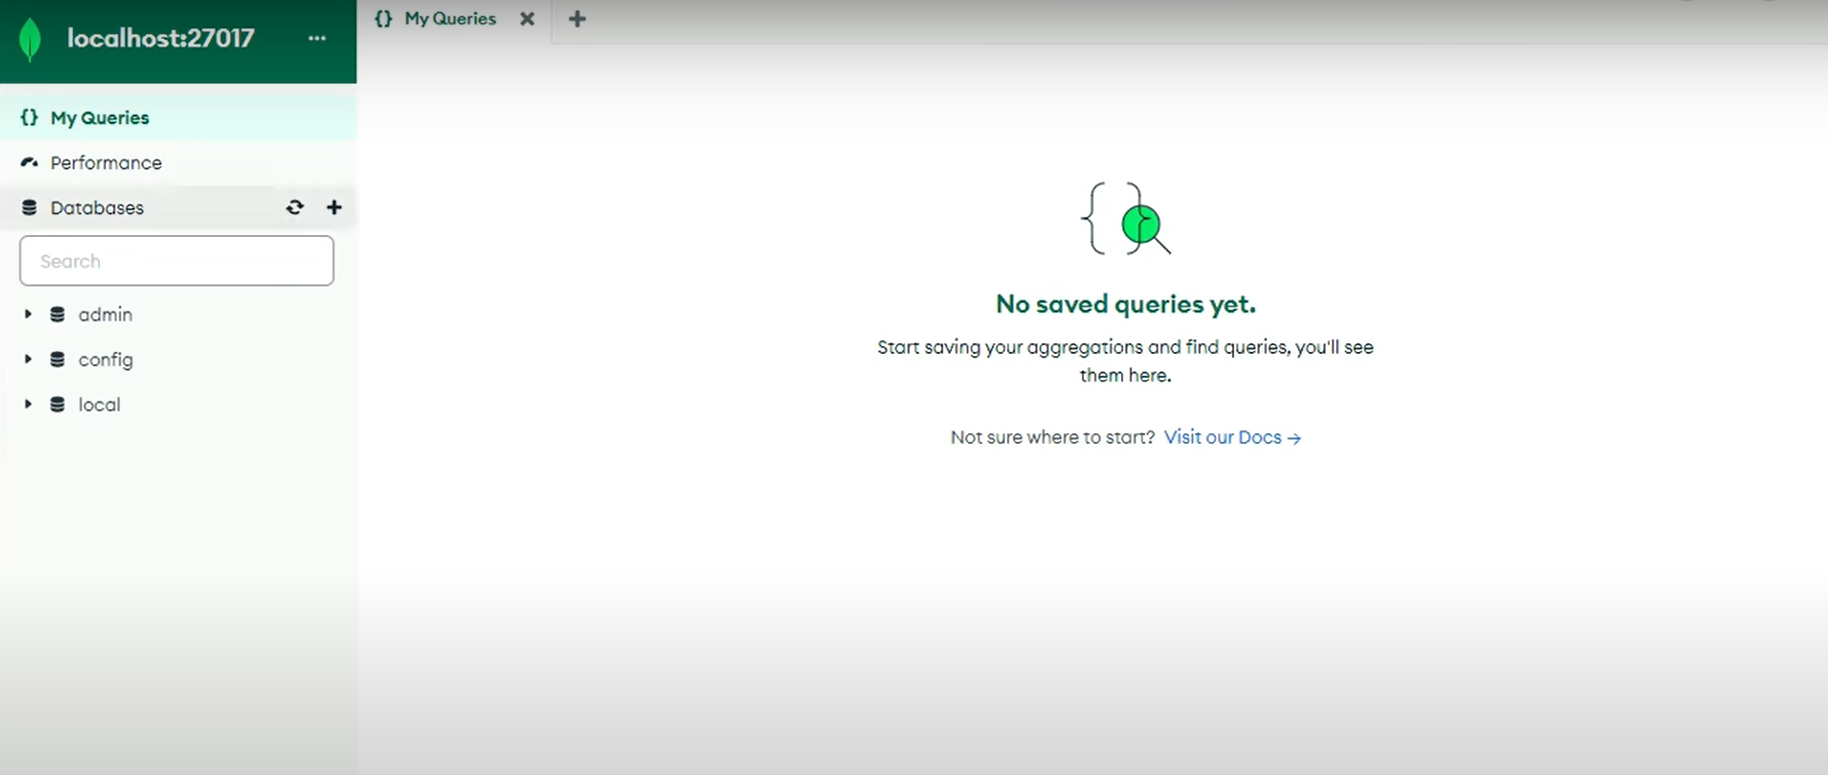
- Step 4: You have to set up the GUI software and connect it to the MongoDB instance. Set the parameters as mentioned below:
- Hostname as Localhost.
- Port as 27017.
- Click on connect as the rest of the fields are default.
C) Create a Database and Insert data in MongoDB Compass
- Step 1: Go to the Create Database button, as shown above. It loads the database helper window, as shown below.
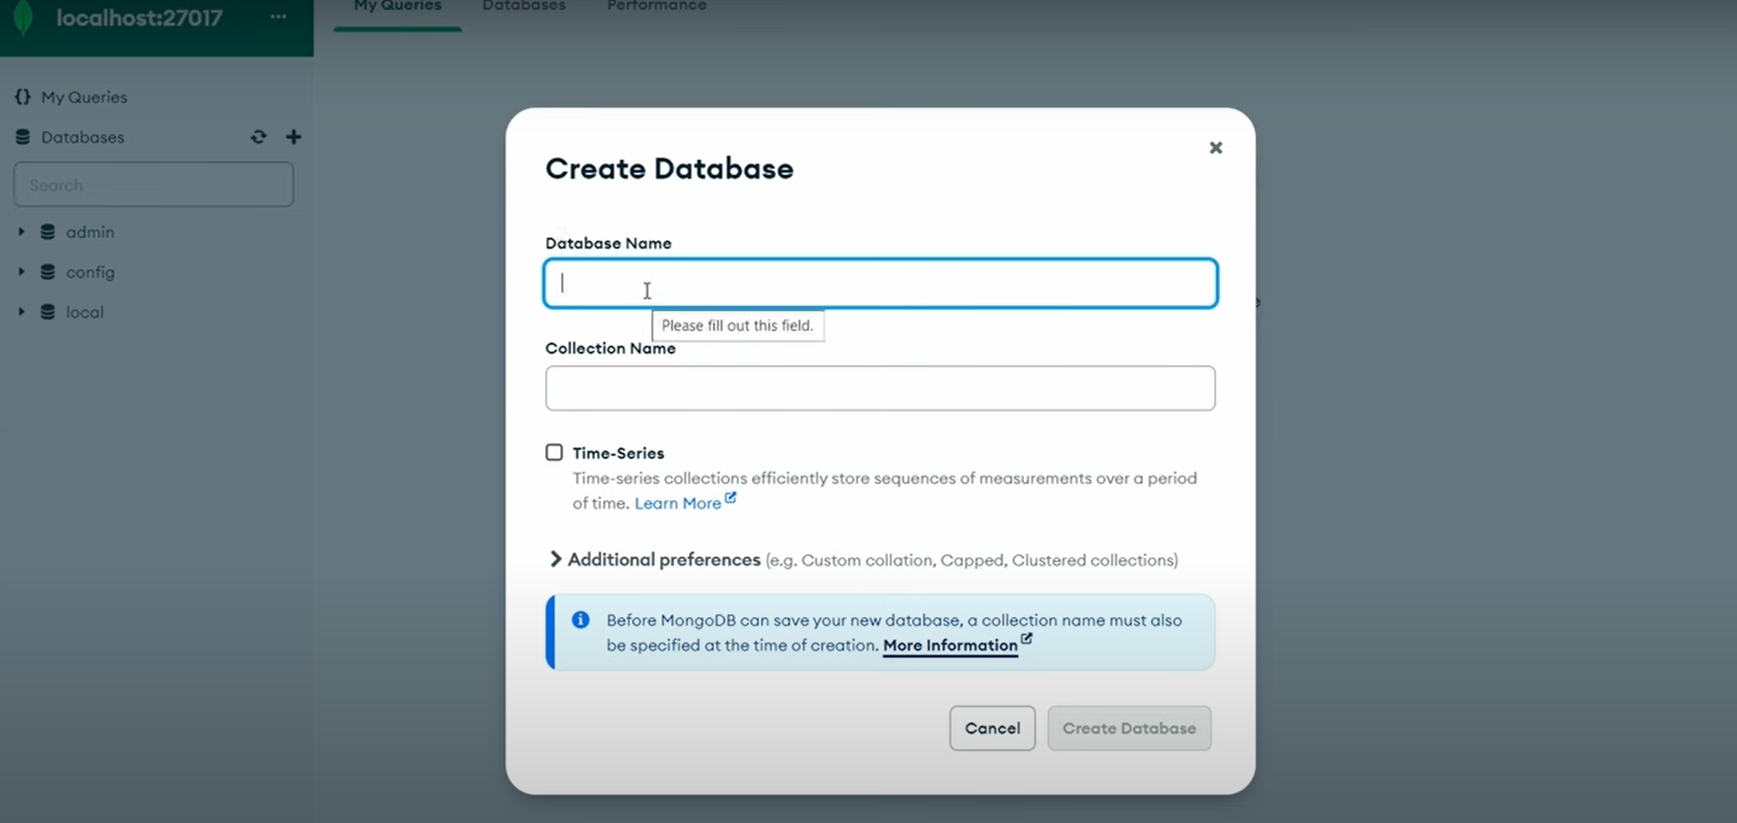
- Step 2: From above, you need to specify the name of the Collection and database created and then click on the Create Database button. The database name is ‘peopledb’ and the collection name is ‘people’ , as you can see below:
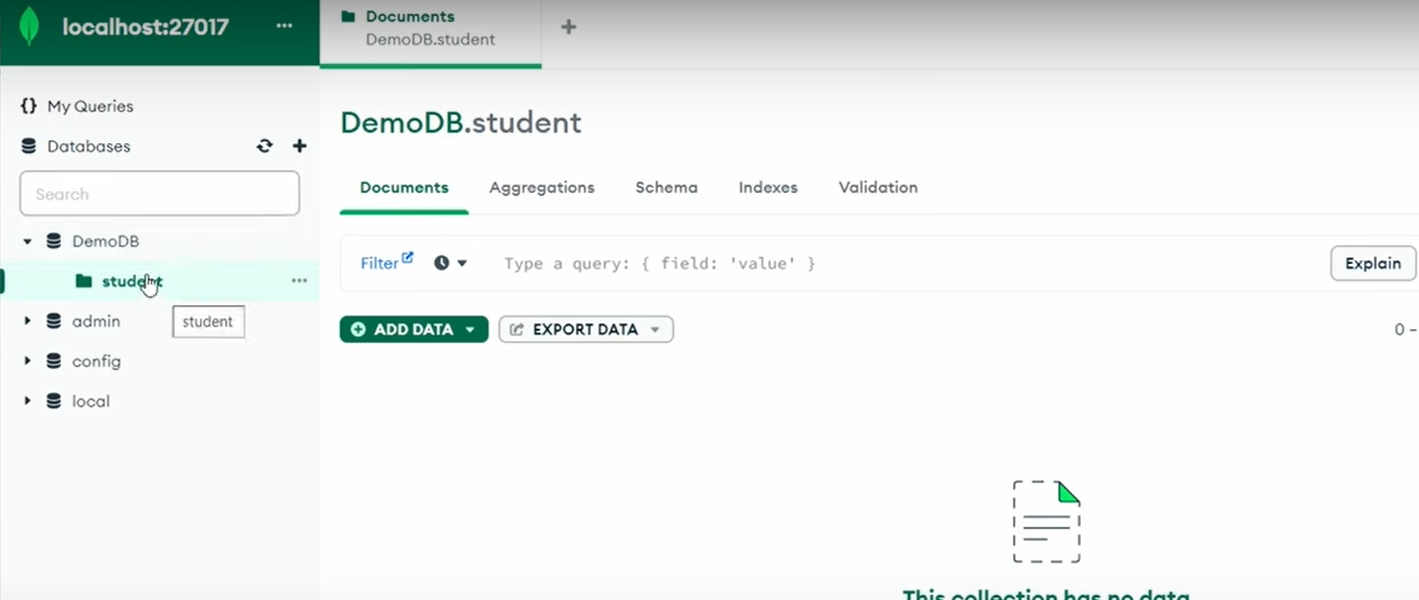
- Step 3: Click on the ‘people’ tab available on the left-hand side under the cluster tab.
- Step 4: Click on the Documents section.
- Step 5: After you click on the Insert Document, it opens an Insert Document Helper, as shown below:
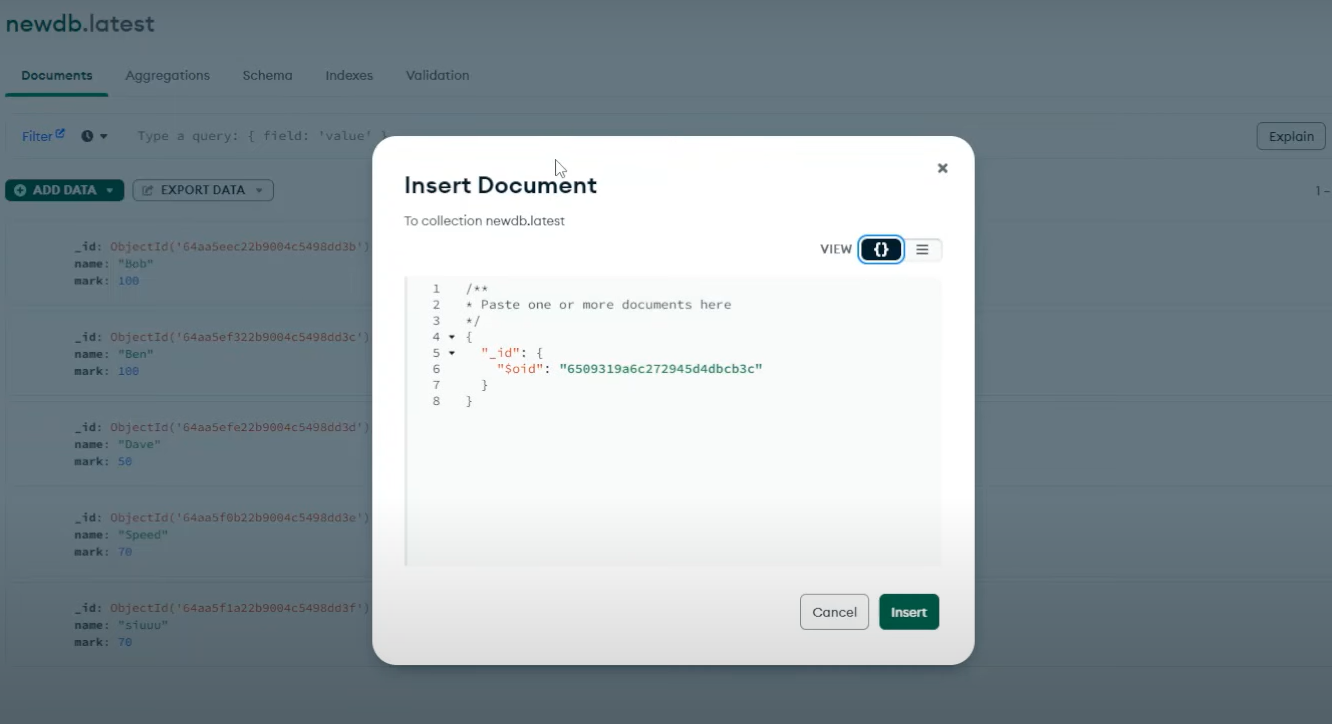
- Step 6: In MongoDB Compass, you can Insert Documents in two types:
- Import JSON or CSV file.
- Insert data manually.
- Step 7: Go to the Add Data option. It gives you two options to import or insert data manually. If you want to import a CSV or JSON file, click on import, it will show the below window.
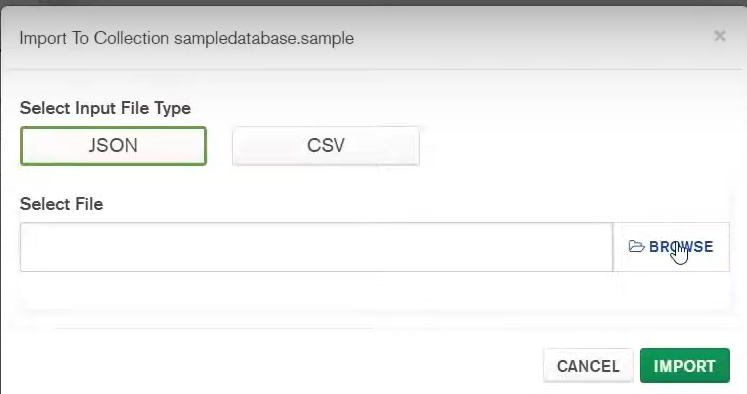
- Step 8: You need to browse the file, select the file type, and import it. It should be in the pair of keys and values when you add data manually.
- Step 9: You need to view the inserted data. In MongoDB Compass, you can view the data in two formats: List and Table View. Go to ‘peopledb’ in the left-hand side corner and click on the Collection named ‘people’. You can see the following window:
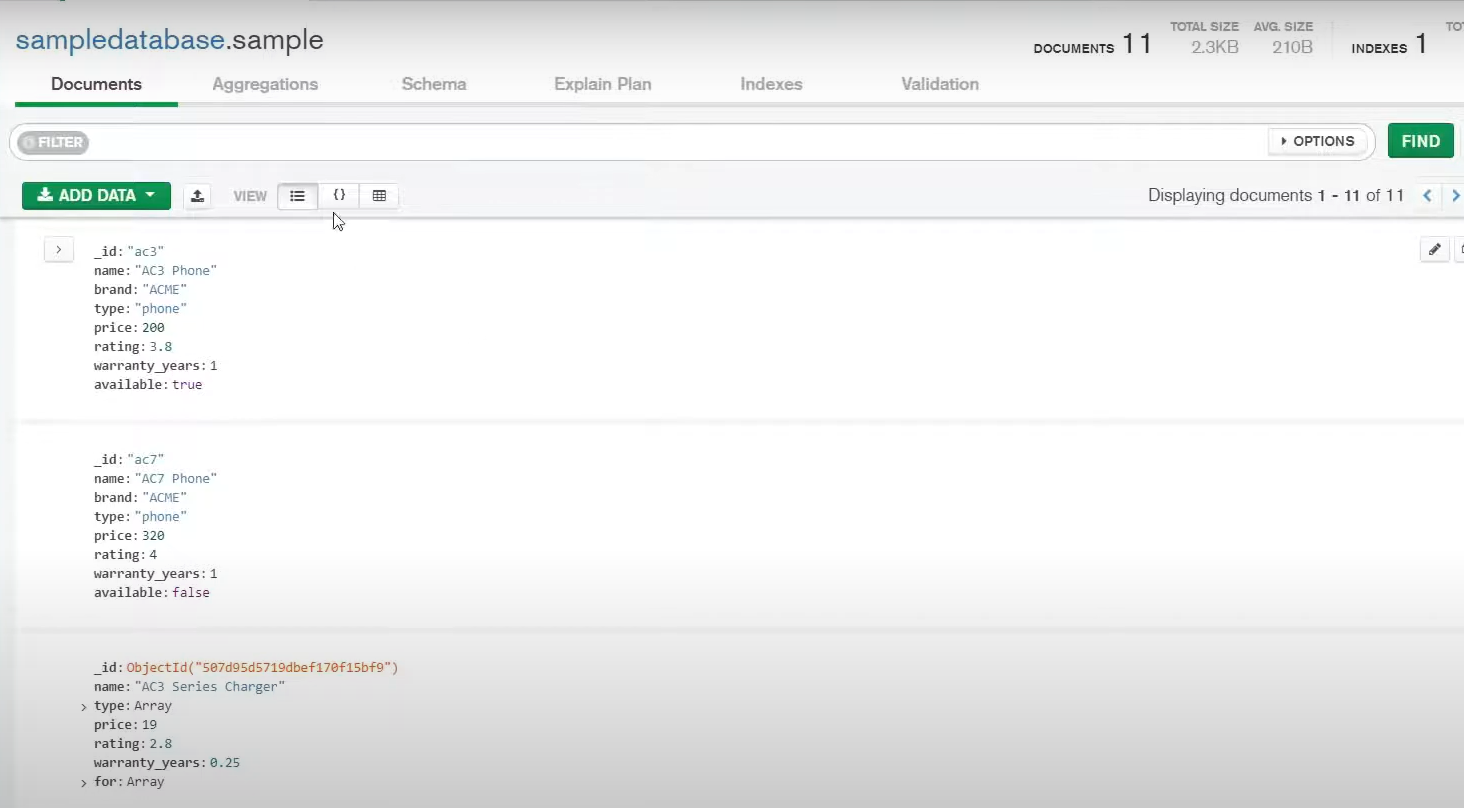
- Step 10: From above, you can see documents in the ‘people’ Collection are by default in the list view. You can change it to Tables through the option given there.
D) Update and Delete Documents in MongoDB Compass
After Creating and Inserting a Document, you need to know how to Update the Document. To update the Document, follow the below steps:
- Step 1: You can see from above that the modification is enabled, and you can update any document you want. After modifying, you need to click on the Update button below.
Similar to Updating, you can also Delete documents in MongoDB Compass.
- Step 2: Go to the document you want to delete
- Step 3: Click on the Trash icon. You can see the red notification mentioning that the document has been deleted.

E) Query Documents in MongoDB Compass
After creating, inserting, updating, and deleting the document, you also need to query the document. To query the documents follow the below steps:
- Step 1: Go to the left-hand side of the MongoDB Compass and select the inventory collection. If you want to select all the documents in the collection, you pass an empty query filter {} to the filter input and click on find.
From above, you can see that all documents in the collection are selected.
- Step 2: To query a document that matches a particular condition, you need to raise the query in the key-value format like { status: “D” }.
From above, you can see that all the documents having status as “D” are filtered by the query.
- Step 3: If there is an embedded document, you need to specify the exact values in the query to filter that document. For example, { size: { h: 14, w: 21, uom: “cm” } }. The field size has the specified value in it, you need to add a query giving the exact values. Check the below window.
You can see from the above window that the document having the { h: 14, w: 21, uom: “cm” } value is fetched by the query.
- Step 4: You can also match only a specified field in the embedded document. You have to enter the query { “size.uom”: “in” }. It fetches all the documents containing that field, just as shown below.
From above, all the documents having { “size.uom”: “in” } are selected and fetched.
- Step 5: You can also match the element in an array using the query { tags: “red” }.
From above, you can see the query { tags: “red” } fetched all the documents with tags containing the string “red.”
Conclusion
This tutorial lets you get familiar with MongoDB Compass, a GUI tool that enables users to visualize the MongoDB Database. You can create, insert, update and delete documents in databases with straightforward options rather than writing manual queries in MongoDB Compass.
If you are using MongoDB as a source of data and searching for a no-fuss alternative to Manual Data Integration, then Hevo can effortlessly automate this for you. Hevo, with its strong integration with 150+ sources & BI tools (Including 60+ Free Sources), allows you to not only export & load data but also transform & enrich your data & make it analysis-ready in a jiffy. Try a 14-day free trial and experience the feature-rich Hevo suite firsthand. Also, check out our unbeatable pricing to choose the best plan for your organization.
FAQs
1. Does MongoDB Compass support aggregation pipelines?
Yes, MongoDB Compass does include an aggregation pipeline builder which will help you build complex transformations of your data.
2. Can I write queries in MongoDB Compass?
Yes, MongoDB Compass lets you compose and execute queries to explore and analyze your data.
3. How does MongoDB Compass help with data analysis?
It also offers data visualization tools. Data visualization tools help users get to know their data patterns, structures easily.


