Businesses using NetSuite often struggle to perform advanced analytics due to limited reporting capabilities and siloed data. Integrating with Snowflake allows companies to centralize their financial and operational data, enabling deeper insights and better decision-making. However, setting up the NetSuite to Snowflake integration comes with challenges like complex APIs, data mapping, and maintaining data consistency.
In this blog, we’ll explore two ways to move data: a manual CSV export approach and an automated, no-code solution with Hevo, to help you choose the right method for your needs.
Table of Contents
What is NetSuite?
NetSuite is a powerful cloud-based platform dedicated to medium and large-sized companies. It allows running all the key business processes with the help of multifunctional tools. Therefore, it is much more than an ERP system that helps efficiently manage accounting, inventory, supply chain, and order processing.
Besides ERP, NetSuite also hosts CRM for following up interactions, PSA to support more efficient project management, and it supports e-commerce, retail, and manufacturing. The integrated solution empowers businesses to manage different aspects of their operations seamlessly.
Why Use Hevo for NetSuite and Snowflake Integration?
- Automated Data Sync: Seamlessly transfer data from NetSuite to Snowflake with minimal manual effort.
- Real-Time Updates: Keep your data synchronized and up-to-date in Snowflake.
- No-Code Platform: Set up your integration effortlessly without requiring technical skills.
Discover the easiest way to integrate and start integrating NetSuite with Snowflake with Hevo and enhance your data analytics today.
Get Started with Hevo for FreeWhat is Snowflake?
Snowflake is a relational cloud data warehouse that can also support semi-structured data formats, including ORC, JSON etc. You can ingest data into Snowflake from many sources, including Amazon S3, GCS, etc. The capabilities of Snowflake in processing and storing data make it a popular solution.
Next, let’s get into the methods for moving data from NetSuite to Snowflake.
What Can You Achieve by Migrating Your Data from NetSuite to Snowflake?
Here’s a little something for the data analyst of your team. We’ve mentioned a few core insights you could get by replicating data from NetSuite to Snowflake.
What can you achieve by moving data from NetSuite to Snowflake?
- You can leverage many additional features like historical analysis, data cloning, scalable storage, and computing in Snowflake for storing your data.
- NetSuite’s capabilities are only for small to intermediate datasets, which is not enough for carrying out data analysis on a large scale. A data warehouse can help here.
- Various integrations with tools and the ecosystem of Snowflake are unparalleled, and you can benefit from it.
Methods to Migrate Data from NetSuite to Snowflake
Method 1: Automate the Data Replication Process Using a No-Code Platform
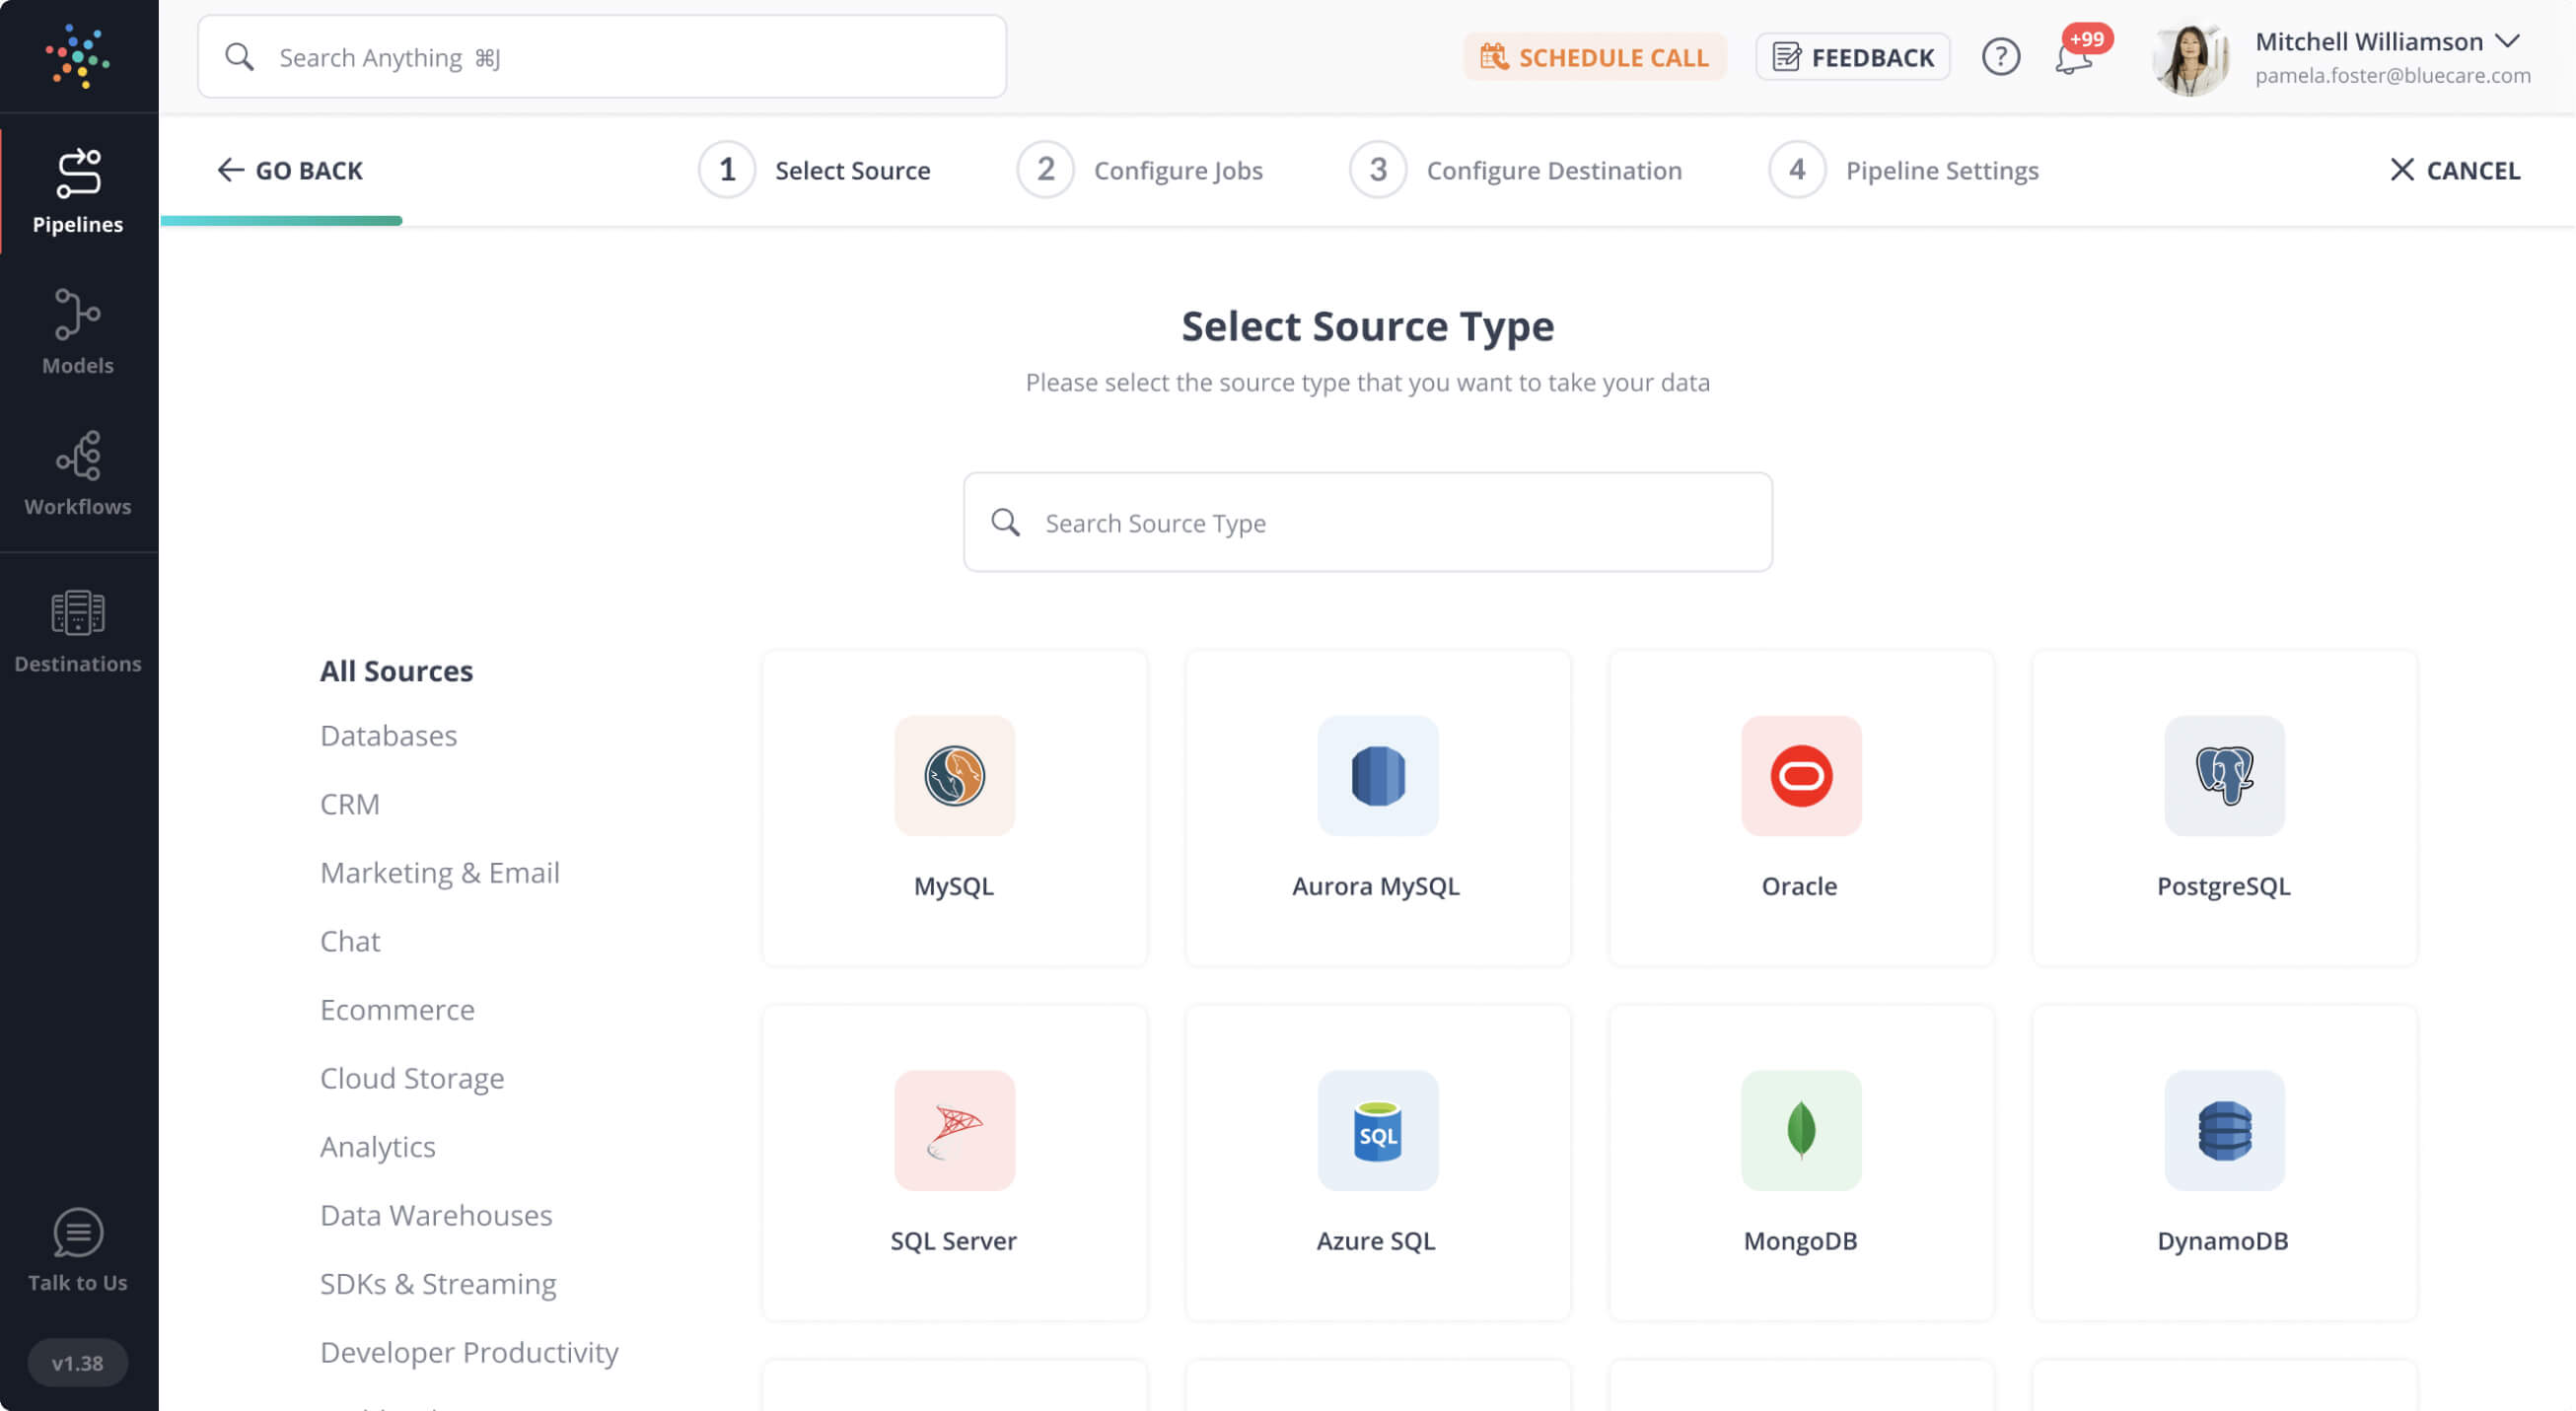
Here’s how Hevo, a cloud-based ETL tool, makes NetSuite to Snowflake data replication ridiculously easy:
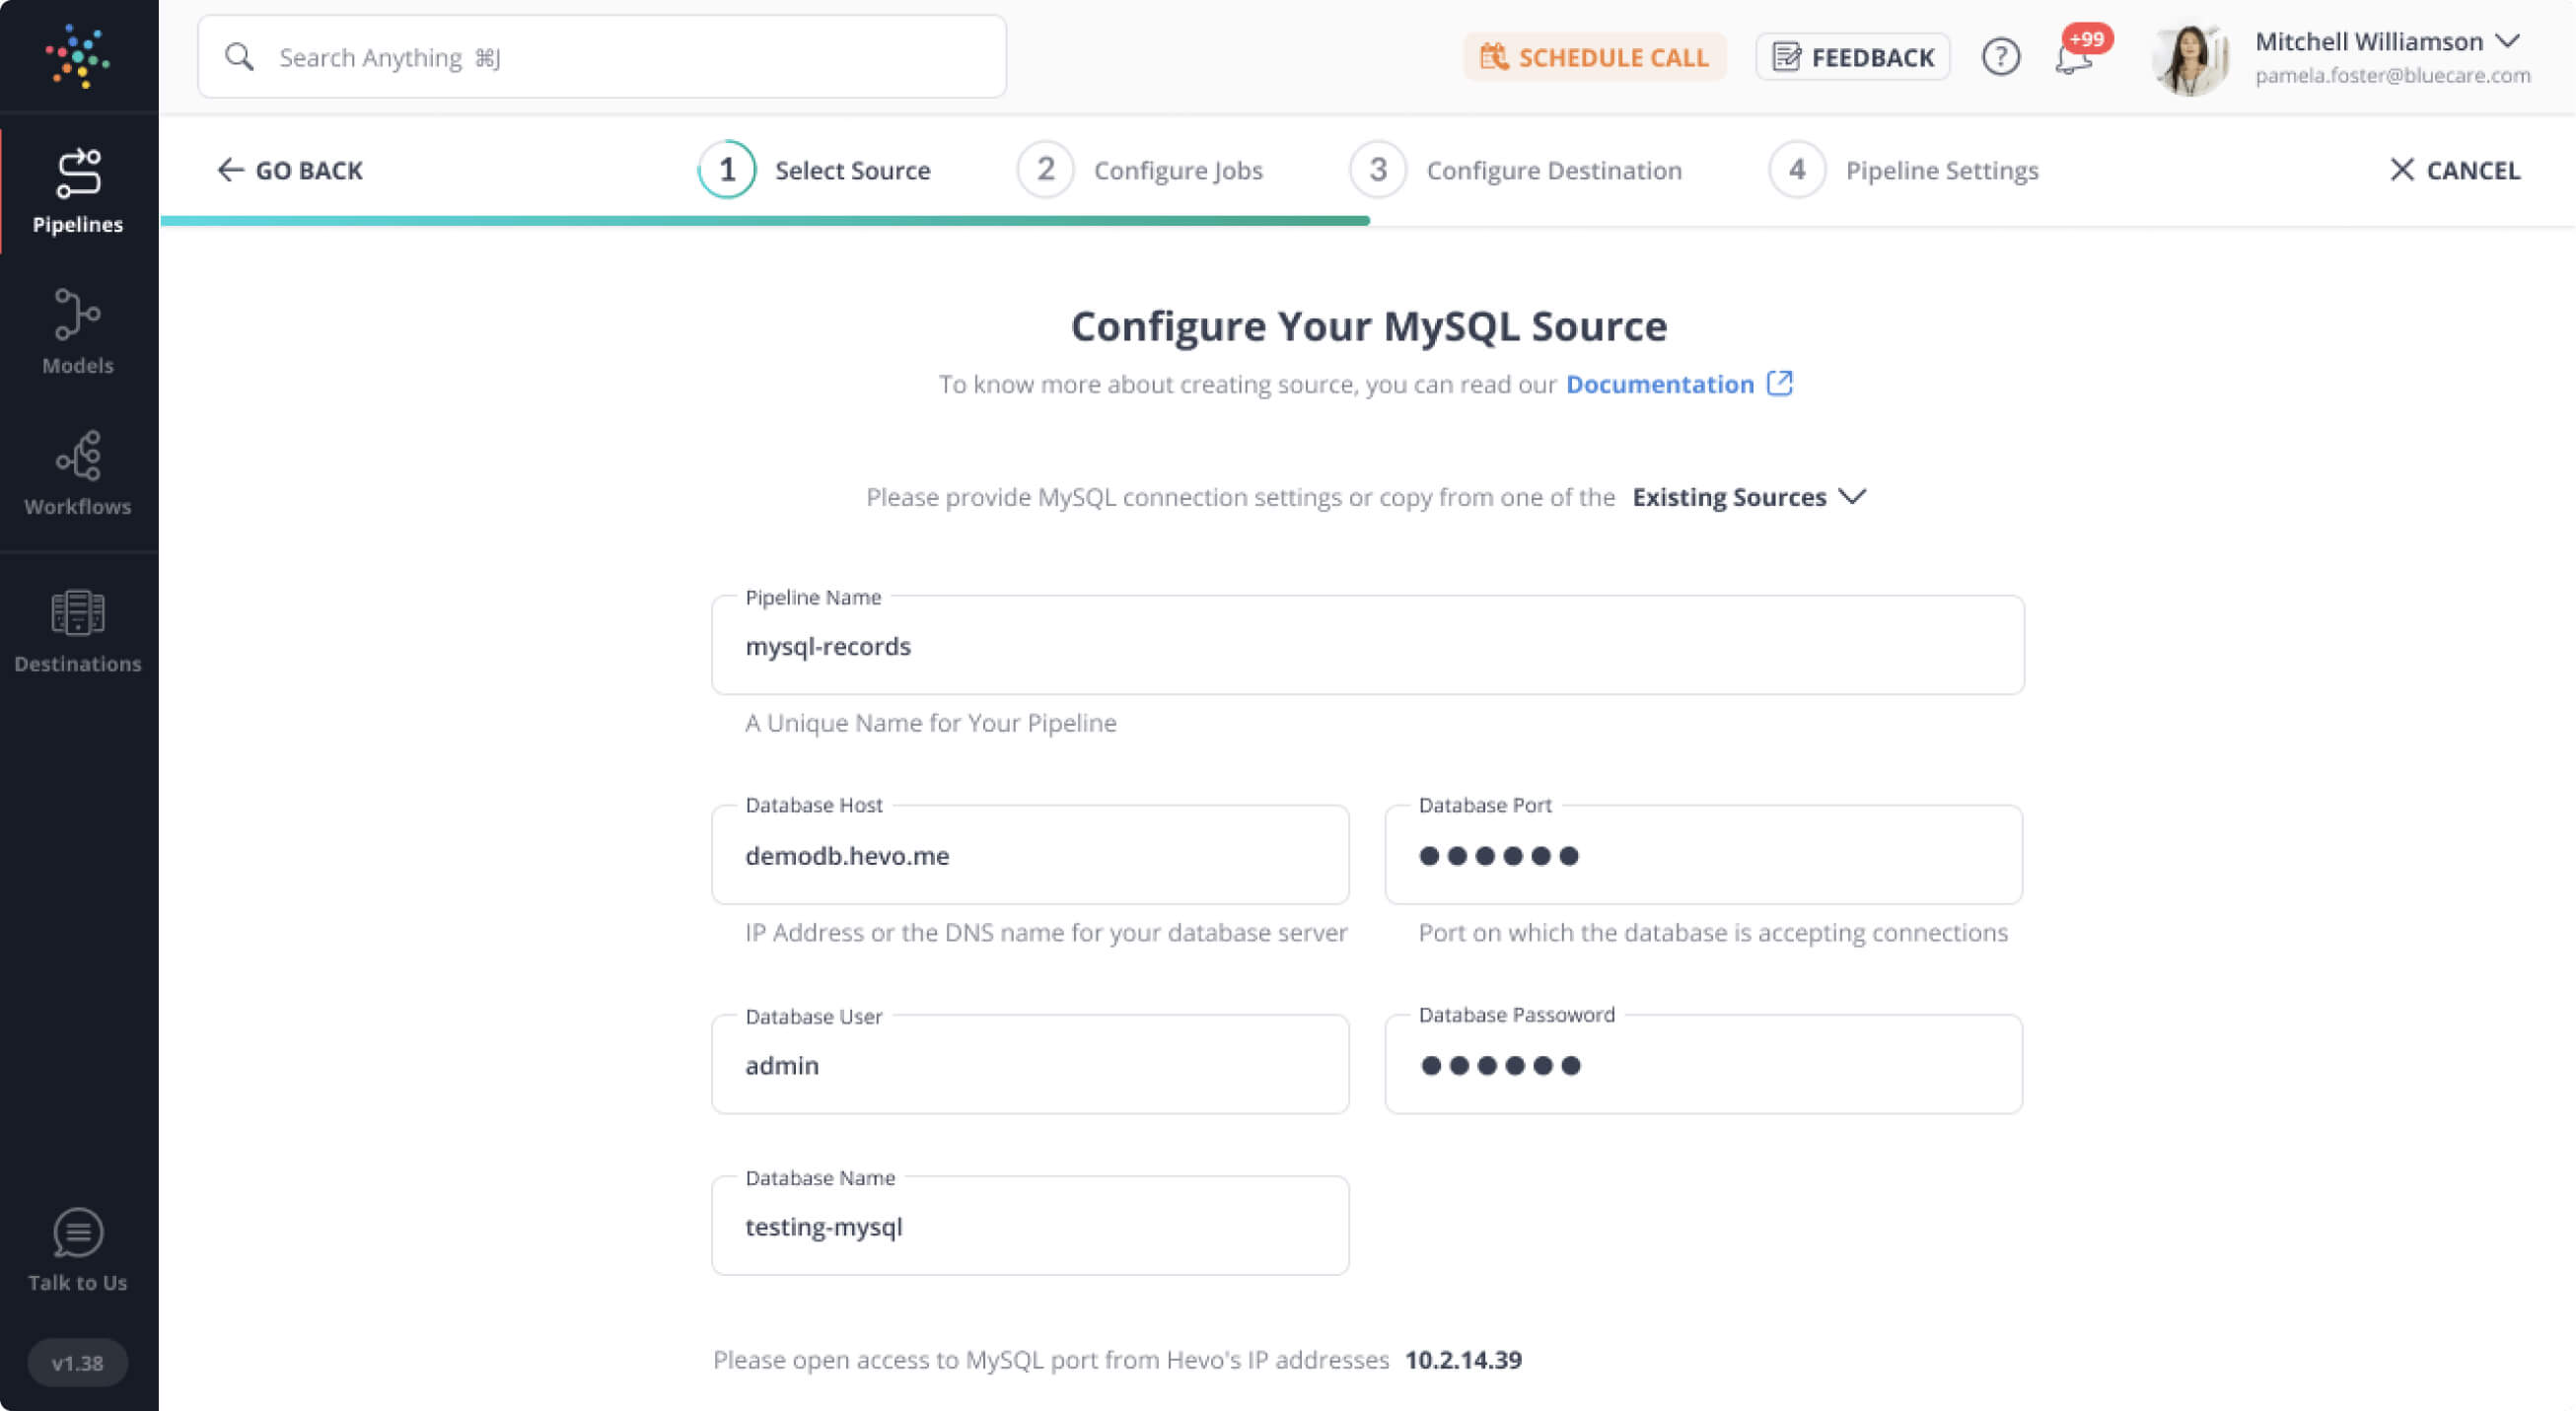
Step 1: Configure NetSuite as a Source
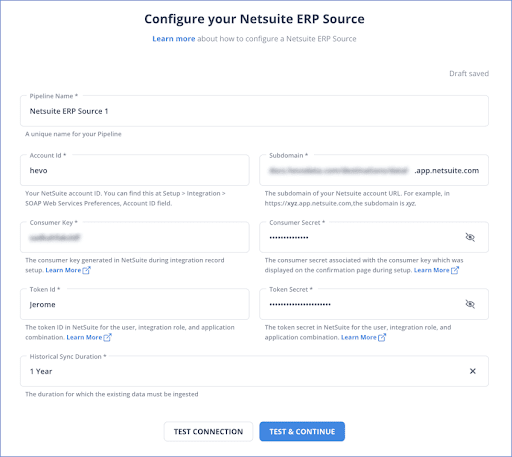
Learn more about how to Authenticate and Configure your NetSuite Source.
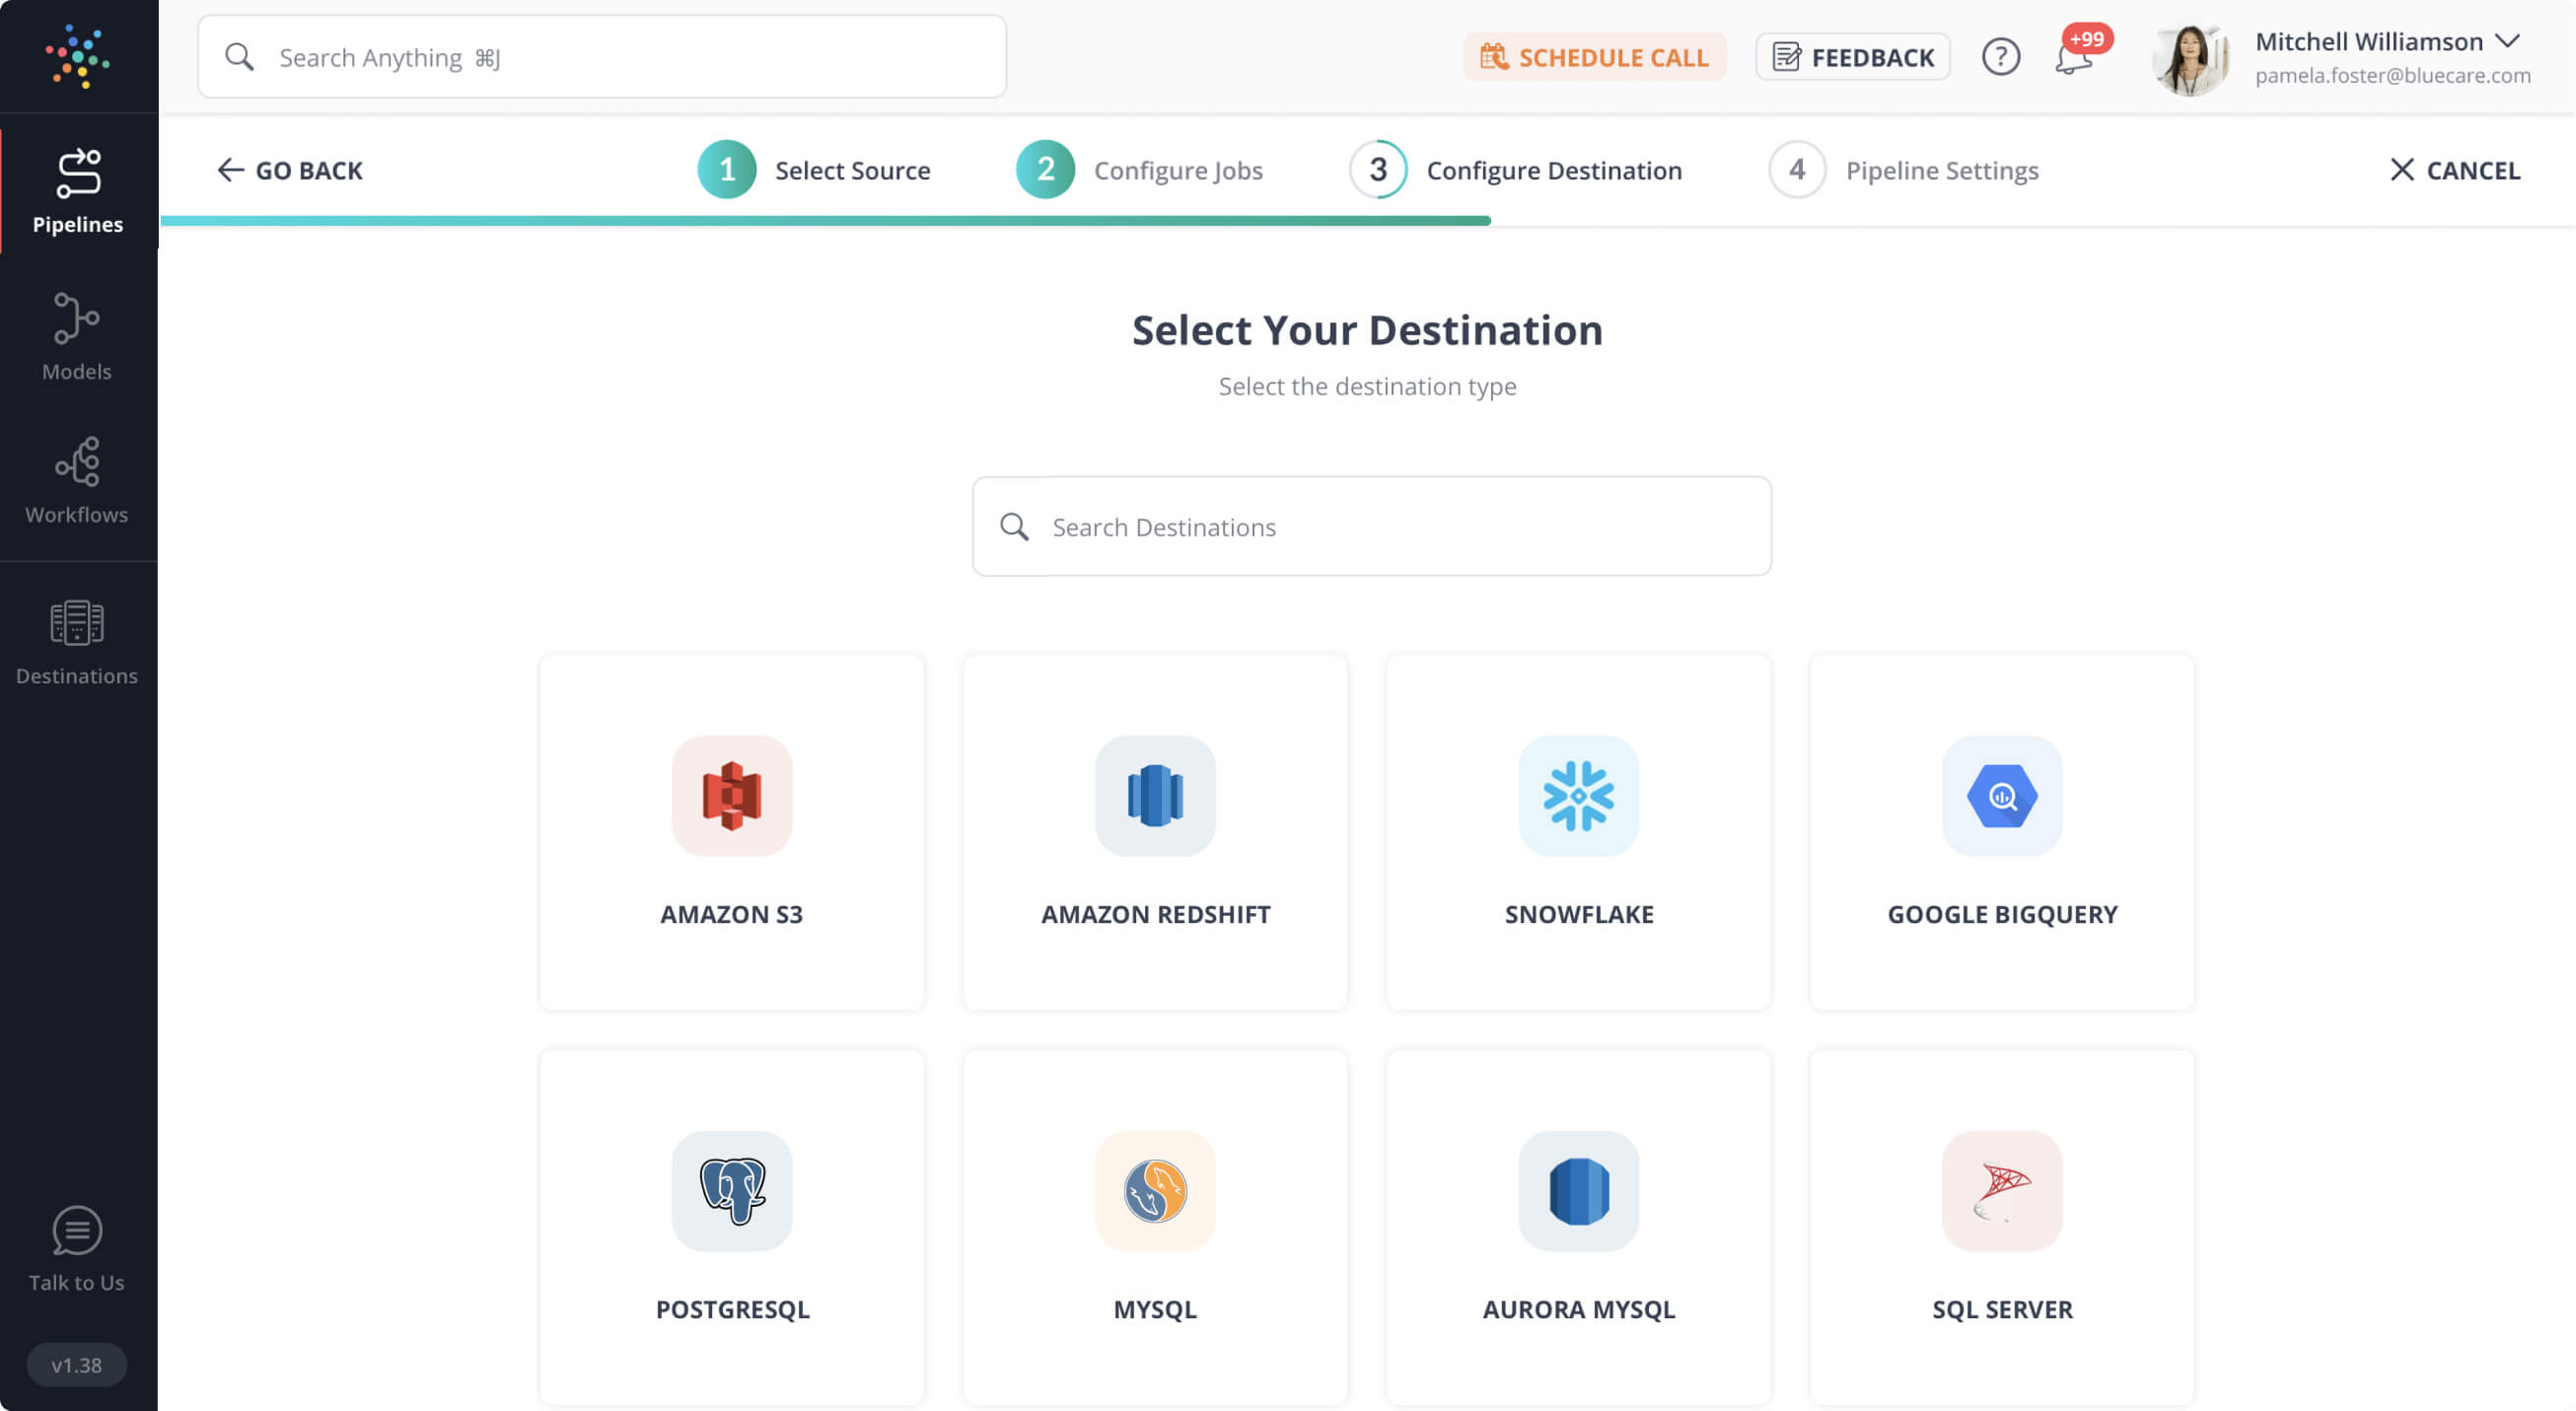
Step 2: Configure Snowflake as a Destination
Learn more about how to configure Snowflake as the destination.
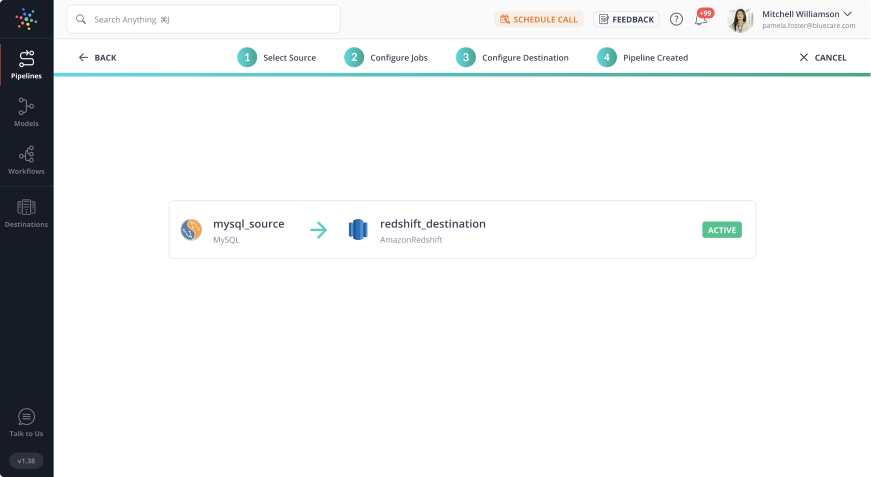
Step 3: All Done to Setup Your ETL Pipeline
Once your NetSuite to Snowflake ETL Pipeline is configured, Hevo will collect new and updated data from NetSuite every five minutes (the default pipeline frequency) and duplicate it into Snowflake. Depending on your needs, you can adjust the pipeline frequency from 5 minutes to an hour.
With these simple steps, you can complete the NetSuite to Snowflake data integration process in just a few minutes.
Method 2: Replicate Data from NetSuite to Snowflake Using CSV
Some prerequisites to manually migrate data from NetSuite to Snowflake are access to NetSuite and Snowsight.
Step 1: Exporting Data from NetSuite to CSV
- Log in to the NetSuite interface
- Navigate to the top right corner of the home page and click on the Setup button.
- Click on Import/Export > Export Tasks > Full CSV Export from the drop-down menu.
- Click on the Submit button.
- On the popup, select Save this file to disk and OK
- Assign a unique name to the file in the Save As window.
- Download the file as a zip, and you can extract it to access the CSV file containing the NetSuite data.
Step 2: Importing NetSuite Data into Snowflake
- Log in to your Snowflake account
- On the main dashboard, in the top left corner, select the Data> Databases option to view your databases.
- Select the database to load NetSuite data from step 1
- If no database exists, click on the +Database button in the top right corner.
- Click on the newly created database and create a new schema – Click Create>Table>Standard
- On the SQL interface, write a SQL query to generate a table that aligns with the structure of the CSV file downloaded from step 1.
- Select the database table and click on the Load Data button in the top-right corner.
- Specify the file format as CSV and fill in other optional fields
- Now, the CSV file will be loaded into your Snowflake database, and you can preview the data to verify the requirements.
These steps help you seamlessly migrate data from NetSuite to Snowflake.
You can get more insight into loading CSV files through the web interface, along with other handy methods.
This 2-step process using CSV is a great way to replicate data from NetSuite to Snowflake effectively. It is optimal for the following scenarios:
- One-Time Data Replication: When your finance team needs the NetSuite data only once in a long period of time.
- No Data Transformation Required: If there is a negligible need for data transformation and your data is standardized, then this method is ideal.
- Small Amount of Data: Since the amount of data is small, the accuracy of data replication would be high, making this method a good fit.
In the following scenarios, using CSV might not be a great fit:
- Data Mapping: Only basic data can be moved. Complex configurations cannot take place. There is no distinction between text, numeric values, and null and quoted values.
- Time Consuming: If you plan to export your data frequently, there may be better choices than the CSV method since it takes time to replicate the data using CSV files.
Limitations of Using the Manual Method
- Exporting data, formatting it, and importing it to another database require time and effort from the data engineering team.
- As it’s not leveraging the scope of automation, errors that arise due to manual intervention will be more.
- Your data can consist of complex structures that wouldn’t be well written in CSV format.
- When you have to transform the raw data every single time. With the increase in data sources, you would have to spend a significant portion of your engineering bandwidth creating new data connectors.
Steps to access your data on NetSuite
The table below explains NetSuite’s data model comes into three versions:
| Versions of data model | Use cases |
| SuiteScript Model | When working with Script or the Workflow Tool |
| Web Service Model | When you want to connect external applications to NetSuite |
| ODBC/JDBC Model | When you purchase SuiteAnalytics module |
A few things when you work with these versions
- You can extend the SuiteScript API using RESTlets in SuiteScript Model. This will help you deploy server-side scripts that interact with NetSuite data adhering to RESTful principles. RESTlets provide easy use for people who know SuiteScript. It also supports more behaviors than NetSuite’s SOAP-based web services that are constrained to SuiteTalk operations.
- You will be working with NetSuite’s web services API under Web Service model. This can be deployed using the SOAP protocol, which adds difficulty to your development as you will have to manage SOAP and XML responses.
Modify and prepare data for Snowflake
- Once you access data on NetSuite, consider the limitations of your database and analysis you want to perform on that data to decide the type of transformation.
- When you use web services SOAP API, you get XML responses. When the data is tabular, you should flatten the data like you do for JSON.
- Choose the right data type, as it’s important to understand the expressivity of the queries and restrict the analysis.
While using NetSuite web services API,
- SOAP is utilizing XML to describe the service and your data. So, the data types you map are from XML and will be, by default, transformed into the primitive data types of the language that you use.
Summing Up
Migrating data from NetSuite to Snowflake can unlock powerful analytical capabilities by centralizing your business data in a scalable cloud data warehouse. In this blog, we explored two primary methods to achieve this: the manual CSV export-import approach and the automated pipeline using Hevo.
While the CSV method might suit one-time or low-frequency transfers, it quickly becomes inefficient and error-prone as your data scales. On the other hand, using Hevo offers a no-code, fully managed, and real-time data pipeline solution that simplifies the entire process, ensuring data accuracy, consistency, and minimal maintenance.
If you’re looking for a hassle-free and scalable way to integrate NetSuite with Snowflake, Hevo is the smarter choice. Sign up for a 14-day free trial and start streaming your NetSuite data to Snowflake in minutes.
FAQ NetSuite to Snowflake
How to connect NetSuite to Snowflake?
Connecting NetSuite to Snowflake involves several steps:
1. Choose an ETL Tool
2. Configure Netsuite as a Source
3. Configure Snowflake as a Destination
4. Map and Transform Data
5. Run and Monitor
Which SQL does Snowflake support?
Snowflake supports several SQL dialects and features that enable flexible and efficient querying of data.
Which ETL tool is best for snowflakes?
The best ETL tool for Snowflake depends on your specific needs, but some popular options include:
Hevo: Known for its no-code interface, real-time data syncing, and support for a wide range of data sources.
Fivetran: Offers automated data pipelines and pre-built connectors for Snowflake and other data sources.
Airbyte: An open-source tool with a growing ecosystem of connectors, suitable for various data sources.


