


Segment has become a popular customer data platform for collecting data from multiple sources. Managing and processing that data is often a challenging task. To effectively handle the exponentially growing structured data, you can use a robust and scalable relational database management system like MySQL.
You can easily leverage the benefits of both by setting up a Segment MySQL connection. However, Segment doesn’t have a native integration for MySQL. Though you can first transfer your data to Postgres and then import that data into MySQL, or simplify the process by using other third-party tools!
In this article, you will learn how to effectively set up the Segment MySQL connection using two different methods.
Table of Contents
What is Segment?

Segment is a widely used customer data platform (CDP) that simplifies the process of collecting the customer data from multiple platforms that your firm uses such as analytics platforms, customer service solutions, product development applications, and sales tools. After consolidating your customer data from several touchpoints in a single place of truth using a single API, you can then segment this data into meaningful audiences and activate it in different ways.
Key Features of Segment
Segment offers the following eye-catching features:
- Flexible: Segment provides several pre-built connections with different data sources via a single API. This allows you to reduce the time spent reviewing and modifying data tracking.
- Centralized Data: Segment allows you to standardize your data collection with improved accuracy and completeness, thereby making your insights even clear and more precise.
- Secure: You get the best in class data security as Segment is GDPR compliant. Segment’s Privacy Portal provides you with the ability to isolate any Pii data collection and immediately block further tracking of this information before it is passed to other platforms and tools.
- Ease-of-Use: Segment’s comprehensive documentation & excellent customer service simplifies implementation and maintenance. Reduce the time spent reviewing and modifying data tracking.
What is MySQL?

MySQL is a popular open-source relational database management system. MySQL data is stored in tables consisting of rows and columns. Introduced in 1995, MySQL is completely developed, distributed, and maintained by Oracle Corporation. Looking over the technical side, MySQL is written in the C and C ++ languages.
Key Features of MySQL
- Ease of Operation: With MySQL, you can work with a diverse set of programming languages such as PHP, PERL, C, C ++, and JAVA. It also provides a set of intuitive tools to simplify time-consuming tasks such as server management, reporting, and data analysis.
- First-rate Performance: MySQL delivers best-in-class query performance across a variety of clustered servers. It provides a fast-loading utility with a separate memory cache and table index partitioning. MySQL can also efficiently handle fluctuating workloads and process large volumes of data at optimal speeds.
- Open-Source: MySQL is under the GNU General Public License (GPL), which means it will always be freely available. It provides you the freedom to customize it on Oracle’s Open-Source MySQL codebase based on your needs.
- Localization: To make it user-friendly, MySQL supports multiple character sets, including latin1 (cp1252), german, big5, ujis, and more.
- Data Security: MySQL provides you full control over the Data Access Control settings.
Method 1: Simplify Segment MySQL Connection By Eliminating The Need For Code
Hevo Data, an automated data pipeline, provides you with a hassle-free solution to set up the Segment MySQL Connection within minutes with an easy-to-use no-code interface. Hevo is fully managed and completely automates the process of not only loading data from Segment but also enriching the data and transforming it into an analysis-ready form without having to write a single line of code.
Method 2: Manually set up the Segment MySQL Connection via Postgres
This method would be time-consuming and somewhat tedious to implement. Since Segment doesn’t support MySQL as a destination, you will have to first manually export data from Segment to Postgres and then again import that data into MySQL from Postgres.
Get Started with Hevo for FreeMethod 1: Simplify Segment MySQL Connection By Eliminating The Need For Code
Step 1: Connecting Segment to Hevo Data:
Authenticate and connect Segment to Hevo Data through Webhooks. To add the generated Webhook URL to your Segment account, just copy the URL and add it to your Segment account as a destination.

Step 2: Setting MYSQL connections
To complete the Segment MySQL Connection, you can start by providing your MySQL database credentials, such as your authorized Username and Password, along with information about your Host IP Address and Port Number.

Why choose Hevo?
Hevo’s no-code data pipeline platform helps you to seamlessly integrate your data from source to destination without any technical expertise.Here are some key features of Hevo:
- Offers real-time data integration which enables you to track your data in real time.
- Eliminate the need for manual mapping with the automapping feature.
- Connect to over 150+ sources, including databases and SaaS applications.
Method 2: Manually set up the Segment MySQL connection via Postgres
Step 1: Connecting Segment to Postgres
- Firstly, you Sign up for a Heroku account, or directly log in to an existing account.
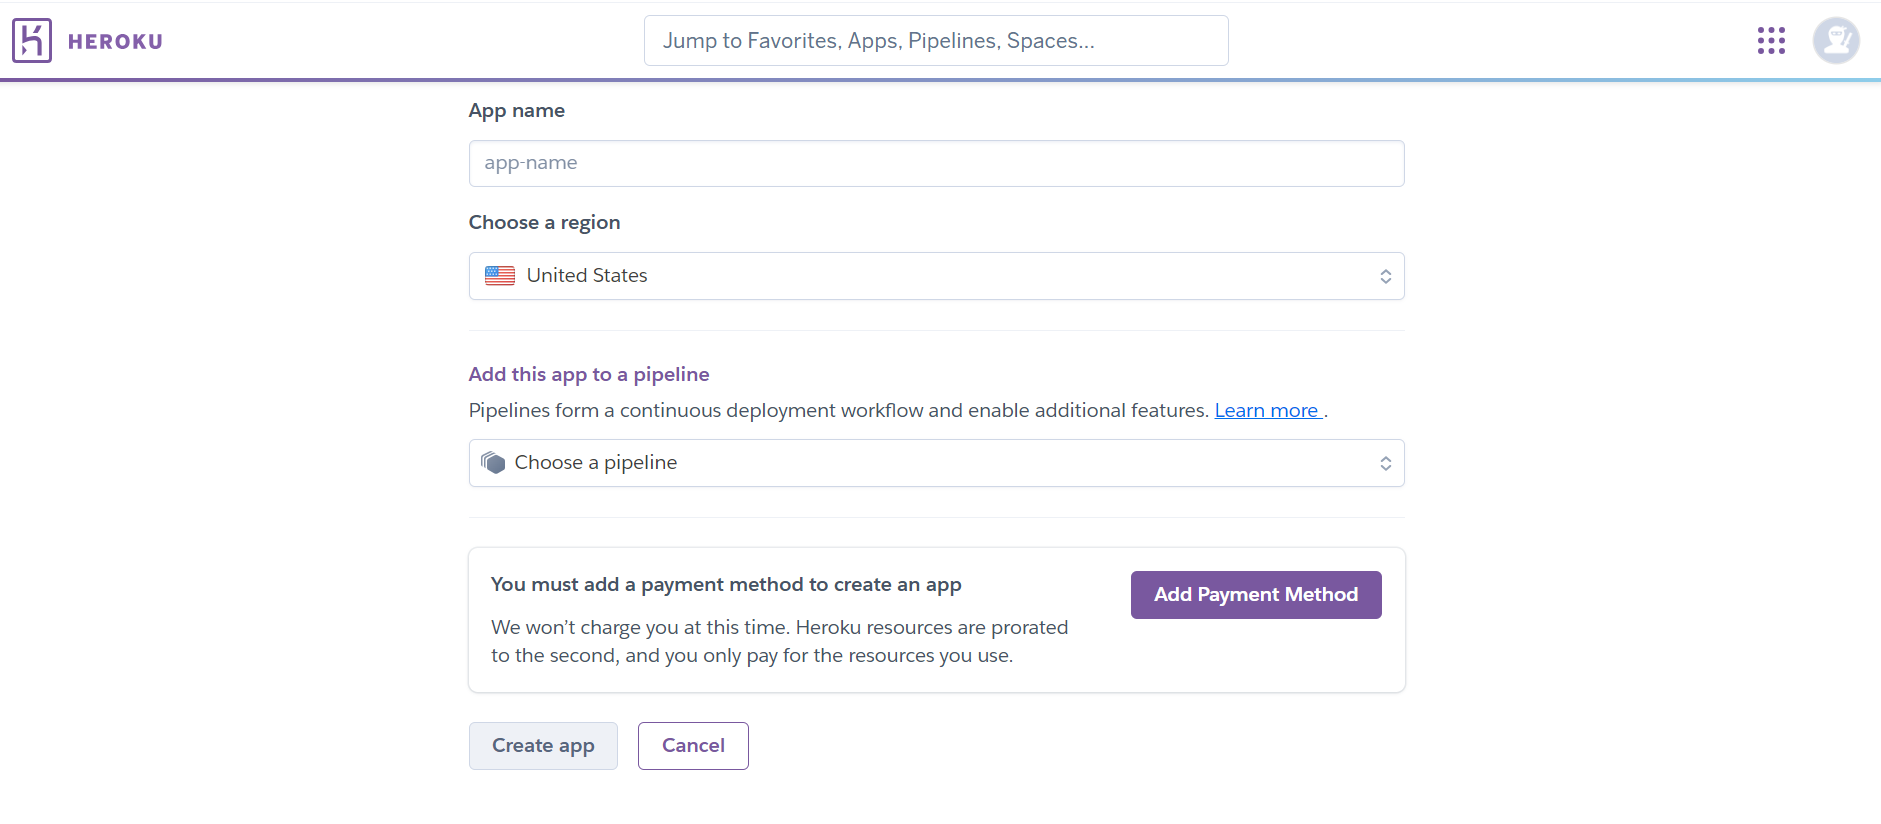
- Now, click on the New option and then click on Create new app option.
- Name your app and choose the desired region where you want to host your PostgreSQL database. After completing the app settings like adding your app to a Heroku pipeline, click on the Create app option.
- Click on the Resources tab present on the Deploy page. As you land on the Resources page, type & enter “Heroku Postgres” in the search bar. Choose a billing plan for your app and click on the Submit Order Form option.
- Now, click on the Heroku PostgreSQL add-on you have just created in the last step and open the Settings tab. Click on the View Credentials button and save the host, database, user, and password values as you will need these for connecting your database to Segment later on.
- Finally, navigate to your Segment app & click on the Add Destination button on your Overview page.
- Select your Postgres destination and similarly select the sources you would want your data from. Once you are done, click on the Next option.
- Now, provide the Postgres details you saved earlier from Heroku such as the host, database, user, and password values, and click on the Connect option.

Step 2: Connecting Postgres to MySQL using MySQL Workbench Migration Wizard
- Firstly, you have to download and install the PostgreSQL ODBC driver in the system where you have installed your MySQL Workbench.
- Open your MySQL Workbench and navigate to Database > Migration Wizard in the main menu.

- An overview page will appear on your screen. Read carefully the Prerequisites section and click on the Start Migration button to proceed with the Segment MySQL Integration.
- In the Source Selection page, choose PostgreSQL for the RDBMS and ODBC driver as a manual entry. Enter your required connection details from the ODBC driver name, hostname, port, username, password, and database, and click Test Connection to confirm the settings set for it.

- After a confirmation message, click on the Next button to move to the Target selection page. Enter your MySQL instance parameters and click on the Test Connection button. Verify if the connection is successful and click on the Next button.
- The Migration Wizard will interact with your Postgres Database and extract a list of the schemata. Once all tasks are completed, click on the Next button.
- From the list of schemata, choose the Pagila sample database and its default schema public.
- Click on the Next button and wait for the MySQL Wizard to complete retrieving the database object information like table names, table columns, primary and foreign keys, indices, triggers, views, etc. Once it is successful, click on the Next button.
- You will be presented with a list of table objects when you click on the Show Selection button. Click on the objects you want to migrate and click on the Next button.
- Now wait for the MySQL Migration Wizard to convert the objects you selected into their equivalent objects in MySQL and build the MySQL code needed to create them in the target server. Click on the Next button once that is complete.
- After the successful mappings, you will land on the page shown below. You can choose Column Mappings in the View combo box to individually review and fix the mapping of column types, default values, and other attributes.
You can also click on the Show Code and Messages button to see and edit the generated MySQL code that corresponds to the selected object.
- Click on the Next button to move to the Target Creation page and again click on the Next button.
- Click on the Next button to move to the data transfer process. Leaving the default values for the data transfer method, click on the Next button.
Here are some other migrations that you may need:
Conclusion
In this article, you have learned how to effectively set up the Segment MySQL Connection using 2 different methods. This is a good method if you rarely need to transfer your data from Segment to MySQL, as this manual Segment MySQL Connection requires a lot of effort and time. A more economical and efficient choice is to opt for a Cloud-based ETL solution like Hevo Data!
You can enjoy a smooth ride with Hevo Data’s 150+ plug-and-play integrations (including 60+ free sources). We are happy to announce that we have launched Azure Synapse as a destination. You can also look at our unbeatable pricing, which will help you choose the right plan for your business needs. Schedule a demo and explore how Hevo’s feature-rich suite can help your organization.
Tell us about your experience of setting up the Segment MySQL Connection! Share your thoughts with us in the comments section below.
Share it with your connections.
-
 Share To LinkedIn
-
 Share To Facebook
-
 Share To X
-
 Copy Link


