


Xero is an Online Accounting Software that highlights facts such as bank balances, outstanding invoices, upcoming payments, and expenditure claims to help business owners understand their financial flow.
Amazon Redshift is a well-known Data Warehouse that offers a wide range of features and efficiency. It contains a vast volume of unprocessed data collected from a variety of sources. Data Modeling Tools assist in the interpretation of this data by providing a platform that allows you to model data quickly and efficiently.
In this article, you will learn about Xero, Amazon Redshift, and its features. You will also learn how to connect Xero to Redshift in two methods.
Table of Contents
What is Xero?

Xero is a cloud-based accounting solution that is simple to use for growing businesses. Thanks to Xero, businesses can now handle invoices, payroll, bank reconciliation, purchasing, expenses, bookkeeping, and more all in one place. Due to its interoperability with over 800 add-on apps and features such as comprehensive, easy-to-use Accounting tools and unlimited user access, Xero is a popular choice for over 2 million users.
Key Features of Xero
The following are some of Xero’s important features:
- Infinite Users: At each membership level, you can add an unlimited number of people to your account. While adding new users, the account owner can also assign permission levels to them.
- Collaboration: Small businesses and advisers may easily connect and interact thanks to Xero’s collaboration features. You can make a user for your accountant and give them access to the system.
- Management and Expense Tracking: Xero maintains track of your inventory and allows you to easily create and submit purchase orders if you need to reorder. By integrating your bank and credit card accounts straight to Xero, you can easily categorize and split transactions.
- Easy to Use: Adding a customer, connecting your business bank account, and making your first invoice are all simple and quick tasks. In Xero, there is also a Customizable Dashboard, which is time-saving.
- Financial Reports: Using Xero’s amazing interface, users can translate their data into meaningful actionable insights that can be mapped into 100 various financial reports, such as Budgets, Balance Sheets, and Income Statements.
- Online Invoicing: By logging in, you can access your cash flow statements from any system. Files, such as documents or photographs, can be linked to invoices.
What is Amazon Redshift?
Amazon Redshift is a cloud-based and fully managed petabyte-scale Data Warehousing service. It enables you to begin with a few gigabytes of data and scale up to a petabyte or more. Amazon Redshift organizes data into clusters that can be examined at the same time. As a result, Amazon Redshift data may be retrieved quickly and easily. Users and apps can access each node independently.
Key Features of Amazon Redshift
- Column-oriented Databases: In a database, data can be organized into rows or columns. Row-orientation databases make up a large percentage of OLTP databases. In other words, these systems are built to perform a huge number of minor tasks such as DELETE, UPDATE, and so on.
- Secure End-to-end Data Encryption: All businesses and organizations must comply with data privacy and security regulations, and encryption is one of the most important aspects of data protection. Amazon Redshift uses SSL encryption for data in transit and hardware-accelerated AES-256 encryption for data at rest.
- Massively Parallel Processing (MPP): Redshift, like Netezza, is an MPP appliance. MPP is a distributed design approach for processing large data sets that employ a “divide and conquer” strategy among multiple processors.
- Cost-effective: Amazon Redshift is the most cost-effective cloud data warehousing alternative. The cost is estimated to be a tenth of the cost of traditional on-premise warehousing.
- Scalable: Amazon Redshift, a petabyte-scale data warehousing technology from Amazon, is scalable. Redshift from Amazon is simple to use and scales to match your needs.
Hevo Data, a No-code Data Pipeline, helps load data from any source, such as Databases, SaaS applications, Cloud Storage, SDKs, and Streaming Services, and simplifies the ETL process. It supports 150+ Data Sources, including 60+ Free Sources. The process is three-step: selecting the data source, providing valid credentials, and choosing the destination.
Hevo loads the data onto the desired Data Warehouse, such as Amazon Redshift, in real-time, enriches the data, and transforms it into an analysis-ready form without having to write a single line of code.
- Auto-Schema Management: Correcting improper schema after the data is loaded into your warehouse is challenging. Hevo automatically maps source schema with destination warehouse so that you don’t face the pain of schema errors.
- Customer Support: With Hevo you get more than just a platform, you get a partner for your pipelines. Discover peace with round the clock “Live Chat” within the platform. What’s more, you get 24×5 support even during the 14-day full-feature free trial.
- Reliability at Scale: With Hevo, you get a world-class fault-tolerant architecture that scales with zero data loss and low latency.
Explore Hevo’s features and discover why it is rated 4.3 on G2 and 4.7 on Software Advice for its seamless data integration. Try out the 14-day free trial today to experience hassle-free data integration.
Get Started with Hevo for FreeXero to Redshift Integration
Step 1: Xero to Salesforce Integration
- Step 1.1: The first step in integrating Xero with Salesforce is to set up an authentication provider in your Salesforce account. To do so, go to Setup and select Security Controls from the drop-down menu. Select New from the Authentication Providers menu. Now, enter your credentials in the following format:
Now save and copy the URL that has been produced.
- Step 1.2: Creating a new Xero App is the next step in the Xero Salesforce Integration process. Navigate to My Apps on the Xero App website and create a new app. Give your App a distinct name and a URL that points to Salesforce. Now paste the URL you copied before. There will be a Client Id and a Client Secret produced. Copy and paste these credentials into the Authorization Provider you generated earlier.

- Step 3: The next step in the Xero Salesforce Integration process is to visit the official Salesforce website, navigate to Setup, and select New Named Credential. Assign a Label and a Name to the New Named Credential. Now fill in the blanks with the remaining information:
- Step 4: The Xero Salesforce Integration process comes to a close with this phase. Now, in the Salesforce environment, install the Apex package for Xero Salesforce Integration listed below.
You must now obtain the Xero Tenant Id and create a Custom Label based on the Tenant Id. You can use the following Apex Method to retrieve the Tenant:
XeroAPI.getXeroTenantId();Copy the value returned by the previous method. Go to Custom Labels, click on Xero Tenant Id, and paste the copied value into the Setup box.
Step 2: Salesforce to Redshift Integration
- Step 2.1: Open the Amazon S3 Console by logging into your AWS account to connect Xero to Redshift.
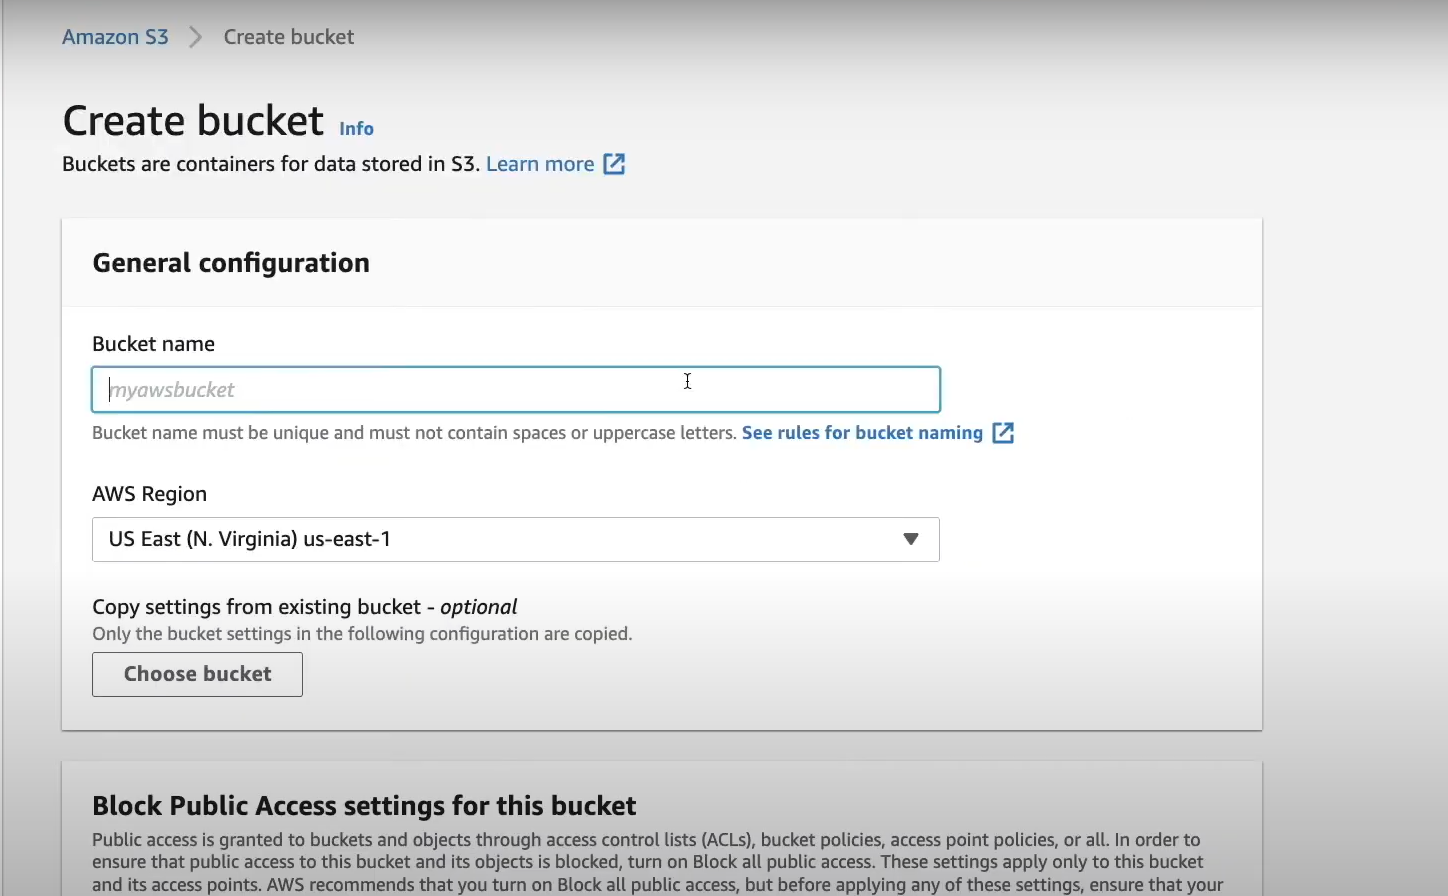
- Step 2.2: Select Create Bucket from the drop-down menu.
- Step 2.3: Choose a good Bucket Name based on your needs. It’s vital to note, however, that Amazon S3 Buckets must have distinct names across the board, therefore it should be named appropriately. Click Create Bucket after selecting an appropriate region and unchecking Block all Public Access.
- Step 2.4: Make a note of the URL for this bucket and put it somewhere safe.
- Step 2.5: Use an SQL Client such as SQL Workbench/J, Aginity Pro, Jetbrains DataGrip, or others, to connect to your Amazon Redshift Cluster from which you want to export data.
- Step 2.6: The UNLOAD query can be used to export data from the Amazon Redshift Cluster and load it into Amazon S3. The UNLOAD query has the following syntax:
UNLOAD ('select-statement')
TO 's3://object-path/name-prefix'
authorization
[ option [ ... ] ]
where option is
{ [ FORMAT [ AS ] ] CSV | PARQUET
| PARTITION BY ( column_name [, ... ] ) [ INCLUDE ]
| MANIFEST [ VERBOSE ]
| HEADER
| DELIMITER [ AS ] 'delimiter-char'
| FIXEDWIDTH [ AS ] 'fixedwidth-spec'
| ENCRYPTED [ AUTO ]
| BZIP2
| GZIP
| ZSTD
| ADDQUOTES
| NULL [ AS ] 'null-string'
| ESCAPE
| ALLOWOVERWRITE
| CLEANPATH
| PARALLEL [ { ON | TRUE } | { OFF | FALSE } ]
| MAXFILESIZE [AS] max-size [ MB | GB ]
| REGION [AS] 'aws-region' }- Step 2.7: Download data from the Amazon S3 bucket and then log on to Salesforce. Now, quick search and launch the Data Import Wizard.
- Step 2.8: Select either Standard Objects to import data about contacts, accounts, etc or Custom Objects.
- Step 2.9: In the next step, you can decide to make new records, update the existing ones, or do both at the same time.

- Step 2.10: Upload the CSV Amazon Redshift file into the Salesforce Data Import Wizard. Make sure that you set your separator to a comma.
- Step 2.11: Automated mapped fields will appear; manually map the remaining fields using the Map button as well and then fine-tune mappings as needed.
- Step 2.12: Finally, click Start Import as you review the settings of import settings and attribute mappings on the last page.
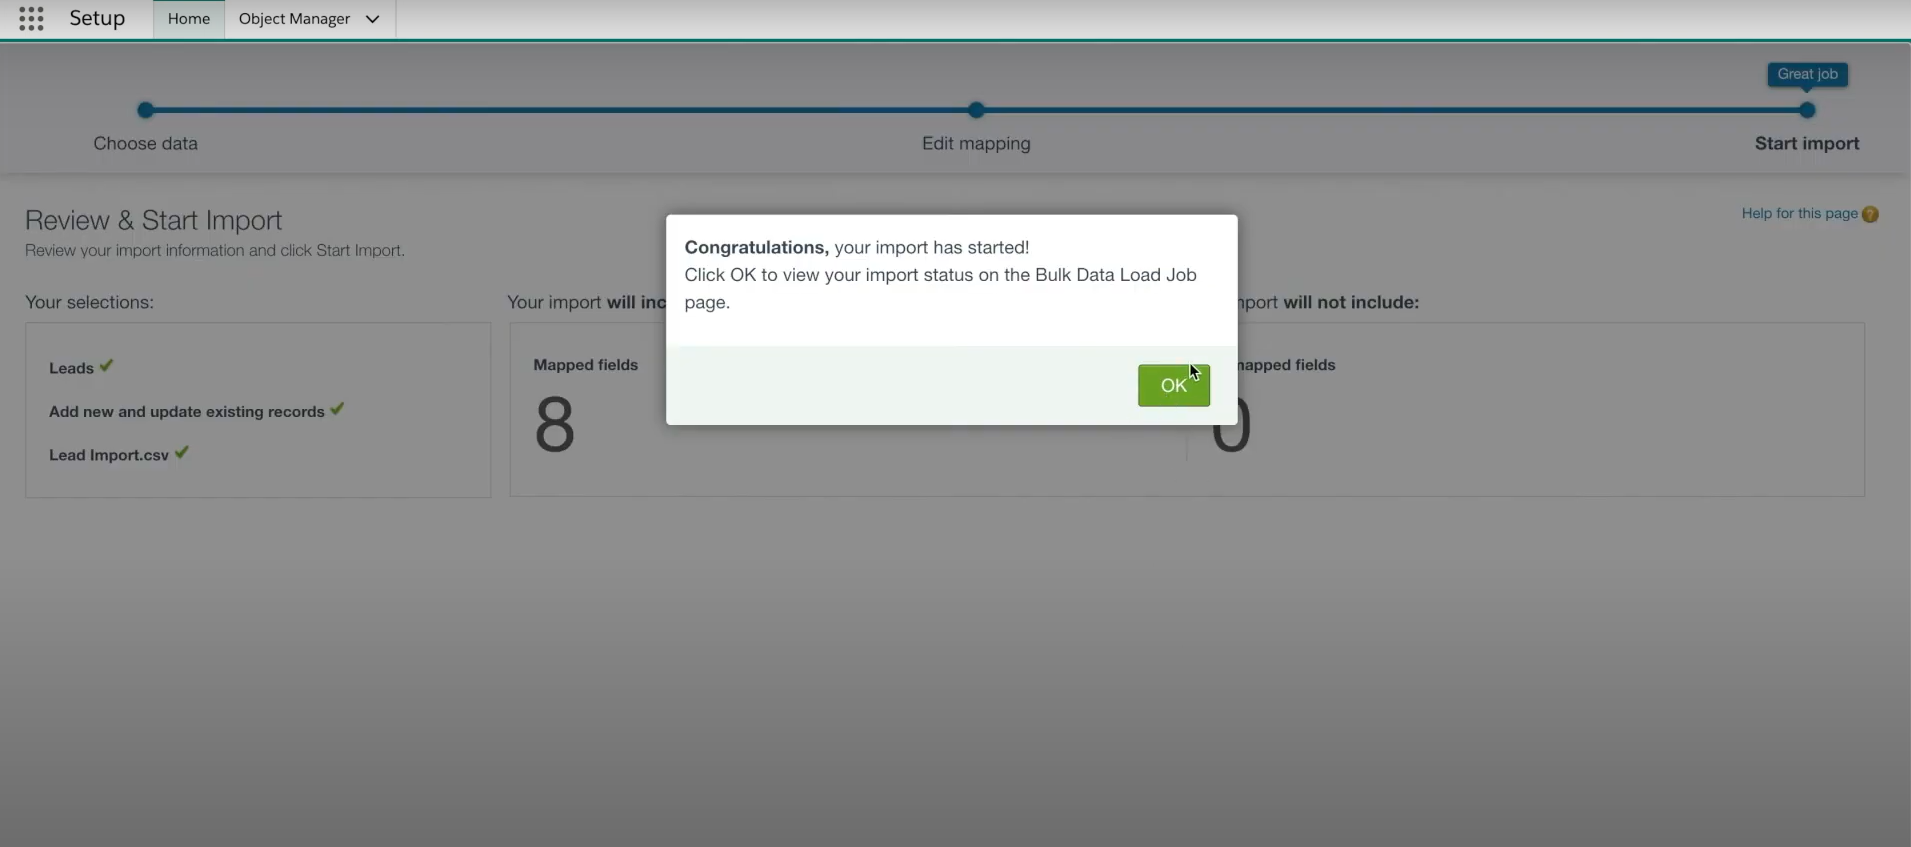
When the import is finished, Salesforce will have all of the necessary data. The manual Amazon Redshift Salesforce Integration is now complete. With this, the Xero to Redshift Integration is also completed.

Conclusion
In this article, you learned how to configure Xero to Redshift along with key features of both Xero and Redshift.
However, as a Developer, extracting complex data from a diverse set of data sources like Databases, CRMs, Project management Tools, Streaming Services, and Marketing Platforms to your Database can seem to be quite challenging. If you are from non-technical background or are new in the game of data warehouse and analytics, Hevo Data can help!
Try a 14-day free trial and experience the feature-rich Hevo suite firsthand. Also checkout our unbeatable pricing to choose the best plan for your organization.
FAQ on Xero to Redshift
1. How do I transfer data to redshift?
Transferring data to Amazon Redshift generally involves these steps:
– Prepare your Data
– Upload Data to Amazon S3
– Create an IAM Role
– Create a Redshift Table
– Use the COPY command
– Monitor the Load Process
2. How do I push data to AWS Redshift?
Pushing data to AWS Redshift follows similar steps as transferring data:
– Prepare your Data
– Upload Data to Amazon S3
– Create a Redshift Table
– Use the COPY command
3. Can Amazon Redshift be used as a data warehouse?
Yes, Amazon Redshift is widely used as a data warehouse solution.
You can also have a look at our unbeatable pricing that will help you choose the right plan for your business needs!

Share it with your connections.
-
 Share To X
-
 Share To LinkedIn
-
 Share To Facebook
-
 Copy Link


