


Table of Contents
Introduction
Integrating GitHub with Looker enables organizations to gain powerful insights into their development workflows, project management, and code repositories. By connecting GitHub data to Looker, teams can create customized dashboards and reports that provide a clear view of code changes, pull requests, issue tracking, and team performance. This integration empowers engineering and management teams to track key metrics, analyze trends, and make data-driven decisions, all from within Looker’s analytics platform. With real-time data visualization, organizations can improve transparency and collaboration across development projects.
Connecting GitHub to Looker
- From Looker Dashboard, click on Develop and go to your project.
- Click Configure GIT and select GitHub.
- Create a new repo on GitHub, and save its address URL.
- Inside Looker , put this URL of your repository, in the “repository URL” text box.
- Once Looker knows where to fetch from, you will have to specify your Looker “deploy key string” into GitHub, allow “Write access” and then add the key.
- Looker can then read and write into the GitHub repo.
- You can validate your LookML and commit it to the repo in production.
Some of your Github commands will also be available in the Looker dashboard.
The above procedure suffices when you make a new Git repo for your Looker project. More often than not, you would need to connect your existing repos to your Looker projects OR allow multiple developers to commit LookML in your repos.
Next, we discuss how to use existing repos and allow multiple/single developer access.
Single or Multiple Accounts
You can either have a single teamwide account, and all your developers can use that to commit to the repo. Looker will use this account to log into Git and make changes on behalf of the developers. Of course, this single user account must have read+write privileges on GitHub. Here, each individual developer’s Looker username is used to identify the committer on GitHub.
The other option is to let each developer use his individual account to commit changes on Git, and use one generic team-wide account to enable Looker to monitor changes as well as to pull the production version of files. Each individual developer account thus has both read+write access to the Git repo, whereas the single generic team-wide account should at least have read access. Here, the Looker admin has to set up each individual developer account, making sure to hide the password or access token attribute.
Improve your project management by exploring GitHub and Asana integration. Learn how syncing these tools can streamline your development and task tracking.
Hevo Data enables easy integration of GitHub as a data source, automating the extraction of key development data like commits, pull requests, and issues, and transferring it to destinations such as Snowflake, BigQuery, or Looker for real-time analysis.
What Hevo Offers?
- No-code Integration: Hevo allows you to connect GitHub without writing any code, streamlining the process of extracting data from repositories.
- Real-time Sync: Automatically sync GitHub data with your data warehouse or analytics platform, ensuring you have the latest insights.
HTTPS or SSH Access
Looker provides two methods to access your related Git repo, you can either use HTTPS or SSH.
For HTTPS access:
- Go to your project settings and click “configure GIT” ( for creating a new Git project) or “Reset GIT connection”( edit existing projects).
- Then go to your GIT repo, and copy the HTTPS (not SSH) URL for your Git repo.
- If you want to connect an existing repo, this URL can also be copied from the “Clone or Download” link, on the “Code” page of your Git repo.
- Paste this URL into the “configure GIT” dialogue in your Looker settings.
- Next, depending on whether you are using the “Single account” option or “Multiple accounts”, specify the credentials Looker will use for accessing the repo.
- If you are using a single team-wide account, choose the “Use a single, constant username and password combination” radio.
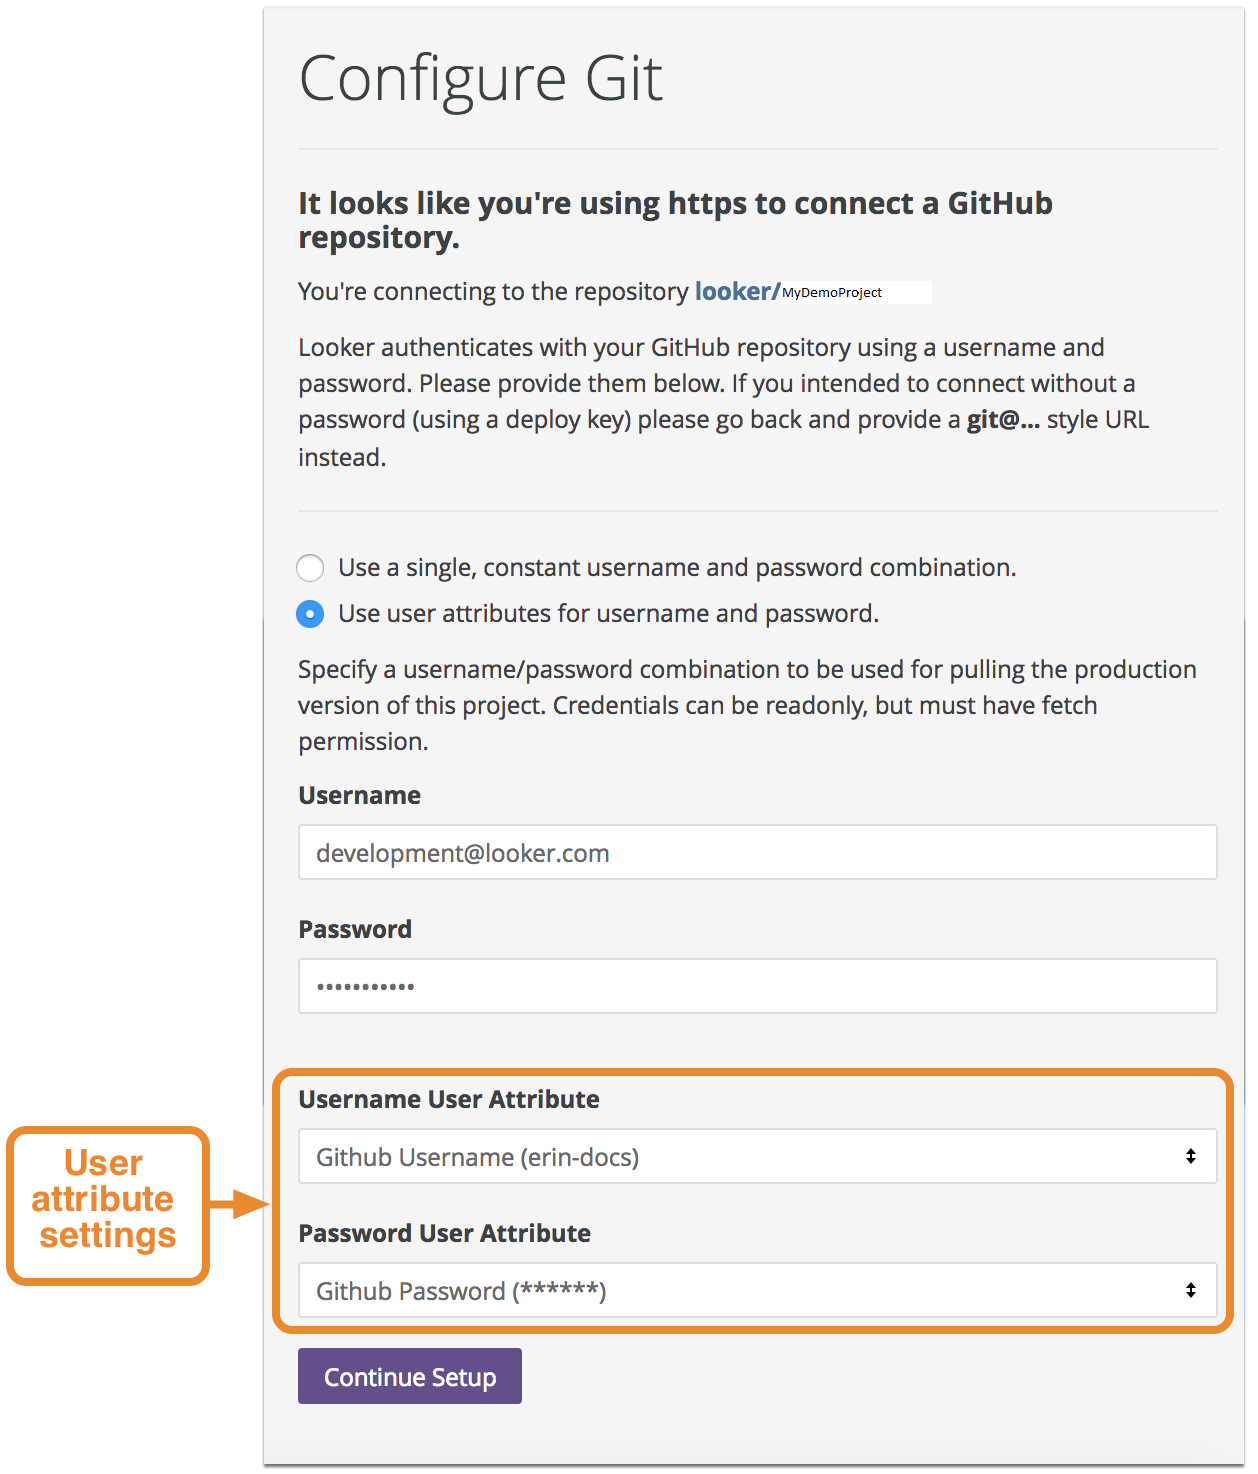
- Then specify the single account you want all your developers to share for all your commits. Else choose the “Use user attributes for username and password” radio button.
- . First specify that single generic team-wide account with at least read access, that Looker will use to pull the production version.
- Next, click the “Use user attributes for username and password” and specify the credentials for each individual developer account.
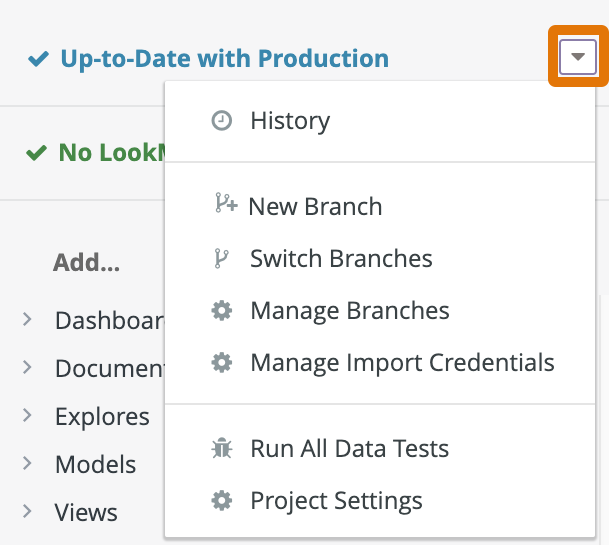
- Once setup is done, Looker allows you to use GIT commands from inside Looker, via the Git menu, on the top left.
For SSH access:
- To use SSH instead, copy the SSH ( not HTTPS) URL of your GitHub repo.
- Paste this URL into the “configure GIT” or “Reset GIT connection” dialogue in your Looker settings.
- Next, Looker will automatically detect your GIT provider and generate an SSH-RSA deploy key, copy this key.
- Go to your repo’s settings, click the “Add Deploy Key” button, and Paste it in your repo.
- Give it a suitable name, in future, you might be working on multiple Looker projects committing on different Git repos; thus, giving a meaningful name here will help in isolating the correct repo later.
- Finally, select the “Allow write access” option, this will give write access to Looker, on your repo.
- After clicking “Test and Finalize setup”, you must be ready for committing your LookerML code in your designated Git repo.
Happy coding!

Conclusion
To conclude, this article tries to discuss how to connect your GIT repo to your Looker instance, to commit your LookML code. These methods, however, can be challenging especially for a beginner & this is where Hevo saves the day.
Find out how to connect Power BI to GitHub effectively. Our resource provides clear instructions for setting up the connector and optimizing your data analysis.
Frequently Asked Questions
1. How to use Git in Looker?
You can use Git in Looker for version control of LookML projects by setting up a Git repository, working in development mode, committing changes, and deploying to production.
2. Is Google Looker free?
Looker is not free; it is a paid analytics platform with pricing based on enterprise needs.
3. Can you upload Excel to Looker?
You can upload Excel files to Looker indirectly by first uploading them to Google Sheets or importing the data into a database that Looker can access.

Share it with your connections.
-
 Share To X
-
 Share To LinkedIn
-
 Share To Facebook
-
 Copy Link


