


To make informed business decisions, you need real-time, high-quality data from all sources in one place. Traditional on-premise Data Warehouses lack scalability and require regular maintenance. Snowflake offers a cost-effective, instantly scalable Cloud solution with industry-leading query performance, complete SQL support, and powerful data analysis capabilities. This article will guide you through connecting DBT to Snowflake and explore different authorization methods.
dbt (Data Build Tool) is a Python-based transformation tool focusing on the “Transform” in ELT operations, simplifying Data Engineering tasks before analysis. If you’re a Snowflake user looking for a Data Transformation tool, dbt is an excellent option. It handles data modeling and transformations efficiently, converting SQL queries into tables and views for easy data transformation within Snowflake.
Assume you’re a Snowflake user in search of a data transformation tool. Then, since dbt can organize data modeling and data transformation operations, it fits nicely into the list of transformation tool options. dbt core connect to Snowflake can transform data that has already been loaded into your data warehouse. It can perform the letter ‘T’ in the word ‘ELT’ (Extract, Load, Transform).
Table of Contents
What is Snowflake?
Snowflake is the world’s first Cloud Data Warehouse solution, built on the infrastructure of a Cloud provider (AWS, Azure, or GCP) of the customer’s choice. Snowflake SQL is consistent with the ANSI standard and includes typical Analytics and Windowing capabilities. You’ll notice certain differences in Snowflake’s syntax, but you’ll also see some commonalities.
Snowflake’s Integrated Development Environment (IDE) is totally Web-based. To interact with your instance, go to XXXXXXXX.us-east-1.snowflakecomputing.com. After logging in, you’ll be sent to the primary Online GUI, which serves as the main IDE, where you can begin interacting with your data assets. Additionally, each query tab in the Snowflake interface is referred to as a “Worksheet” for convenience. These “Worksheets” are saved automatically and can be accessed at any time, similar to the tab history feature.
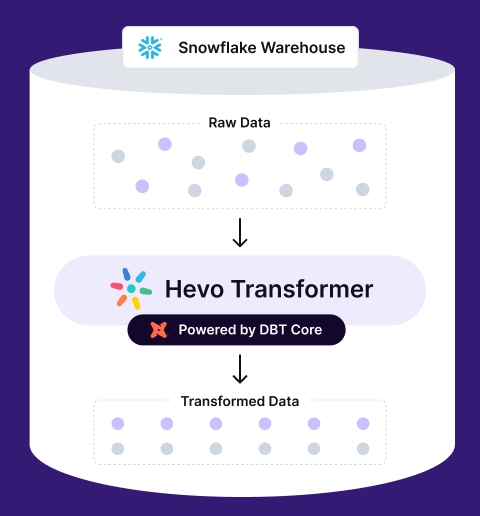
Seamlessly join, aggregate, modify your data on Snowflake. Automate dbt workflows, version control with Git, and preview changes in real-time. Build, test, and deploy transformations effortlessly, all in one place.
🔹 Instant Data Warehouse Integration – Connect in minutes, auto-fetch tables
🔹 Streamlined dbt Automation – Build, test, and run models with ease
🔹 Built-in Version Control – Collaborate seamlessly with Git integration
🔹 Faster Insights – Preview, transform, and push data instantly
Key Features of Snowflake
- Caching & Query Optimization: Snowflake uses caching to return repeated query results quickly and optimizes queries automatically through clustering and partitioning, eliminating the need for manual intervention.
- Secure Data Sharing: Snowflake enables seamless data sharing between accounts using tables, views, and UDFs, ensuring secure access to shared data.
- Support for Semi-Structured Data: It allows importing formats like JSON, Avro, Parquet, ORC, and XML, using the VARIANT data type for storing semi-structured data.
- SQL Support & Fault Tolerance: Snowflake supports both ANSI SQL and advanced SQL features like Merge and Statistical Functions, along with fault tolerance for recovering objects during failures.
What is dbt (Data Build Tool)?

The Python Application dbt (Data Build Tool) is a Transformation Tool that concentrates on the Transformation element of ELT (Extract, Load, Transform) procedures. Its goal is to execute Data Engineering tasks before using the data for Analytics. Select statements are utilized by dbt to execute transformations, which are then converted into Tables and Views, making the transformation process simple and effective.
dbt is available in two forms.
- dbt CLI: It is a command line interface that runs on a terminal.
- dbt Cloud: A web-based solution with an Integrated Development Environment.
You can read more about dbt in this comprehensive guide.
Key Features of dbt
- Accurate Documentation: dbt’s documentation is updated on a regular basis when new models are generated. It is also freely accessible at all times during the construction process. The documentation is generated based on the Specified Descriptions, Model Dependencies, SQL Files, Sources, and Configured Tests.
- Version Management: Version control has been more integrated thanks to the integration of GIT and dbt. In the associated GIT repository, all of the Project’s Models, Tests, Sources, Packages, and other Configurations are versioned.
- Testing: dbt includes prebuilt tests for uniqueness, non-nullity, referential integrity, and accepted value. Apart from the Default Tests, Jinja and SQL can be used to construct Custom Test Cases to offer further testing functionality.
- Refreshes of Data in the dbt Cloud: Without the use of an orchestration tool, it is possible to schedule refreshes in the production environment according to business requirements using dbt.
Who is dbt appropriate for?
Anyone who interacts with a data warehouse should use dbt. Data engineers, data analysts, and data scientists, as well as anyone who knows how to write SQL select queries, can use it.
If you’re new to programming, you’ll probably want to spend some time learning the basics of the command line and getting acquainted with git.
To get the most out of dbt, you should be familiar with some programming fundamentals, such as for loops and if statements, so you can use Jinja effectively in your models.
What are the Benefits and Drawbacks of dbt?
Benefits:
- Open-source, free, and well-documented, with easy setup and SQL-based usage.
- Enhances productivity for data engineers and analysts through collaboration and reuse.
- Supports data quality testing, automatic documentation, and integrated quality assurance.
- Enforces data pipeline standards while generating searchable data lineage and catalog information.
Drawbacks:
- Although there is a graphical user interface, it is primarily text-based.
- The focus is primarily on database data transformation.
What are the benefits of connecting dbt to snowflake?

- Converting Tables to Views: After successfully establishing dbt Snowflake. if there’s a need to convert a table to a view, you can simply update the materialization in a single config file.
- Stored Procedures: The models display the stored procedures developed in dbt, which may be viewed and modified after you connect dbt to Snowflake.
- Combining Transformation Logic: dbt uses dbt Tags to group together Transformation Logic that is comparable.
- Version Control: dbt integrates with GitHub to provide version control.
- Open-Source Community: Rather than beginning from scratch, the development could be aided by exchanging experiences with other developers.
How to Connect dbt to Snowflake?
Step 1: Create a Snowflake Account
The first step in the process to connect dbt to Snowflake is to create a Snowflake account and take note of the highlighted details, which will be used to connect dbt to Snowflake.

Step 2: Create a dbt Account
Try dbt Cloud Free to create an account with dbt. Create a new project once you’ve logged in. Follow the steps below to set up the newly created project.

To get started, click the start button. On the next page, select an acceptable dbt project name and click Continue. Select Snowflake from the list of Data Warehouses on the next screen.
Step 3: Configure dbt Snowflake Connection
While you connect dbt to Snowflake, you can configure the connection by filling in the following fields :

- Account: For the Snowflake account to which you want to connect, the Account Name should be abc12345.east-us-2.azure if the Snowflake account URL is abc12345.east-us-2.azure.snowflakecomputing.com.
- Role: After connecting to Snowflake, utilize this role. (This is an optional field.)
- Database: To perform queries, build a connection to this Logical Database in the Data Warehouse.
- Data Warehouse: The Virtual Warehouse will be used to conduct queries.
- Auth Methods: There are two Auth methods:
- Username / Password: Enter the Snowflake username (particularly, the login name) and the matching user’s Snowflake password to authorize dbt Cloud to perform Snowflake queries on behalf of a Snowflake user.
- Key Pair: When used from a dbt Cloud project, the Keypair auth method uses Snowflake’s Key Pair Authentication to authenticate the credentials. For the authentication process, rsa_public_key should be configured for the Snowflake user after generating an encrypted key pair.

After you connect dbt to Snowflake, you can test the connection once the credentials have been provided. Connect dbt to an empty GIT repository after a successful connection.
Step 4: Connect dbt with your GitHub Repository
Connect dbt to Snowflake with your GitHub repository. Create a new repository on GitHub with the same email address that you used to create your dbt Cloud account. On the setup repository screen, click GitHub.
- Click the link to your GitHub Account on the integrations page.
- Select only the selected repositories and the newly formed dbt repository, then click Install. You will be routed to the Integrations page after installation. To return to the remainder of your account, go to the hamburger menu in the top left corner of your dbt page click on the Home Page, and click on Continue.
- The link to your repository will be highlighted below if you click on GitHub again. Click on that repository, then proceed once it has been successfully connected.
By following the above steps, you should now be able to connect dbt to Snowflake successfully!
What are the Ways to Authenticate your dbt Snowflake Integration?
All Configurations
Read along to know the ways to authentically connect dbt to Snowflake, The “basic” Snowflake Target Configs are shown below.
Note: You should additionally supply auth-related configs appropriate to the authentication method you’re using.
| Config | Required? | Description |
| account | Yes | The account to connect to as per Snowflake’s documentation. See notes below |
| user | Yes | The user logs in as |
| database | Yes | The database that dbt should create models in |
| warehouse | Yes | The warehouse to use when building models |
| schema | Yes | The schema to build models into by default. Can be overridden with custom schemas |
| role | No (but recommended) | The role to assume when running queries as the specified user. |
| client_session_keep_alive | No | If provided, issue a periodic select statement to keep the connection open when particularly long-running queries are executing (> 4 hours). Default: False (see note below) |
| threads | No | The number of concurrent models dbt should build. Set this to a higher number if using a bigger warehouse. Default=1 |
| query_tag | No | A value with which to tag all queries, for later searching in QUERY_HISTORY view |
| retry_all | No | A boolean flag indicating whether to retry on all Snowflake connector errors |
| retry_on_database_errors | No | A boolean flag indicating whether to retry after encountering errors of type snowflake.connector.errors.DatabaseError |
| connect_retries | No | The number of times to retry after an unsuccessful connection |
| connect_timeout | No | The number of seconds to sleep between failed connection retries |
The above configurations are used in the 3 types of Auth methods:

1) Key Pair Authentication
If you want to employ Key Pair Authentication, leave out the password and instead give your target a private_key_path and, optionally, a private_key_passphrase. Note that prior to version 0.16.0, private keys had to be encrypted and a private_key_passphrase had to be provided. In dvtv0.16.0, this behavior was changed.
my-snowflake-db:  target: dev  outputs:    dev:      type: snowflake      account: [account id]      user: [username]      role: [user role]
      # Keypair config      private_key_path: [path/to/private.key]      private_key_passphrase: [passphrase for the private key, if key is encrypted]
      database: [database name]      warehouse: [warehouse name]      schema: [dbt schema]      threads: [1 or more]      client_session_keep_alive: False      query_tag: [anything]
      # optional      connect_retries: 0 # default 0      connect_timeout: 10 # default: 10      retry_on_database_errors: False # default: false      retry_all: False  # default: false
2) Password or User Authentication
As demonstrated below, Snowflake can be configured using basic User/Password Authentication.
my-snowflake-db: target: dev outputs: dev: type: snowflake account: [account id]
my-snowflake-db:  target: dev  outputs:    dev:      type: snowflake      account: [account id]
      # User/password auth      user: [username]      password: [password]
      role: [user role]      database: [database name]      warehouse: [warehouse name]      schema: [dbt schema]      threads: [1 or more]      client_session_keep_alive: False      query_tag: [anything]
      # optional      connect_retries: 0 # default 0      connect_timeout: 10 # default: 10      retry_on_database_errors: False # default: false      retry_all: False  # default: false
3) SSO Authentication
If you want to use SSO authentication with Snowflake, don’t use a password and instead give your target an authenticator config. ‘externalbrowser’ or a valid Okta URL can be used as an authenticator.
my-snowflake-db:  target: dev  outputs:    dev:      type: snowflake      account: [account id]
      # User/password auth      user: [username]      password: [password]
      role: [user role]      database: [database name]      warehouse: [warehouse name]      schema: [dbt schema]      threads: [1 or more]      client_session_keep_alive: False      query_tag: [anything]
      # optional      connect_retries: 0 # default 0      connect_timeout: 10 # default: 10      retry_on_database_errors: False # default: false      retry_all: False  # default: false
Conclusion
This article has exposed you to various insights on how to connect dbt to Snowflake to help you improve your overall decision-making and experience when trying to make the most out of your data. In case you want to export data from a source of your choice into your desired Database/destination like Snowflake, then Hevo Data is the right choice for you!
Hevo Data provides its users with a simpler platform for integrating data from 150+ sources for Analysis. It is a No-code Data Pipeline that can help you combine data from multiple sources. You can use it to transfer data from multiple data sources into your Data Warehouses such as Snowflake, Database, or a destination of your choice. It provides you with a consistent and reliable solution to managing data in real-time, ensuring that you always have Analysis-ready data in your desired destination.
Want to take Hevo for a spin?Want to take Hevo for a spin? Explore Hevo’s 14-day free trial and experience the feature-rich Hevo suite firsthand. You can also have a look at our unbeatable pricing that will help you choose the right plan for your business needs!
Share your experience of learning about how to connect dbt to Snowflake! Let us know in the comments section below!
Frequently Asked Questions
1. What is the dbt tool used for snowflakes?
dbt (data build tool) is a popular open-source tool used for data transformation and modeling in modern data warehouses like Snowflake.
2. Which schema is faster star or Snowflake?
The Star Schema is generally faster for query performance due to simpler joins and a more straightforward structure. The Snowflake Schema can be more efficient in terms of storage and data integrity but may result in slower queries due to additional joins.
3. Why is Snowflake better than Postgres?
The Star Schema is generally faster for query performance due to simpler joins and a more straightforward structure. The Snowflake Schema can be more efficient in terms of storage and data integrity but may result in slower queries due to additional joins.

Share it with your connections.
-
 Share To X
-
 Share To LinkedIn
-
 Share To Facebook
-
 Copy Link


