


Salesforce is a SaaS (Software as a Service) cloud-based company that provides clients with CRM (Customer Relationship Management) solutions as well as a broad range of enterprise applications to simplify marketing automation, analytics, application management, and development, and improve customer service.
Amazon Redshift is a well-known Data Warehouse with a plethora of features and efficiency. It contains a large amount of raw data gathered from many sources. This data is tough to interpret, and Data Modeling Tools help by providing a platform that allows you to model data fast and efficiently.
In this article, you will learn how to integrate Salesforce Pardot to Redshift in two methods and also the key features of both.
Table of Contents
What is Salesforce Pardot?

Salesforce Pardot is a Marketing Automation Application that is built on the Salesforce platform that helps users manage their leads and customer relationships with simplicity. Pardot is a Marketing Automation Platform that aims to help organizations handle their leads more efficiently and effectively.
It also enables organizations to track and assess the performance of their efforts via a unified dashboard, allowing them to determine the marketing impact of various initiatives and have a better understanding of how their marketing campaigns are performing. It integrates with B2B marketing analytics and assists companies in engaging buyers through a variety of lead-generating efforts. Pardot has several tools that organizations may use to improve the efficiency of their lead generation and marketing operations.
Before you get into how to use Salesforce Pardot to design and manage campaigns, it’s vital to go over some of the platform’s key features.
Key Features of Salesforce Pardot
Salesforce Pardot has several fantastic capabilities that organizations can utilize to better manage their campaigns and boost their marketing ROI. Here are some of Pardot’s top features:
- Simplified Automation: One of Pardot’s biggest benefits is that it enables more automation. You don’t have to worry about going through a checklist before sending an email to your marketing list any longer. Pardot not only allows you to schedule emails, but it also gives you more power by allowing you to:
- Create segmented audience lists that are targeted.
- Make automated rules.
- Automate various processes based on the actions you take on the page.
- Generate custom redirects that are unique to you.
- Tailor the content that a prospect sees by using dynamic content.
- No-Code Friendliness: One of the most appealing aspects of Pardot is that it does not necessitate any prior understanding of CSS or HTML to fully utilize the platform. This makes it logical, given that marketers will be using Pardot more than engineers. Instead of looking for the relevant portions in HTML, Pardot allows users to change different template drafts within the content editor, similar to WordPress.
- Insightful Reporting: You can utilize Pardot’s reporting tools to determine the efficacy of your marketing initiatives. The List Email Reports tool is also extremely useful, providing users with detailed information on how their sent emails are performing. You can get more information about the performance of your emails by clicking on one of three main tabs:
- The Open Rates, Bounced Email Rates, and Unopened Email Rates tabs provide open, bounced, and unopened email rates.
- The Interaction tab displays activity related to how your emails were received, such as how many individuals skimmed, glanced, or read them.
- The Email Clients tab displays the devices on which your receivers read your emails.
- Real-Time Edits: Salesforce Pardot allows you to examine your landing page in real-time while making updates to see how the changes will appear. Because all updates are made live on the website, this can save you a lot of time and effort. You can also do a lot of A/B testing to evaluate what works and what needs to be changed.
Method 1: Pardot to Redshift Integration using Hevo
Hevo Data, an Automated Data Pipeline, provides you a hassle-free solution to connect Pardot to Redshift within minutes with an easy-to-use no-code interface. Hevo is fully managed and completely automates the process of not only loading data from Kafka but also enriching the data and transforming it into an analysis-ready form without having to write a single line of code.
Method 2: Pardot to Redshift Manual Integration
This method would be time-consuming and somewhat tedious to implement. Users will have to write custom codes to enable two processes, streaming data from Pardot to Salesforce and then ingesting data into Redshift. This method is suitable for users with a technical background.
Get Started with Hevo for FreeWhat is Amazon Redshift?

Amazon Redshift is a petabyte-scale data warehousing service that is cloud-based and completely managed. It allows you to start with a few gigabytes of data and work your way up to a petabyte or more. Data is organized into clusters that can be examined at the same time via Amazon Redshift. As a result, Amazon Redshift data may be rapidly and readily retrieved. Each node can be accessed individually by users and apps.
Many existing SQL-based clients, as well as a wide range of data sources and data analytics tools, can be used with Amazon Redshift. It features a strong architecture that makes it simple to interface with a wide range of Business Intelligence tools.
Each Redshift Data Warehouse is fully managed, which means administrative tasks like backup creation, security, and configuration are all automated.
Because Amazon Redshift was designed to handle large amounts of data, its modular design allows it to scale easily. The multi-layered structure of Amazon Redshift enables handling several inquiries at once simpler.
Slices can be created from Redshift clusters, allowing for a more granular examination of data sets.
Key Features of Amazon Redshift
Here are some of Amazon Redshift’s important features:
- Column-oriented Databases: In a database, data can be organized into rows or columns. Row-orientation databases make up a large percentage of OLTP databases. In other words, these systems are built to perform a huge number of minor tasks such as DELETE, UPDATE, and so on. When it comes to accessing large amounts of data quickly, a column-oriented database like Redshift is the way to go. Redshift focuses on OLAP operations and SELECT operations have been improved.
- Secure End-to-end Data Encryption: All businesses and organizations must comply with data privacy and security regulations, and encryption is one of the most important aspects of data protection. Amazon Redshift uses SSL encryption for data in transit and hardware-accelerated AES-256 encryption for data at rest. All data saved to the disc is encrypted, as are any backup files. You won’t need to worry about key management because Amazon will take care of it for you.
- Massively Parallel Processing (MPP): Amazon Redshift, like Netezza, is an MPP appliance. MPP is a distributed design approach for processing large data sets that employ a “divide and conquer” strategy among multiple processors. A large processing work is broken down into smaller tasks and distributed among multiple compute nodes. To complete their calculations, the compute node processors work in parallel rather than sequentially.
- Cost-effective: Amazon Redshift is the most cost-effective cloud data warehousing alternative. The cost is estimated to be a tenth of the cost of traditional on-premise warehousing. Consumers simply pay for the services they use; there are no hidden costs. You may discover more about pricing on the Amazon Redshift official website.
- Scalable: Amazon Redshift, a petabyte-scale data warehousing technology from Amazon, is scalable. Amazon Redshift is simple to use and scales to match your needs. With a few clicks or a simple API call, you can instantly change the number or kind of nodes in your Data Warehouse, and scale up or down as needed.
Pardot to Redshift ETL Integration Process
Here you will learn how to integrate Pardot to Redshift using two methods:
Method 1: Pardot to Redshift Integration Using Hevo
Hevo provides Amazon Redshift as a Destination for loading/transferring data from any Source system, which also includes Pardot. You can refer to Hevo’s documentation for Permissions, User Authentication, and Prerequisites for Amazon Redshift as a destination here. Hevo uses your SSO-enabled Salesforce credentials to access the data in your Pardot environment.
Configuring Pardot as a Source
Configure Pardot as a Source for Pardot to Redshift Integration in your Pipeline by following these steps:
- Step 1: In the Asset Palette, choose PIPELINES.
- Step 2: In the Pipelines List View, click + CREATE.
- Step 3: Select Pardot on the Select Source Type page.
- Step 4: Click + ADD SALESFORCE ACCOUNT LINKED TO PARDOT on the Configure your Salesforce Account linked to Pardot page.

- Step 5: Click CONTINUE after selecting the environment linked with your Salesforce login.
- Step 6: Go to your Salesforce account and sign in.
- Step 7: Allow Hevo access to your Pardot environment by clicking Allow. After that, you’ll be taken to the Configure your Pardot Source page.
- Step 8: Set the following parameters on the Configure your Pardot Source page for Pardot to Redshift Integration:
- Pipeline Name: Give your Pipeline a unique name.
- Domain Name for Pardot: Enter the domain name for your Pardot data.
- Pardot Business Unit ID: A unique identity for the Pardot business unit whose data you want to replicate. It has a length of 18 characters and starts with the value 0Uv.
- Historical Sync Duration: The time it takes to absorb historical data. By default, the historical sync duration is set to All Available Data.
- Step 9: TEST & CONTINUE should be selected for Pardot to Redshift Integration.
- Step 10: Proceed to setting up the Destination and configuring the data ingestion.
You can refer to Pardot docs for further information for Pardot to Redshift Integration.
Configuring Redshift as a Destination
To set up Amazon Redshift as a destination in Hevo for Pardot to Redshift Integration, follow these steps:
- Step 1: In the Asset Palette, select DESTINATIONS.
- Step 2: In the Destinations List View, click + CREATE.
- Step 3: Select Amazon Redshift from the Add Destination page.
- Step 4: Set the following parameters on the Configure your Amazon Redshift Destination page:
- Destination Name: Give your destination a unique name.
- Database Cluster Identifier: The IP address or DNS of the Amazon Redshift host is used as the database cluster identifier.
- Database Port: The port on which your Amazon Redshift server listens for connections is known as the database port. 5439 is the default value.
- Database User: In the Redshift database, a user with a non-administrative position.
- Database Password: The user’s password.
- Database Name: The name of the destination database into which the data will be loaded.
- Database Schema: The Destination database schema’s name. The default setting is public.

- Step 5: To test connectivity with the Amazon Redshift warehouse in Pardot to Redshift Integration, click Test Connection.
- Step 6: When the test is complete, select SAVE DESTINATION for Pardot to Redshift Integration.
Method 2: Pardot to Redshift Manual Integration
To manually integrate Pardot to Redshift, you must first connect Pardot to Salesforce and then Salesforce to Redshift.
Step 1: Pardot to Salesforce Integration
You must log in to your Pardot Dashboard and perform the following procedures after installing the Pardot AppExchange Package from this installation link and setting access rights for just Admins (recommended) to perform Pardot to Redshift Integration.
- Step 1: To add Salesforce Connector, go to your Pardot Admin Panel on the right side of the Pardot Dashboard and click +Add Connector. You’ll notice a Salesforce Connector in the Connectors Description Panel if your Pardot already has one.
- Step 2: In the Create Connector section, look for Salesforce.com and click it.
- Step 3: You’ll be prompted to connect to Salesforce Sandbox in a verification window. Check the box and then click the Create Connector button if you want to connect Pardot to your Salesforce Sandbox.
- Step 4: Pardot will authorize Pardot Salesforce Integration and ask you to log into your Salesforce account. To enable Data Sync and perform Pardot Salesforce Integration, click Allow for Pardot to Redshift Integration.
- Step 5: Once you’ve logged in and authenticated, you’ll be prompted to change a few settings.
To complete the process, choose the necessary checkboxes from the list and then click Finish for Pardot to Redshift Integration.
Step 2: Salesforce to Redshift Integration
The following procedures can be used to manually export Amazon Redshift data as CSV files in order to set up Amazon Redshift Salesforce Integration for Pardot to Redshift Integration:
- Step 1: Open the Amazon S3 Console by logging into your AWS account.
- Step 2: Select Create Bucket from the drop-down menu.
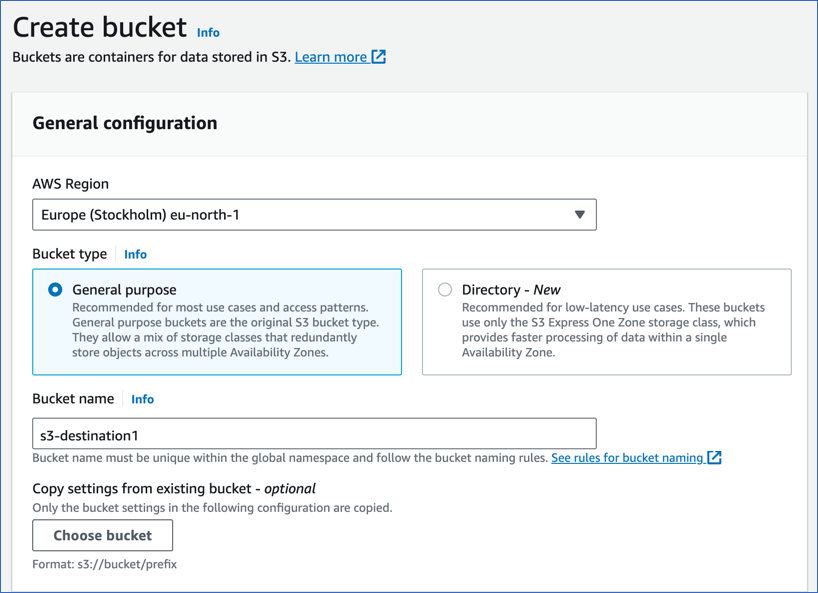
- Step 3: Choose a good Bucket Name based on your needs. It’s vital to note, however, that Amazon S3 Buckets must have distinct names across the board, therefore it should be named appropriately. Click Create Bucket after selecting an appropriate region and unchecking Block all Public Access.
- Step 4: Make a note of the URL for this bucket and put it somewhere safe.
- Step 5: Use an SQL Client such as SQL Workbench/J, Aginity Pro, Jetbrains DataGrip, or others, to connect to your Amazon Redshift Cluster from which you want to export data.
- Step 6: The UNLOAD query can be used to export data from the Amazon Redshift Cluster and load it into Amazon S3. The UNLOAD query has the following syntax:
UNLOAD ('select-statement')
TO 's3://object-path/name-prefix'
authorization
[ option [ ... ] ]
where option is
{ [ FORMAT [ AS ] ] CSV | PARQUET
| PARTITION BY ( column_name [, ... ] ) [ INCLUDE ]
| MANIFEST [ VERBOSE ]
| HEADER
| DELIMITER [ AS ] 'delimiter-char'
| FIXEDWIDTH [ AS ] 'fixedwidth-spec'
| ENCRYPTED [ AUTO ]
| BZIP2
| GZIP
| ZSTD
| ADDQUOTES
| NULL [ AS ] 'null-string'
| ESCAPE
| ALLOWOVERWRITE
| CLEANPATH
| PARALLEL [ { ON | TRUE } | { OFF | FALSE } ]
| MAXFILESIZE [AS] max-size [ MB | GB ]
| REGION [AS] 'aws-region' }
- Step 7: From the Amazon S3 Bucket, you can now download the exported data.
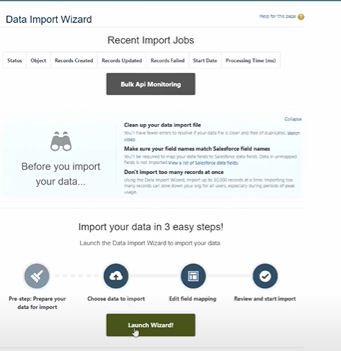
- Step 8: Log in to your Salesforce account and search for Data Import Wizard in the Quick Box.
- Step 9: Select Launch Wizard from the drop-down menu.
- Step 10: Select Standard Objects if you want to import contacts, accounts, person accounts, leads, articles, or solutions. Click Custom Objects if you want to import custom objects in Pardot to Redshift Integration.
- Step 11: Choose whether to create new Salesforce records, edit existing records, or add and update records at the same time.
- Step 12: Drag the CSV file from Amazon Redshift to the upload portion of the page.
- Step 13: Because the data was exported as a CSV file, make sure the value separator is set to a comma and then click Next.
- Step 14: The Salesforce Data Import Wizard will now attempt to automatically match as many properties as possible. The remaining ones will need to be manually mapped. Each unmapped field has a Map button to the left of it. You can search for and select up to ten qualities to map within the Map Your Field box, then click Map. If you want to change any of the automatically mapped attributes, click the Change button to the left of the attribute, erase the Salesforce mapping, select the Salesforce attribute you want to map it to, and then click Map. Click Next once all of the properties have been mapped to the requirements.
- Step 15: A Review Page will now appear, displaying a summary of all the import settings as well as the attribute mapping in Pardot to Redshift Integration. Start Import if you don’t want to make any changes.
When the import is finished, Salesforce will have all of the necessary data. The manual Amazon Redshift Salesforce Integration is now complete. With this, the Pardot to Redshift Integration is also completed.

Conclusion
In this article, you learned how to configure Pardot to Redshift and how to load data into Redshift along with key features or both Pardot and Redshift.
However, as a Developer, extracting complex data from a diverse set of data sources like Databases, CRMs, Project management Tools, Streaming Services, and Marketing Platforms to your Database can seem to be quite challenging. If you are from non-technical background or are new in the game of data warehouse and analytics, Hevo Data can help!
Hevo Data will automate your data transfer process, hence allowing you to focus on other aspects of your business like Analytics, Customer Management, etc. This platform allows you to transfer data from 150+ multiple sources like Salesforce Paradot to Cloud-based Data Warehouses like Snowflake, Google BigQuery, Amazon Redshift, etc. It will provide you with a hassle-free experience and make your work life much easier.
Want to take Hevo for a spin? Try Hevo’s 14-day free trial and experience the feature-rich Hevo suite firsthand.
You can also have a look at our unbeatable pricing that will help you choose the right plan for your business needs!
Frequently Asked Questions
1. How to load data from SQL Server to Redshift?
a) AWS Database Migration Service (DMS): A managed service for migrating data.
b) AWS Glue: ETL service to extract, transform, and load data.
c) SQL Server Integration Services (SSIS): Use SSIS with a Redshift connector.
d) Manual Export/Import: Export data to CSV and use the COPY command to load it into Redshift.
2. How do I load data from Excel to Redshift table?
a) Export: Save Excel data as a CSV file.
b) Upload: Upload the CSV file to an Amazon S3 bucket.
c) Load: Use the COPY command to load data from S3 into Redshift.
3. Does Redshift replicate data?
Amazon Redshift provides several features for data replication and redundancy.

Share it with your connections.
-
 Share To X
-
 Share To LinkedIn
-
 Share To Facebook
-
 Copy Link


