Python Rest APIs: 5 Important Commands, Key Modules, and Examples

By: Published: October 20, 2021

Python REST API FI

On the Internet, there is an incredible amount of information. Many web services, such as YouTube and GitHub, provide an Application Programming Interface (API) that allows Third-Party programs to access their data. The REST Architecture Style is one of the most popular techniques to construct APIs. Python has a number of useful tools for both retrieving data from REST APIs and creating your own Python REST APIs.

In this in-depth article, you will get to know about Python REST APIs, along with the considerations you should have in mind during the process, key modules, and comprehensive examples.

Table of Contents

What is REST API?

REST stands for Representational State Transfer, and it’s a Software Architecture style that establishes a paradigm for Client-Server Communication via the Internet. REST is a set of software architecture restrictions that promotes System Performance, Scalability, Simplicity, and Dependability.

The following architectural limitations are defined by REST:

  • Stateless: The server will not keep any state between client requests.
  • Client-server Architecture: The Client and Server must be divorced from one another so that each can develop independently.
  • Cacheable: Data acquired from the Server should be cacheable by either the Client or the Server.
  • Standard Interface: Without defining their representation, the server will provide a standard interface for accessing resources.
  • Layered System: The client can indirectly access server resources via other layers such as a proxy or load balancer.
  • Code on Demand (optional): The server can send executable code to the client, such as JavaScript for a single-page application.

Any Web Service that follows the REST Architecture restrictions is referred to as a REST Web Service. These online services use an API to make their data available to the public. REST APIs allow users to access web service data via public web URLs. Python REST API is one such API.

For example, here’s one of the GitHub REST API’s URLs:

https://api.github.com/users/<username>

You can use this URL to get information on a certain GitHub user. Sending an HTTP request to a specific URL and processing the answer is how you get data from a Python REST API.

HTTP Methods

To determine which actions to perform on the Web Service’s resources, REST APIs listen for HTTP methods like GET, POST, and DELETE. Any data in the Web Service that can be accessed and altered with HTTP queries to the REST API is referred to as a resource. The HTTP method instructs the API on how to handle the resource.

Although there are numerous HTTP methods, the following five are the most typically used with Python REST APIs:

Python Rest API - HTTP Methods
Image Source

These five HTTP methods can be used by a Python REST API Client Application to manage the state of resources in the web service.

Status Codes

An HTTP Response is returned by a Python REST API or any API after it receives and executes an HTTP request. An HTTP Status Code is included in this response. This code contains information on the request’s outcomes. The Status-Code can be checked by an application submitting requests to the API and actions can be taken based on the result. Handling Errors or providing a success message to a user are examples of these actions.

The most frequent status codes returned by Python REST APIs are listed below:

These ten Status Codes are merely a small portion of the total number of HTTP Status Codes accessible. The numbering of Status Codes is based on the category of the result:

When working with Python REST APIs or any APIs, HTTP Status Codes come in handy because you’ll often need to apply various logic depending on the request’s results.

REST Architecture

With REST Architecture comes the elasticity with which professionals implement pagination. REST has a defined set of main (or general) constraints which act vital when developing RESTful APIs. Let’s have a look at them:

  1. Client-Server: The client-server restriction is based on the idea that the client and server should be kept separate and permitted to grow independently. In other words, I should be able to make modifications to my mobile application without affecting the server’s data structure or database design. At the same time, I should be able to make changes to the database or my server program without affecting the mobile client. This offers a separation of concerns, allowing one application to expand and scale independently of the others, allowing your company to grow swiftly and effectively.
  2. Stateless: Python REST APIs are stateless, which means that calls may be made independently of one another, and each call contains all of the data required to properly finish itself. A Python REST API should not rely on data saved on the server or sessions to determine what to do with a request, but should instead rely purely on the data supplied in that call. When making calls, no identifying information is retained on the server. Instead, each request contains all of the relevant data, such as the API key, access token, user ID, and so on.
  3. Cache: A Python REST API should be built to facilitate the storing of cacheable data since a stateless API can raise request overhead by managing massive loads of incoming and outgoing requests. This implies that when data is cacheable, the answer should indicate that the data can be saved up to a particular period, or that the response should not be cached by the client in circumstances when data must be real-time. By activating this essential limitation, you will not only significantly minimize the number of contacts with your API and decrease internal server consumption, but you will also offer your API users the tools they need to create the quickest and most efficient apps imaginable.
  4. Uniform Interface: The key to decoupling client and server is to provide a standard interface that permits independent growth of the program without the application’s services, models, or actions being tightly tied to the API layer itself. The uniform interface enables the client to communicate with the server in a single language, regardless of the architectural backing. This interface should provide a consistent, standardized way for the client and server to communicate.
  5. Layered System: A layered system, as the name indicates, is a system made up of levels, each with its own set of functions and responsibilities. When considering a Model View Controller structure, each layer has its own set of duties, with the models determining how data should be created, the controller focused on incoming actions, and the view focusing on output. Each layer is distinct, but they all interact with one another. The same approach applies to Python REST API design, with different levels of the architecture collaborating to establish a hierarchy that aids in the creation of a more scalable and flexible application.
  6. Code on Demand: Code on Demand, maybe the least known of the six constraints and the only optional constraint, permits code or apps to be delivered over the API for usage within the application. In essence, it generates a smart programme that is no longer entirely reliant on its own code structure. However, maybe because it was ahead of its time, Code on Demand has struggled to gain traction as Web APIs are accessed in numerous languages and code transfer raises security issues. (For example, the directory must be writeable, and the firewall must allow ordinarily prohibited information to get through.)

What is Python?

Python is a high-level, general-purpose programming language that is interpreted. The use of considerable indentation in its design philosophy emphasizes code readability. Its language elements and object-oriented approach are aimed at assisting programmers in writing clear, logical code for both small and large-scale projects.

Python is garbage-collected and dynamically typed. It supports a variety of programming paradigms, including structured (especially procedural) programming, object-oriented programming, and functional programming. Owing to its extensive standard library, it is often referred to as a “batteries included” language.

For further information on Python, check out the official website here.

Simplify ETL with Hevo’s No-code Data Pipeline

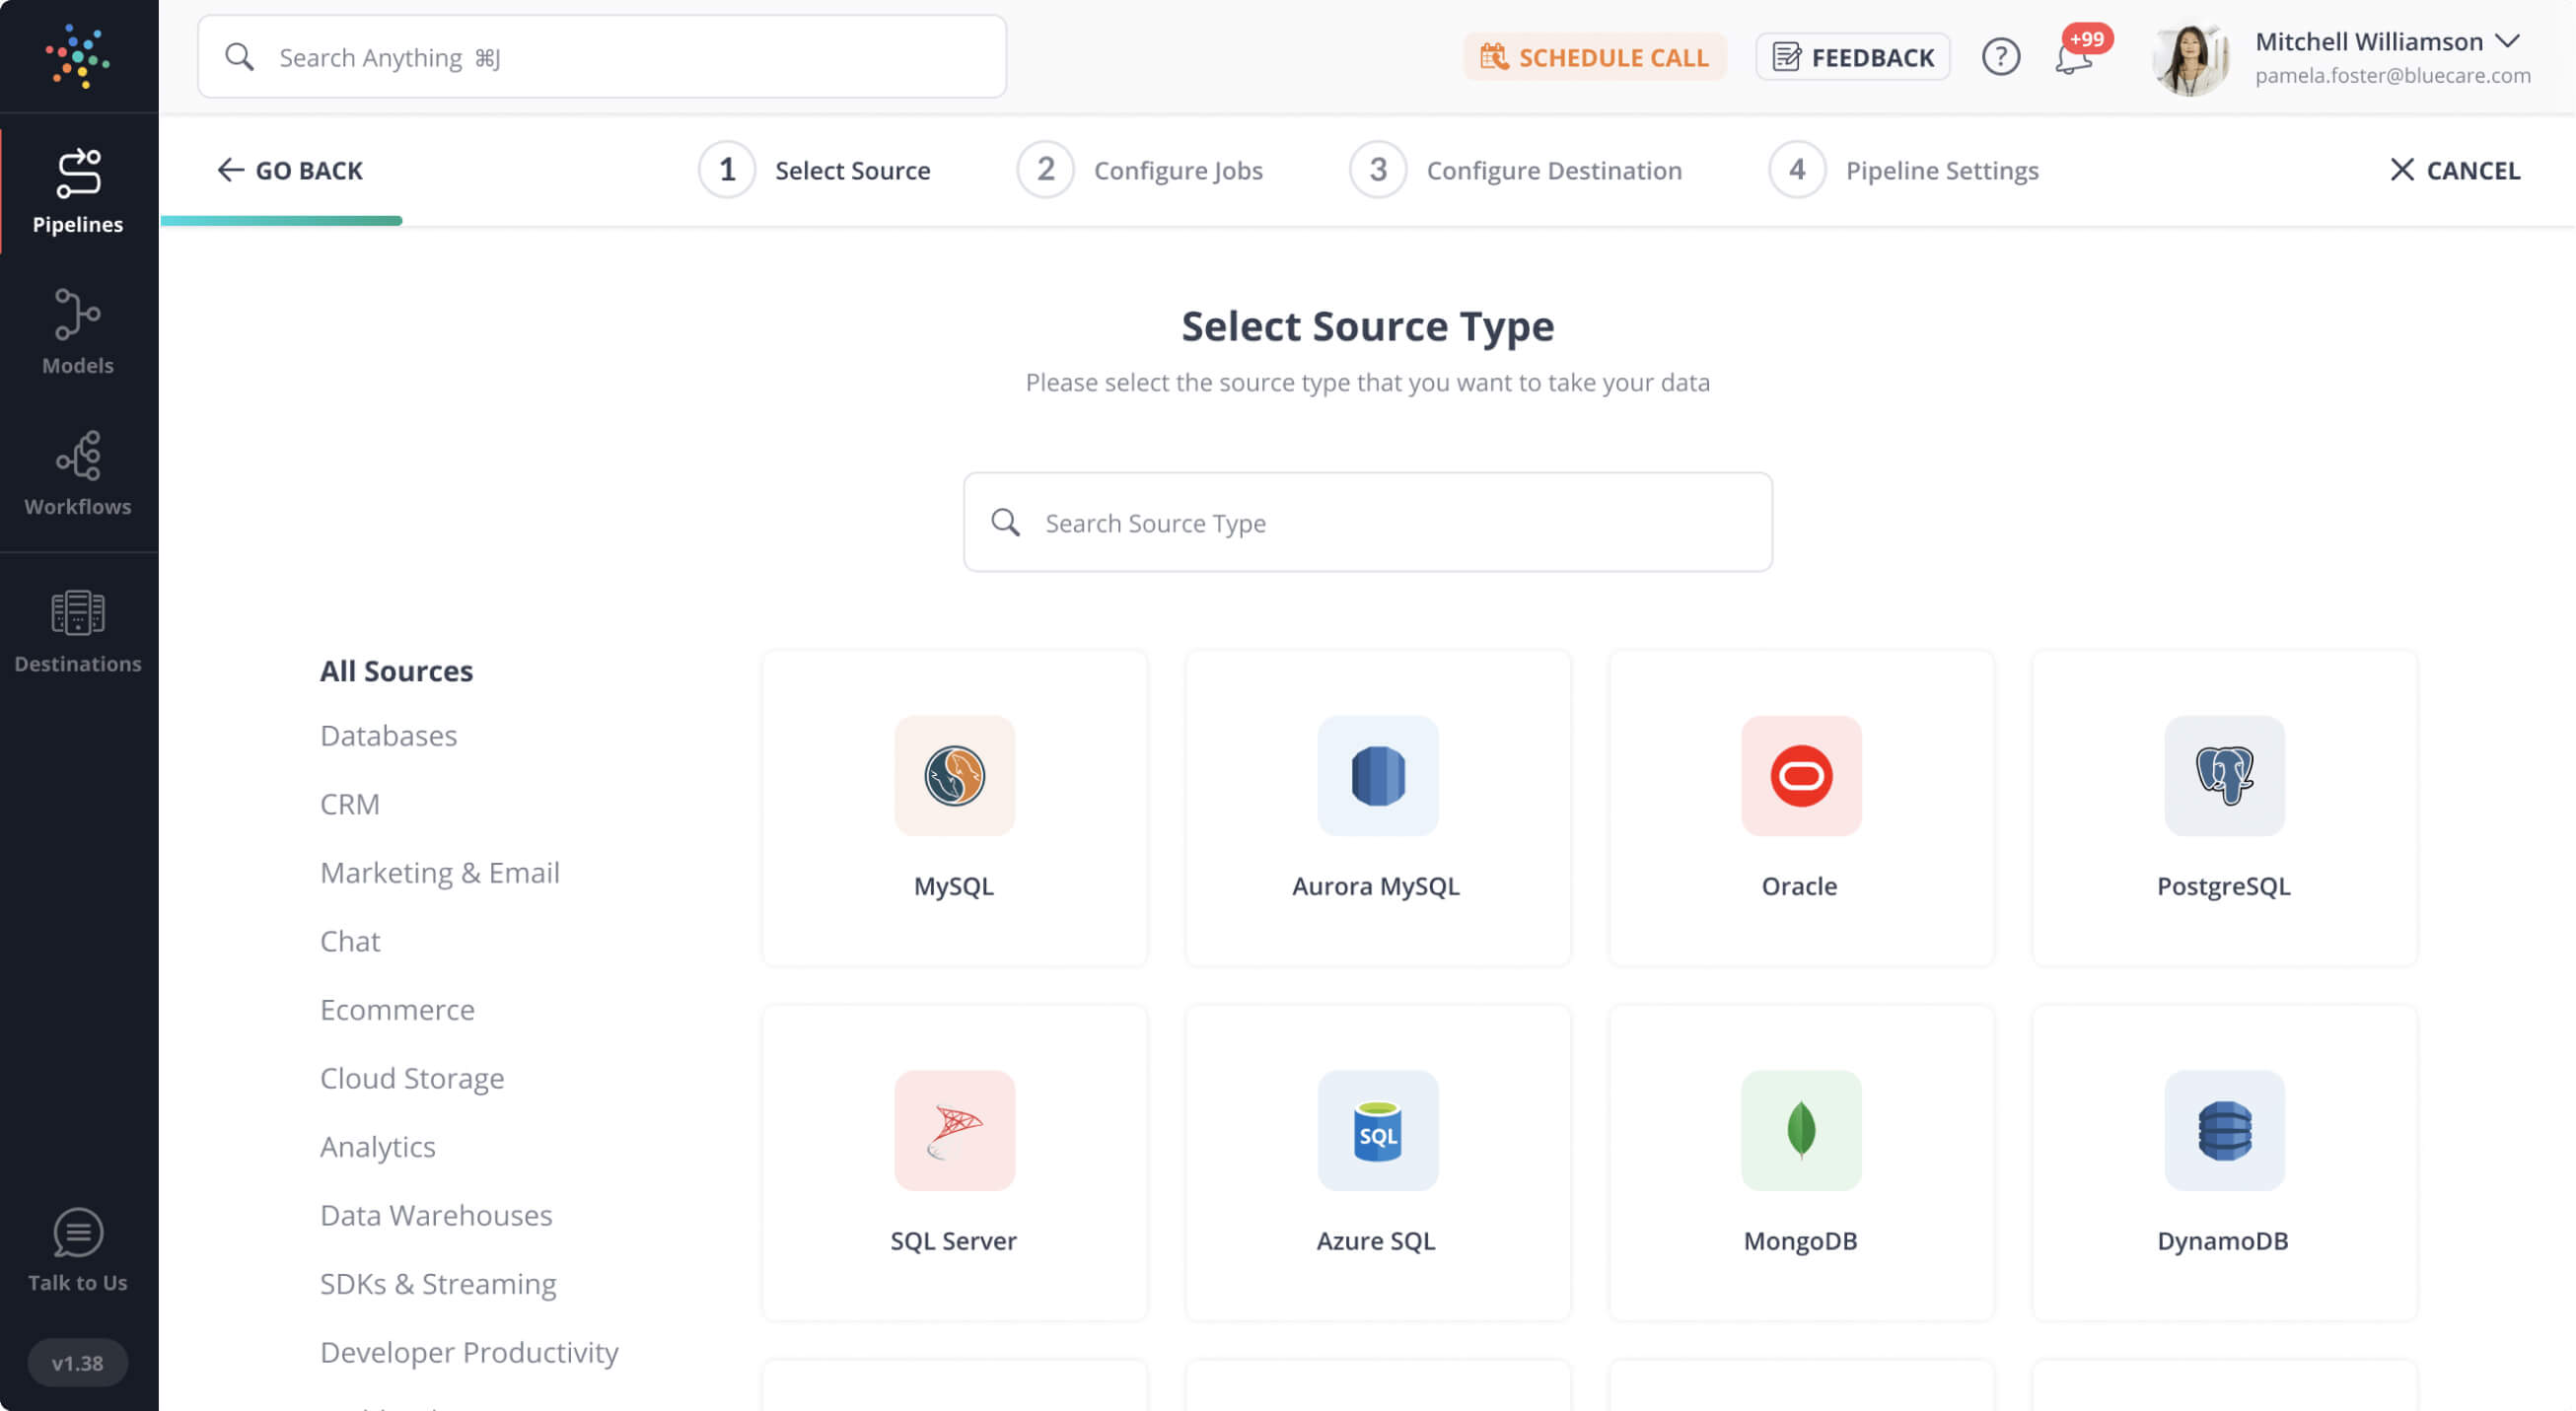
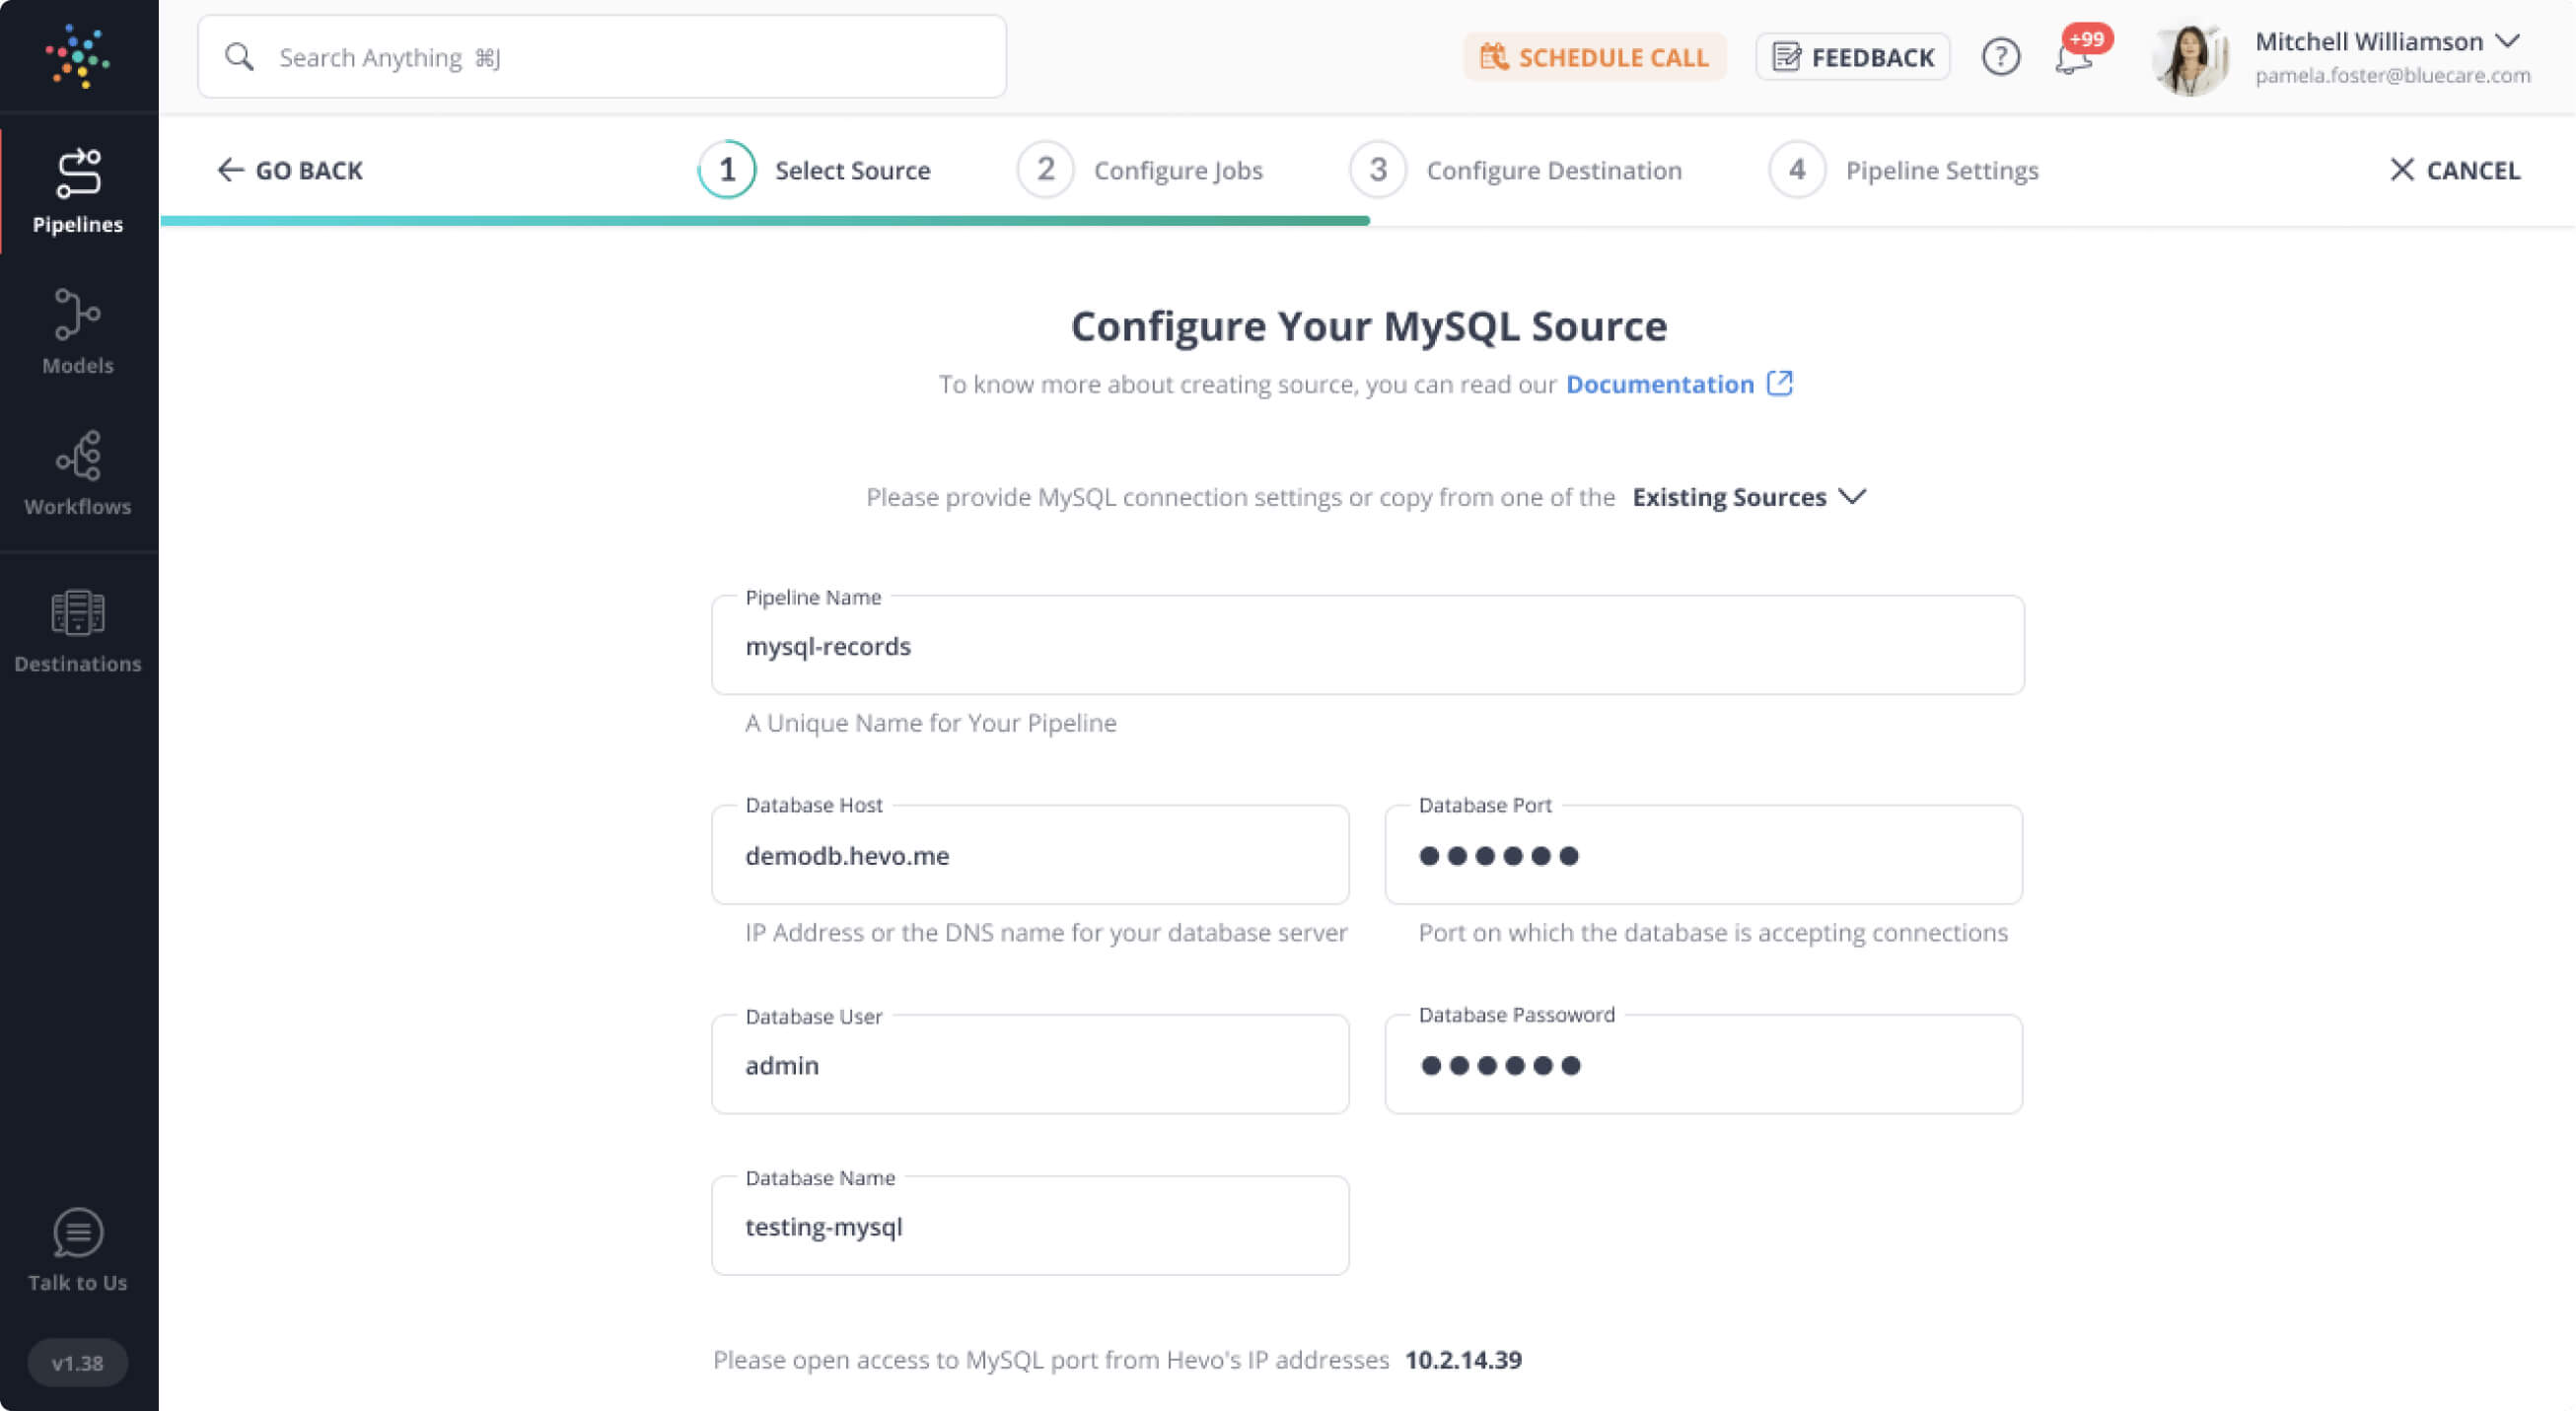
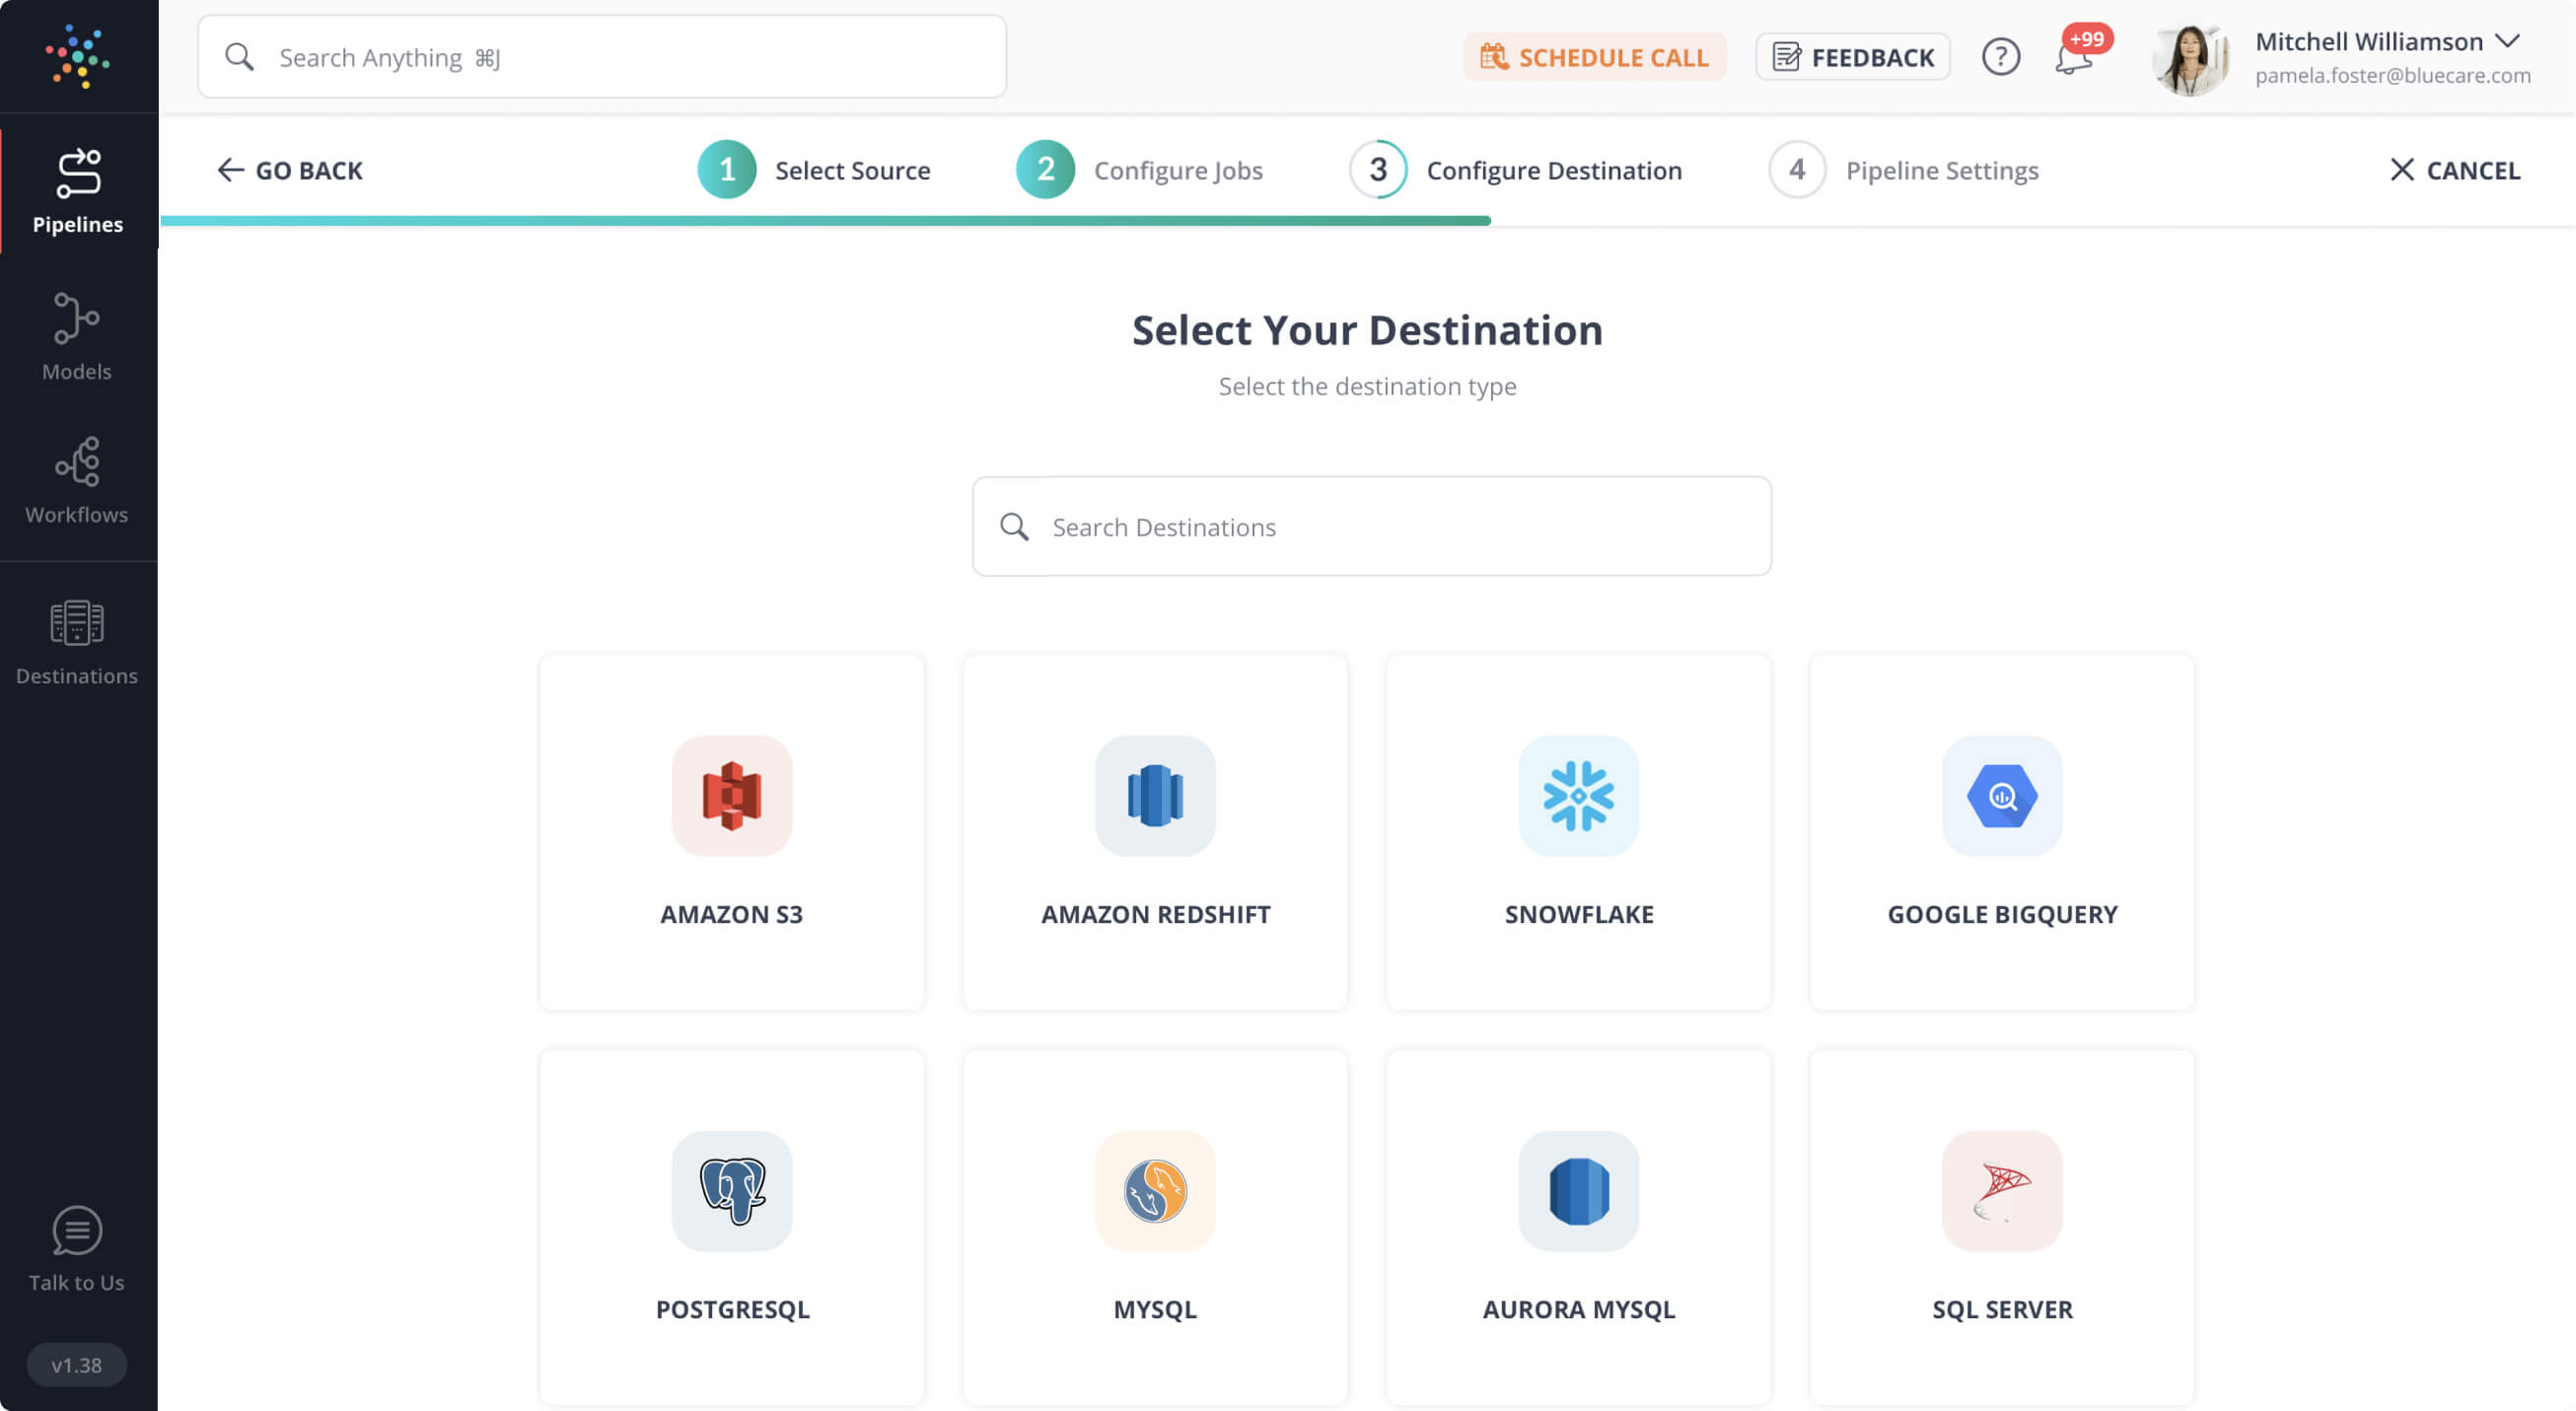
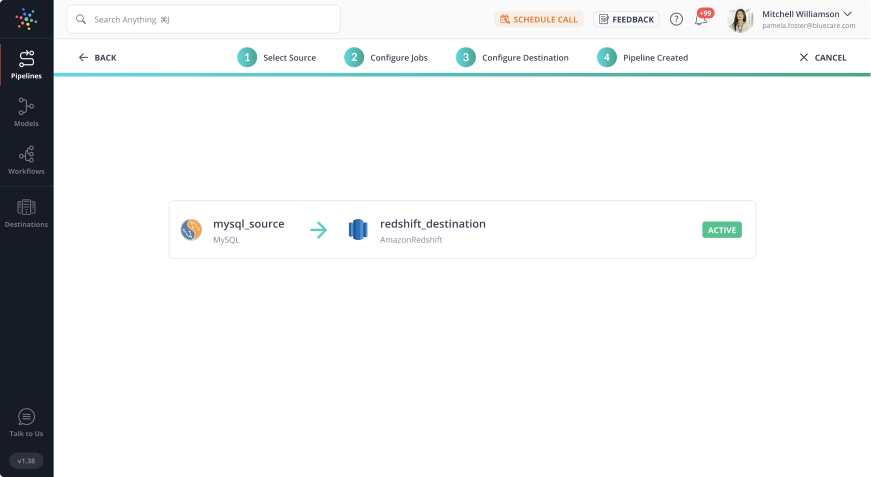
A fully managed No-code Data Pipeline platform like Hevo Data helps you integrate and load data from 150+ Different Sources (40+ Free Data Sources) to a Data Warehouse or Destination of your choice in real-time in an effortless manner. Hevo with its minimal learning curve can be set up in just a few minutes allowing the users to load data without having to compromise performance.

Get Started with Hevo for Free

It helps transfer data from a source of your choice to a destination of your choice. Its strong integration with umpteenth sources allows users to bring in data of different kinds in a smooth fashion without having to code a single line. 

Check out some of the cool features of Hevo:

  • Completely Automated: The Hevo platform can be set up in just a few minutes and requires minimal maintenance.
  • Connectors: Hevo supports 150+ Integrations to SaaS platforms like Shopify, files, Databases, analytics, and BI tools. It supports various destinations including Google BigQuery, Amazon Redshift, Snowflake Data Warehouses; Amazon S3 Data Lakes; and MySQL, SQL Server, TokuDB, DynamoDB, PostgreSQL Databases to name a few.  
  • Real-Time Data Transfer: Hevo provides real-time data migration, so you can have analysis-ready data always.
  • 100% Complete & Accurate Data Transfer: Hevo’s robust infrastructure ensures reliable data transfer with zero data loss.
  • Scalable Infrastructure: Hevo has in-built integrations for 150+ sources (including 40+ free sources) such as Shopify, that can help you scale your data infrastructure as required.
  • 24/7 Live Support: The Hevo Team is available round the clock to extend exceptional support to you through chat, email, and support calls.
  • Schema Management: Hevo takes away the tedious task of schema management & automatically detects the schema of incoming data and maps it to the destination schema.
  • Live Monitoring: Hevo allows you to monitor the data flow so you can check where your data is at a particular point in time.
Sign up here for a 14-Day Free Trial!

Python REST API: Consuming APIs and Requests 

Most Python programmers use requests to send HTTP requests when writing code that interacts with REST APIs which is known as Python REST APIs. The intricacies of making HTTP requests are abstracted away using this Python REST API module. Python REST API is one of the few projects that deserve to be treated as if it belonged in the standard library.

You must first install requests before you can use them. You may install it with pip:

$ python -m pip install requests

You can start sending HTTP requests now that you’ve installed requests.

1) GET

When working with Python REST APIs, one of the most used HTTP methods is GET. You can use this method to get resources from an API. As GET is a read-only method, it should not be used to alter an existing resource.

You’ll use a service named JSONPlaceholder to test out GET and the other methods in this section. This free service generates dummy Python REST API endpoints that return results that can be processed by requests.

To test this, open the Python REPL and run the commands below to submit a GET request to a JSONPlaceholder endpoint:

>>> import requests
>>> api_url = "https://jsonplaceholder.typicode.com/todos/1"
>>> response = requests.get(api_url)
>>> response.json()
{'userId': 1, 'id': 1, 'title': 'delectus aut autem', 'completed': False}

Requests are invoked by this code. use get() to make a GET request to /todos/1, which returns the to-do item with ID 1 as the response. The data returned by the API can then be seen by call.json() on the response object.

JSON, a key-value store comparable to a Python dictionary, is used to format the return data. It’s a widely used data format that most Python REST APIs use as the de facto interchange format.

You can see more information about the answer than just the JSON data from the Python REST API:

>>> response.status_code
200

>>> response.headers["Content-Type"]
'application/json; charset=utf-8'

You may see the HTTP status code by going to response.status code. With response. headers, you may see the HTTP headers of the response. This dictionary stores information about the response, such as the response’s Content-Type.

2) POST

Take a look at how you may build a new resource by using requests to POST data to a Python REST API. You’ll use JSONPlaceholder once more, but this time with JSON data included in the request. Here’s the information you’ll send:

{
    "userId": 1,
    "title": "Buy milk",
    "completed": false
}

A new to-do item is represented by this JSON. To create a new to-do, return to the Python REPL and type the following code:

>>> import requests
>>> api_url = "https://jsonplaceholder.typicode.com/todos"
>>> todo = {"userId": 1, "title": "Buy milk", "completed": False}
>>> response = requests.post(api_url, json=todo)
>>> response.json()
{'userId': 1, 'title': 'Buy milk', 'completed': False, 'id': 201}

>>> response.status_code
201

To add a new to-do in the system, you use requests.post().

To begin, make a dictionary with the data for your to-do. Then you send this dictionary to requests.post() JSON keyword parameter. When you do this, requests.post() sets the HTTP header Content-Type of the request to application/json. It also converts todo into a JSON string, which it adds to the request’s body.

If you don’t use the JSON keyword argument to deliver JSON data, you’ll have to manually define the Content-Type and serialize the JSON. Here’s a replacement for the prior code:

>>> import requests
>>> import json
>>> api_url = "https://jsonplaceholder.typicode.com/todos"
>>> todo = {"userId": 1, "title": "Buy milk", "completed": False}
>>> headers =  {"Content-Type":"application/json"}
>>> response = requests.post(api_url, data=json.dumps(todo), headers=headers)
>>> response.json()
{'userId': 1, 'title': 'Buy milk', 'completed': False, 'id': 201}

>>> response.status_code
201

You add a headers dictionary with a single header Content-Type set to application/json in this code. This informs the Python REST API that the request contains JSON data.

Instead of providing to-do to the JSON parameter, you call json.dumps(to-do) to serialize it before using requests.post(). You provide it to the data keyword argument after it’s serialized. The data argument specifies which data should be included in the request. You can also manually set HTTP headers bypassing the headers dictionary to requests.post().

When you use requests.post() like this, you get the same result as before, but you have greater control over the request.

To read the JSON returned by the Python REST API, call response.json(). A created id for the new todo is included in the JSON. A new resource has been created, as shown by the 201 status code.

3) DELETE

Finally, if you wish to totally delete a resource, you can use DELETE. To remove a todo, use the following code:

>>> import requests
>>> api_url = "https://jsonplaceholder.typicode.com/todos/10"
>>> response = requests.delete(api_url)
>>> response.json()
{}

>>> response.status_code
200

Requests are what you name them. Use delete() with an API URL containing the ID of the to-do you want to delete. This sends a DELETE request to the Python REST API, which deletes the resource that matches. The API returns an empty JSON object indicating that the resource has been destroyed after it has been erased.

The requests package is a fantastic tool for working with Python REST APIs and is a must-have in your Python toolbox. You’ll shift gears in the next section and analyze what it takes to create a Python REST API.

4) PUT

Requests support all of the various HTTP methods you’d use with a Python REST API, in addition to GET and POST. The code below makes a PUT request to update an existing todo with new information. Any data submitted with a PUT request will entirely overwrite the todo’s current values.

You’ll use the same JSONPlaceholder endpoint as for GET and POST, but append 10 to the end of the URL this time. This instructs the Python REST API to update the following to-do:

>>> import requests
>>> api_url = "https://jsonplaceholder.typicode.com/todos/10"
>>> response = requests.get(api_url)
>>> response.json()
{'userId': 1, 'id': 10, 'title': 'illo est ... aut', 'completed': True}

>>> todo = {"userId": 1, "title": "Wash car", "completed": True}
>>> response = requests.put(api_url, json=todo)
>>> response.json()
{'userId': 1, 'title': 'Wash car', 'completed': True, 'id': 10}

>>> response.status_code
200

The first thing you do is make a phone call to make a request. To see the contents of an existing to-do, use get(). After that, you make requests. To replace the existing to-do values, use put() with new JSON data. When you call response, you can see the new values with json(). As you are changing an existing resource rather than generating a new one, successful PUT requests always return 200 instead of 201.

5) PATCH

Next, you’ll use requests.patch() to change the value of an existing to-do’s specified field. In contrast, to PUT, PATCH will not totally replace the existing resource. It just changes the values in the JSON that was supplied along with the request. To test requests.patch(), you’ll use the same todo as in the previous example. The current values are as follows:

You can now add a new value to the title:

>>> import requests
>>> api_url = "https://jsonplaceholder.typicode.com/todos/10"
>>> todo = {"title": "Mow lawn"}
>>> response = requests.patch(api_url, json=todo)
>>> response.json()
{'userId': 1, 'id': 10, 'title': 'Mow lawn', 'completed': True}

>>> response.status_code
200

When you use response.json(), you’ll notice that the title has been changed to “Mow lawn”.

REST and Python: Building APIs

Python REST API design is a vast subject with several levels. As with most things in technology, there are many different points of view on the best way to develop APIs. This section will go through some suggested procedures to take while developing an API.

Identify Resources: The first step in developing a Python REST API is to identify the resources that the API will handle. These resources are commonly referred to as plural nouns, such as consumers, events, or transactions. As you identify different resources in your web service, you’ll create a list of nouns that represent the various data types that consumers may control using the API. Take into account any nested resources as you go. Customers, for example, may have sales, and events may even have guests. Creating these resource hierarchies will aid in the definition of API endpoints.

Define the Endpoint: The following endpoints are used once the resources in your web service are identified.

HTTP MethodAPI EndpointDescription
GET/transactionsGet a list of transactions.
GET/transactions/<transaction_id>Get a single transaction.
POST/transactionsCreate a new transaction.
PUT/transactions/<transaction_id>Update a transaction.
PATCH/transactions/<transaction_id>Partially update a transaction.
DELETE/transactions/<transaction_id>Delete a transaction.

Next, we have mentioned some examples of endpoints for nested resources. The below-given endpoints are for “guests,” nested under events resources:

HTTP MethodAPI Endpoint Description
GET/events/<event_id>/guestsGet a list of guests.
GET/events/<event_id>/guests/<guest_id>Get a single guest.
POST/events/<event_id>/guestsCreate a new guest.
PUT/events/<event_id>/guests/<guest_id>Update a guest.
PATCH/events/<event_id>/guests/<guest_id>Partially update a guest.
DELETE/events/<event_id>/guests/<guest_id>Delete a guest.

Picking the Data Interchange Format: The two most popular options to format web service data are XML and JSON. Generally, XML is popular with SOAP APIs and JSON is more popular with Python REST APIs. Have a look at the code below for the book formatted as XML.

<?xml version="1.0" encoding="UTF-8" ?>
<book>
    <title>Python Basics</title>
    <page_count>635</page_count>
    <pub_date>2021-03-16</pub_date>
    <authors>
        <author>
            <name>David Amos</name>
        </author>
        <author>
            <name>Joanna Jablonski</name>
        </author>
        <author>
            <name>Dan Bader</name>
        </author>
        <author>
            <name>Fletcher Heisler</name>
        </author>
    </authors>
    <isbn13>978-1775093329</isbn13>
    <genre>Education</genre>
</book>

To encode data, XML employs a sequence of components. Each element has an opening and closing tag, as well as data in the middle. Components can stack within other elements. This may be seen in the example above, where numerous author> tags are nested inside of authors>.

The below-given code is for the book formatted in JSON.

{
    "title": "Python Basics",
    "page_count": 635,
    "pub_date": "2021-03-16",
    "authors": [
        {"name": "David Amos"},
        {"name": "Joanna Jablonski"},
        {"name": "Dan Bader"},
        {"name": "Fletcher Heisler"}
    ],
    "isbn13": "978-1775093329",
    "genre": "Education"
}

JSON, like a Python dictionary, stores data in key-value pairs. JSON, like XML, allows you to layer data to any level, allowing you to represent complicated data.

Neither JSON nor XML is fundamentally superior to the other, yet JSON is preferred by Pyhton REST API developers. This is especially true when a Python REST API is used with a front-end framework such as React or Vue.

Designing Success Responses: The next step once the data format is picked is to respond to HTTP requests. It is a prerequisite that you choose a similar format for each Python REST API, including the proper HTTP status code.

In this section, you’ll see some sample HTTP replies for a fictitious API that handles a vehicle inventory. These examples will help you understand how to structure your API replies. To clarify, you’ll examine raw HTTP requests and answers rather than HTTP library-like queries.

To begin, consider the following GET request to /cars, which returns a list of cars:

GET /cars HTTP/1.1
Host: api.example.com

The HTTP request has four parts:

  1. GET is the HTTP method type.
  2. /cars is the API endpoint.
  3. HTTP/1.1 is the HTTP version.
  4. Host: api.example.com is the API host.

These four components are all that are required to submit a GET request to /cars. Take a peek at the answer now. JSON is the data transfer format used by this API:

HTTP/1.1 200 OK
Content-Type: application/json
...

[
    {
        "id": 1,
        "make": "GMC",
        "model": "1500 Club Coupe",
        "year": 1998,
        "vin": "1D7RV1GTXAS806941",
        "color": "Red"
    },
    {
        "id": 2,
        "make": "Lamborghini",
        "model":"Gallardo",
        "year":2006,
        "vin":"JN1BY1PR0FM736887",
        "color":"Mauve"
    },
    {
        "id": 3,
        "make": "Chevrolet",
        "model":"Monte Carlo",
        "year":1996,
        "vin":"1G4HP54K714224234",
        "color":"Violet"
    }
]

The API delivers a list of automobiles as a response. The 200 OK status code indicates that the answer was successful. The answer also includes a Content-Type header with the value application/json. The user is instructed to parse the answer as JSON.

It is critical to always provide the right Content-Type header in your response. Set the Content-Type to application/json if you’re sending JSON. If it’s XML, set it to application/xml. This header instructs the user on how to parse the data.

In addition, you should include an appropriate status code in your answer. You should return 200 OK for each successful GET request. This informs the user that their request was handled correctly.

Consider the following GET request, this time for a single car:

GET /cars/1 HTTP/1.1
Host: api.example.com

This HTTP request queries the API for the car 1. Here’s the response:

HTTP/1.1 200 OK
Content-Type: application/json

{
    "id": 1,
    "make": "GMC",
    "model": "1500 Club Coupe",
    "year": 1998,
    "vin": "1D7RV1GTXAS806941",
    "color": "Red"
},

This answer provides a single JSON object containing info on the automobile. It does not need to be wrapped in a list because it is a single object. This answer, like the last one, has a status code of 200 OK.

The below code provide insight into the POST request to add a new car:

POST /cars HTTP/1.1
Host: api.example.com
Content-Type: application/json

{
    "make": "Nissan",
    "model": "240SX",
    "year": 1994,
    "vin": "1N6AD0CU5AC961553",
    "color": "Violet"
}

This POST request includes JSON for the new automobile. It changes the Content-Type header to application/json so that the API understands the request’s content type. The API will generate a new automobile based on the JSON.

Here’s the response:

HTTP/1.1 201 Created
Content-Type: application/json

{
    "id": 4,
    "make": "Nissan",
    "model": "240SX",
    "year": 1994,
    "vin": "1N6AD0CU5AC961553",
    "color": "Violet"
}

The 201 Created status code in this response indicates to the user that a new resource has been created. For all successful POST queries, use 201 Created rather than 200 OK.

This answer also provides a duplicate of the new vehicle with an API-generated id. It’s critical to include an id in the response so the user can alter the resource again.

Below-given in the PUT request; have a look:

PUT /cars/4 HTTP/1.1
Host: api.example.com
Content-Type: application/json

{
    "make": "Buick",
    "model": "Lucerne",
    "year": 2006,
    "vin": "4T1BF3EK8AU335094",
    "color":"Maroon"
}

This request updates the automobile with all new data by using the id from the previous request. PUT, as previously said, changes all fields on the resource with new data. Here’s the response:

HTTP/1.1 200 OK
Content-Type: application/json

{
    "id": 4,
    "make": "Buick",
    "model": "Lucerne",
    "year": 2006,
    "vin": "4T1BF3EK8AU335094",
    "color":"Maroon"
}

The answer contains a duplicate of the automobile with the updated info. Again, with a PUT request, you should always return the entire resource. The same is true for a PATCH request:

PATCH /cars/4 HTTP/1.1
Host: api.example.com
Content-Type: application/json

{
    "vin": "VNKKTUD32FA050307",
    "color": "Green"
}

PATCH requests change only a portion of a resource. The vin and color fields in the preceding request will be modified with new values. Here is my response:

HTTP/1.1 200 OK
Content-Type: application/json

{
    "id": 4,
    "make": "Buick",
    "model": "Lucerne",
    "year": 2006,
    "vin": "VNKKTUD32FA050307",
    "color": "Green"
}

The answer includes a complete duplicate of the automobile. Only the vin and color fields have been modified, as you can see.

Finally, consider how your Python REST API should react when it gets a DELETE request. Here’s a DELETE request to get rid of a car:

DELETE /cars/4 HTTP/1.1

This DELETE request instructs the API to delete the automobile with ID 4. Here’s the response:

HTTP/1.1 204 No Content

This answer consists just of the status code 204 No Content. This status code indicates to the user that the operation was successful but that no content was delivered in the response. This makes reasonable sense given that the automobile has been removed. There’s no reason to provide a copy of the answer.

When everything goes as intended, the responses above function perfectly, but what happens if there is an issue with the request? In the next part, you’ll look at how your Python REST API should handle problems.

Designing Error Responses:

There is always the possibility that queries to your Python REST API will fail. It’s a good practice to specify how an error response will seem. These answers should provide an explanation of the issue as well as the relevant status code. You’ll see a few instances in this section.

To begin, consider the following request for a resource that does not exist in the API:

GET /motorcycles HTTP/1.1
Host: api.example.com

The user attempts to submit a GET request to /motorcycles, which does not exist. The API returns the following response:

HTTP/1.1 404 Not Found
Content-Type: application/json
...

{
    "error": "The requested resource was not found."
}

This answer has the status code 404 Not Found. In addition, the answer includes a JSON object with a detailed error message. Giving the user a meaningful error message provides them additional context for the problem.

Consider the following error response when a user submits an incorrect request:

POST /cars HTTP/1.1
Host: api.example.com
Content-Type: application/json

{
    "make": "Nissan",
    "year": 1994,
    "color": "Violet"

This POST request contains JSON, however, it is not properly formed. A closing curly brace () is omitted at the conclusion. This data cannot be processed by the API. The error answer informs the user of the problem:

HTTP/1.1 400 Bad Request
Content-Type: application/json

{
    "error": "This request was not properly formatted. Please send again."
}

This answer contains an informative error message as well as the 400 Bad Request status code, informing the user that the request must be fixed.

Even if the request is properly formed, there are various different ways for it to be incorrect. In the following example, the user submits a POST request with an unsupported media type:

POST /cars HTTP/1.1
Host: api.example.com
Content-Type: application/xml

<?xml version="1.0" encoding="UTF-8" ?>
<car>
    <make>Nissan</make>
    <model>240SX</model>
    <year>1994</year>
    <vin>1N6AD0CU5AC961553</vin>
    <color>Violet</color>
</car>

The user provides XML in this request, but the API only accepts JSON. The API answers are as follows:

HTTP/1.1 415 Unsupported Media Type
Content-Type: application/json

{
    "error": "The application/xml mediatype is not supported."
}

The 415 Unsupported Media Type status code is supplied in this response to indicate that the POST request contains a data type that the API does not accept. This error number makes sense for data that is in the incorrect format, but what about data that is faulty even though it is in the proper format?

In the following example, the user submits a POST request but includes automobile data that does not match any of the other data’s fields:

POST /cars HTTP/1.1
Host: api.example.com
Content-Type: application/json

{
    "make": "Nissan",
    "model": "240SX",
    "topSpeed": 120
    "warrantyLength": 10
}

The user adds topSpeed and warrantyLength fields to the JSON in this request. Because these fields aren’t supported by the API, it returns an error message:

HTTP/1.1 422 Unprocessable Entity
Content-Type: application/json

{
    "error": "Request had invalid or missing data."
}

The 422 Unprocessable Entity status code is included in this answer. This status number indicates that there were no problems with the request, but that the data was incorrect. Incoming data must be validated via a REST API. If the user includes data in the request, the API should validate it and notify the user of any issues.

One of the most crucial functions of a Python REST API is to respond to queries, both successful and unsuccessful. Users will be able to create apps around your web service if your API is simple to use and gives accurate results. Fortunately, some excellent Python web frameworks abstract away the difficulties of processing HTTP requests and responding to them. In the next part, you’ll look at three popular solutions.

Authenticating to a Python REST API 

You’ve seen how to use open Python REST APIs that don’t require any authorization so far. However, many Python REST APIs, especially those that deal with sensitive data, require you to authenticate before you may access specific endpoints.

There are a few typical Python REST API authentication mechanisms that Python Requests can handle. The simplest method is to use HTTP Basic Auth to send your login and password to the relevant endpoint; this is the same as typing your username and password into a webpage.


requests.get(
 'https://api.github.com/user',
 auth=HTTPBasicAuth('username', 'password')
)

Obtaining an access token, which works as an equivalent to a username/password combination, is a more secure technique; the mechanism for obtaining an access token varies greatly from API to API, but OAuth is the most prevalent framework for Python REST API authentication. 

Manage Access Token using Sessions

When working with Python Requests, Session Objects come in handy as a way to save parameters that are required for making many requests inside a single session, such as access tokens. Additionally, maintaining session cookies can improve speed by eliminating the need to start a new connection for each request.

session = requests.Session()
session.headers.update({'Authorization': 'Bearer {access_token}'})
response = session.get('https://httpbin.org/headers')

How to Handle HTTP Errors With Python Requests?

The given code snippet will help you understand how to interact with an API in case an HTTP error occurs and when wanting to know why processing stops in the remaining code in the function as well as at the calling level.

First, you need to make the initial request using the “request” library, and then introduce the “except” blocks for each error type:

try:
            response = requests.post(_url, files={'file': some_file})
            response.raise_for_status()
        except requests.exceptions.HTTPError as errh:
            return "An Http Error occurred:" + repr(errh)
        except requests.exceptions.ConnectionError as errc:
            return "An Error Connecting to the API occurred:" + repr(errc)
        except requests.exceptions.Timeout as errt:
            return "A Timeout Error occurred:" + repr(errt)
        except requests.exceptions.RequestException as err:
            return "An Unknown Error occurred" + repr(err)

Python and REST: Best Tools for Python REST APIs

In this part, you’ll learn about three common Python frameworks for creating Python REST APIs. Each framework has advantages and disadvantages, so you’ll have to decide which is ideal for you. To that purpose, each framework’s Python REST API will be examined in the following sections. All of the examples will be for a Python REST API that manages a group of countries.

The following fields will be present in each country:

  • The country’s name is called name.
  • The country’s capital is called the capital.
  • The country’s area is measured in square kilometers.

The fields name, capital, and region are used to hold information about a certain country in the world.

The data sent from a Python REST API is almost always from a database. This lesson does not cover connecting to a database. Your data will be stored in a Python list in the examples below. The Django REST framework example is an exception, as it uses the SQLite database that Django produces.

You’ll use nations as your main endpoint for all three frameworks to keep things consistent. For all three frameworks, you’ll utilize JSON as your data format.

1) Django REST Framework

The Django REST framework is another popular alternative for creating Python REST APIs. The Django REST framework is a Django plugin that gives Python REST API functionality to a Django project.

To work with the Django REST framework, you’ll need a Django project. If you already have one, you can use the patterns in this area to enhance it. Otherwise, simply follow along to create a Django project and incorporate the Django REST framework.

To begin, use pip to install Django and the djangorestframework:

Django and the djangorestframework are installed. You can now create a new Django project with the Django-admin tool. To begin your project, type the following command:

This command creates a new folder called countryapi in your current directory. This folder contains all of the files required to launch your Django project. After that, you’ll construct a new Django application within your project. Django divides a project’s functionality into applications. Each application is in charge of a different aspect of the project.

Change directories to countryapi and run the following command to construct the application:

Within your project, a new countries folder is created. The application’s base files are located in this folder.

Now that you’ve built a working application, you’ll need to notify Django about it. A folder called countryapi exists beside the nations folder you just created. This folder includes your project’s parameters and settings.

Open the countryapi folder and look for the settings.py file. To inform Django about the nations application and the Django REST framework, add the following lines to INSTALLED APPS:

# countryapi/settings.py
INSTALLED_APPS = [
    "django.contrib.admin",
    "django.contrib.auth",
    "django.contrib.contenttypes",
    "django.contrib.sessions",
    "django.contrib.messages",
    "django.contrib.staticfiles",
    "rest_framework",
    "countries",
]

A line for the countries application and rest framework has been added.

You might be wondering why the Python REST API Django framework needs to be added to the apps list. Because Django REST framework is just another Django application, you must include it. Django plugins are bundled and distributable Django apps that anybody can use.

To define the fields of your data, you’ll need to establish a Django model. Update models.py in the countries application with the following code:

# countries/models.py
from django.db import models
 
class Country(models.Model):
    name = models.CharField(max_length=100)
    capital = models.CharField(max_length=100)
    area = models.IntegerField(help_text="(in square kilometers)")

A Country model is defined by this code. This model will be used by Django to construct the database table and columns for the country information.

To have Django update the database based on this model, use the following commands:

$ python manage.py makemigrations
Migrations for 'countries':
  countries/migrations/0001_initial.py
    - Create model Country
 
$ python manage.py migrate
Operations to perform:
  Apply all migrations: admin, auth, contenttypes, countries, sessions
Running migrations:
  Applying contenttypes.0001_initial... OK
  Applying auth.0001_initial... OK
  ...

Django migrations are used in these procedures to build a new table in the database.

This table is initially empty, however, it would be useful to have some data to test the Django REST framework. To accomplish this, you’ll utilize a Django fixture to import data into the database.

Copy and save the JSON data below into a file called nations.json in the countries directory:

 
[
    {
        "model": "countries.country",
        "pk": 1,
        "fields": {
            "name": "Thailand",
            "capital": "Bangkok",
            "area": 513120
        }
    },
    {
        "model": "countries.country",
        "pk": 2,
        "fields": {
            "name": "Australia",
            "capital": "Canberra",
            "area": 7617930
        }
    },
    {
        "model": "countries.country",
        "pk": 3,
        "fields": {
            "name": "Egypt",
            "capital": "Cairo",
            "area": 1010408
        }
    }
]

Three countries’ database entries are included in this JSON. To load this data into the database, run the following command:

$ python manage.py loaddata countries.json
Installed 3 object(s) from 1 fixture(s)

Three rows are added to the database as a result of this.

Your Django application is now ready to use and populated with data. The Django REST framework can now be added to the project.

The Django REST framework converts a Django model to JSON for use in a Python REST API. Model serializers are used to do this. The Django REST framework uses a model serializer to tell it how to convert a model instance to JSON and what data to include.

You’ll use the Country model to develop your serializer. Begin by generating a serializers.py file within the countries application. After that, edit serializers.py and add the following code:

# countries/serializers.py
from rest_framework import serializers
from .models import Country
 
class CountrySerializer(serializers.ModelSerializer):
    class Meta:
        model = Country
        fields = ["id", "name", "capital", "area"]

CountrySerializer is a serializer that subclasses other serializers. ModelSerializer generates JSON content automatically based on the model fields of Country. A ModelSerializer subclass will include all fields from the Django model in the JSON unless otherwise specified. Set fields to a list of data you want to include to change this behavior.

Django REST framework, like Django, employs views to query data from the database and show it to the user. You can subclass the Django REST framework’s ModelViewSet class, which contains default views for typical Python REST API activities, instead of building REST API views from scratch.

These actions map to the normal HTTP methods you’d expect in a REST API, as you can see. You can override these actions in your subclass or add new ones based on your API’s requirements.

The code for a ModelViewSet subclass called CountryViewSet is shown below. The views required to manage Country data will be generated by this class. Inside the countries application, add the following code to views.py:

# countries/views.py
from rest_framework import viewsets
 
from .models import Country
from .serializers import CountrySerializer
 
class CountryViewSet(viewsets.ModelViewSet):
    serializer_class = CountrySerializer
    queryset = Country.objects.all()

Serializer class is set to CountrySerializer, and queryset() is set to Country.objects.all in this class. This instructs the Django REST framework on which serializer to use and how to query the database for this set of views.

Following the creation of the views, they must be mapped to the relevant URLs or endpoints. The Django REST framework provides a DefaultRouter that will build URLs for a ModelViewSet automatically.

In the nation’s application, create a urls.py file and add the following code to it:

 # countries/urls.py
from django.urls import path, include
from rest_framework.routers import DefaultRouter
 
from .views import CountryViewSet
 
router = DefaultRouter()
router.register(r"countries", CountryViewSet)
 
urlpatterns = [
    path("", include(router.urls))
]

This code registers CountryViewSet under the nation’s URL and builds a DefaultRouter. This will put all of CountryViewSet’s URLs in the /countries/ directory.

Finally, you must change the project’s base urls.py file to add all of the project’s countries’ URLs. Replace the following code in the urls.py file in the countryapi folder:

# countryapi/urls.py
from django.contrib import admin
from django.urls import path, include
 
urlpatterns = [
    path("admin/", admin.site.urls),
    path("", include("countries.urls")),
]

This places all of the URLs in the /countries/ folder. You’re now ready to use your Django-based Pyhton REST API. To start the Django development server, run the following command in the root countryapi directory:

The development server has been started. To receive a list of all the nations in your Django project, perform a GET request to /countries/:

HTTP/1.1 200 OK
...
[
    {
        "id": 1,
        "name":"Thailand",
        "capital":"Bangkok",
        "area":513120
    },
    {
        "id": 2,
        "name":"Australia",
        "capital":"Canberra",
        "area":7617930
    },
    {
        "id": 3,
        "name":"Egypt",
        "capital":"Cairo",
        "area":1010408
    }
]

The Django REST framework responds with a JSON response containing the three nations you specified previously. As the above response is formatted for reading, yours will be different.

All of the standard API endpoints have URLs provided by the DefaultRouter you created in countries/urls.py:

  • GET /countries/
  • GET /countries/<country_id>/
  • POST /countries/
  • PUT /countries/<country_id>/
  • PATCH /countries/<country_id>/
  • DELETE /countries/<country_id>/

Below are a couple of additional endpoints to test out. Create a new Country in your Django project by sending a POST request to /countries/:

$ curl -i http://127.0.0.1:8000/countries/ 
-X POST 
-H 'Content-Type: application/json' 
-d '{"name":"Germany", "capital": "Berlin", "area": 357022}' 
-w 'n'
 
HTTP/1.1 201 Created
...
 
{
    "id":4,
    "name":"Germany",
    "capital":"Berlin",
    "area":357022
}

The JSON you sent in the request is used to create a new Country. The 201 Created status code and the new Country are returned by the Django REST framework.

By sending a request to GET /countries/country id>/ with an existing id, you can access an existing Country. To get the first country, run the following command:

HTTP/1.1 200 OK
...
{
    "id":1,
    "name":"Thailand",
    "capital":"Bangkok",
    "area":513120
}

The first Country’s information is included in the response. Only GET and POST queries were covered in these examples. Feel free to experiment with PUT, PATCH, and DELETE requests to discover how you can manage your model completely through the Python REST API.

As you can see, the Django REST framework is an excellent choice for creating Python REST APIs, particularly if you already have a Django project and want to add an API.

2) Flask

Flask is a Python microframework that may be used to create web apps and Python REST APIs. Flask provides a robust foundation for your Apps while allowing you to make various design decisions. Flask’s primary responsibility is to handle HTTP requests and route them to the relevant application function.

For the Python REST API, here’s an example Flask application:

# app.py
from flask import Flask, request, jsonify

app = Flask(__name__)

countries = [
    {"id": 1, "name": "Thailand", "capital": "Bangkok", "area": 513120},
    {"id": 2, "name": "Australia", "capital": "Canberra", "area": 7617930},
    {"id": 3, "name": "Egypt", "capital": "Cairo", "area": 1010408},
]

def _find_next_id():
    return max(country["id"] for country in countries) + 1

@app.get("/countries")
def get_countries():
    return jsonify(countries)

@app.post("/countries")
def add_country():
    if request.is_json:
        country = request.get_json()
        country["id"] = _find_next_id()
        countries.append(country)
        return country, 201
    return {"error": "Request must be JSON"}, 415

To manage the list of nations, this application defines the API endpoint /countries. It can deal with two types of requests:

  • The list of countries is returned by GET /countries.
  • POST /countries adds a new nation to the list of available countries.

Installing flask with pip will allow you to try out this application.

Save the code in a file called app.py once the flask is installed. To execute this Flask application, you must first set the FLASK APP environment variable to app.py. This instructs Flask on which file your application is stored in.

Inside the folder containing app.py, run the following command:

In the current shell, this sets FLASK APP to app.py. You may also change FLASK ENV to development to run Flask in debug mode:

Debug mode will restart the application after all code changes, in addition to providing helpful error messages. You’d have to restart the server every time you made a change if you didn’t use debug mode.

Now that you’ve set up all of your environment variables, you can start the Flask development server by typing flask run:

$ flask run
* Serving Flask app "app.py" (lazy loading)
* Environment: development
* Debug mode: on
* Running on http://127.0.0.1:5000/ (Press CTRL+C to quit)

This launches a server that runs the program. Go to http://127.0.0.1:5000/countries in your browser and you’ll see the following response:

[
    {
        "area": 513120,
        "capital": "Bangkok",
        "id": 1,
        "name": "Thailand"
    },
    {
        "area": 7617930,
        "capital": "Canberra",
        "id": 2,
        "name": "Australia"
    },
    {
        "area": 1010408,
        "capital": "Cairo",
        "id": 3,
        "name": "Egypt"
    }
]

The three nations defined at the start of app.py are included in this JSON response. To demonstrate how this works, look at the following code:

@app.get("/countries")
def get_countries():
    return jsonify(countries)

This code connects GET requests to a function in the application using @app.get(), a Flask route decorator. Flask calls the decorated function to handle the HTTP request and return a response when you access /countries.

In the code above get.countries() accepts a Python list of countries and turns it to JSON using jsonify(). In the response, this JSON is returned.

Take a look at the add_country() function now. This function handles POST requests to /countries and allows you to add a new country to the list. It gets information about the current HTTP request using the Flask request object:

@app.post("/countries")
def add_country():
    if request.is_json:
        country = request.get_json()
        country["id"] = _find_next_id()
        countries.append(country)
        return country, 201
    return {"error": "Request must be JSON"}, 415

The following operations are performed by this function:

  • To ensure that the request is JSON, use request.is_json.
  • Requesting the creation of a new country instance using get_json()
  • Identifying the next id and putting it in the appropriate country
  • Adding a new country to the list of countries
  • In the response, the nation is returned along with a 201. Status code has been created.
  • If the request was not JSON, it would return an error message and a 415 Unsupported Media Type status code.

add_country() also calls _find_next_id() to determine the id for the new country:

def _find_next_id():
    return max(country["id"] for country in countries) + 1

This utility function selects all of the nation IDs with a generator expression and then calls max() on them to get the largest number. To get the next ID to utilize, it increases this value by one.

Curl, a command-line utility that allows you to send HTTP requests from the command line, can be used to test this endpoint in the shell. You’ll be adding a new country to the list here:

$ curl -i http://127.0.0.1:5000/countries 
-X POST 
-H 'Content-Type: application/json' 
-d '{"name":"Germany", "capital": "Berlin", "area": 357022}'
HTTP/1.0 201 CREATED
Content-Type: application/json
...
{
    "area": 357022,
    "capital": "Berlin",
    "id": 4,
    "name": "Germany"
}

There are a few choices to be aware of when using the curl command:

  • The -X option specifies the HTTP method for the request.
  • An HTTP header is added to the request with the -H option.
  • The -d option specifies the request data.

Curl transmits JSON data in a POST request with the Content-Type header set to application/json when these settings are set. The Python REST API responds with 201 CREATED and the JSON for the newly added nation.

To validate that the new nation was added, use curl to perform a GET request to /countries. If you don’t include -X in your curl command, it defaults to a GET request:

HTTP/1.0 200 OK
Content-Type: application/json
...
[
    {
        "area": 513120,
        "capital": "Bangkok",
        "id": 1,
        "name": "Thailand"
    },
    {
        "area": 7617930,
        "capital": "Canberra",
        "id": 2,
        "name": "Australia"
    },
    {
        "area": 1010408,
        "capital": "Cairo",
        "id": 3,
        "name": "Egypt"
    },
    {
        "area": 357022,
        "capital": "Berlin",
        "id": 4,
        "name": "Germany"
    }
]

This returns the whole list of countries in the system, starting at the bottom with the newest.

This is only a small sample of what Flask can accomplish. Endpoints for all of the other HTTP methods might be added to this application. Flask also provides a vast community of extensions that add features like database connectors, authentication, and background processing to Python REST APIs.

3) FASTAPI

FastAPI is a Python web framework designed specifically for developing APIs. It makes use of Python-type hints and includes built-in async support. FastAPI is a high-performance API built on top of Starlette and Pydantic.

An example of a Python REST API created with FastAPI is shown below:

# app.py
from fastapi import FastAPI
from pydantic import BaseModel, Field
def _find_next_id():
    return max(country.country_id for country in countries) + 1
class Country(BaseModel):
    country_id: int = Field(default_factory=_find_next_id, alias="id")
    name: str
    capital: str
    area: int
countries = [
    Country(id=1, name="Thailand", capital="Bangkok", area=513120),
    Country(id=2, name="Australia", capital="Canberra", area=7617930),
    Country(id=3, name="Egypt", capital="Cairo", area=1010408),
]
@app.get("/countries")
async def get_countries():
    return countries
@app.post("/countries", status_code=201)
async def add_country(country: Country):
    countries.append(country)
    return country

This application makes use of FastAPI’s features to provide a Python REST API for the same nation data as the other examples.

This application can be tried by installing FastAPI with pip:

You’ll also need to set up uvicorn[standard], which is a server that can run FastAPI apps:

Save the code above in a file called app.py if you’ve installed both FastApi and uvicorn. To start a development server, type the following command:

$ uvicorn app:app --reload
INFO: Uvicorn running on http://127.0.0.1:8000 (Press CTRL+C to quit)

The server is up and operating presently. Go to http://127.0.0.1:8000/countries in your browser. FastAPI will react as follows:

[
    {
        "id": 1,
        "name":"Thailand",
        "capital":"Bangkok",
        "area":513120
    },
    {
        "id": 2,
        "name":"Australia",
        "capital":"Canberra",
        "area":7617930
    },
    {
        "id": 3,
        "name":"Egypt",
        "capital":"Cairo",
        "area":1010408
    }
]

A JSON array containing a list of nations is returned by FastAPI. A POST request to /countries: can also be used to add a new nation.

$ curl -i http://127.0.0.1:8000/countries 
-X POST 
-H 'Content-Type: application/json' 
-d '{"name":"Germany", "capital": "Berlin", "area": 357022}' 
-w 'n'
HTTP/1.1 201 Created
content-type: application/json
...

You added a new country. You can confirm this with GET /countries:

HTTP/1.1 200 OK
content-type: application/json
...
[
    {
        "id":1,
        "name":"Thailand",
        "capital":"Bangkok",
        "area":513120,
    },
    {
        "id":2,
        "name":"Australia",
        "capital":"Canberra",
        "area":7617930
    },
    {
        "id":3,
        "name":"Egypt",
        "capital":"Cairo",
        "area":1010408
    },
    {
        "id":4,
        "name": "Germany",
        "capital": "Berlin",
        "area": 357022
    }
]

FastAPI provides a JSON list that includes the newly added nation.

The FastAPI application resembles the Flask application in appearance. FastAPI, like Flask, offers a limited feature set. It does not attempt to cover every facet of web application development. It’s made to help you create APIs that use contemporary Python features.

A class called Country, which extends BaseModel, may be found towards the top of app.py. The data structure of the Python REST API is described by the Country class:


class Country(BaseModel):
    country_id: int = Field(default_factory=_find_next_id, alias="id")
    name: str
    capital: str
    area: int

This is a Pydantic model in action. In FastAPI, Pydantic models provide certain useful features. To enforce the data type for each field in the class, they employ Python-type annotations. FastAPI can now automatically produce JSON for API endpoints with the necessary data types. FastAPI may also use it to validate incoming JSON.

As there’s a lot going on in the first line, it’s helpful to highlight it:

This line contains the variable country id, which holds an integer representing the Country’s ID. It modifies the behavior of country id with Pydantic’s Field function. The keyword arguments default factory and alias are passed to Field in this example.

The default factory argument is set to _find next_id (). When a new Country is created, this argument defines a function to run. The country id will be allocated the return value.

alias, the second argument, is set to id. This instructs FastAPI to output the key “id” in the JSON instead of “country id“:

{
    "id":1,
    "name":"Thailand",
    "capital":"Bangkok",
    "area":513120,
},

You can also use id when creating a new Country with this alias. This is visible in the list of countries:

countries = [
    Country(id=1, name="Thailand", capital="Bangkok", area=513120),
    Country(id=2, name="Australia", capital="Canberra", area=7617930),
    Country(id=3, name="Egypt", capital="Cairo", area=1010408),
]

This list provides three Country instances for the API’s first three nations. Pydantic models include a lot of cool capabilities and make it easy for FastAPI to parse JSON input.

Take a look at the application’s two API functions now. For GET queries to /countries, the first method, get countries(), gives a list of countries:

@app.get("/countries")
async def get_countries():
    return countries

FastAPI will generate JSON based on the Pydantic model’s fields and establish the appropriate JSON data type based on the Python type hints.

When you send a POST request to /countries, the Pydantic model also helps. The parameter country has a Country annotation, as you can see in the second API method below:

@app.post("/countries", status_code=201)
async def add_country(country: Country):
    countries.append(country)
    return country

FastAPI will validate the incoming JSON against Country if this type of annotation is present. FastAPI will return an error if it does not match. You can test this by sending a JSON request that does not match the Pydantic model:

$ curl -i http://127.0.0.1:8000/countries 
-X POST 
-H 'Content-Type: application/json' 
-d '{"name":"Germany", "capital": "Berlin"}' 
-w 'n'
HTTP/1.1 422 Unprocessable Entity
content-type: application/json
...
{
    "detail": [
        {
            "loc":["body","area"],
            "msg":"field required",
            "type":"value_error.missing"
        }
    ]
}

FastAPI provided a response with the status code 422 Unprocessable Entity and details about the error because the JSON in this call was missing a value for the area. The Pydantic model makes this validation possible.

This is simply a small portion of what FastAPI can accomplish. FastAPI is worth considering for your future Python REST API because of its great performance and modern features like async functions and automatic documentation.

How to Make Robust Python REST API Requests?

Python’s straightforward and simple syntax makes it an excellent language for interacting with Python REST APIs, and in true Python form, a module called Requests was created particularly to provide that feature. Python Requests is a powerful tool that allows you to perform HTTP requests to any API in the world using the simple beauty of Python.

The Roles of HTTP, APIs, and REST

An Application Programming Interface (API) is a web service that provides access to certain data and functions that other programmes may use – and occasionally alter – using conventional HTTP protocols, similar to the webpage’s. Why? Because of its simplicity. APIs may be readily integrated into a wide range of applications. The most prominent architectural style of APIs for web services is arguably the REST. It is a collection of standards aimed to make client-server communication easier. Python REST APIs make data access considerably easier and more rational.

The Request

A request is what you make when you wish to interact with data using a Python REST API. A request consists of the following elements:

Endpoint: It’s the URL that specifies the type of data with which you are engaging. An endpoint URL is linked to a specific resource within an API, similar to how a web page URL is linked to a single page.

Method: It describes how you’re dealing with the resource at the specified endpoint. Python REST APIs provide ways for enabling complete Create, Read, Update, and Delete (CRUD) capabilities. The following are the most frequent methods provided by most Python REST APIs:

  • GET: Retrieve data
  • PUT: Replace data
  • POST: Create data
  • DELETE: Delete data

Data: If you’re utilizing a Python REST API method that involves modifying data, you must send a data payload with the request that contains any data that will be produced or updated.

Headers: Any metadata that must be supplied with the request, such as authentication tokens, the content type that should be returned, and any caching rules, are included in the headers.

The Response

When you make a request, the API will respond with a response. It will have a response header and, if applicable, response data, just like the request. The response header contains essential metadata about the answer, whereas the response data contains the actual response that you requested. This might be any type of data, as it is entirely dependant on the API. The text is often delivered as JSON, although other markdown languages, such as XML, are also supported.

Let’s have a look at a simple request and answer. We’ll use curl in the terminal to send a GET request to the Open Notify API. This is a simple, yet useful API that contains data on astronauts that are currently in space:

curl -X GET "http://api.open-notify.org/astros.json"

You should get a JSON response with information on these astronauts; at the time of writing, there are three individuals on a historic voyage to the International Space Station:

{
  "number": 3,
  "message": "success",
  "people": [
    {
      "craft": "ISS",
      "name": "Chris Cassidy"
    }, 
    {
      "craft": "ISS",
      "name": "Anatoly Ivanishin"
    }, 
    {
      "craft": "ISS",
      "name": "Ivan Vagner"
    }
  ]
}

How to Use Python Requests with REST APIs

Now, let’s look at what it takes to use Python Requests to interface with a REST API. First, you’ll need the essential software; to ensure that Python and pip are installed on your PC. Then, go to the command line and use pip to install the python requests module:

pip install requests

Now that you’re ready to start interacting with a REST API with Python Requests, make sure you import the Requests module into any scripts you wish to utilize it in:

import requests

How Request Data With GET?

The GET method is used to retrieve data from a Python REST API for a specified resource; Python Requests offers a function for this purpose.

import requests
response = requests.get("http://api.open-notify.org/astros.json")
print(response)
>>>> Response<200>

The response object contains all of the information delivered by the server in response to your GET request, including headers and the data payload. When this code sample outputs the response object to the console, it simply gives the object’s class name and the status code received by the request (more on status codes later).

While this information may be important, you’re more likely interested in the request’s content, which may be retrieved in a variety of ways:

response.content() # Return the raw bytes of the data payload
response.text() # Return a string representation of the data payload
response.json() # This method is convenient when the API returns JSON

How to Use Query Parameters?

Queries can be used to filter the data returned by an API, and they are provided as query parameters to the endpoint URL. This is handled by the params option in Python Requests, which accepts a dictionary object; let’s see what that looks like when we use the Open Notify API to GET an estimate for when the ISS will pass over a given point:

query = {'lat':'45', 'lon':'180'}
response = requests.get('http://api.open-notify.org/iss-pass.json', params=query)
print(response.json())

The print command would provide the following output:

{
  'message': 'success',
  'request': {
    'altitude': 100,
    'datetime': 1590607799,
    'latitude': 45.0,
    'longitude': 180.0,
    'passes': 5
  },
  'response': [
    {'duration': 307, 'risetime': 1590632341},
    {'duration': 627, 'risetime': 1590637934},
    {'duration': 649, 'risetime': 1590643725},
    {'duration': 624, 'risetime': 1590649575},
    {'duration': 643, 'risetime': 1590655408}
  ]
}

How to Create and Modify Data With POST and PUT?

The data argument, like the query parameters, may be used to add the related data for PUT and POST method requests.

# Create a new resource
response = requests.post('https://httpbin.org/post', data = {'key':'value'})
# Update an existing resource
requests.put('https://httpbin.org/put', data = {'key':'value'})

How to Access REST Headers?

Headers can also be used to get metadata from the response. For example, to examine the response date. You can just define it with the ‘headers’ property like shown below:

print(response.headers["date"]) 
>>>> 'Wed, 11 June 2020 19:32:24 GMT'

That covers the fundamentals of open APIs. However, many APIs are not available to the general public. Let’s go through how to authenticate to Python REST APIs for them.

How to Authenticate to a Python REST API?

So far, you’ve learned how to communicate with open REST APIs that don’t require authentication. Many REST APIs, however, require you to login before you may access specific endpoints, especially if they deal with sensitive data.

There are a few typical authentication mechanisms for Python REST APIs that Python Requests can handle. The easiest method is to provide your login and password as HTTP Basic Auth to the relevant endpoint; this is akin to putting your username and password into a webpage.

requests.get(
  'https://api.github.com/user', 
  auth=HTTPBasicAuth('username', 'password')
)

A more secure option is to obtain an access token, which serves as an equivalent to a username/password combination; the mechanism for obtaining an access token varies greatly from API to API, although OAuth is the most often used framework for API authentication. We utilize a three-legged OAuth here at Nylas to give an access token for user accounts that are confined to scopes that describe the precise data and functionality that may be accessed.

Once you have an access token, you can include it in the request header as a bearer token: this is the most secure approach to authenticate to a REST API using an access token:

my_headers = {'Authorization' : 'Bearer {access_token}'}
response = requests.get('http://httpbin.org/headers', headers=my_headers)

Other techniques for authenticating to a Python REST API include digest, Kerberos, NTLM, and AuthBase. The use of these is determined by the REST API producer’s architectural considerations.

Use Sessions to Manage Access Tokens 

Session objects are useful when dealing with Python Requests as a mechanism for persisting parameters required for many requests inside a single session, such as access tokens. In addition, controlling session cookies can give a significant speed boost because you don’t have to start a new connection for each request.

session = requests.Session()
session.headers.update({'Authorization': 'Bearer {access_token}'})
response = session.get('https://httpbin.org/headers')

How to Handle HTTP Errors With Python Requests?

API calls may not always go as expected, and there are a variety of reasons why API requests may fail, which may be the fault of either the server or the client. To make your code more resilient, if you’re going to utilize a REST API, you must learn how to manage the errors that they report when things go wrong. This section will teach you all you need to know about dealing with HTTP failures using Python Requests.

The Basics of HTTP Status Codes

Before delving into the specifics of Python Requests, we must first understand what HTTP status codes are and how they relate to errors you may encounter.

The status codes are classified into one of five groups.

  • 1xx Informational: Indicates that a request was received and that the client should continue to request the data payload. When dealing with Python Requests, you probably won’t have to bother about these status codes.
  • 2xx Successful: Indicates that a requested action was received, comprehended, and accepted. You can use these codes to validate the presence of data before acting on it.
  • 3xx Redirection: Indicates that the client must do an extra action, such as accessing the resource through a proxy or another endpoint, to complete the request. To cope with these codes, you may need to create extra requests or change your existing ones.
  • 4xx Client Error: Indicates an issue with the client, such as a lack of authorization, restricted access, prohibited techniques, or attempts to access nonexistent resources. This usually indicates a problem with the client application’s configuration.
  • 5xx Server Error: This error code indicates that there is an issue with the server that supplies the API. There are several types of server problems, and they frequently necessitate the intervention of the API provider.

How to Check for HTTP Errors With Python Requests?

The status code element of the response objects may be used to check for any issues reported by the API. The following example illustrates how to use this property to check for successful and 404 not found HTTP status codes, although this format may be used for any HTTP status code.

response = requests.get("http://api.open-notify.org/astros.json")
if (response.status_code == 200):
    print("The request was a success!")
    # Code here will only run if the request is successful
elif (response.status_code == 404:
    print("Result not found!")
    # Code here will react to failed requests

To test this, remove the final letter from the URL endpoint; the API should return a 404 status code.

If you want Requests to raise an exception for all error codes (4xx and 5xx), use the raise for status() method and catch particular issues with Requests’ built-in exceptions. The next code sample does the same thing as the previous one.

try:
    response = requests.get('http://api.open-notify.org/astros.json')
    response.raise_for_status()
    # Additional code will only run if the request is successful
except requests.exceptions.HTTPError as error:
    print(error)
    # This code will run if there is a 404 error.

TooManyRedirects: The necessity to redirect to a different site for the resource you’re requesting is frequently signaled by 3xx HTTP status codes. This can lead to an endless redirect loop in some cases. To resolve this issue, utilize the TooManyRedirects error in the Python Requests module. To fix this issue, it’s probable that the URL you’re using to access the resource is incorrect and has to be modified.

try:
    response = requests.get('http://api.open-notify.org/astros.json')
    response.raise_for_status()
    # Code here will only run if the request is successful
except requests.exceptions.TooManyRedirects as error:
    print(error)

You may specify the maximum number of redirects using the request options:

response = requests.get('http://api.open-notify.org/astros.json', max_redirects=2)

Alternatively, you may deactivate redirecting entirely in your request options:

response = requests.get('http://api.open-notify.org/astros.json', allow_redirects=False)

ConnectionError: So far, we’ve only looked at errors generated by a live server. What if you don’t get a response from the server at all? Connection problems can occur for a variety of reasons, including DNS failure, rejected connection, internet connectivity difficulties, or network slowness. When your client is unable to connect to the server, Python Requests throws the ConnectionError exception.

try:
    response = requests.get('http://api.open-notify.org/astros.json') 
    # Code here will only run if the request is successful
except requests.ConnectionError as error:
    print(error)

This sort of mistake might be either transitory or permanent. In the first case, you should retry the request to check if the outcome is different. In the latter case, make sure you’re prepared to cope with a protracted inability to obtain data from the API, which may necessitate investigating your own connectivity difficulties.

Timeout: Timeout issues occur when you can connect to the API server but it does not finish the request inside the time limit. Python Requests, like the previous problems we’ve looked at, may handle this error using a Timeout exception:

try:
    response = requests.get('http://api.open-notify.org/astros.json', timeout=0.00001)
    # Code here will only run if the request is successful
except requests.Timeout as error:
    print(error)

The timeout, in this case, was set to a fraction of a second using the request parameters. Because most APIs cannot react this rapidly, the code will throw a timeout error. You may avoid this problem by extending your script’s timeouts, optimizing your requests to be smaller, or implementing a retry loop for the request. This can also indicate an issue with the API provider. One last option is to use asynchronous API calls to keep your code from freezing as it waits for bigger answers.

How to Make Robust API Request?

As we’ve seen, the Requests module gracefully handles typical API request problems by leveraging Python’s exception handling. When we combine all of the faults we’ve discussed, we have a rather simple solution to handle any HTTP request error that comes our way:

try:
    response = requests.get('http://api.open-notify.org/astros.json', timeout=5)
    response.raise_for_status()
    # Code here will only run if the request is successful
except requests.exceptions.HTTPError as errh:
    print(errh)
except requests.exceptions.ConnectionError as errc:
    print(errc)
except requests.exceptions.Timeout as errt:
    print(errt)
except requests.exceptions.RequestException as err:
    print(err)

Conclusion

This article teaches you about Python REST APIs. It provides in-depth knowledge about the concepts behind every step to help you understand and implement them efficiently. Building a Python REST API connection manually, and using API calls can be challenging especially for a beginner & this is where Hevo saves the day.

Visit our Website to Explore Hevo

Hevo Data provides its users with a simpler platform for integrating data from 150+ Data sources for Analysis. It is a No-code Data Pipeline that can help you combine data from multiple sources. You can use it to transfer data from multiple data sources into your Data Warehouses, Database, or a destination of your choice. It provides you with a consistent and reliable solution to managing data in real-time, ensuring that you always have Analysis-ready data in your desired destination.

Want to take Hevo for a spin? Sign Up for a 14-day free trial and experience the feature-rich Hevo suite first hand. You can also have a look at our unbeatable pricing that will help you choose the right plan for your business needs!

Share your experience of learning about Python REST APIs! Let us know in the comments section below!

mm
Former Research Analyst, Hevo Data

Harsh comes with experience in performing research analysis who has a passion for data, software architecture, and writing technical content. He has written more than 100 articles on data integration and infrastructure.

No-Code Data Pipeline for Your Data Warehouse