

To boost the visibility of your website and reach more people through Google Search, no better ally exists than Google Search Console. This powerful and completely free tool will give direct insights into exactly how Google views and ranks your website, highlights performance metrics, search traffic, and possibly some technical issues. Whether you just start using SEO or adjust your strategy for your website, creating a Google Search Console account is the first step toward discovering more and unlocking everything about your online presence. Having made the case for the necessity of having a Google Search Console account for a website owner, let us walk through the steps required to set up Google Search Console Account.
Table of Contents
Introduction to Google Search

If you have a website and wish to get organic traffic from Google search, then a Google Search Console account is a must-have. It gives you a complete picture of how your content is performing in Google searches. It comes with several tools and reports to help you gauge your site’s performance and identify shortcomings. These include performance reports, core web vitals, links reports, mobile usability reports, and several others.
The recently added Search Console Insights (beta) takes the usability of the Google Search Console to the next level and provides you with a comprehensive view of your top content, top traffic sources, top keywords, the performance of your new content, top referring sites, and also how much social media is aiding your traffic.
Are you having trouble migrating your data from Google Search Console? With a no-code platform and competitive pricing, Hevo makes the process seamless and cost-effective.
- Secure & Reliable: Hevo’s fault-tolerant architecture ensures secure, consistent data handling with zero loss and automatic schema management.
- Efficient Data Transfer: Hevo supports real-time, incremental data loads, optimizing bandwidth usage for both ends.
- Live Monitoring & Support: Hevo provides live data flow monitoring and 24/5 customer support via chat, email, and calls.
You can see it for yourselves by looking at our 2000+ happy customers, such as Airmeet, Cure.Fit, and Pelago.
SIGN UP HERE FOR A 14-DAY FREE TRIALSteps to Set up Google Search Console
Prerequisites
It is assumed that you have a website property for which you wish to set up Google Search Console account. Apart from this, there aren’t any prerequisites.
Getting Started
Follow these steps to set up Google Search Console Account:
1. Go to https://search.google.com/search-console
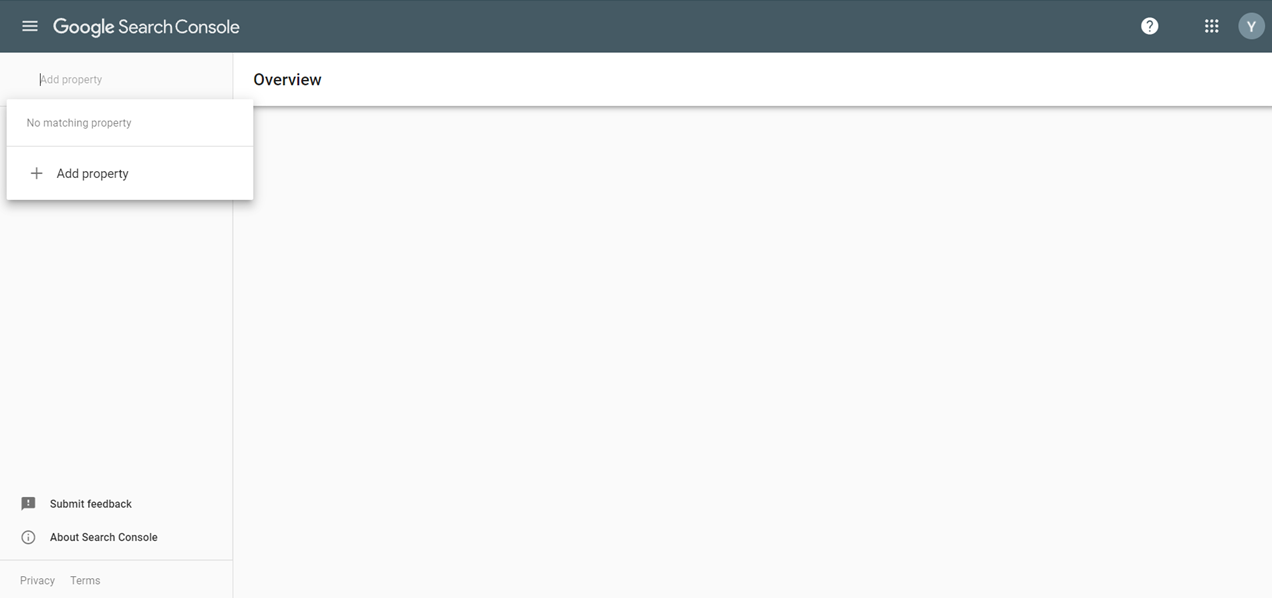
2. If you are visiting the above link for the first time, you will mostly see a blank screen. Click on ‘Add property’ from the left pane, and select ‘Add property’ from the dropdown.
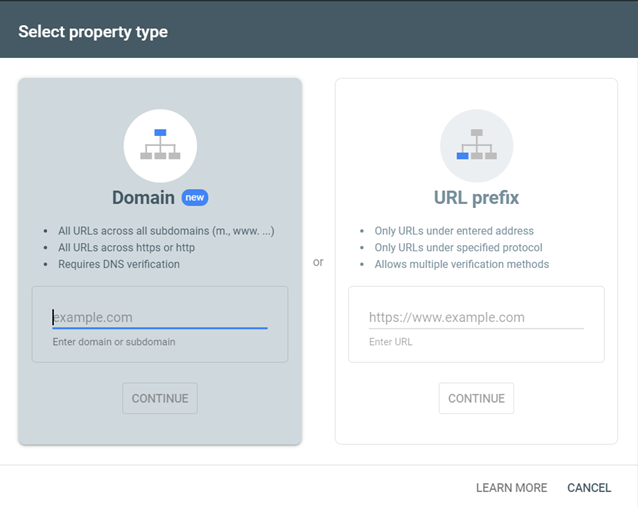
3. A dialog box will open up, asking you to select the property type. You can select either a Domain property or a URL prefix property.
Note:
- A Domain property refers to a property wherein you own the domain (like mysite.com). All the URLs within that domain and across all subdomains (like m.mysite.com) get included. All URLs across protocols (http or https) get included, and you need to perform DNS verification of your property.
- A URL prefix property refers to a property where you have only partial ownership. Take the example of a shared blog. The domain may be community-blog.com. However, once you create an account, all posts created with your account will have URLs containing an identifier, maybe your username.
- For example, if your username is abcd, then all your posts will have URLs starting with https://community-blog.com/abcd/. When you add such a property, only the URLs starting with that prefix are included under the specified protocol (either http or https). You get access to multiple verification methods with this type of property.
You can add the top-level domain as well, like https://community-blog.com, under the ‘URL prefix’ type. The constraints will remain. Subdomains won’t get included, and http prefix pages won’t get included.


4. Select the type that best describes your property, then enter the URL of your property and click on continue.
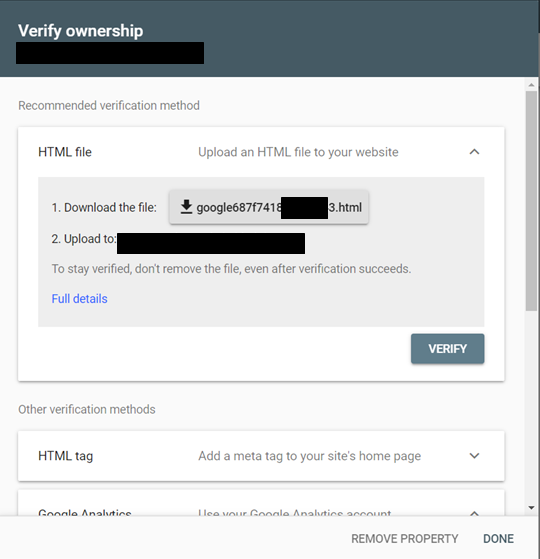
5. You will now be asked to verify your ownership of the site.
If you have chosen ‘Domain’ as the type, you will have only one option: DNS verification. However, if you have chosen ‘URL prefix’ as the type, you get several options, with the recommended one being uploading an HTML to your site. Once you verify that you are the owner of the site, using one of the listed methods, click on ‘Done’.
6. Once the verification is complete, click on ‘Go To Property’
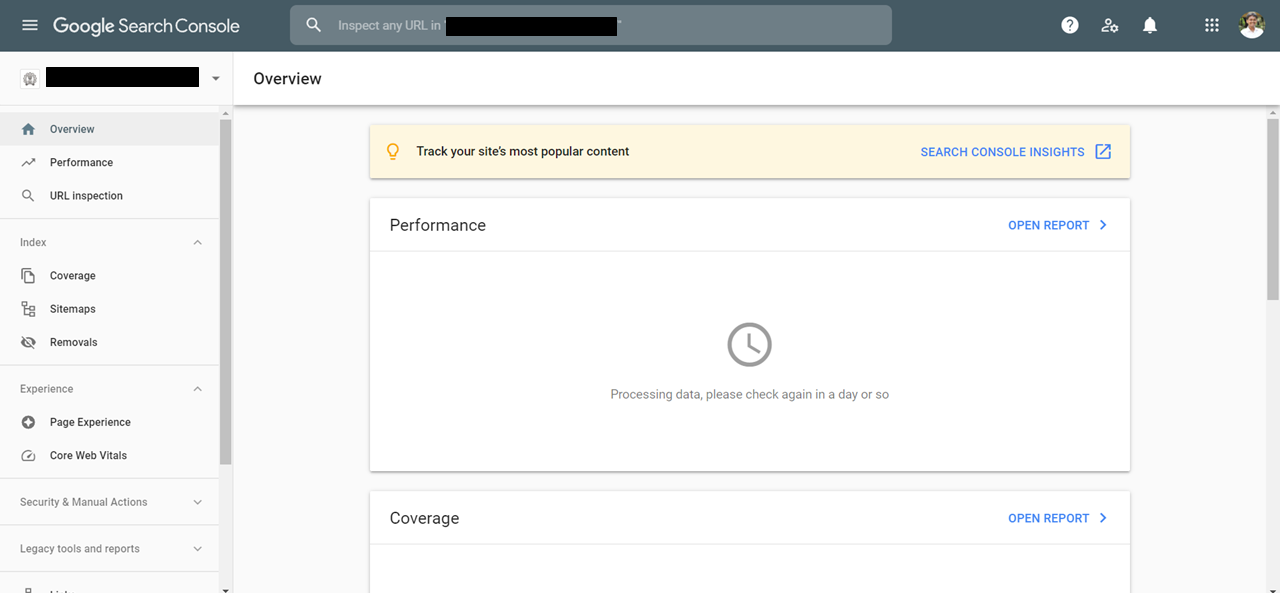
After the set up Google Search Console will take some time to process your data. As the text reads, you should check back in a day or so. Don’t worry, your data will appear there alright.
Note: If you have a WordPress site, then nearly all the heavy lifting associated to set up Google Search Console account can be done by the Site Kit plugin provided by Google. All you will need to do is link the plugin to your Google account. You can get steps related to set up Google Search Console using Site Kit here.
Next Steps
Once your account is set up, here are a few optional things you can do on an immediate basis:
Submit a Sitemap
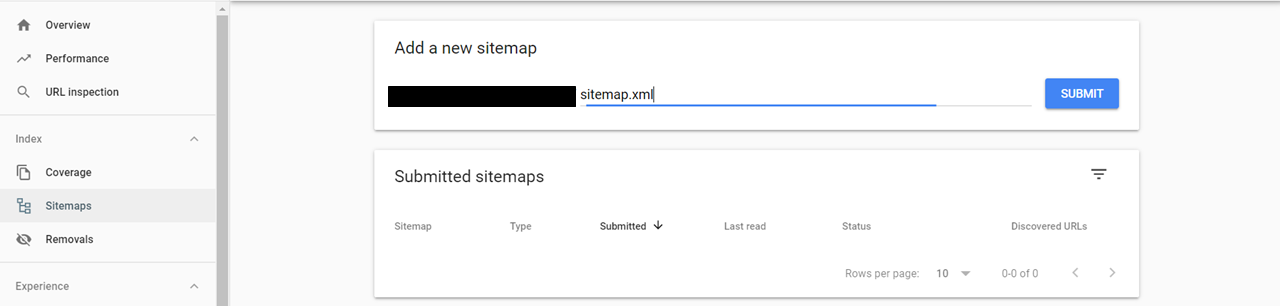
1. Click on ‘Sitemaps’ in the left menu, and enter the URL of the sitemap on your site. A sitemap, as the name suggests, provides information about the pages and other files on your site, and how they are related to each other. If you submit a sitemap, Google reads it periodically, and this ensures that any new content that you add to your site is quickly made available to Google to crawl and index.
Not everyone needs a sitemap, and therefore, it is recommended you follow Google’s guide on Do I need a sitemap?. Once you have decided that you need one and have had it created, add the URL to the sitemap and click on Submit.
Connect Google Analytics to Search Console
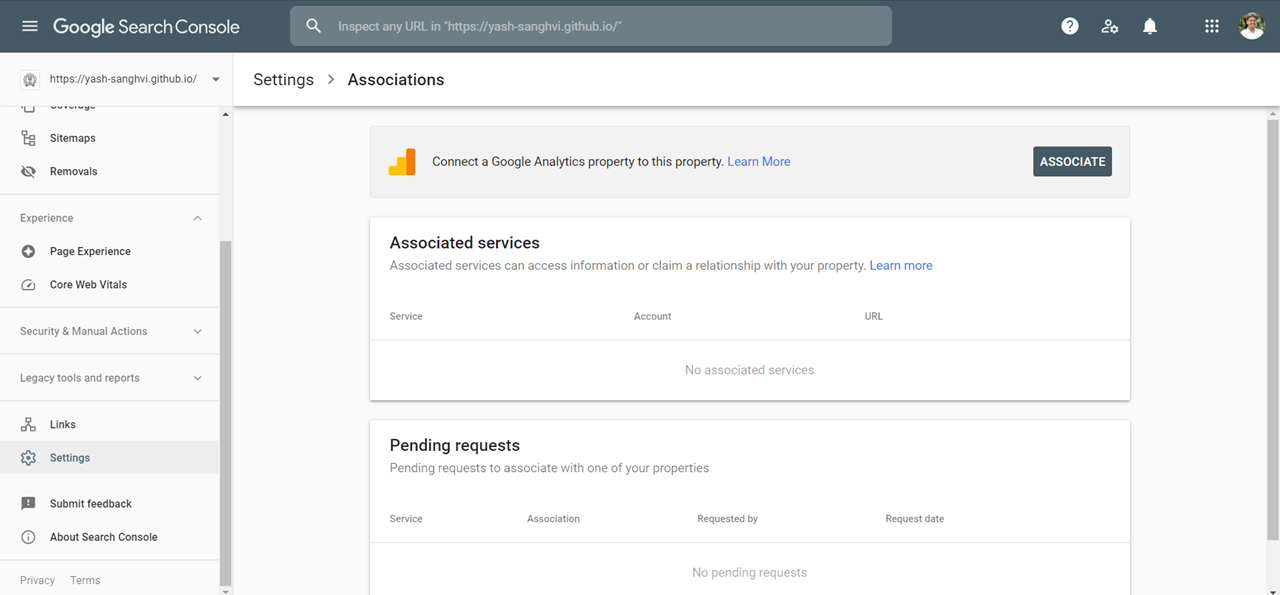
1. If you have Google Analytics enabled for your site, you can link your Google Analytics account to your Search Console account. This will help you see Google Analytics data in Search Console insights, and also see Search Console data in Google Analytics. You can read more here.
In order to perform the linkage, go to Settings -> Associations. You will see the option to connect a Google Analytics property. Click on ‘ASSOCIATE’
Select the Google Analytics property from the dialog box that opens up and click on ‘Continue’. You will be asked to confirm your association. Verify the details, and click ‘ASSOCIATE’
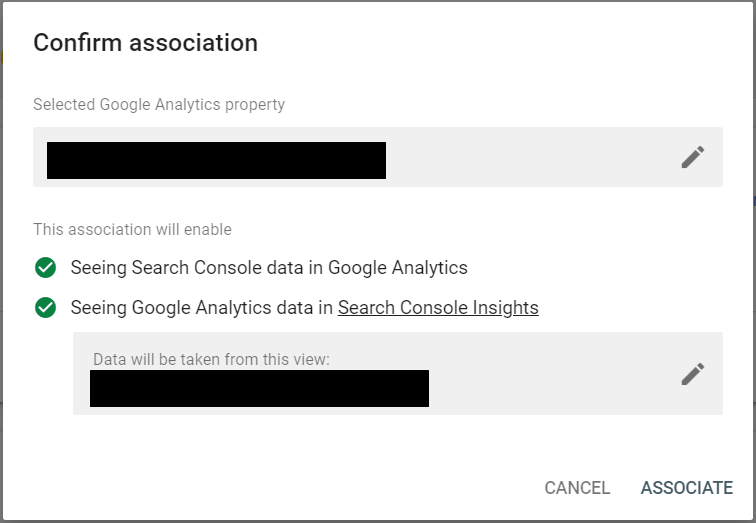
This will perform the association and you will be able to see it under ‘Associated Services’. Once the association is done, you can see some data (like all-time page views, traffic sources, popular content, etc.) populated in the Search Console Insights.
Conclusion
We saw how to set up a Google Search Console account and also why it is important to connect your site to the Search Console. We also saw some optional setup steps that can be taken immediately after the main setup is done.
Set up Google Search Console, is a hectic task to Set Up the proper environment. To make things easier, Hevo comes into the picture. Hevo Data is a No-code Data Pipeline and has awesome 150+ pre-built Integrations that you can choose from.
SIGN UP for a 14-day free trial and see the difference!
Share your experience learning the steps to set up Google Search Console in the comments section below.
FAQs
1. How do I register my site with Google Search Console?
To register your site with Google Search Console, go to the Google Search Console website, sign in with your Google account, and add your site by entering its URL. Then, follow the steps to verify that you own the website.
2. How to create a GSC account?
Creating a Google Search Console (GSC) account is simple. Just go to the Google Search Console page, sign in with a Google account, and you’ll be guided through adding and verifying your website.
3. How do I submit my website to Google Search Console?
Once your site is added and verified in Google Search Console, go to the “URL Inspection” tool and enter your site’s URLs. You can also submit a sitemap to help Google crawl your site more effectively.
Share it with your connections.
-
 Share To LinkedIn
-
 Share To Facebook
-
 Share To X
-
 Copy Link


