A webhook is an API concept that’s growing in popularity. A webhook (also called a Web Callback or HTTP push API) is a way for an app to provide other applications with real-time information.
- A webhook delivers data to other applications as it happens, meaning you get data immediately. Unlike typical APIs, where you would need to poll for data very frequently to get it real-time, webhooks are much more efficient for both provider and consumer.
- Given that you may not have a second chance to receive a webhook, you need to properly test the webhook systems so that they can process all requests without errors.
- Webhooks testing also comes in handy when you’re trying to scale up your infrastructure to meet the webhook demands.
Table of Contents
Webhooks Testing Types
There are various test types can be employed to identify and eliminate bugs, ensure scalability, and optimize performance in webhook processing.
- Unit Testing Webhooks for Logic Errors
- Functional Testing of Webhook Workflows
- Load Testing for Resilience
Learn how Hevo simplifies integration by supporting Webhooks as a source. With Hevo, you can enable seamless data ingestion without writing any code, making the process more efficient and accessible.
Let’s see some unbeatable features of Hevo Data:
- Fully Managed: Hevo Data is a fully managed service and is straightforward to set up.
- Schema Management: Hevo Data automatically maps the source schema to perform analysis without worrying about the changing schema.
- Real-Time: Hevo Data works on the batch as well as real-time data transfer so that your data is analysis-ready always.
- Live Support: With 24/5 support, Hevo provides customer-centric solutions to the business use case.
1. Unit Testing Webhooks for Logic Errors
- Unit testing is critical to ensuring the correctness and robustness of webhook processing logic. It involves testing the smallest functional units of your code, such as functions, classes, and modules, in isolation.
What are Unit Tests?
- Unit tests validate the behavior of your code by providing predefined inputs and verifying the outputs against expected results.
- For example, if your webhook endpoint handler includes a function that checks for a database record or performs authentication, you can test it in a unit test to ensure it performs as expected.
How to Perform Unit Tests?
- Unit tests are executed using testing libraries, test runners, and assertion libraries, which are often bundled together.
- These tools are language-specific, such as Jest for JavaScript, PHPUnit for PHP, and Go’s built-in testing library.
- Refer to the documentation of your chosen testing library for detailed instructions on performing unit tests for your codebase.
Common Types of Unit Tests for Webhooks
- Verifying the expected result when providing specific inputs to a function
- Validating calculations within functions or class methods
- Testing the behavior when supplying incorrect data or data types
- Ensuring proper instantiation of classes
- Validating data integrity for functions that perform database operations
Benefits of Unit Testing Webhooks
- Ensures the detection and removal of logic errors in your code
- Identifies errors and informs error handling when incorrect data types are supplied
- Reduces debugging time by providing confidence in thoroughly tested code components
- Improves code maintainability and facilitates refactoring
- Increases overall code quality and reliability
2. Functional Testing of Webhook Workflows
- Functional testing is essential for validating the end-to-end behavior of your webhook processing system.
- It verifies that the individual components work together seamlessly to produce the expected outcome.
Testing Webhook Processing
- One way to functionally test your webhooks is to check the webhook request and processing flow.
- This ensures that your webhook is delivered to the correct destination and processed as expected.
- To facilitate this, you’ll need a publicly accessible HTTPS endpoint as your webhook URL for testing purposes.
Performing Functional Tests on Webhook URLs
- Webhook URLs are endpoints in your application’s API. Testing these URLs involves sending mock requests to the endpoint and verifying the output against expected results.
- The approach and libraries used for writing functional tests are programming language and framework-specific. For example, supertest is a
Node.jslibrary that can send mock requests and check the outcomes, while Postman offers a comprehensive API testing suite compatible with any codebase. - With Postman, you can create collections that simulate different scenarios (success, failure, invalid data, etc.) for your webhook endpoint and write tests for each use case. These tests can be run locally or automated in a CI/CD pipeline using Postman’s command-line utility, Newman.
Benefits of Functional Tests on Webhooks
- Validate the entire workflow involved in processing a webhook
- Test webhook idempotency (handling duplicate requests)
- Perform data integrity checks by inspecting the outcome of webhook processing
- Observe error handling and behavior in failure situations
- Test authentication mechanisms
- Verify other application-specific workflows and expected outcomes
3. Load Testing for Resilience
- Load testing is a crucial practice in webhooks testing, enabling you to assess your application’s ability to handle high volumes of webhook traffic without dropping requests.
- This testing approach is essential for applications that need to process a significant number of webhooks, as it helps you make informed decisions about scaling your infrastructure as traffic grows.
How to Load Test Your Webhooks?
- One of the most widely used tools for load testing is Apache Benchmark (AB). This command-line utility allows you to fire a specified number of requests (hundreds, thousands, etc.) against an API endpoint with customizable concurrency levels and payloads.
For example, the following AB command fires 1,000 requests against the [https://myserver.com/webhook-processing](https://myserver.com/webhook-processing) endpoint, using a concurrency level of 20 and passing data from a data.json file in JSON format:
ab -n 1000 -c 20 -p data.json -T application/json -rk https://myserver.com/webhook-processing
After completing the requests, AB provides useful information, including:
- Total requests executed per second
- Total completed requests
- Total failed requests
- Average time per request
This data is invaluable for engineers seeking to scale their webhook infrastructure effectively.
Benefits of Load Testing Webhooks
- Determines the capacity of your servers
- Helps establish appropriate rate-limiting settings
- Supports horizontal scaling decisions by identifying the need for additional servers to handle increasing traffic
- Identifies when to introduce asynchronous processing components like message queues
- Ensures your webhook processing system can handle high loads without failures or performance degradation
Top 3 Webhook Testing Tools
1. RequestBin
- RequestBin allows you to create a
requestbin,which essentially is a listener( or Endpoint) used for webhooks Testing of requests. - While Webhooks testing, requests will hit this listener URL or Endpoint. The endpoint will collect all these requests, inspects them, and provides statistics, to help debug your webhooks.
- This endpoint can be configured to send responses based on the request parameters that it receives. Requests can be generated via browser or programming languages like Curl/Go/PHP/Ruby etc.

This way one can execute the webhook test online so that the endpoint and the intended payload receive the webhook is delivered.
Also, confirmatory responses can be sent based on received request payloads. The event source or trigger can be an email or a cron scheduler or an HTTP webhook.
RequestBin ensures that your requests are properly formatted, allows you to generate payloads, and does not get overwhelmed when request volume increases.

Alternatively, you can also receive your webhooks testing requests, the ones you plan to subscribe to, on the RequestBin endpoint. The endpoint will show you all the headers, query-string, and the raw body of what is received.
This way you get an idea of what to expect when you test webhook online and plan your applications accordingly.
Pros of RequestBin
- Provides a free account, if you want your tests to remain private you have to pay.
- Integrates well with many other services and allows you to create requestbins for Github/Dropbox/Typeform/Twitter/GoogleDrive/AWS SES/Slack etc.
- Provides preconfigured Triggers for these services, like a new upload in Github/new Item in RSS feed/Start of a meeting in Xoom etc.
- Well documented with good support
- Large and active developer community
Cons of RequestBin
- If using the free account, your webhooks testing becomes public, or at least RequestBin has a right to show them to others.
- The test is named “Untitled” on a free account, so it’s a bit tedious to share it with others and manage if you have multiple endpoints.
- Encryption and HTTPS can be used in paid mode only
2. HTTPie
HTTPie, pronounced aitch-tee-tee-pie, is an easy-to-use command-line tool that can be used for Webhooks testing as well as API testing.
For those who prefer command-line tools; for their simplicity, fine-grained control, and detailed output logs; HTTPie can be a good option. The calls are made to the URL httpie.io, providing the parameters
The general syntax to be used at the command line is:-
HTTPie assumes JSON to be the default notation, to the extent that it can detect JSON even if the Content-Type is incorrectly specified as text/plain
There are many advanced features that make HTTPie powerful and convenient.
- Complex or lengthy parameters can be passed in a file in JSON format
http POST pie.dev/post < /home/user/myfiles/data.json- –offline option allows you to construct your command line HTTP requests without sending them. This option can be used to construct complex command input and play around with them, you can submit them after you’re confident about their accuracy, by just removing the –offline tag.
Its also used for documentation, debugging, and exploring dry runs or runs which will be executed on many endpoints.
- You can easily submit forms using the –form, -f option.
http --form POST pie.dev/post name='John Smith' - You can easily upload files using the cv@~ option, OR submit multi-part form data
http  -f POST pie.dev/post name='John Smith'
datafile@~/home/user/myfiles/data.xml
The above command is the same as a multi-part form submit a request as detailed below.
<form enctype="multipart/form-data" method="post" action="pie.dev/post">
    <input type="text" name="name" />
    <input type="file" name="datafile" />
</form>- Another corollary of the same option is to use “=@”, to embed a file’s contents as the regular text field value.
http -f POST pie.dev/post name='John Smith' address:=@/home/user/myfiles/address.json - HTTPie also allows you to define proxies via environment variables like ALL_PROXY, HTTP_PROXY, and HTTPS_PROXY, etc.
export HTTP_PROXY=http://101.27.1.10:8180
export HTTPS_PROXY=https://101.27.1.10:443
export NO_PROXY=localhost,MyTestServer.com
You can also create a <i> config.json file, when HTTPie sees it, this file will be used as its configuration file.
- It supports SSL communication, and you can specify your custom CA bundle path via the <i> –verify=<CA_BUNDLE_PATH> option.
Your client-side certificate for the SSL communication can be specified via the <i>–cert option
http --verify=/ssl/custom_ca_bundle https://example.org
http --cert=client.pem https://example.org
Pros of HTTPie
- Programmers favorite as it gives transparency in terms of the parameters sent and responses received, everything is in the foreground.
- Provides fine-grained control.
- As you construct your command line requests, some obvious optimizations and errors become easily evident.
- Supports Basic and Digest authentication methods
Cons of HTTPie
- Can be error-prone if you are not used to command-line interfaces
- Can be tedious for the non-experienced user or for a user in a hurry
If you rather prefer GUI tools, then the next tool we discuss is another option for you.


3. Postman
Postman is a platform that enables API design, development, Webhooks testing as well as documentation. It provides you with tools for the complete API lifecycle, including sharing and discoverability of your APIs.
We will just discuss the tools postman provides for webhooks testing.
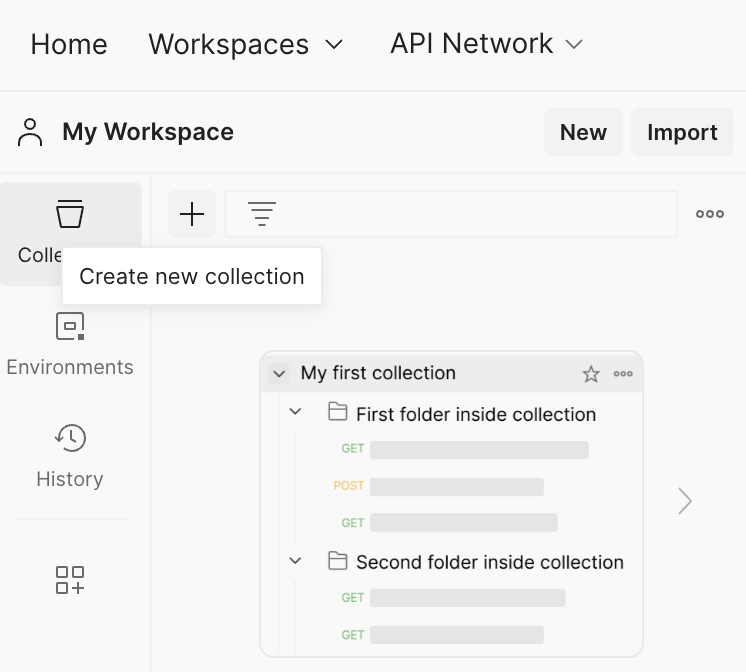
Postman’s monitoring service allows you to test your APIs and also perform Webhooks testing. Postman monitors are based on collections. A collection is a group of your Webhooks ( or API calls) that can be run one after another, to be tested. You can also attach a corresponding environment with variables you’d like to utilize during each collection run.

Once a collection is created you can start adding requests(webhooks) to your collection, also you can add authorization config/pre-request/test script code, and any variables you want to share across all requests in the collection.

You can also attach a corresponding environment with variables you’d like to utilize during each collection run.

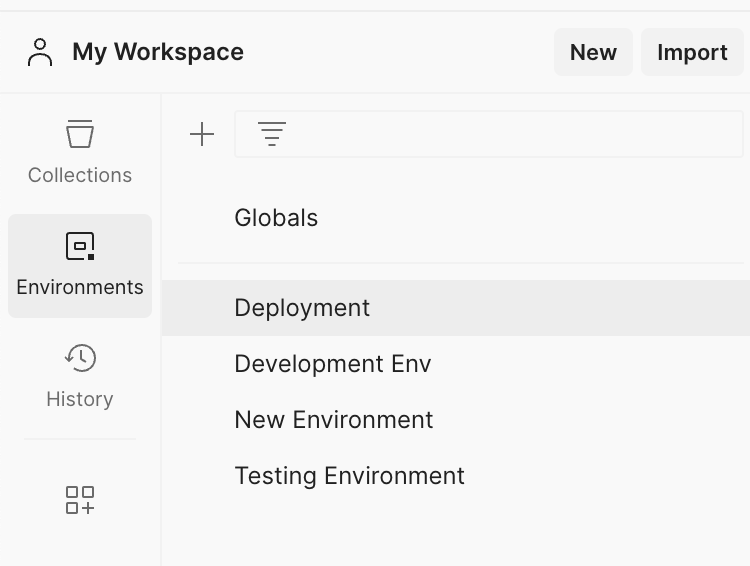
An environment here is a set of variables, constants, URLs, etc. You can provide custom parameters that are auto-populated by Postman, and fed to the test run. It’s a replacement for using global variables which lets you control the visibility of your data values within your workspace and team.

You can have separate environments for development, webhooks testing, production, etc. You can also share your environments with different teams as and when the need arises.
Moreover, different users can have different roles within an environment. Environment variables can be set inside your test scripts also.
pm.environment.set("variable_key", "variable_value"); Next, you can write Test scripts on how to perform your tests, using these collections. While running a collection, Postman will use the test scripts to make sure that the responses received are as expected. It will flag anomalies, send emails/Slack notifications when tests fail.
Pros of Postman
- A powerful and multi-faceted development environment can be used for all your API development practices.
- Allows collaboration and tracking in a multi-team environment.
- Enables design, development, and testing of other programs working alongside your Webhooks.
Cons of Postman
- Most advanced services are paid and there are Usage limits based on the plan subscribed to.
- Could be overkill if you just want to test a small webhooks-based application.
Difference between Webhook and API
| Aspect | API | Webhooks |
| Data Retrieval | Requires sending requests to pull data from the API. | Sends updates automatically when data changes. |
| Request Frequency | Needs frequent polling, often multiple times per minute. | No need for continuous polling; updates are pushed as they happen. |
| Delay in Receiving Data | May cause delays due to constant polling and waiting for new data. | Immediate data updates with no delay when changes occur. |
| Server Load | Burdens API server with continuous requests, even if no new data. | Reduces server load as requests are only made when updates occur. |
| Handling No Data | Polls even when no new data is available, wasting resources. | No update means no request, saving resources when nothing changes. |
Nuances, Challenges, and Bottlenecks in Webhook Testing and Development
- Since webhooks, by and large, belong to an open federated system, there are certain unique security, accessibility, and throughput constraints; that they need to address.
- Also, as the messages travel through the internet, encryption and authentication must be addressed.
- Developers implement these functions in their code to address these issues. In this post, we will discuss how to test that the required functionality has been achieved and that critical issues have been addressed.
Webhook Examples
- Adding webhook integration to your application can provide you an advantage over your competition because it can aid users in a variety of ways, such as receiving real-time updates, being notified when a specific event occurs, building an automatic process, and more.
- Many firms have included webhook integration into their products.
GitHub
GitHub’s webhook allows users to subscribe to specific GitHub events and take actions when they occur, such as updating an external issue tracker, starting CI builds, deploying to a production server, updating a backup mirror, etc.
Whenever one of these events occurs, a POST request is sent to the Payload URL (webhook URL) specified by the user.

Webhooks can be created and implemented on the repository and organization levels. In addition, it can be installed as a GitHub App. Despite the installation target, a maximum of 20 webhooks can be added to each of them.
Discord
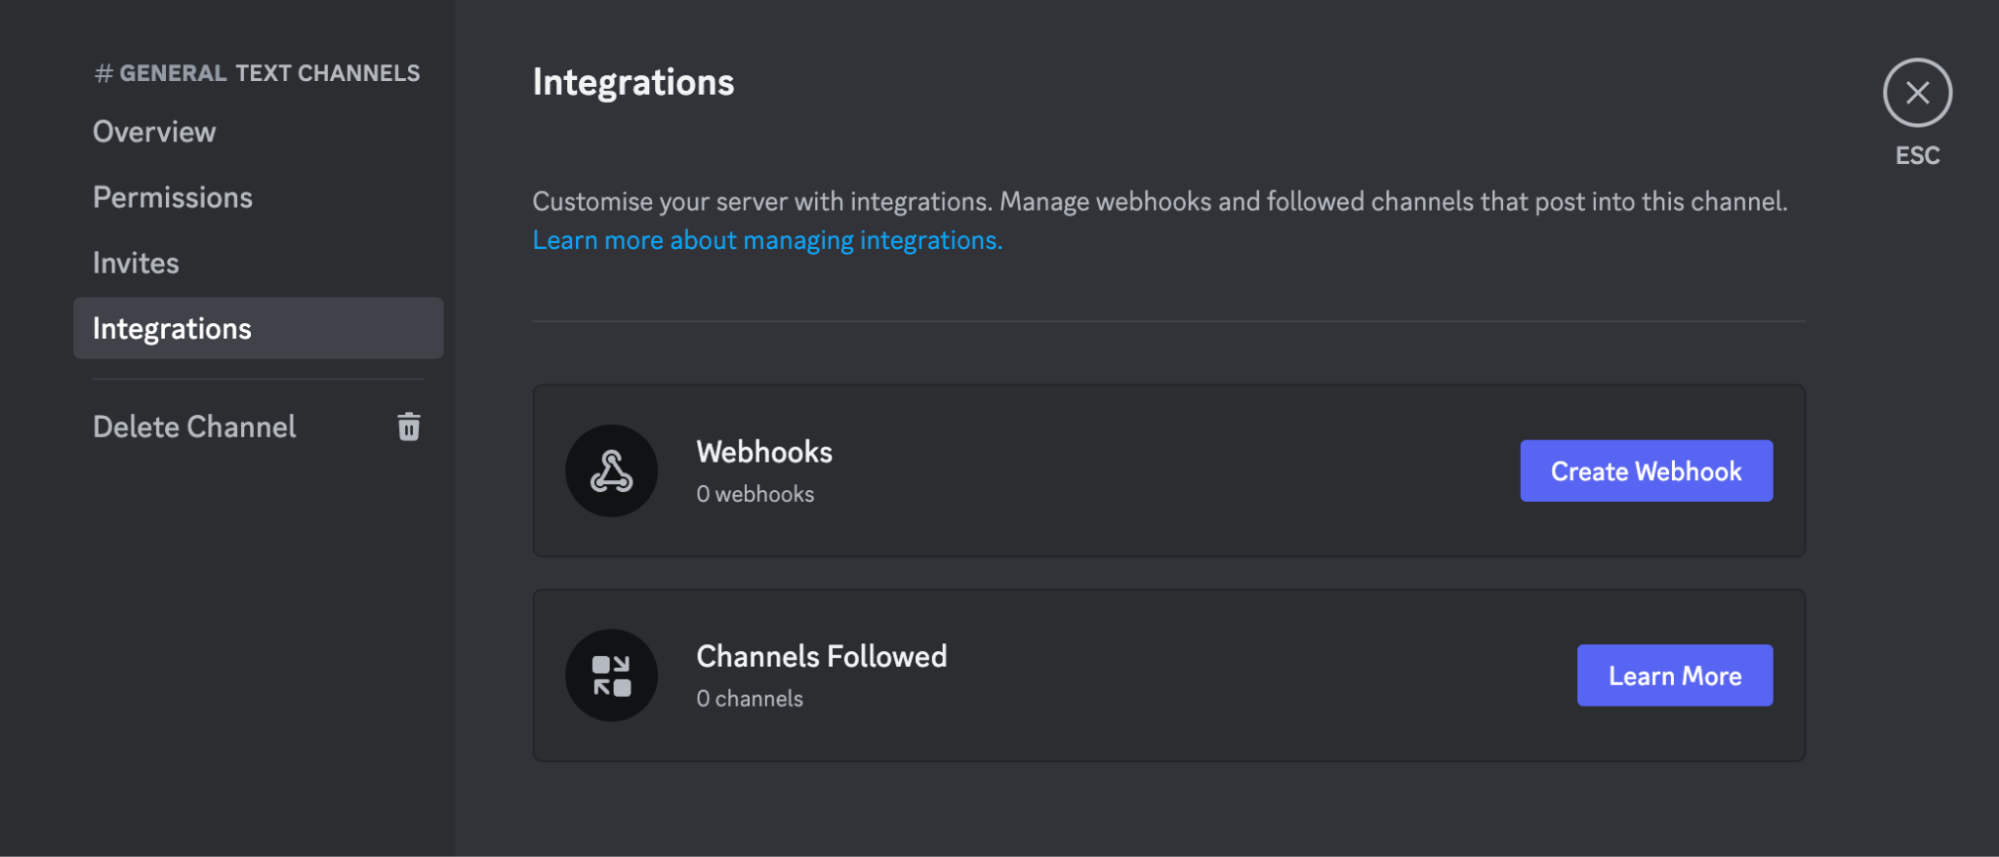
Discord is a cross-platform communication tool that allows users to establish and join virtual “servers” where they may chat with one another using voice, text, and video. As one of the widely used platforms for online communities, its in-built webhook allows server administrators to effortlessly send automatic messages to text channels on their server. This allows them to immediately communicate the most recent changes and information with their users from a variety of sources such as GitHub, Twitter, and YouTube.
By creating a webhook endpoint on the server, the server owner receives a webhook URL that can be used to link the two platforms.

For instance, the webhook URL can serve as the Payload URL for GitHub’s webhook. When a new commit is added to the GitHub repository, the webhook is triggered and a message is automatically sent to the server.

Additional Resources on Webhooks testing
- Explore more on Webhook to MySQL
- Read more on Python Webhook
- Methods to Connect Webhooks to PostgreSQL
Conclusion
- To conclude, we have discussed 3 very different tools for Webhooks Testing.
- We hope this blog can be helpful for you in choosing the right webhooks testing tool based on your current needs.
- To make things easier, Hevo comes into the picture.
You can try Hevo’s 14-day free trial. You can also have a look at the unbeatable pricing that will help you choose the right plan for your business needs!
FAQs
1. What is webhook testing?
Webhook testing is the process of checking whether a webhook integration works correctly. It involves ensuring that the webhook is sending the expected data and that the receiving server processes it as intended.
2. How to automate webhook testing?
To automate webhook testing, you can use tools like Postman or custom scripts to simulate real webhook events.
3. How is a webhook different from an API?
A webhook sends data automatically when an event occurs, while an API requires you to request the data manually. Webhooks are push-based, and APIs are pull-based.


