


Do you want to analyze the Microsoft SQL Server data in Databricks? Is it true that you find setting up the SQL Server Databricks Integration challenging? Assuming, indeed, you’ve arrived at the correct spot! This article will answer all your questions and diminish the strain of discovering a really efficient arrangement.
Upon a complete walkthrough of this article, you will gain a decent understanding of two of the most efficient methods that can be leveraged for Databricks Connect to SQL Server. Read along to learn more about the steps required to set up Databricks Connect to SQL Server.
Table of Contents
What is Databricks?

Databricks is an integrated data analytics platform developed to facilitate working with massive datasets and machine learning. Based on Apache Spark, it creates a seamless collaboration environment for data engineers, data scientists, and analysts.
Key Features of Databricks
- Unified Data Analytics Platform: Combines data engineering, data science, and analytics in one platform.
- Integrated with Apache Spark: Provides high-performance data processing using Apache Spark.
- Collaborative Notebooks: Interactive notebooks for data exploration and collaboration.
- Delta Lake for Reliable Data Lakes: Ensures data reliability and quality with ACID transactions.
- Machine Learning Capabilities: Supports the full machine learning lifecycle from model development to deployment.
Facing challenges migrating your customer and product data from SQL Server to Databricks? Migrating your data can become seamless with Hevo’s no-code intuitive platform. With Hevo, you can:
- Automate Data Extraction: Effortlessly pull data from SQL Server(and other 60+ free sources).
- Transform Data effortlessly: Use Hevo’s drag-and-drop feature to transform data with just a few clicks.
- Seamless Data Loading: Quickly load your transformed data into your desired destinations, such as Databricks.
Try Hevo and join a growing community of 2000+ data professionals who rely on us for seamless and efficient migrations.
Get Started with Hevo for FreeWhat is SQL Server?
SQL Server is a relational database management system (RDBMS) developed by Microsoft. It is designed to store, manage, and retrieve data as requested by other software applications. SQL Server is built on the SQL (Structured Query Language) standard, which is used to query and manage relational databases.
Key Features of SQL Server:
- Scalability: Supports huge databases and multiple concurrent users.
- High Availability: Features include Always On and Failover clustering.
- Security: Tight security through solid encryption, auditing, and row-level security.
- Integration: Integrates very well with other Microsoft services and Third-Party Tools
- Data Tools: In-depth tools for ETL, reporting, and data analysis.
- Cloud Integration: Comparatively much easier to integrate with Azure services
- TSQL: Robust Transact-SQL in complex queries and stored procedures.
How Can You Connect Databricks to SQL Server?
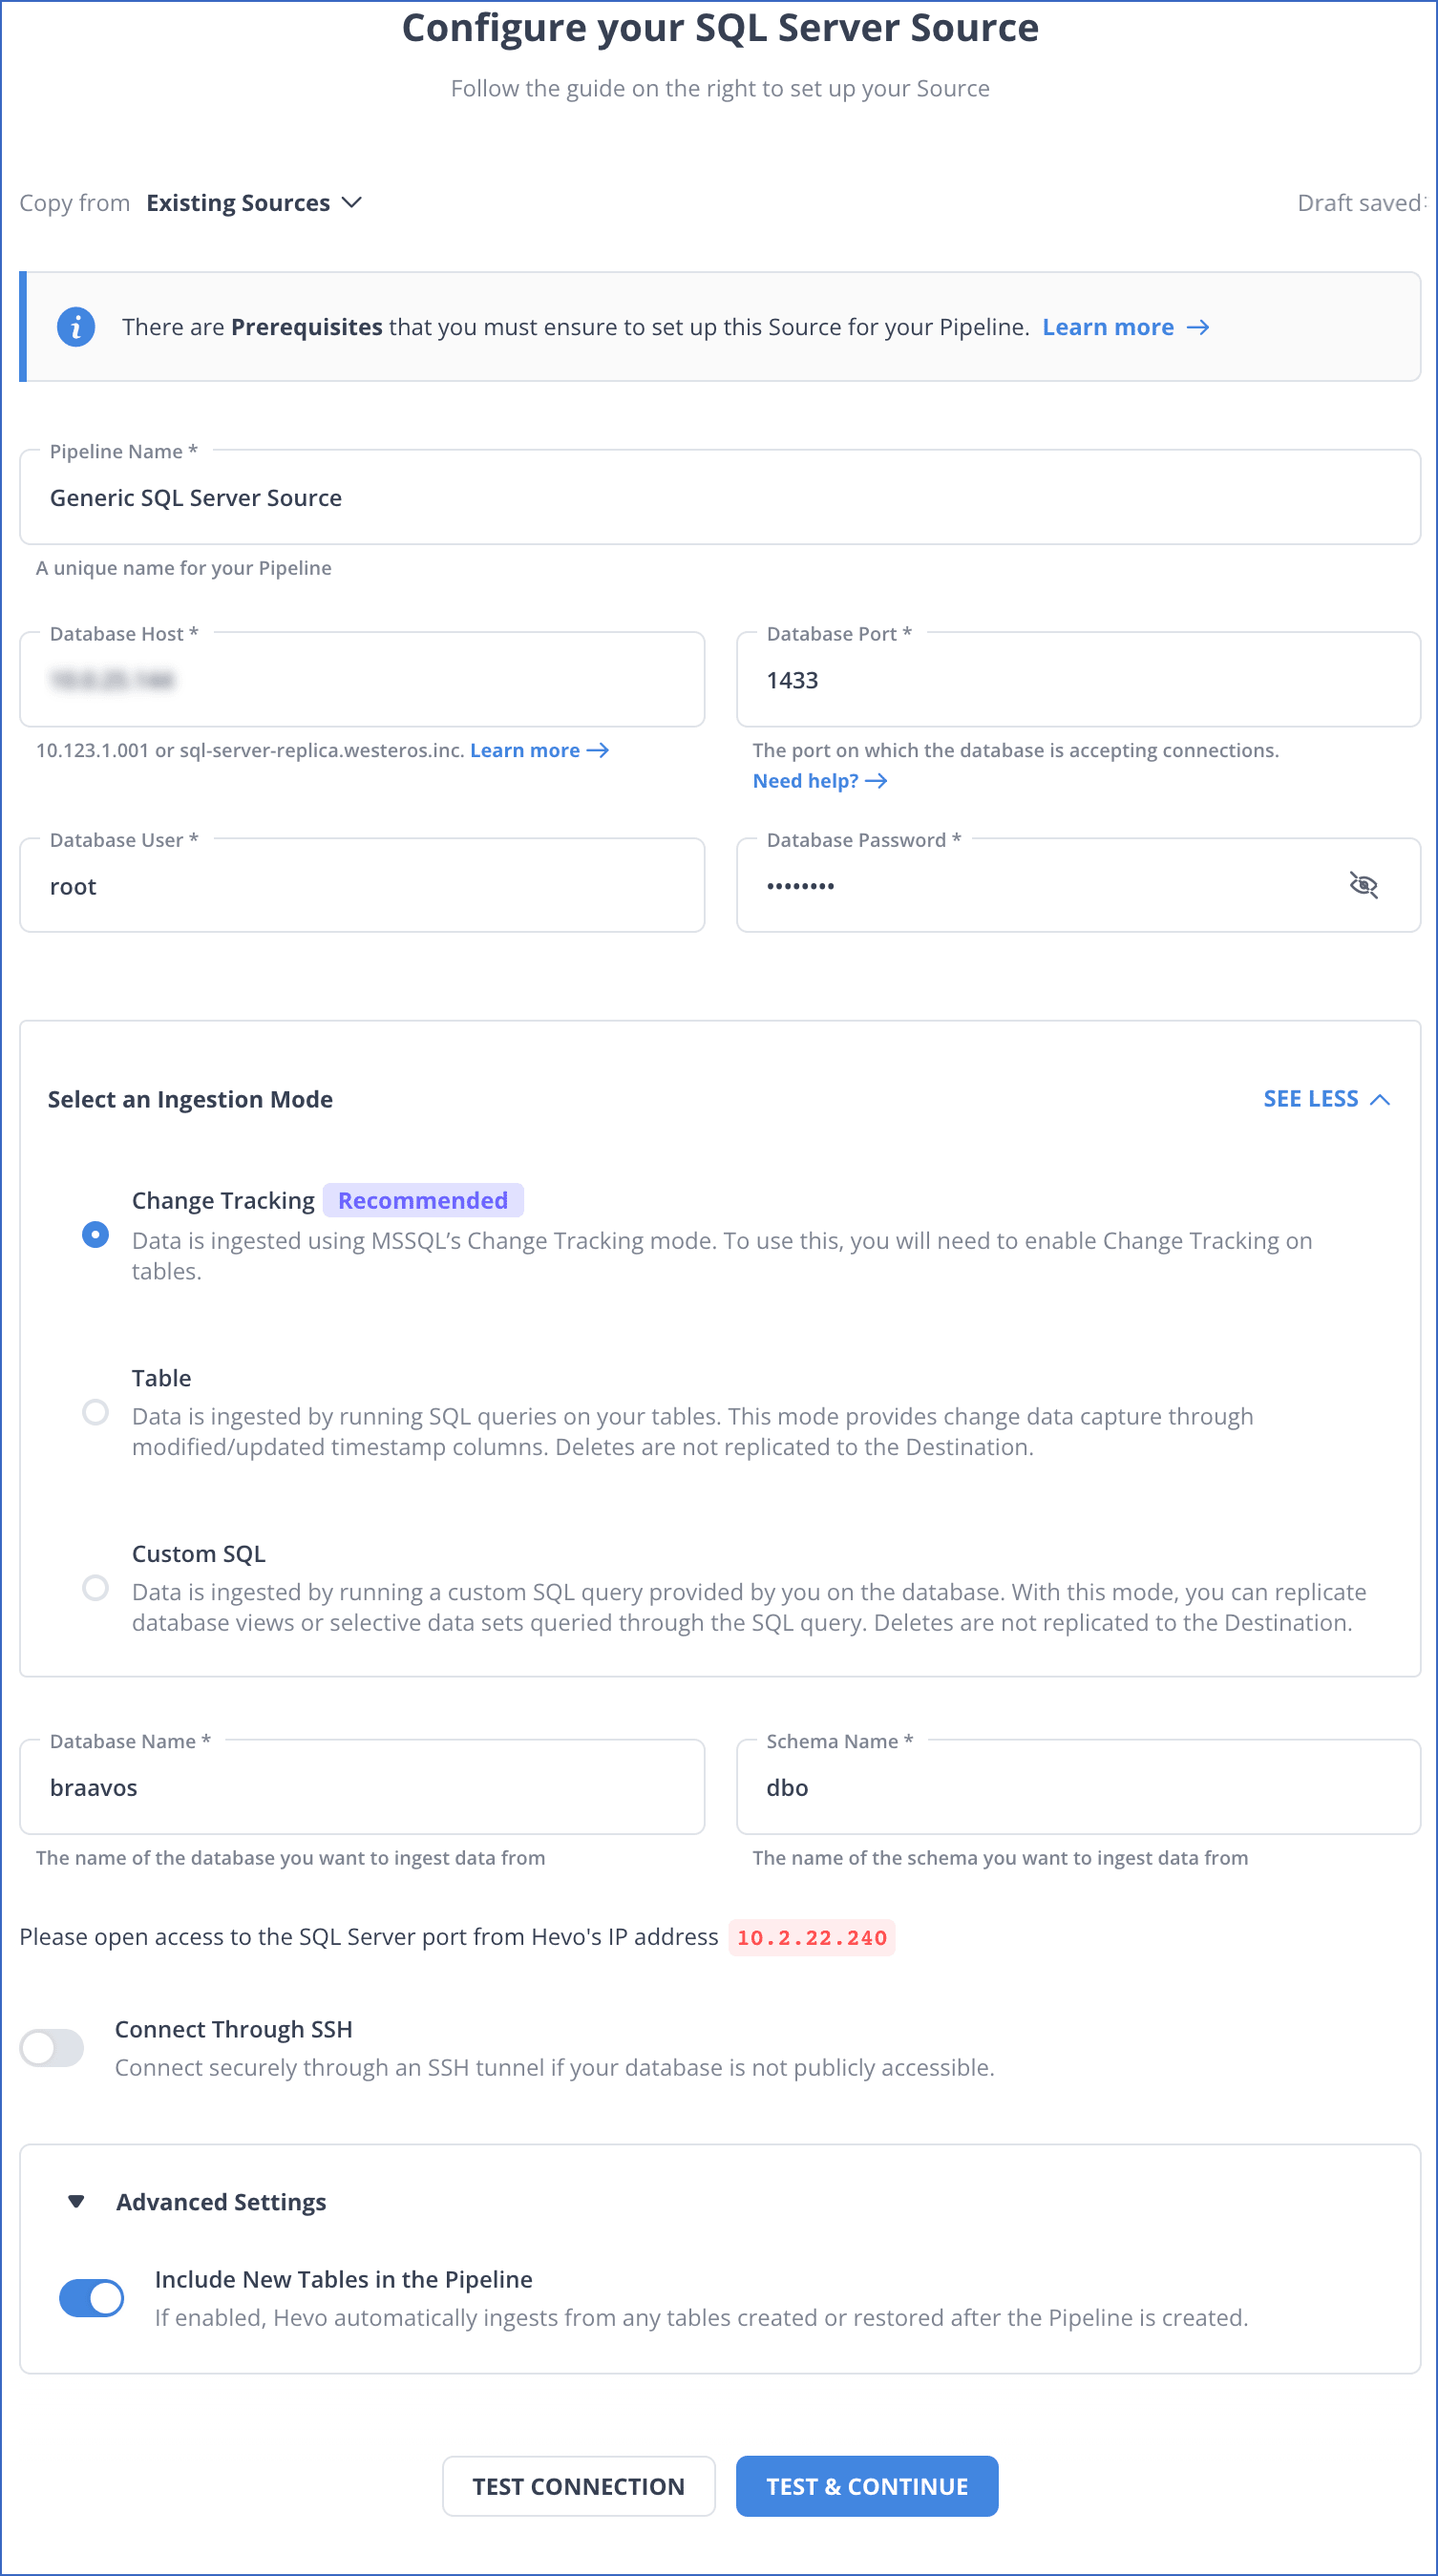
Method 1: Using Hevo’s Automated Platform
Step 1: Connect SQL Server as your source.
Step 2: Connect Databricks as your destination.

Method 2: Using JDBC Driver to Connect Databricks to SQL Server
Before You Begin:
- Your workspace is enabled for Unity Catalog.
- Serverless compute is enabled for notebooks, workflows, and DLT. See Enable serverless compute.
- To create a connection:
CREATE CONNECTIONon the metastore.To use an existing connection:USE CONNECTIONorALL PRIVILEGESon the connection. USE CATALOGon the target catalog.USE SCHEMA,CREATE TABLE, andCREATE VOLUMEon an existing schema orCREATE SCHEMAon the target catalog.- Unrestricted permissions to create clusters or a custom policy.
- The worker nodes (
node_type_id) are not used but are required to run DLT.
Step 1: Configure SQL Server
If you are using Databricks Runtime 11.3 LTS and above, you can use the sqlserver keyword to use the included driver to connect to the SQL server. Use the following syntax:
remote_table = (spark.read

  .format("sqlserver")

  .option("host", "hostName")

  .option("port", "port") # optional, can use default port 1433 if omitted

  .option("user", "username")

  .option("password", "password")

  .option("database", "databaseName")

  .option("dbtable", "schemaName.tableName") # (if schemaName not provided, default to "dbo")

  .load()

)
Step 2: Specify the JDBC Configurations
In Databricks Runtime 10.4 LTS and below, you must specify the driver and configurations using the JDBC settings.
driver = "com.microsoft.sqlserver.jdbc.SQLServerDriver"

database_host = "<database-host-url>"

database_port = "1433" # update if you use a non-default port

database_name = "<database-name>"

table = "<table-name>"

user = "<username>"

password = "<password>"

url = f"jdbc:sqlserver://{database_host}:{database_port};database={database_name}"

remote_table = (spark.read

  .format("jdbc")

  .option("driver", driver)

  .option("url", url)

  .option("dbtable", table)

  .option("user", user)

  .option("password", password)

  .load()

)
After these steps, you will have created a connection between SQL Server and Databricks to read and write data.
Limitations of Using JDBC for Connecting SQL Server to Databricks
- Data Transformation Complexity: JDBC does not support advanced transformation logic directly, requiring additional steps in Databricks.
- Serialization Overheads: JDBC serializes data row by row, which can result in higher processing times for large datasets.
- Single Threaded Nature: Most JDBC implementations process data sequentially, limiting scalability for high-throughput applications.
- No Native Parallelism: JDBC does not inherently support parallel reads or writes, which can hinder the performance of big data workflows.
- Resource Intensive: Managing JDBC connections for concurrent operations can exhaust SQL Server or Databricks cluster resources.

Use Cases of Azure Databricks SQL Server Integration
- Big Data Analytics: Azure Databricks enables data engineering and data science teams to process large datasets using Spark. On the other hand, SQL plays can streamline the process of gaining insights from huge volumes of data by using a variety of conditional commands. Thus, Azure Databricks SQL Server integration makes Big Data Analytics efficient.
- Healthcare: Healthcare organizations use SQL to analyze large data sets containing information about patient behavior, medical conditions, and demographics. It facilitates medical professionals to gain critical insight, which contributes toward developing specific solutions for solving problems. Integrating Azure Databricks with SQL Server can optimize the functioning of the healthcare sector.
- Social Media: Social media networks process significant data every second. To store users’ profile information, use SQL on platforms such as Snapchat and Instagram. When users create new posts or share photos, the Structured Query Language allows them to update the app database. It also enables the recording of messages which users can retrieve later.
You can also read more about:
- Databricks Connect to Oracle Database
- Azure SQL to Databricks
- PostgreSQL to Databricks
- AWS RDS MSSQL to Databricks
- GCP MySQL to Databricks
Conclusion
This blog introduced you to two methods that can be used to set up Databricks Connect to SQL Server. It gives comprehensive information on how to connect Databricks to SQL Server. It also briefed you about SQL Server and Databricks and their features. Suppose you want to integrate data from various data sources, such as SQL Server, into your desired database/destination, such as Databricks, and seamlessly visualize it in a BI tool of your choice. In that case, Hevo Data is the right choice for you! It will help simplify the ETL and management process of data sources and destinations.
You can also look at how you can integrate data from SQL Server to Google BigQuery to identify more use cases of migrating data from SQL Server.
Sign up for a 14-day free trial and experience the feature-rich Hevo suite first hand. You can also have a look at our unbeatable pricing that will help you choose the right plan for your business needs!
Frequently Asked Questions
1. Is Databricks SQL the same as Spark SQL?
Databricks SQL is built on Spark SQL but provides additional features and an optimized environment for SQL analytics within the Databricks platform.
2. Can I use SQL with Spark?
Yes, you can use SQL with Spark through Spark SQL.
3. Can I connect to a MS SQL server table in Databricks account?
Yes, you can connect to a SQL Server table in Databricks.

Share it with your connections.
-
 Share To X
-
 Share To LinkedIn
-
 Share To Facebook
-
 Copy Link


