Key Takeaways
Migrating data from SQLite to SQL Server allows businesses to scale from lightweight, file-based databases to a robust, enterprise-grade relational database system. This process is crucial for applications that require higher concurrency, advanced analytics, or integration with tools such as SSMS and Azure Data Studio.
Steps to Migrate SQLite to SQL Server
- Follow Best Practices: Ensure separate storage for master and temporary databases, and allocate adequate disk space (SSD/RAID recommended).
- Download an ODBC Driver for SQLite: Get the appropriate 32-bit and 64-bit drivers for your system.
- Install the Driver: Run the executable based on your operating system architecture.
- Create a System DSN: Configure a system Data Source Name for your SQLite database.
- Create a Linked Server in SQL Server: Use T-SQL commands to link SQLite with SQL Server.
- Select and Insert Data into SQL Server Tables: Query the linked server and populate destination tables.
- Use the .dump Command (Alternative Method): Export the SQLite database schema and data as SQL statements, then import into SQL Server.
SQL Server has established itself as an easy-to-use, reliable, and efficient system. It provides a wide range of functionalities as well. It works on SQL, and like any other DBMS, under a wide range of scenarios, the system doesn’t provide the level of efficiency you require.
This article helps you connect SQLite to SQL Server seamlessly. It also gives a brief introduction to SQL Server and SQLite before diving into the SQLite to SQL Server integration methods. Let’s dive straight into the SQLite to SQL Server migration.
Table of Contents
Methods to Connect SQLite to SQL Server via ODBC Data Migration Tool
Here are the steps you can follow to migrate data from SQLite to SQL Server through the ODBC Migration tool:
- Step 1: Downloading an ODBC Driver for SQLite
- Step 2: Installing the Driver
- Step 3: Creating a System DSN for the Database
- Step 4: Creating a Linked Server in SQL Server
- Step 5: Selecting the Data from the Source and inserting it into SQL Server Database Table
Hevo Data is a No-code Data Pipeline solution that can help you move data from 150+ data sources like Postgres and MySQL to your desired destination like MS SQL Server.
- No-Code Solution: Easily connect your data without writing a single line of code.
- Flexible Transformations: Use drag-and-drop tools or custom scripts for data transformation.
- Real-Time Sync: Keep your destination database updated in real time.
- Auto-Schema Mapping: Automatically handle schema mapping for a smooth data transfer.
Hevo has been rated 4.7/5 on Capterra. Know more about our 2000+ customers and give us a try.
Get Started with Hevo for FreeStep 1: Downloading an ODBC Driver for SQLite
- Surf to the SQLite ODBC Driver Source page. Configuring the correct driver might be a little difficult, so it is recommended that you download both 32 and 64-bit drivers to migrate data from SQLite to SQL Server.
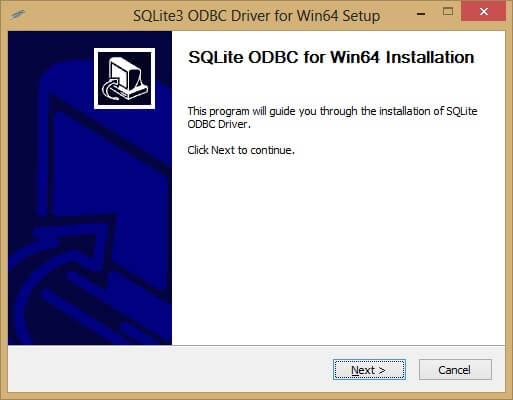
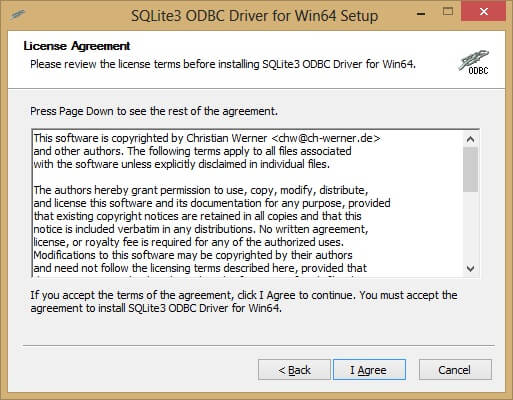
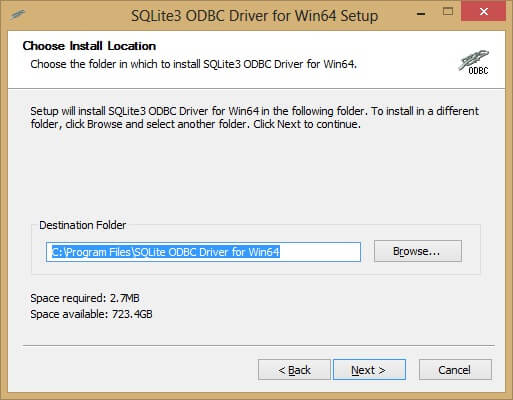
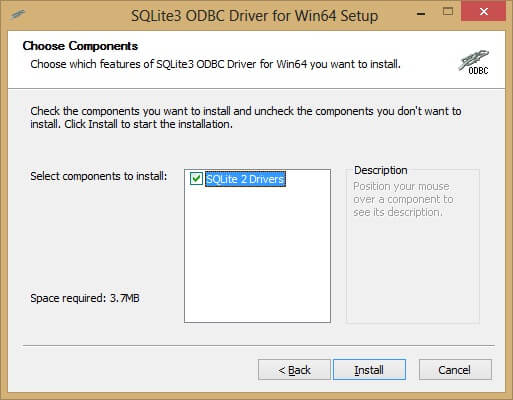
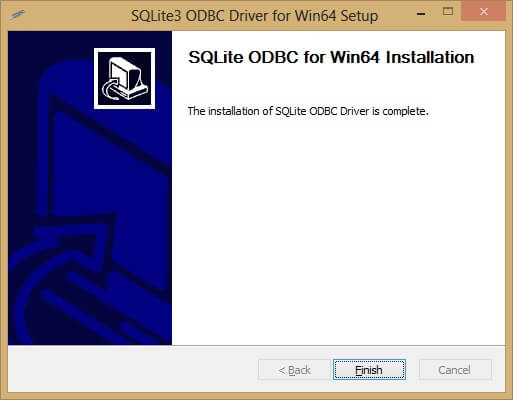
Step 2: Installing the Driver
- Next, you can choose to run either the 64-bit or 32-bit driver .exe file. You can make the choice based on the operating system you are using for moving data from SQLite to SQL Server.
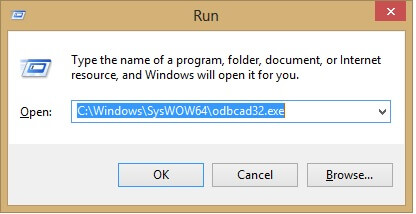
Step 3: Creating a System DSN for the Database
- Next, click Start Run and type odbcad32, and press return for the 64-bit administrator.
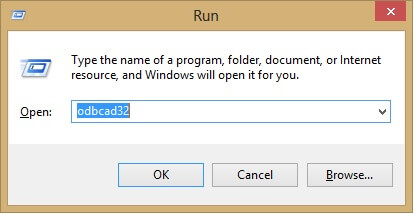
- After the previous SQLite to SQL Server migration step, you can click Start Run and type and press return if you are working with the 32-bit administrator.
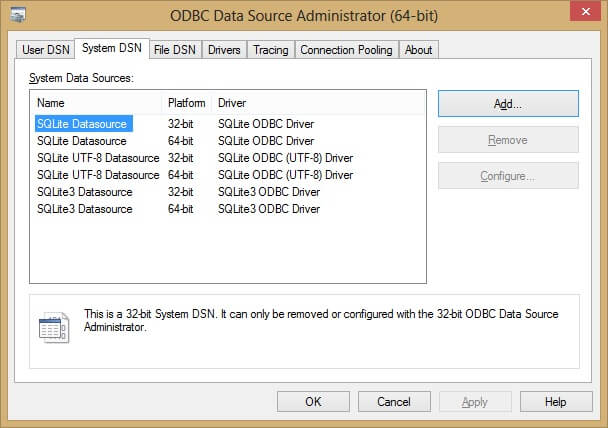
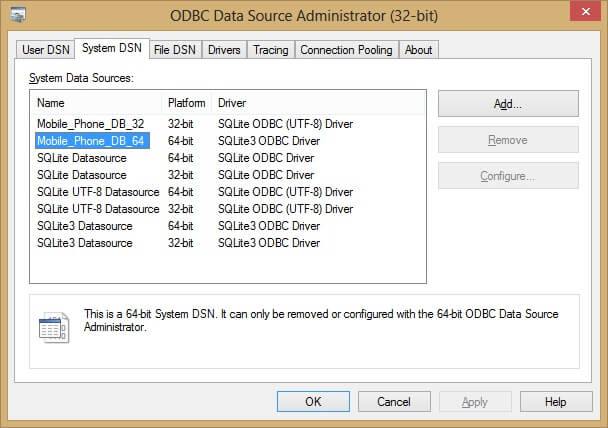
- Click on the System DSN tab to show up a list of System Data Sources.
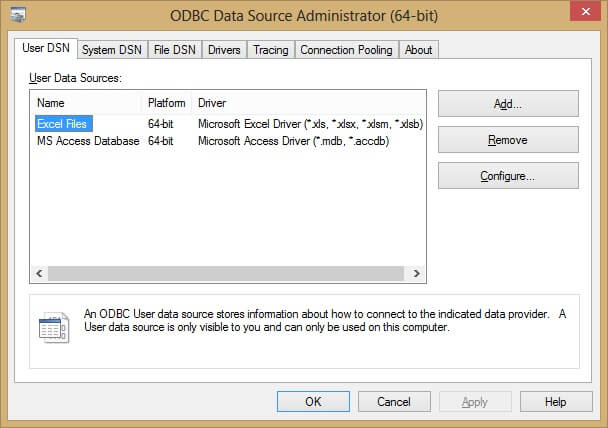
- Click on the Add button to add a new System Data Source for your SQLite to SQL Server migration.
- You can then choose an appropriate driver. If you don’t have an idea about the driver that would suit your needs, you can give them a try in turn to zero in on one that is tailored to your SQLite to SQL Server migration.
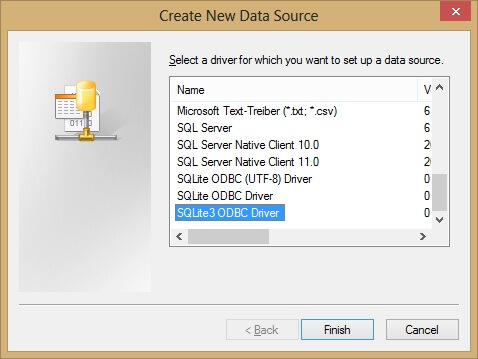
- Next, you need to enter your SQLite database path. A point to note here is that some of the options are documented on the driver’s side. You can leave them as-is for the time being and move on to the next step of SQLite to SQL Server conversion.

- You can observe here that the 32-bit driver is only editable from a 32-bit administrator and the 64-bit driver is only editable from a 64-bit administrator.
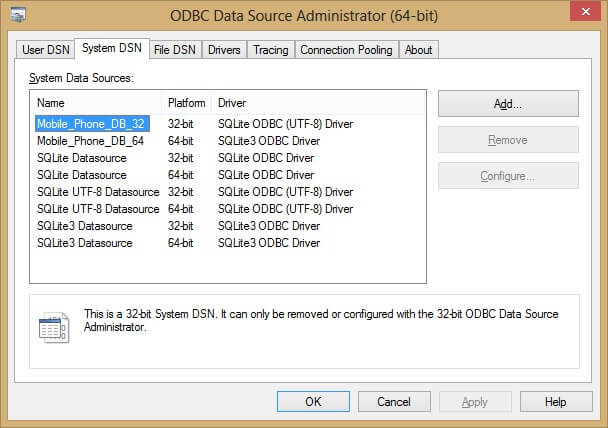
- You can notice that the remove and configure buttons are greyed out.
Step 4: Creating a Linked Server in SQL Server
- For this step, it is recommended that you leverage the following T-SQL snippet to create the linked server to your SQLite database. There aren’t any login accounts or any security context with this linked server.
USE [master]
GO
EXEC sp_addlinkedserver
   @server = 'Mobile_Phone_DB_64', -- the name you give the server in SSMS
   @srvproduct = '', -- Can be blank but not NULL
   @provider = 'MSDASQL',
   @datasrc = 'Mobile_Phone_DB_64' -- the name of the system dsn connection you created
GO
Advantages of Using SQL Server Linked Servers to Connect to SQLite are:
- Connection of other database instances on the same or remote server.
- The distributed queries can be run on heterogeneous data sources across the organization.
- It enables working with diverse data sources in the same manner.
Step 5: Selecting the Data from the Source and inserting it into SQL Server Database Table
- This brings us to the last step of SQLite to SQL Server migration. Click on the linked server stem and expand it to the tables. You can then simply query the tables as follows:
Select *
from openquery(Mobile_Phone_DB_64 , 'select * from db_notes')
GO- You can make a table in your destination SQL Server with the following type of TSQL:
Select * into SQLite_Data -- This creates a table
from openquery(Mobile_Phone_DB_64 , 'select * from db_notes')
GO- Finally, you can modify the data types within your destination SQL Server database table by leveraging alter commands.
Limitations of ODBC Drivers:
- ODBC drivers are slightly complicated to build and maintain. They are slow with large databases, and their servers are not standardized.
- Intricate SQLite schema elements like foreign keys, triggers, or user-defined functions may not be accurately translated by the ODBC driver. This may lead to inconsistencies in the target SQL databases.
- ODBC Driver does basic data transformations but lacks in dealing with complex data structures.
Method to use the .dump command-line option in SQLite to export your database
- To begin, open a terminal or command prompt.
- Use the cd command to move to the directory containing your SQLite database file.
- Open the database by running the sqlite3 command followed by the database filename.
sqlite3 your_database.db- Export the entire database by running the.dump command, which will display the entire database schema (structure) and data as SQL statements on your screen.
.dump- To save the output to a file, run the.output command followed by the desired filename.
.output dump.sql
.dump
This will redirect the output of the.dump command to the dump.sql file, creating a script with all the SQL statements needed to reconstruct your database structure and populate it with data.
Limitations of using .dump command-line option in SQLite to export your database
1. Limited formatting options
All that’s left of the exported data is an array of unprocessed SQL queries. Even while it works, it could not include formatting or comments, which makes it more difficult to read and comprehend—especially for big datasets.
2. No data manipulation
Only current data is exported using the.dump command. It is not capable of filtering, transforming, or modifying the data before export, which might be required in some circumstances.
3. Security issues
All SQL commands, including possibly sensitive data like table names and column definitions, are included in the exported file. Since this file has the potential to be exploited to recover the database structure and access its contents, it must be handled with caution and kept safe from unauthorized access.
4. Exclusive to SQLite
Only SQLite-specific instructions are contained in the exported.sql file. The syntax and features of different database engines may differ; therefore directly importing it into another engine might not work.


Migrating Data from SQLite to SQL Server: Best Practices to Follow
Here are a few best practices you can put into effect to get the most out of migrating data from SQLite to SQL Server:
- The master database for migration from the SQLite database needs to be on a different disk (200 GB, RAID 5, SAS).
- MDF files for the user’s databases need to be hosted on a separate disk (150 GB, SSD-, RAID 1/0).
- You also need to make sure that the temporary databases are hosted on a separate disk (150 GB, SSD-, RAID 1/0).
When Should You Use SQL Server: Key Use Cases
SQL Server can primarily be leveraged as a relational database engine to manage and store data for multiple applications of ERP, CRM, and Automation. It is also widely utilized by a large number of teams across different project functions that need a database management solution. You can also use SQL Server as a backend for data staging, web apps, and SSIS/SSRS.
Before we wrap up, let’s cover some basics.
What is SQLite?

SQLite is an open-source Relational Database Management System (RDBMS). Most Relational Databases are based on the Client-Server model, which means that the Database typically runs on a server. However, SQLite is a Serverless Relational Database Management System, also referred to as an Embedded Database. SQLite Database operates from within the software that is accessing data. The Database can be accessed directly without the need for intermediation from a Host Server.
SQLite is self-contained, file-based, and is known for its portability, performance in low memory environments, and reliability. It is designed to work without a Database Administrator and is very easy to set up. The data transactions carried out in SQLite are ACID compliant [Atomicity, Consistency, Isolation, Durability]. SQLite, being an open-source tool, is available free of cost for all users. However, depending on the use case you can always pay for additional extensions.
Key Features of SQLite
Here are the key features of SQLite:
- Cross-platform DBMS: You do not need a large range of different platforms like Mac OS, Windows, Unix, and Linux. You can even use it on a lot of embedded operating systems like Windows CE and Symbian.
- Easy Storage: With SQLite, you are guaranteed an efficient way to store your user data.
- Large Assortment of APIs: SQLite provides API for a large range of programming languages like Java, PHP, Python, Objective C, C#, and Visual Basic, to name a few.
- Variable Length of Columns: The length of the columns is variable and not fixed. It facilitates you to allocate only the space a field might need. For instance, if you have a varchar(200) column, and you place a 10 characters length value on it, then SQLite would allocate only 20 characters’ space for that value as opposed to the complete space.
- Flexible and Serverless: SQLite doesn’t need a different server system or process to operate and facilitates you to work on various databases in the same session at the same time.
When Should You Use SQLite: Key Use Cases
One of SQLite’s greatest advantages is that it can run on all platforms, including macOS, Windows, Linux, etc. SQLite is an RDBMS contained in a C library, hence the Applications written in any language can use SQLite as long as they can be connected to External Libraries written in C. Below are the appropriate uses for SQLite.
- SQLite comes in handy for developing Embedded Software for Digital Devices like Televisions, Mobile Phones, Set-Top Boxes, Game Consoles, Cameras, etc.
- Depending on your usage, you can leverage SQLite’s flexibility to work on multiple Databases in the same session simultaneously.
- SQLite is used as a Temporary Dataset for Applications to get some processed data.
- SQLite is a cross-platform DBMS, hence you can access it over all platforms including Windows, macOS, and more.
- SQLite works well as a Database Engine for most websites, as it can manage low to medium-traffic HTTP requests.
- Because it is simple to set up and use, it is used in Educational Institutions for learning and training purposes.
What is Microsoft SQL Server?
SQL Server is a relational database system provided by Microsoft. It can hold petabytes of data and have 100s of parallel running cores. It has a comprehensive querying layer that aids in business analysis and tightly integrates with reporting tools. Recent versions have spark support built-in; which means analyzing large amounts of data using Spark SQL without much additional setup needed.
It supports ANSI SQL, the standard SQL (structured query language) language. SQL Server comes with its implementation of the proprietary language called T-SQL (transact SQL). SQL server management studio (SSMS) is the main interface tool, consisting of a client and server. A client is an application for sending requests to the SQL Server installed on a given machine, whereas a server is capable of processing input data as requested.
SQL Server provides enterprise-grade security and support which makes it a favorite among organizations with strict compliance requirements. This post is about loading data from Google Analytics to SQL Server.


Key Features of SQL Server
Here are a few key features of SQL Server:
- The Database Engine: This segment handles data storage, fast exchange processing, and data security.
- The SQL Server: This assistance begins, pauses, stops, and continues the dataset process.
- The Server Agent: It plays out the job of the task scheduler. It tends to be set off by any occasion or according to request.
- The SQL Server Browser: This receives approaching queries and connects with the ideal SQL server instance.
- The SQL Server Full-Text Search: This permits the client to run a full-text search against Character information in SQL Tables.
You can also learn more about:
Conclusion
In this article, you had a glimpse of how to move your data from SQL Server to SQLite after a brief introduction to the salient features, use cases, and benefits of both tools. It is a comprehensive guide to convert SQLite to SQL server. The method discussed in this article is using CSV/ODBC Migration Tool to move data from SQLite to MSSQL seamlessly. While using the manual method can be cumbersome, the use of Hevo Data can help you convert SQLite to SQL with ease.
Extracting complex data from a diverse set of data sources to carry out an insightful analysis can be challenging, and this is where Hevo saves the day! Hevo offers a faster way to move data from Databases or SaaS applications into your Data Warehouse or a tool like SQL Server. Hevo is fully automated and hence does not require you to code. Sign up for Hevo’s 14-day free trial and experience seamless data migration.
FAQ on SQLite to SQL Server
How can I migrate data from SQLite to SQL Server?
You can migrate data using multiple methods:
1. ODBC Driver: Connect SQLite to SQL Server via system DSNs and linked servers.
2. SQLite .dump command: Export SQLite data as SQL statements and import into SQL Server.
3. Automated pipelines: Use platforms like Hevo Data for code-free, real-time migration.
How do you import SQLite files into SQL Server?
ODBC drivers can be slow with large datasets, may not translate complex schema elements (like foreign keys or triggers) accurately, and perform only basic data transformations. They can also be challenging to configure and maintain.
What are the limitations of using the .dump command-line method?
The .dump method exports only raw SQL statements, cannot filter or transform data, has limited formatting options, and may pose security risks since sensitive database details are included. It’s also SQLite-specific and may not work seamlessly with other databases.
When should I use SQLite vs SQL Server?
1. SQLite: Best for embedded applications, small to medium projects, and temporary datasets.
2. SQL Server: Suitable for enterprise applications, high-volume transactional systems, ERP/CRM backends, data staging, and analytics solutions.
Share it with your connections.
-
 Share To X
-
 Share To LinkedIn
-
 Share To Facebook
-
 Copy Link