


Apache Kafka is a distributed streaming platform capable of handling and storing trillions of real-time data per day. The real-time streaming data that flows into Kafka can be of any type, like a simple linear message, a message queue, or even bulk data. A simple linear message or message queue can be easily used to publish inside Kafka servers.
However, it is difficult to stream and transfer bulk or colossal amounts of real-time data from any external databases into the Kafka cluster. To mitigate such complexities, Kafka source connectors can be used to seamlessly transfer bulk data from external databases to targeted Kafka servers.
In this article, you will learn about Kafka, Kafka Source connectors, and how to work with Kafka connectors to transfer data between external databases and Kafka servers.
Unlock the full potential of your financial data by using Hevo for integration. Within minutes, you can seamlessly connect QuickBooks to your chosen destination, automating your data workflows and gaining real-time insights.
Why Integrate Kafka with Hevo?
- Automated Data Sync: Automatically transfer data from Kafka to your preferred destinations without manual intervention.
- Real-Time Data Flow: Keep your financial data up-to-date and consistent across all platforms.
- No-Code Platform: With Hevo’s intuitive interface, you can easily set up and manage your data pipeline with no technical skills required.
Join 2000+ Happy Customers
Industry leaders such as Thoughtspot trust Hevo for its reliable data integration solutions.
Table of Contents
What is Apache Kafka?

Developed initially by Linkedin, Apache Kafka is an open-source, distributed streaming platform that handles, stores, and organizes real-time data. Since it streams real-time and continuous data, Kafka helps developers build data pipelines, recommendation systems, and event-driven applications.
The Kafka ecosystem comprises a set of distributed and dedicated servers, which collects, organizes, and manages real-time streaming data. Producers can write messages into Kafka topics, while consumers can fetch messages from specific topics on Kafka servers.
Since it helps achieve maximum throughput, Kafka is being used by the world’s most prominent companies, including 80% of fortune 500 companies, to implement event steaming operations.
Key Advantages of Apache Kafka
Compared to traditional Message Brokers, Kafka has several advantages.
- It provides for load de-bulking because no indexes are required for the message.
- It improves stream efficiency and eliminates buffering for end-users.
- Without deleting any data, all data logs are maintained with a punched time. As a result, the danger of data loss is reduced.
What are Kafka Source Connectors?
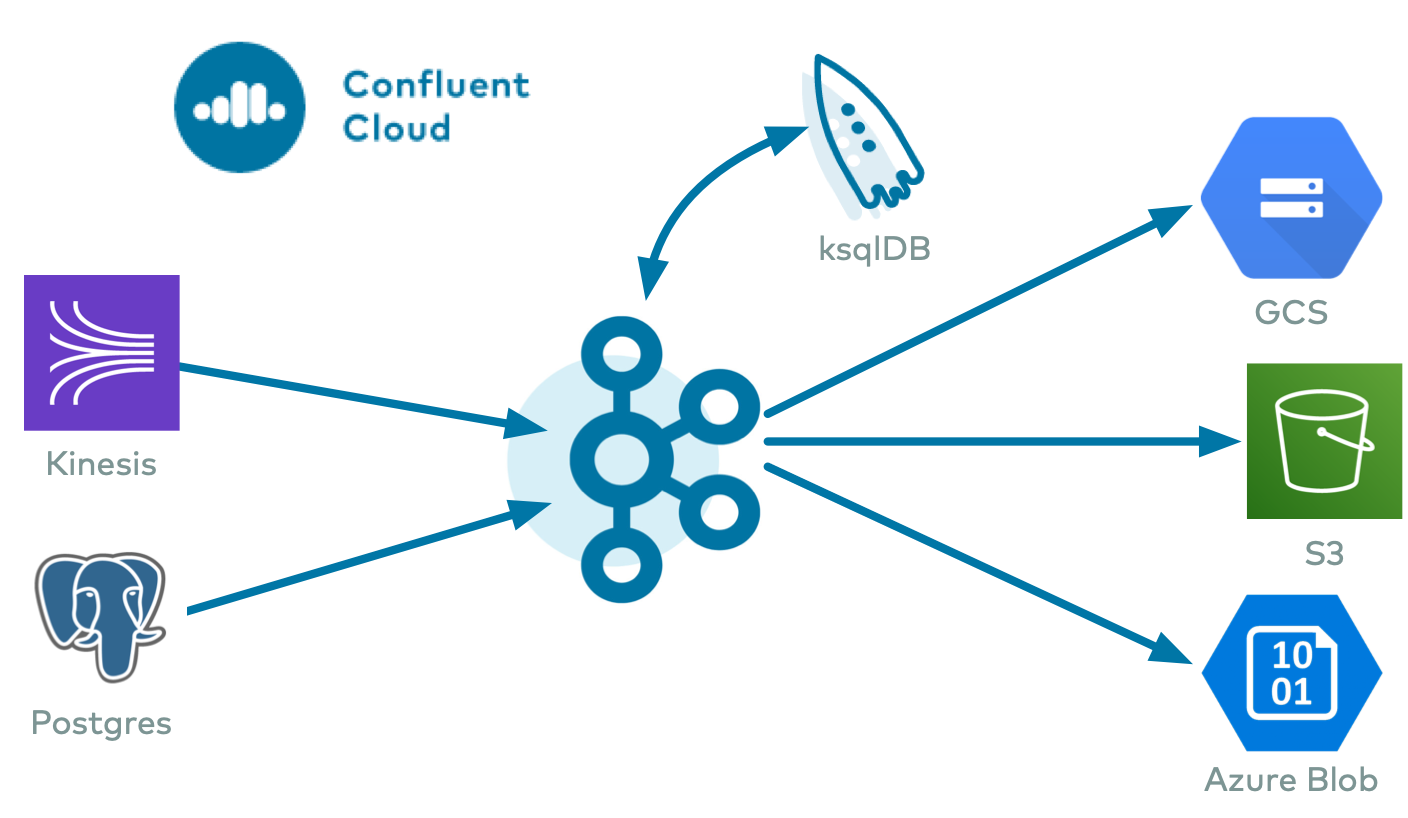
Kafka Connectors allow you to connect or synchronize any external systems like databases to Kafka servers for streaming real-time data between two entities. In other words, Kafka connectors enable you to transfer data from any relational database to Kafka.
However, Kafka connectors not only allow you to share data from databases to Kafka servers but also stream or transfer real-time data present in Kafka servers to other external relational databases present outside the Kafka environment.
The connections or synchronization between external databases and Kafka are established by the Kafka JDBC (Java Database Connectivity) connector. There are two types of JDBC connectors: JDBC source connector and JDBC sink connector.
JDBC source connector helps transfer data from database to Kafka, while JDBC sink connector transfers data from Kafka to any external databases. When you want to connect database applications like MySQL, SQLite, and PostgreSQL, you should have the JDBC connector plugin for that respective database.
Working with Kafka Source Connector
There are two ways to work with this Source Connector: Using the command-line tool or Confluent Control Center web interface (UI). When using the Confluent Control Center web interface, you do not have to write long commands or code since the process is made utterly interactive with Confluent UI.
However, the Confluent Control Center web interface charges you to manage all Kafka services in one place. In the below steps, you will learn how to stream data between database and Kafka servers using the command console method.
Kafka Source Connector Operations: Setting up Kafka Environment
- Initially, you have to download and install the Confluent Platform package. Visit the official Confluent website and download the wholesome Confluent Platform package.
- You can also download the package with the curl command. Open a command prompt and enter the following command.
curl -O http://packages.confluent.io/archive/7.0/confluent-7.0.1.zip- After the package is downloaded, unzip it by executing the following command.
unzip confluent-7.0.1.zip- The extracted folder will have various directories containing driver scripts, configuration files, log files, etc.
- To achieve end-to-end data transfer between external databases and Kafka servers, you have to run Kafka server, Zookeeper instance, Kafka schema registry, and Kafka connect.
- For starting and running the above-mentioned entities, you have to perform some alterations in the configuration files of Kafka.
- Firstly, you can configure the Zookeeper properties. Navigate to the Zookeeper properties file in the bin directory in the location “/etc/kafka/zookeeper.properties” and open it with your desired text editor application.
- In the Zookeeper properties file, modify the property parameter as shown below.

- After altering the properties, save the file.
- Then, navigate to the Kafka server properties file in the bin directory “/etc/kafka/server.properties”, open it with a text editor application, and modify the properties as shown below.
zookeeper.connect=zookeeper:2181
broker.id.generation.enable=true- On completing the property modifications, save the file.
- In the next step, you have to configure the schema registry properties. Navigate to the schema registry properties in the location “/etc/schema-registry/schema-registry.properties” and open it with a text editor application. Configure and alter the properties as shown below.

- On completing the property modifications, save the file.
- After configuring the property files, you are now ready to run the required instances to start the Kafka environment.
- Execute the following commands to start the following instances.
To start Zookeeper:

<path-to-confluent>/bin/zookeeper-server-start <path-to-confluent>/etc/kafka/zookeeper.properties

To start Kafka server:

<path-to-confluent>/bin/kafka-server-start <path-to-confluent>/etc/kafka/server.properties

To start Schema registry:

<path-to-confluent>/bin/schema-registry-start <path-to-confluent>/etc/schema-registry/schema-registry.properties

To start Kafka connect:

<path-to-confluent>/bin/connect-distributed <path-to-confluent>/etc/schema-registry/connect-avro-distributed.properties- After executing the above commands, you successfully started all four instances to set up the Kafka environment.

Kafka Source Connector Operations: Installing JDBC Connector
The JDBC connector enables you to exchange or transfer data between Kafka servers and relational databases. The JDBC source connector allows you to import data from any relational database into Kafka topics, while the JDBC sink connector lets you transfer data from Kafka topics to any relational database.
- Go to the Confluent Hub website to download the Kafka connect JDBC connector. After the download is completed, extract the downloaded zip file to the Kafka connect’s plugin path.
- The JDBC file should always be in the Kafka connect path to avoid runtime errors occurring during data transfer. It is not mandatory to copy all the jar files downloaded previously.
- You can only copy the Kafka connect JDBC’s jar file “kafka-connect-jdbc-10.0.1.jar” to the Kafka connects plugin path. The ideal location for JDBC is similar to “share/java/kafka-connect-jdbc.”
- Since you are about to transfer data from a MySQL database, you should readily have a MySQL connector driver to connect with Kafka. Download the MySQL driver from the official MySQL website.
- After downloading, copy the driver file “mysql-connector-java-5.1.48.jar” to the location “share/java/kafka-connect-jdbc.” Then, you can configure the MySQL property files by separating altering the Kafka source and Kafka sink files.
- Refer to the GitHub link for file configurations. For overall JDBC database configuration, you can also refer to the official documentation by Confluent.
Kafka Source Connector Operations: Working with Kafka Source Connector for real-time file transfer
- To start real-time data transfer between the database and Kafka, you must create a Kafka source and Kafka sink connector console.
- Initially, you can create a source connector. Go to the Kafka server console and execute the following command for starting the source connector.
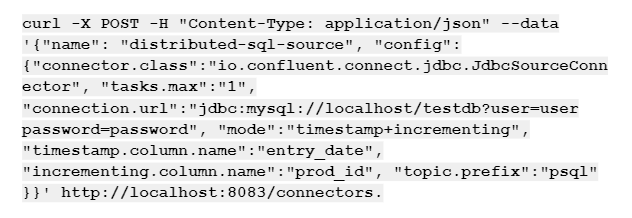
- After the above command is executed, you can see the connector available in Kafka connect. You can locate the Kafka connect interface on http://localhost:8083/connectors.
- Then, you can create a sink connector by executing the following command.

- Refresh the browser to check whether the sink connector is created in the Kafka connect interface.
- Now, both the source and sink connectors are online.
- You can open your preferred database application as the destination by following the sink property file.
- Login to your database from the command prompt by entering the following command.
mysql -u user -p- Then, you will be prompted to enter the password. Provide the respective password to start with the MySQL monitor.
- Enter the following command to provide the sample database you will use for data transfer.
Use testdb;
select * from products- Now, launch the consumer console for witnessing the data being streamed from the database to the consumer panel. Execute the following command to start the consumer console.
kafka-avro-console-consumer --bootstrap-server localhost:9092 --topic psqlproducts --from-beginning- In the next step, insert the record into the products table and check whether it streams data into the topic in the Kafka server. Execute the following command to insert data.
insert into products (prod_name) values('Husky Rope 50');- In a few seconds, a record appears in the respective topic.
- You can see that records appear in the consumer console as well as the destination database.
- Execute a few more records to test it again. Run the following command.
insert into products (prod_name) values('Granite Climbing Helmet');
insert into products (prod_name) values('Granite Belay2- While the command executes, you can witness that data is continuously transferred into the Kafka topic and destination database.
- You can also insert and update a new column to the source database and check whether the change reflects on the destination.
- Execute the following command to update a new row to the product table.
UPDATE products SET prod_name = 'Granite Helmet' where prod_id = 2;- After the command is executed, the table in the destination database gets updated with the new row.
- Execute the following command to insert a new column to the product table.
UPDATE products SET prod_code = '7785' where prod_id = 2;- A new column is successfully added to the destination database after executing the above command.
On executing the above steps, you can easily transfer or continuously stream data from the database to Kafka using Kafka source connector. With sink connectors, you can seamlessly transfer data from Kafka to any destination database.
Conclusion
In this article, you learned about Kafka source connector, JDBC connector, and how to transfer data between Kafka and databases. This article mainly focuses on transferring data between database and Kafka servers using the command line console.
However, you can also perform the same streaming operations to establish a connection between Kafka and other databases without writing extensive commands or code. One of such methods is the Confluent Control Center.
With the interactive UI of Confluent Control Center, you can seamlessly transfer or stream data between the source (Kafka) and destinations (databases).
Extracting complex data from a diverse set of data sources to carry out an insightful analysis can be challenging, and this is where Hevo saves the day! Hevo offers a faster way to move data from 100+ Data Sources including Databases or SaaS applications like Kafka into your Data Warehouse to be visualized in a BI tool. Hevo is fully automated and hence does not require you to code.
FAQ
What is the source connector in Kafka?
A Kafka source connector is used to ingest data from external systems (like databases, file systems, or cloud storage) into Kafka topics. It allows Kafka to collect and process real-time data streams from these sources.
What is the difference between source and sink connector in Kafka?
A source connector ingests data from external systems into Kafka topics, while a sink connector takes data from Kafka topics and writes it to external systems (e.g., databases, file storage).
What is the difference between Debezium and Kafka source connector?
Debezium is a specialized source connector built for change data capture (CDC), enabling real-time streaming of database changes, while Kafka’s generic source connectors are used to pull data from a wider range of systems without focusing solely on CDC.

Share it with your connections.
-
 Share To X
-
 Share To LinkedIn
-
 Share To Facebook
-
 Copy Link


